A Device Administration license allows you to use TACACS+ services on a Policy Service node. In a high availability (HA) standalone deployment, a Device Administration license permits you to use TACACS+ services on a single Policy Service node in the HA pair.
Configure TACACS+ over TLS 1.3 on an IOS XE Device with ISE
Available Languages
Download Options
Updated:January 21, 2026
Document ID:225097
Bias-Free Language
The documentation set for this product strives to use bias-free language. For the purposes of this documentation set, bias-free is defined as language that does not imply discrimination based on age, disability, gender, racial identity, ethnic identity, sexual orientation, socioeconomic status, and intersectionality. Exceptions may be present in the documentation due to language that is hardcoded in the user interfaces of the product software, language used based on RFP documentation, or language that is used by a referenced third-party product. Learn more about how Cisco is using Inclusive Language.
Contents
Introduction
This document describes an example for TACACS+ over TLS with Cisco Identity Services Engine (ISE) as server and a Cisco IOS® XE device as client.
Overview
The Terminal Access Controller Access-Control System Plus (TACACS+) Protocol [RFC8907] enables centralized device administration for routers, network access servers, and other networked devices through one or more TACACS+ servers. It provides authentication, authorization, and accounting (AAA) services, specifically tailored for device administration use cases.
TACACS+ over TLS 1.3 [RFC8446] enhances the protocol by introducing a secure transport layer, safeguarding highly sensitive data. This integration ensures confidentiality, integrity, and authentication for the connection and network traffic between TACACS+ clients and servers.
Using this Guide
This guide divides the activities into two parts to enable ISE to manage administrative access for Cisco IOS XE based network devices.
• Part 1 – Configure ISE for Device Admin
• Part 2 – Configure Cisco IOS XE for TACACS+ over TLS
Prerequisites
Requirements
Requirements to configure TACACS+ over TLS:
- A Certificate Authority (CA) to sign the certificate used by TACACS+ over TLS to sign the certificates ofISE and network devices.
- The root certificate from the Certificate Authority (CA).
-
Network devices and ISE have DNS reachability and can resolve hostnames.
Components Used
The information in this document is based on these software and hardware versions:
- ISE VMware virtual appliance, release 3.4 patch 2
- Cisco IOS XE Software, version 17.18.1+
The information in this document was created from the devices in a specific lab environment. All of the devices used in this document started with a cleared (default) configuration. If your network is live, ensure that you understand the potential impact of any command.
Licensing
Part 1 - Configure ISE for Device Administration
Generate Certificate Signing Request for TACACS+ Server Authentication
Step 1. Log in to the ISE admin web portal using one of the supported browsers.
By default, ISE uses a self-signed certificate for all services. The first step is to generate a Certificate Signing Request (CSR) to have it signed by our Certificate Authority (CA).
Step 2.Navigate to Administration > System > Certificates.
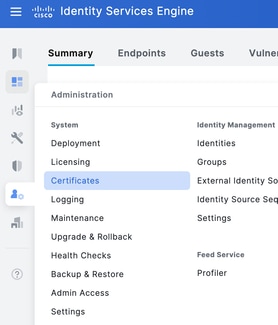
Step 3. Under Certificate Signing Requests, click Generate Certificate Signing Request.

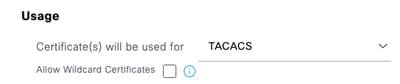
Step 4.Select TACACS inUsage.
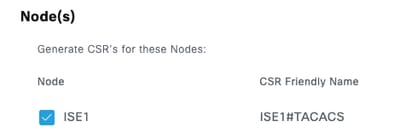
Step 5.Select the PSNsthat wil have TACACS+ enabled.
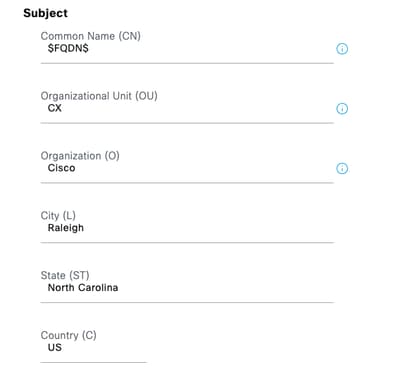
Step 6. Fill the Subject fields with the appropriate information.
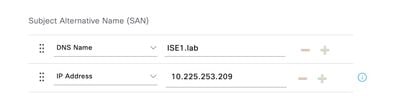
Step 7.Add the DNS Name and IP Address under Subject Alternative Name (SAN).
Step 8.Click Generate and then Export.

Now, you can have the certificate (CRT) signed by yourCertificate Authority (CA).
Upload Root CA Certificate for TACACS+ Server Authentication
Step 1. Navigate to Administration > System > Certificates. Under Trusted Certificates, click Import.

Step 2. Select the certificate issued by the Certificate Authority (CA) that signed your TACACS Certificate Signing Request (CSR). Make sure that the option is enabled.
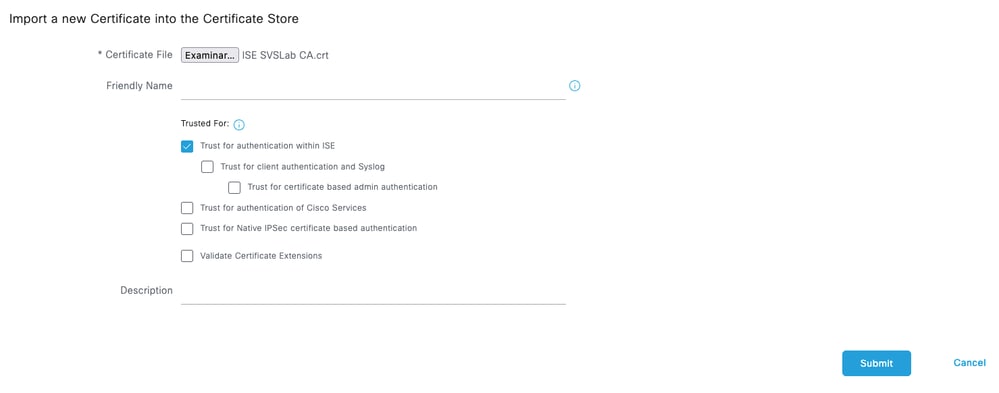
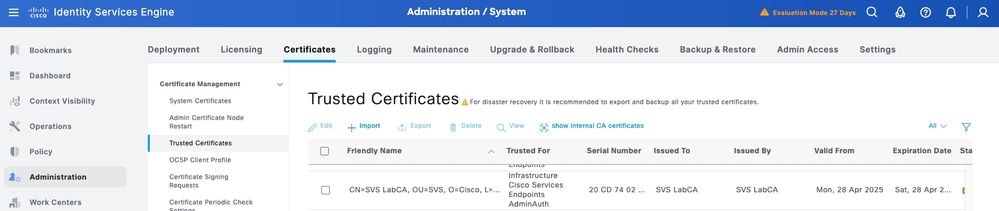
Step 3. Click Submit. The certificate must now appear under Trusted Certificates.
Bind the Signed Certificate Signing Request (CSR) to ISE
Once the Certificate Signing Request (CSR) is signed, you can install the signed certificate on ISE.
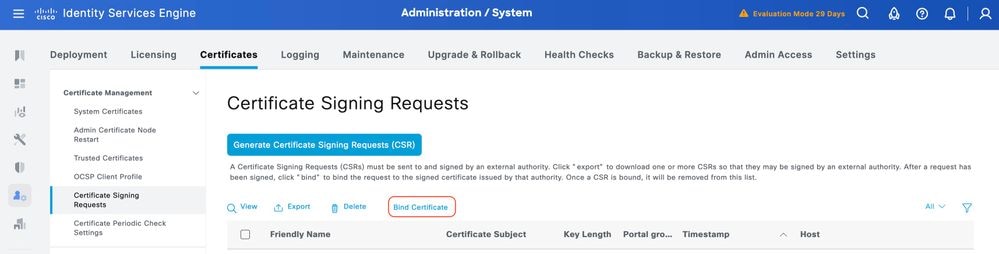
Step 1.Navigate to Administration > System > Certificates. Under Certificate Signing Requests, select the TACACS CSR generated in the previous step and click Bind Certificate.
Step 2.Select the signed certificate and ensure the TACACS checkbox under Usage remains selected.
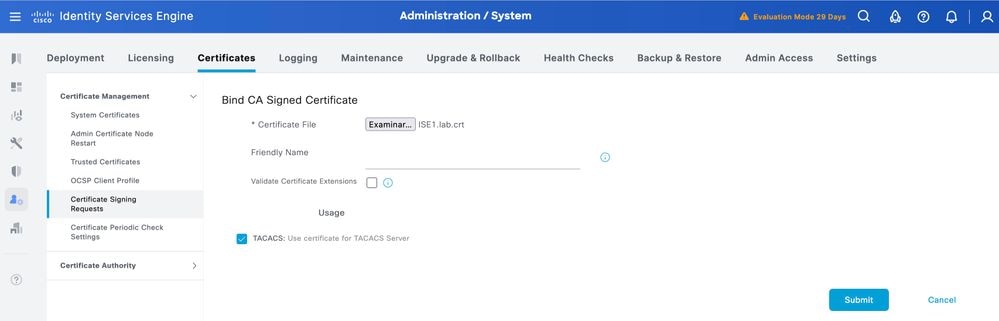
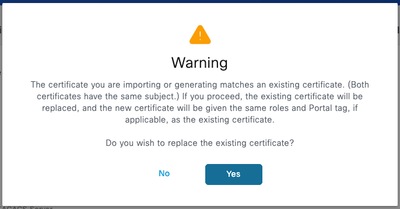
Step 3.Click Submit. If you receive a warning about replacing the existing certificate, click Yes to proceed.
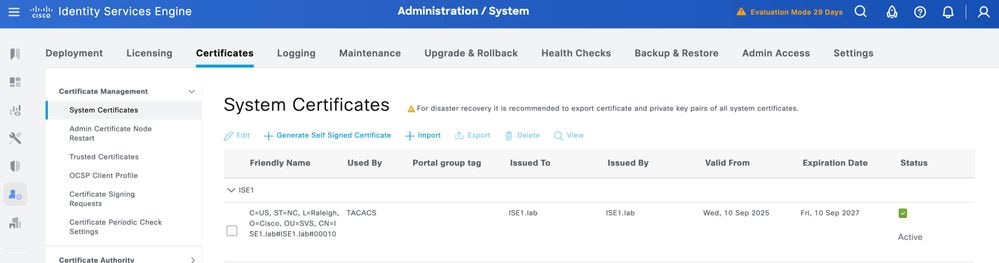
The certificate must now be correctly installed. You can verify this under System Certificates.
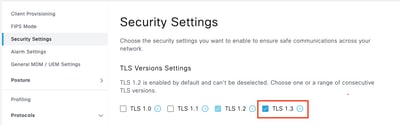
Enable TLS 1.3
TLS 1.3 is not enabled by default in ISE 3.4.x. It must be manually enabled.
Step 1.Navigate to Administration > System > Settings.
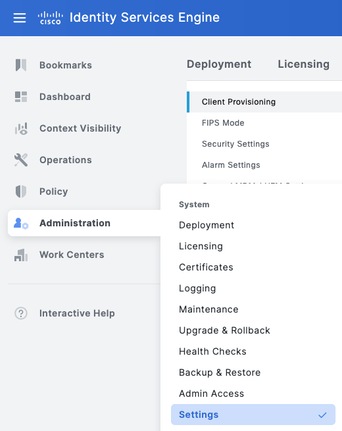
Step 2.Click Security Settings, select the check box next to TLS1.3 under TLS Version Settings, then click Save.

Warning: When you change the TLS version, the Cisco ISE application server restarts on all the Cisco ISE deployment machines.
Enable Device Administration on ISE
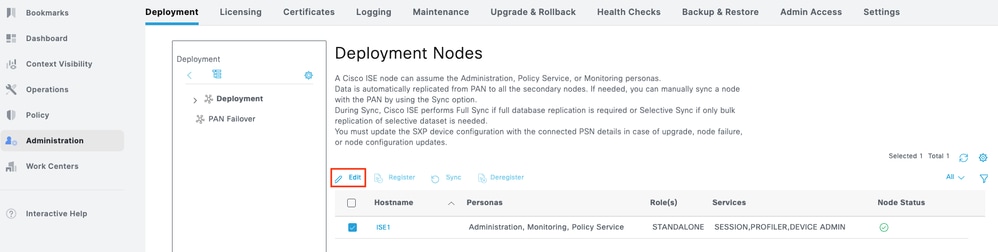
The Device Administration service (TACACS+) is not enabled by default on an ISE node. Enable TACACS+ on a PSN node.
Step 1.Navigate to Administration > System > Deployment. Select the check box next to the ISE node and clickEdit.
Step 2.Under GeneralSettings, scroll down and select the check box next to Enable Device Admin Service.
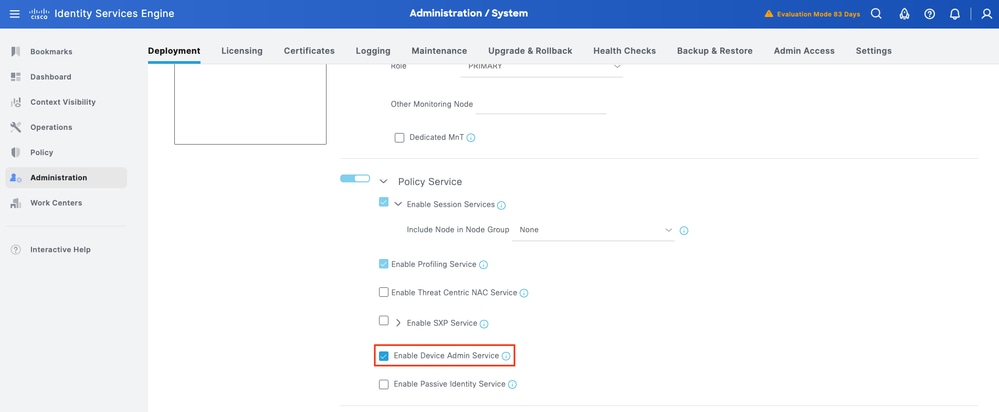
Step 3. Save the configuration. Device Admin Service is now enabled on ISE.
Enable TACACS Over TLS
Step 1.Navigate to Work Centers > Device Administration > Overview.
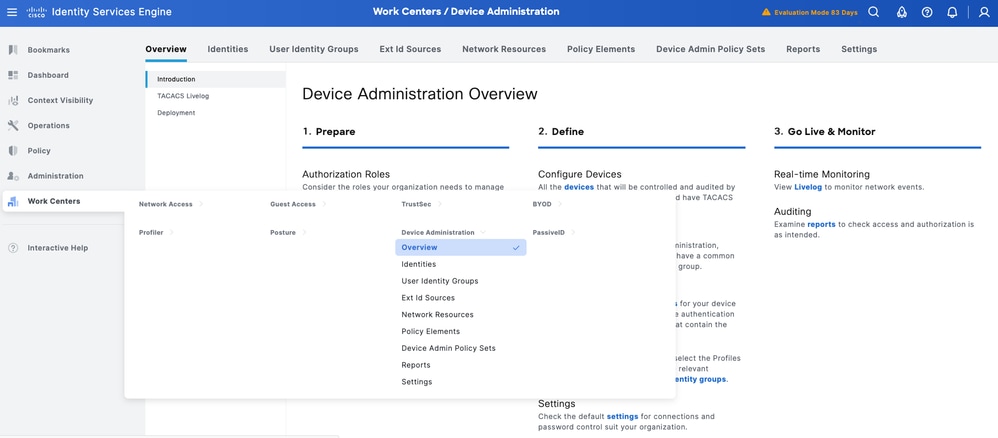
Step 2.Click Deployment. Select the PSN nodes where you want to enable TACACS over TLS.
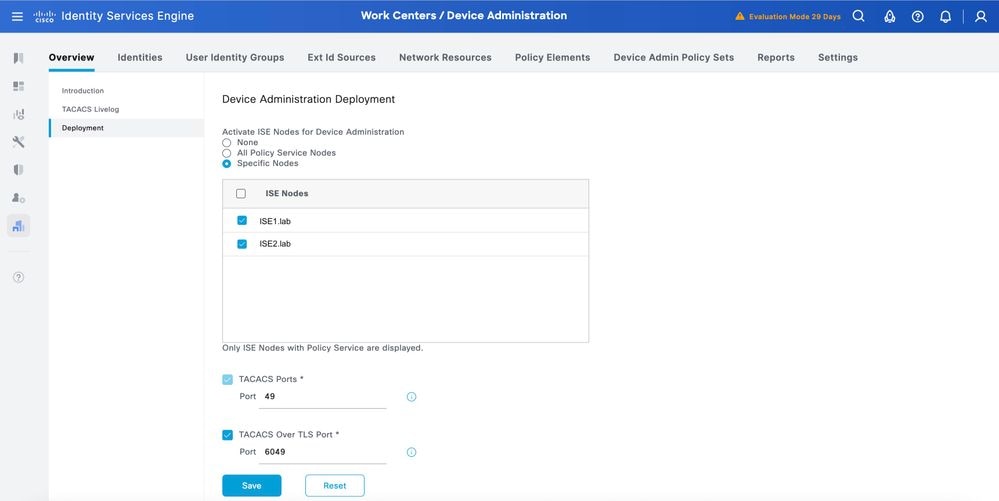
Step 3.Keep the default port 6049 or specify a different TCP port for TACACS over TLS, then click Save.
Create Network Device and Network Device Groups
ISE provides powerful device grouping with multiple device group hierarchies. Each hierarchy represents a distinct and independent classification of network devices.
Step 1. Navigate to Work Centers > Device Administration > Network Resources.Click Network Device Groups and create a group with the name IOS XE.
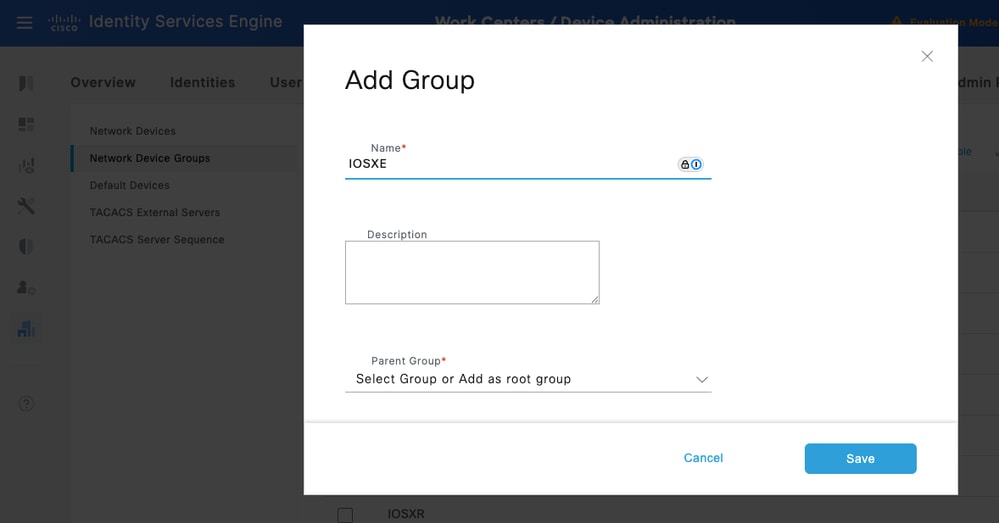

Tip: All Device Types and All Locations are default hierarchies provided by ISE. You can add your own hierarchies and define the various components in identifying a Network Device which can be used later in the Policy Condition
Step 2.Now, add a Cisco IOS XE device as a Network Device. Navigate to Work Centers > Device Administration > Network Resources > Network Devices. Click Add to add a new Network Device. For this test, it would be SVS_BRPASR1K.
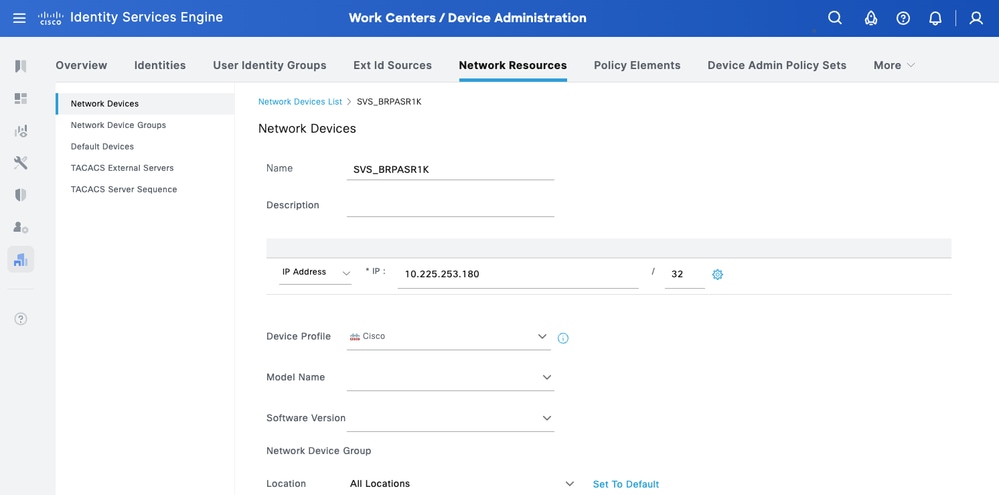
Step 3.Enter the IP address of the Device and make sure to map the Location and Device Type(IOS XE) for the Device. Finally, enable theTACACS+ over TLS Authentication Settings.
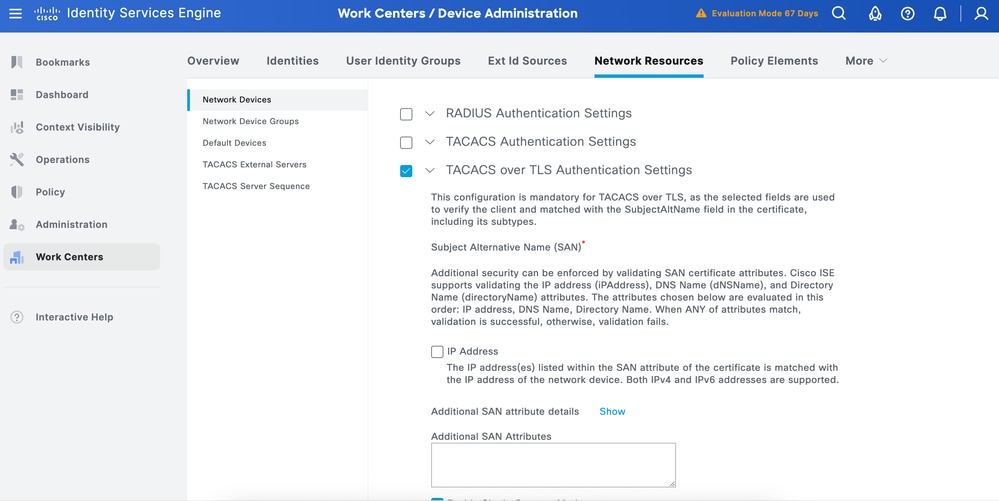
Tip: It is recommended to Enable Single Connect Mode to avoid restarting the TCP session each time a command is sent to the device.
Configure Identity Stores
This section defines an Identity Store for the Device Administrators, which can be the ISE Internal Users and any supported External Identity Sources. Here uses Active Directory (AD), an External Identity Source.
Step 1. Navigate to Administration > Identity Management > External Identity Stores > Active Directory. Click Add to define a new AD Joint Point.
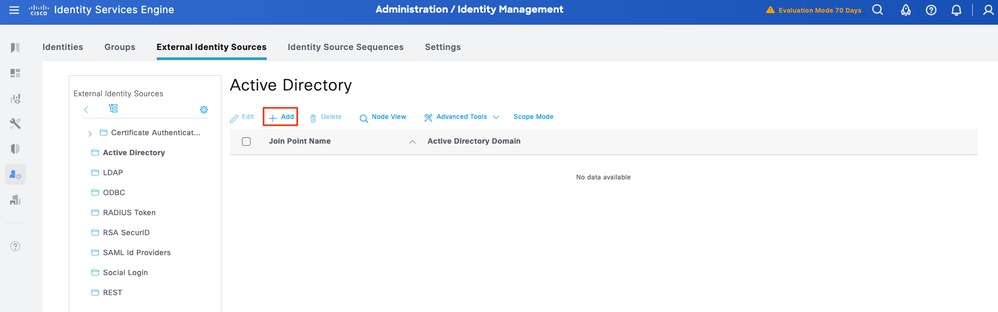
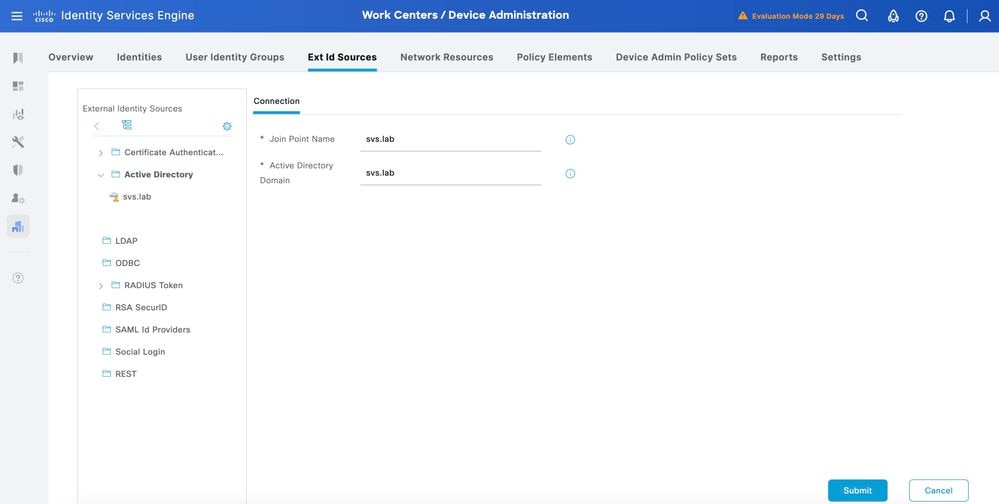
Step 2. Specify the Join Point name and the AD domain name and click Submit.
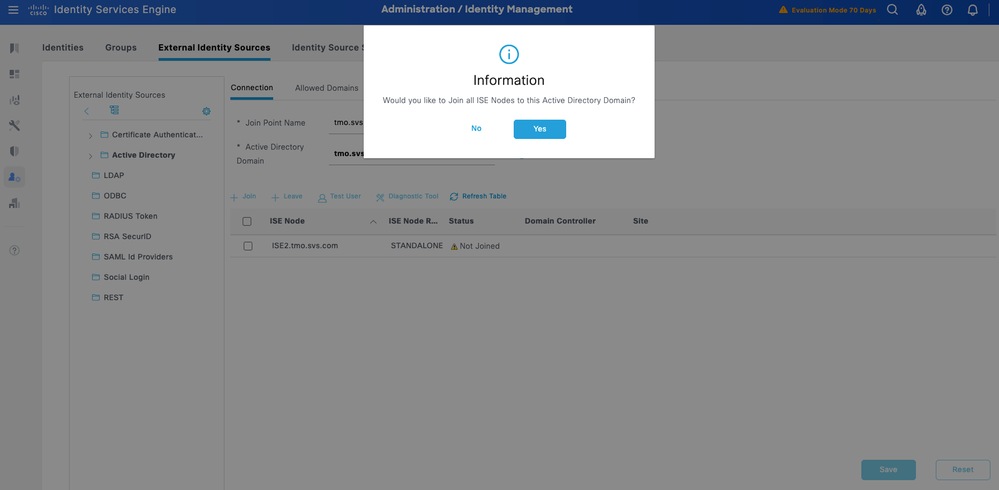
Step 3. Click Yes when prompted Would you like to Join all ISE Nodes to this Active Directory Domain?
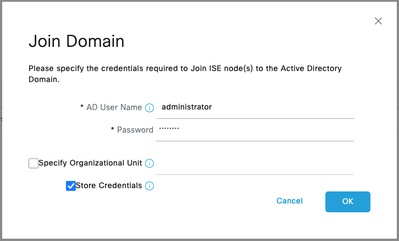
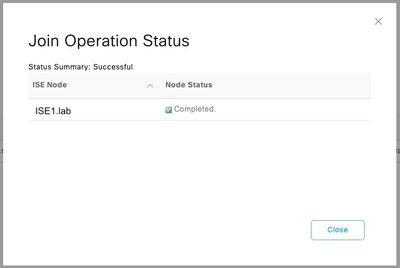
Step 4. Input the credentials with AD join privileges, and Join ISE to AD. Check the Status to verify it operational.
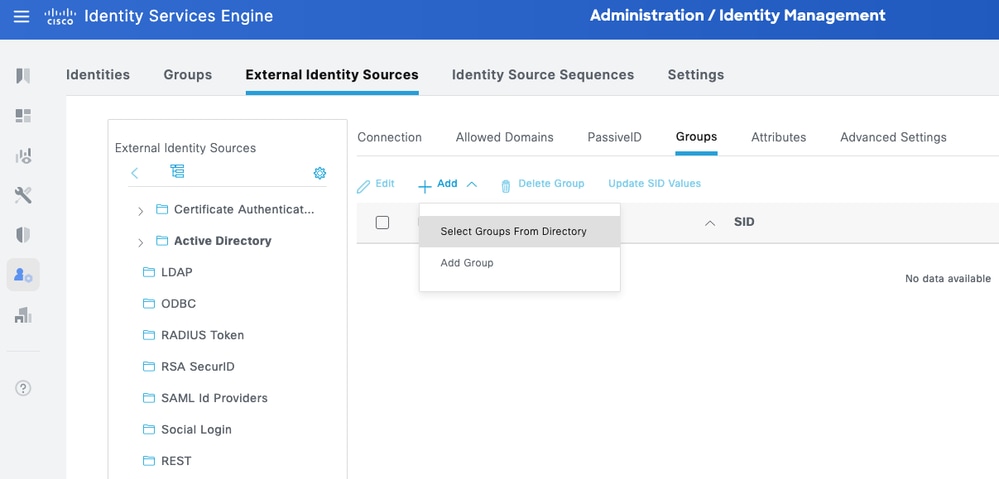
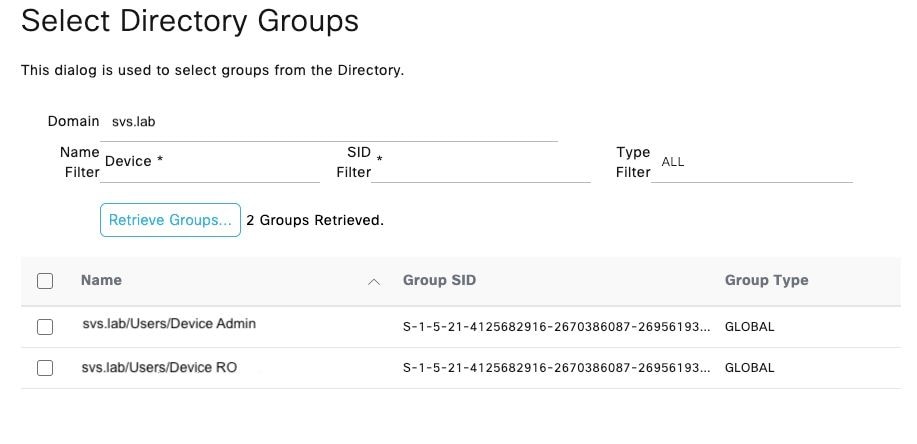
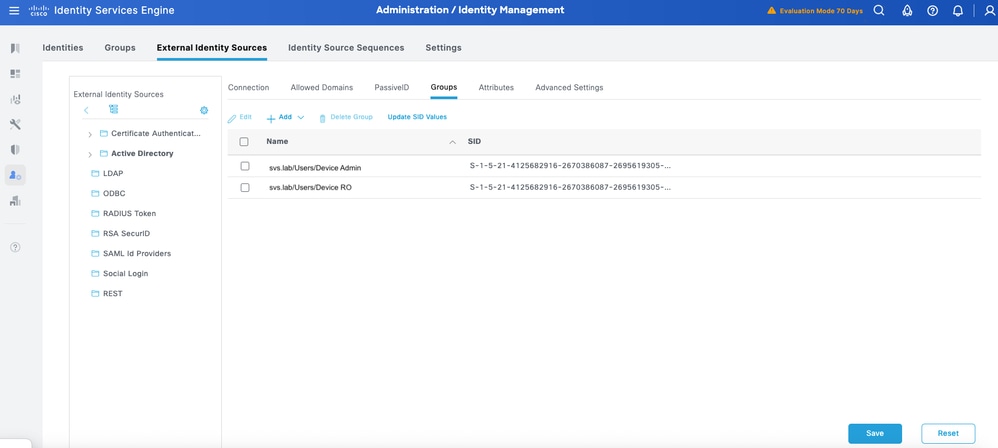
Step 5. Navigate to the Groups tab, and click Add to get all the groups needed based on which the users are authorized for the device access. This example shows the groups used in the Authorization Policy in this guide
ConfigureTACACS+ Profiles
You are going to map the TACACS+ Profiles to the two main user roles on the Cisco IOS XE devices:
- Root System Administrator – This is the highest-privileged role in the device. The user with the root system administrator role has full administrative access to all system commands and configuration capabilities.
- Operator –This role is intended for users who need read-only access to the system for monitoring and troubleshooting purposes.
These are defined as two TACACS+ Profiles: IOS XE_RW and IOSXR_RO.
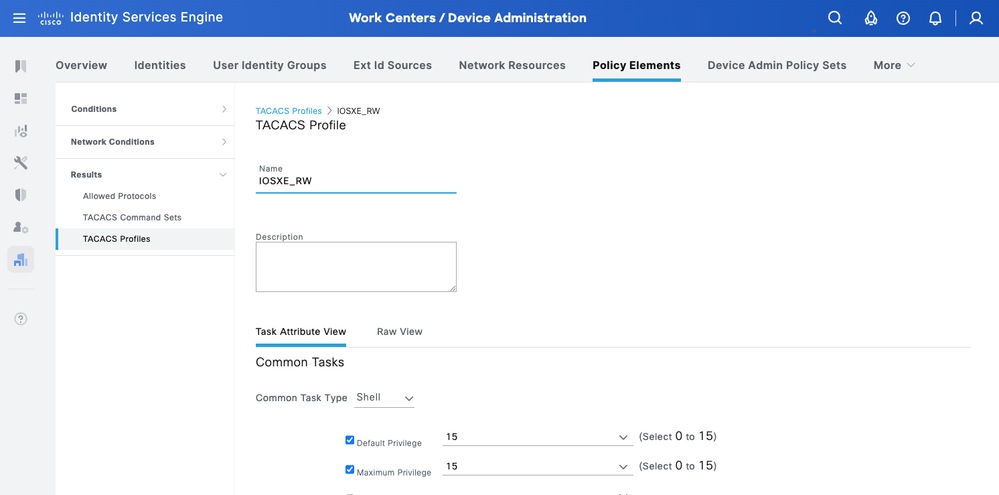
IOS XE_RW - Administrator Profile
Step 1. Navigate to Work Centers > Device Administration > Policy Elements > Results > TACACS Profiles. Add a new TACACS Profile and name it IOS XE_RW.
Step 2. Check and set the Default Privilege and Maximum Privilege as 15.
Step 3. Confirm the config and Save.
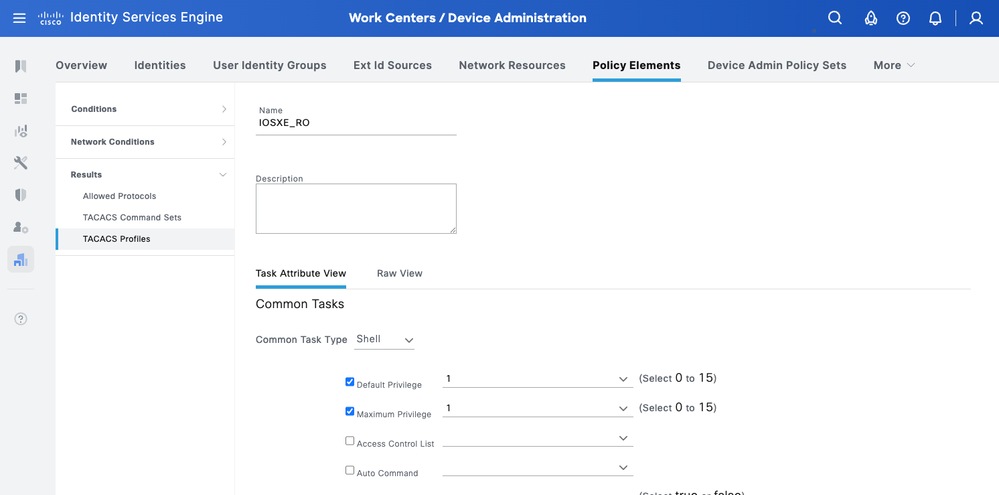
IOS XE_RO - Operator Profile
Step 1. Navigate to Work Centers > Device Administration > Policy Elements > Results > TACACS Profiles. Add a new TACACS Profile and name it IOS XE_RO.
Step 2. Check and set the Default Privilege and Maximum Privilege as 1.
Step 3. Confirm the config and Save.
ConfigureTACACS+ Command Sets
these are defined as two TACACS+ Commands Sets: CISCO_IOS XE_RW and CISCO_IOS XE_RO.
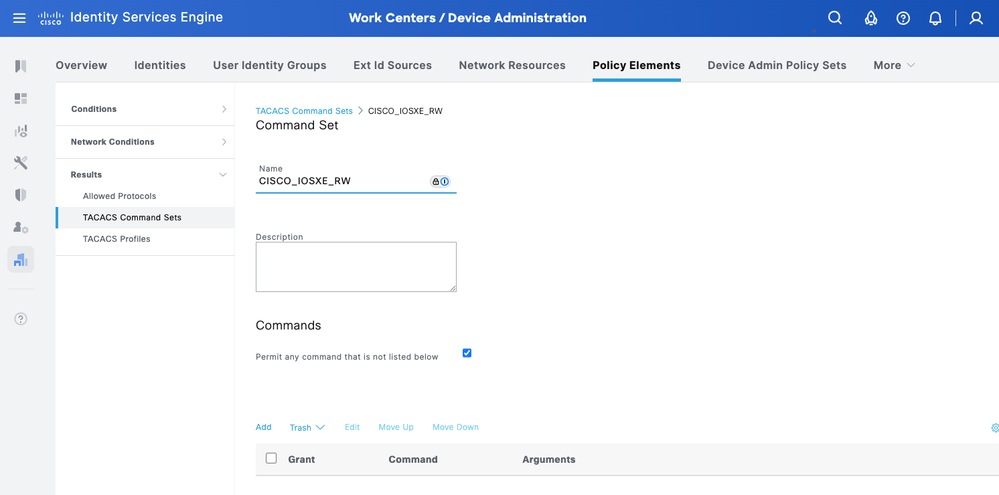
CISCO_IOS XE_RW - Administrator Command Set
Step 1. Navigate to Work Centers > Device Administration > Policy Elements > Results > TACACS Command Sets. Add a new TACACS Command Set and name it CISCO_IOS XE_RW.
Step 2. Check the Permit any command that is not listed below checkbox (this allows any command for the administrator role) and click Save.
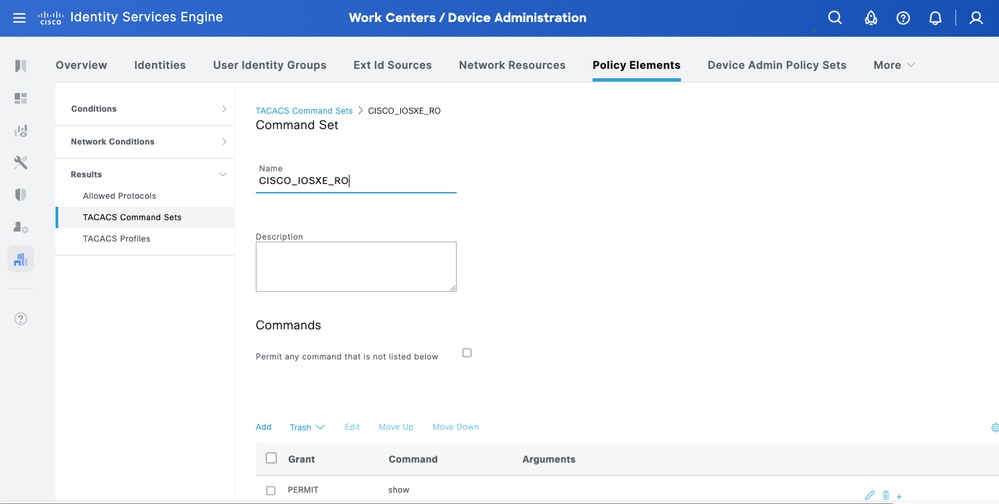
CISCO_IOS XE_RO - Operator Command Set
Step 1. From ISE UI, navigate to Work Centers > Device Administration > Policy Elements > Results > TACACS Command Sets. Add a new TACACS Command Set and name it CISCO_IOS XE_RO.
Step 2. In Commands section, add a new command.
Step 3. Select Permit from the dropdown list for Grant column and enter show on the Command column; and click the check arrow.
Step 4. Confirm the data and click Save.
ConfigureDevice Admin Policy Sets
Policy Sets are enabled by default for Device Administration. Policy Sets can divide polices based on the Device Types so to ease application of TACACS profiles.
Step 1.Navigate to Work Centers > Device Administration > Device Admin Policy Sets. Add a new Policy Set IOS XE Devices. Under condition specify DEVICE:Device Type EQUALS All Device Types#IOS XE. Under Allowed Protocols, select Default Device Admin.
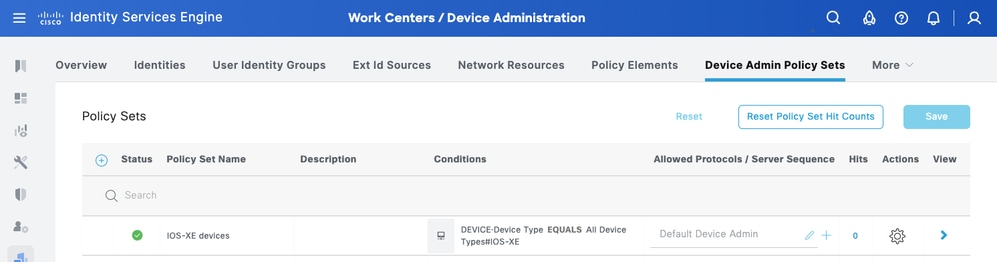
Step 2.Click Save and click the right arrow to configure this Policy Set.
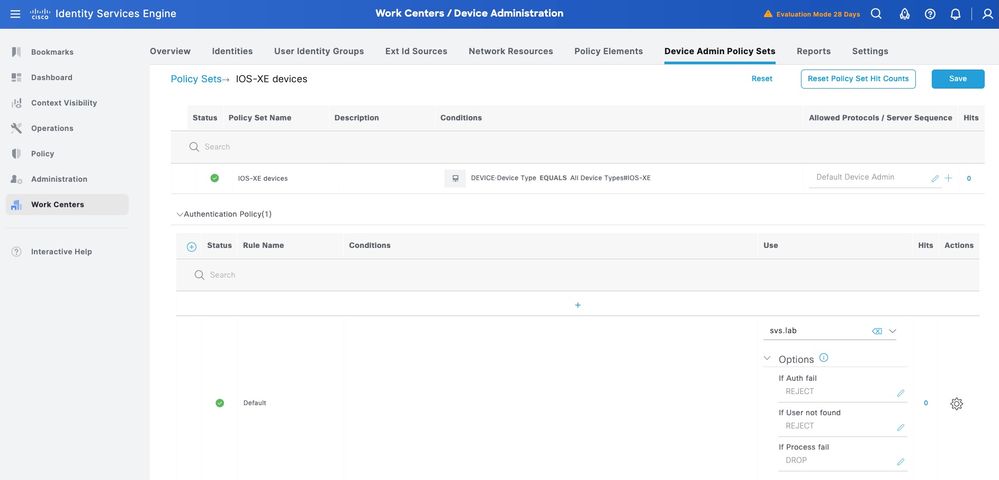
Step 3.Create the Authentication Policy. For Authentication, you use the AD as the ID Store. Leave the default options under If Auth fail, If User not found and If Process fail.
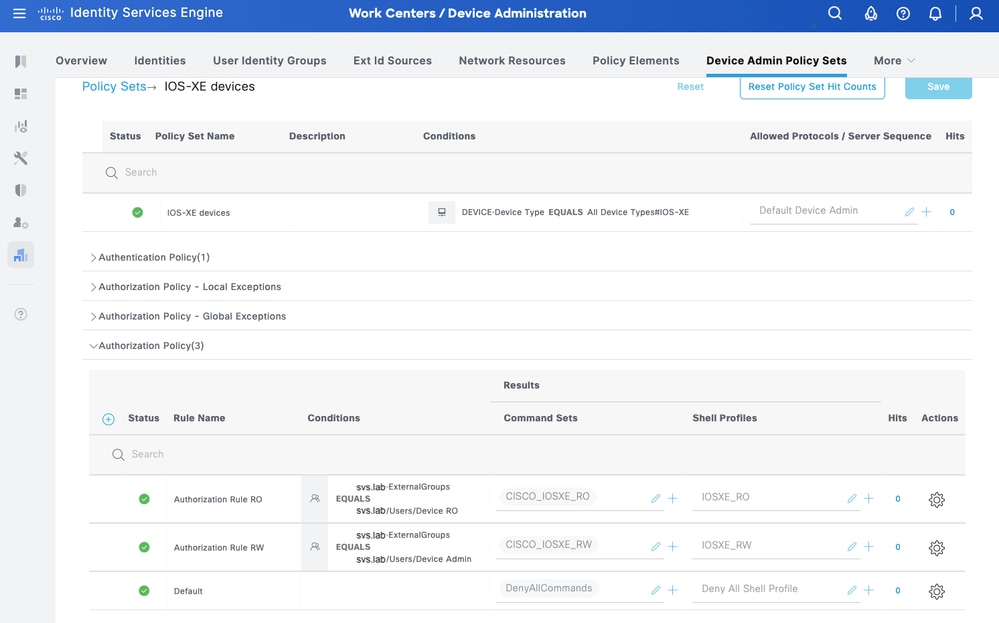
Step 4. Define the Authorization Policy.
Create the authorization policy based on user groups in Active Directory (AD).
For Example:
• Users in the AD group Device RO are assigned the CISCO_IOSXR_RO Command Set and the IOSXR_RO Shell Profile.
• Users in the AD group Device Admin are assigned the CISCO_IOSXR_RW Command Set and the IOSXR_RW Shell Profile.
Part 2 - Configure Cisco IOS XE for TACACS+ over TLS 1.3

Caution: Ensure that the console connection is reachable and functioning properly.
Tip: It is recommended to configure a temporary user and change the AAA authentication and authorization methods to use local credentials instead of TACACS while making configuration changes, to avoid being locked out of the device.
Configuration Method 1 - Device Generated Key-pair
TACACS+ Server Configuration
Step 1.Configure domain name and generate a key-pair used for router trustpoint.
ip domain name svs.lab

crypto key generate ec keysize 256 label svs-256ec-key
Trustpoint Configuration
Step 1. Create router trustpoint and associate the key-pair.
crypto pki trustpoint svs_cat9k
  enrollment terminal pem
  subject-name C=US,ST=NC,L=RTP,O=Cisco,OU=SVS,CN=cat9k.svs.lab
  serial-number none
  ip-address none
  revocation-check none
  eckeypair svs-256ec-key
Step 2. Authenticate Trustpoint by installing CA certificate.
cat9k(config)#crypto pki authenticate svs_cat9k

Enter the base 64 encoded CA certificate.

End with a blank line or the word "quit" on a line by itself

-----BEGIN CERTIFICATE-----

MIIFlDCCA3ygAwIBAgIIIM10AsTaN/UwDQYJKoZIhvcNAQELBQAwajELMAkGA1UE
BhMCVVMxFzAVBgNVBAgTDk5vcnRoIENhcm9saW5hMRAwDgYDVQQHEwdSYWxlaWdo
MQ4wDAYDVQQKEwVDaXNjbzEMMAoGA1UECxMDU1ZTMRIwEAYDVQQDEwlTVlMgTGFi
Q0EwHhcNMjUwNDI4MTcwNTAwWhcNMzUwNDI4MTcwNTAwWjBqMQswCQYDVQQGEwJV
UzEXMBUGA1UECBMOTm9ydGggQ2Fyb2xpbmExEDAOBgNVBAcTB1JhbGVpZ2gxDjAM
BgNVBAoTBUNpc2NvMQwwCgYDVQQLEwNTVlMxEjAQBgNVBAMTCVNWUyBMYWJDQTCC
AiIwDQYJKoZIhvcNAQEBBQADggIPADCCAgoCggIBAJvZUOyn2vIn6gKbx3M7vaRq
2YjwZlzSH6EkEvxnJTy+kksiFD33GyHQepk7vfp4NFU5OtQ4HC7t/A0v9grDa3QW
VwvV4MBbJhFM3s0J/ejgDYcMZhIAaPy0Zo5WLboOkXEiKjPLatkXojB8FVrhLF3O
jMBSqwa4/Wlniy5S+7s4FFxsCf20COWfBAsnrs0tatIIhmcnx+VLJP7MRm8f0w4m
mutNo7IhbJSrgAFXmjlbBjMmgspObULo/wxMHdTbtPBf11HRHTkNIo3qy04UADL2
WpoGhgT/FaxxBo2UBcnYVaP+jjRE0NYT973MCbVAAxtNVU6bEBR0z+LWniACzupm
+qh23SL43uW5A3iSw/BuU1E9p7B0e8oDNKU6gXlojKyLP/gC7j8AeP03ir+KZui8
b8X4iYn/67SbzZFhwxn3chkW4JYhQ4AImW1An2Q1+DMoZL7zRtSqQ3g9ZqRIMzQN
gJ+kQXe7QtT/u6m1MrtjE3gAEVpL334rTIxy9hpKZIkB86t2ZA3JX8CLsbCa13sA
z1XCoONX+6a1ekmXuAOI+t3c1sNbN2AtFi4cJovTA01xh60I4QnK+MNQKpTjt/E4
ydHl0rrurXsZummj9QBnkX4pqY7cDLHhdMKpbjDwg7jVLl783nTc9wYptQEPi5sw
83g9EMgKV0ARIiVUa/qlAgMBAAGjPjA8MAwGA1UdEwQFMAMBAf8wEQYJYIZIAYb4
QgEBBAQDAgAHMBkGCWCGSAGG+EIBDQQMFgpTVlMgTGFiIENBMA0GCSqGSIb3DQEB
CwUAA4ICAQAIT308oL2L6j/7Kk9VdcouuaBsN9o2pNEk3KXeZ8ykarNoxa87sFYr
AwXIwfAtk8uEHfnWu1QcZ3LkEJM9rHVCZuKsYd3D6qojo54HTpxRLgo5oKOdGayi
iSEkSSX9qyfLfINHR2JSVqJU6jLsy86X7q7RmIPMS7XfHzuddFNI4YDoXRX67X+v
O+ja6zTQqjO6lqJhmrSkyFbYf/ZTpe4d1OzJsZjNsNOr8bF9nOA/7qNZLp3Z3cpU
PU0KdbiSvRqnPw3e8TfITVmAzcx8COI2SrYFMSUazolVBvDy+xRKxyAtMbneGz6n
YdykCimThCKoKwp/pWpYBEqIEOf5ay1PKURO/8aj/B7aluJapXkmnj5qPeGhN0pB
Q9r14reov4so2EspkXS7CrH9yGfpIyTprokz1UvZBZ8vloI7YZmjFmem+5rT6Gnk
eU/lX7nV61SYG5W5K+I8uaKuyBHOMn7Amy3DYL5c5GJBqxpSZERbLXV+Q1tIgRU8
8ggzlPOdsS/i6Lo7ypYX0eB9HgVDCkzQsLXQuHGj/2WsgPgdRcjkvnyURk4Jx+Ib
xDrmo7e0XPpSW4l72a6Kl8CR3U2Cr4wsuvndPEq/qd2NRSBWffF0XE/AJHQG7STT
HaXLU9r2Ko603oecu8ysGTwLlIt/9T1/FOb0xZRugWcpJrVoTgDGuA==

-----END CERTIFICATE-----

Certificate has the following attributes:
   Fingerprint MD5: D9C404B2 EC08A260 EC3539E7 F54ED17D
   Fingerprint SHA1: 0EB181E9 5A3ED780 3BC5A805 9A854A95 C83AC737

% Do you accept this certificate? [yes/no]: yes
Trustpoint CA certificate accepted.
% Certificate successfully imported

cat9k(config)#
Step 3. Generate Certificate Signing Request (CSR).
cat9k(config)# crypto pki enroll svs_cat9k
% Start certificate enrollment ..

% The subject name in the certificate will include: C=US,ST=NC,L=RTP,O=Cisco,OU=SVS,CN=cat9k.svs.lab
% The subject name in the certificate will include: cat9k.svs.lab
Display Certificate Request to terminal? [yes/no]: yes
Certificate Request follows:

-----BEGIN CERTIFICATE REQUEST-----
MIIBfDCCASMCAQAwgYQxGjAYBgNVBAMTEWNhdDlrLnRtby5zdnMuY29tMQwwCgYD
VQQLEwNTVlMxDjAMBgNVBAoTBUNpc2NvMQwwCgYDVQQHEwNSVFAxCzAJBgNVBAgT
Ak5DMQswCQYDVQQGEwJVUzEgMB4GCSqGSIb3DQEJAhYRY2F0OWsudG1vLnN2cy5j
b20wWTATBgcqhkjOPQIBBggqhkjOPQMBBwNCAATpYE7atscrtl4ddevCh3UgxjYi
4N4oBGWrpJBctKy4so8V5i6RXDt7kHgPzp14Qnf20bcXVODE1wtTAHHBrIXqoDww
OgYJKoZIhvcNAQkOMS0wKzAcBgNVHREEFTATghFjYXQ5ay50bW8uc3ZzLmNvbTAL
BgNVHQ8EBAMCB4AwCgYIKoZIzj0EAwQDRwAwRAIgZqP2QTwM3ZZrmIphJ7+jSTER
40kTx2DiVs1c1Xf+vR4CIBcSb18DIYz84DmgMHUaf778/cmpe9cWakvdaxMWseBH
-----END CERTIFICATE REQUEST-----

---End - This line not part of the certificate request---

Redisplay enrollment request? [yes/no]: no
cat9k(config)#
Step 4. Import CA signed certificate.
cat9k(config)#crypto pki import svs_cat9k certificate

Enter the base 64 encoded certificate.
End with a blank line or the word "quit" on a line by itself

-----BEGIN CERTIFICATE-----
MIID8zCCAdugAwIBAgIIKfdYWg5WpskwDQYJKoZIhvcNAQELBQAwajELMAkGA1UE
BhMCVVMxFzAVBgNVBAgTDk5vcnRoIENhcm9saW5hMRAwDgYDVQQHEwdSYWxlaWdo
MQ4wDAYDVQQKEwVDaXNjbzEMMAoGA1UECxMDU1ZTMRIwEAYDVQQDEwlTVlMgTGFi
Q0EwHhcNMjUwNTE0MTUxMjAwWhcNMjYwNTE0MTUxMjAwWjCBhDEaMBgGA1UEAxMR
Y2F0OWsudG1vLnN2cy5jb20xDDAKBgNVBAsTA1NWUzEOMAwGA1UEChMFQ2lzY28x
DDAKBgNVBAcTA1JUUDELMAkGA1UECBMCTkMxCzAJBgNVBAYTAlVTMSAwHgYJKoZI
hvcNAQkCFhFjYXQ5ay50bW8uc3ZzLmNvbTBZMBMGByqGSM49AgEGCCqGSM49AwEH
A0IABOlgTtq2xyu2Xh1168KHdSDGNiLg3igEZaukkFy0rLiyjxXmLpFcO3uQeA/O
nXhCd/bRtxdU4MTXC1MAccGsheqjTTBLMB4GCWCGSAGG+EIBDQQRFg94Y2EgY2Vy
dGlmaWNhdGUwHAYDVR0RBBUwE4IRY2F0OWsudG1vLnN2cy5jb20wCwYDVR0PBAQD
AgeAMA0GCSqGSIb3DQEBCwUAA4ICAQBObgKVykeyVC9Usvuu0AUsGaZHGwy2H9Yd
m5vIaui6PJczkCzIoAIghHPGQhIgpEcRqtGyXPZ2r8TCJP11WXNN/G73sFyWAhzY
RtmIM5KIojiDHLtifPayxv9juDu0ZRx+wYR2PIQ5eLv1bafg7K8E82sqOCfOtcPr
Oc0NU8UCxq0bdOgu4XsdBN1+wcWFqeQSDLmP7nxvhO0m/LXwCWUHwgVioOAuU2Fe
k5NthtvdxNAhRAImQdTyq6u/yB7vwTwJHcRiJc5USsyzCsTBb6RvL+HsXqBgXGc5
lxCSoLtYOdUxFIpJyK2MOZBY2zq2cNSc8Xbso5/OEQmnHtpWPvij4rSPUhQSY+4m
Qq2Sn3iqf4mGh/A08T4iXfWDWfNezh7ZxMsCSCK/ZRlELZ2hj60fzwX1H27Uf8XU
ecr0Wx+WzRn7LVRCaGQzFkukfi8S4DLLNtxnNHfsLBVX5yHXCLEL+CQ7n8Z/pxcB
VVrPitwN3ZbO9poZyWiRLTnBsb42xNaWiL9bjQznA0iTDfmfFFourBsaAioz7ouY
2r1Mh+OpE83Uu+4lOTMawDgGiEv7iaiJ6xWc95EC+Adm0x3FvBXMtIM9qr7WwHW6
3C2hVYHJH254elV5+H8iiz7rovEPm8ZDsnvYpJn4Km3iDvBNqp/vvAHOFcyXrvG6
3i/1b9erGQ==
-----END CERTIFICATE-----

% Router Certificate successfully imported

cat9k(config)#
TACACS & AAA with TLS Configuration
Step 1. Create TACACSS server and AAA groups, associate the client (router) trustpoint.
tacacs server svs_tacacs
 address ipv4 10.225.253.209
 single-connection
 tls port 6049
 tls idle-timeout 60
 tls connection-timeout 60
 tls trustpoint client svs_cat9k
 tls ip tacacs source-interface GigabitEthernet0/0
 tls ip vrf forwarding Mgmt-vrf
!
aaa group server tacacs+ svs_tls
 server name svs_tacacs
 ip vrf forwarding Mgmt-vrf
!
tacacs-server directed-request
Step 2. Configure AAA methods.
aaa authentication login default group svs_tls local enable
aaa authentication login console local enable
aaa authentication enable default group svs_tls enable
aaa authorization config-commands
aaa authorization exec default group svs_tls local if-authenticated
aaa authorization commands 1 default group svs_tls local if-authenticated
aaa authorization commands 15 default group svs_tls
aaa accounting exec default start-stop group svs_tls
aaa accounting commands 1 default start-stop group svs_tls
aaa accounting commands 15 default start-stop group svs_tls
aaa session-id common
Configuration Method 2 - CA Generated Key-Pair
If you are importing the keys as well as device and CA certificates directly in a PKCS#12 format instead of CSR method, you can use the this method.
Step 1. Create client trustpoint.
cat9k(config)#crypto pki trustpoint svs_cat9k_25jun17
cat9k(ca-trustpoint)#revocation-check none
Step 2. Copy the PKCS#12 file into bootflash.

Note: Ensure that PKCS#12 file contains the complete certificate chain and the private key as encrypted file.
Caution: Keys in the imported PKCS#12 must be of RSA (E.g.: RSA 2048) type, not ECC.
cat9k# copy sftp bootflash: vrf Mgmt-vrf
Address or name of remote host [10.225.253.247]?
Source username [svs-user]?
Source filename [cat9k.svs.lab.pfx]? /home/svs-user/upload/cat9k-25jun17.pfx
Destination filename [cat9k-25jun17.pfx]?
Password:
!
2960 bytes copied in 3.022 secs (979 bytes/sec)
Step 3. Import the PKCS#12 file using the import command.
cat9k#crypto pki import svs_cat9k_25jun17 pkcs12 bootflash:cat9k-25jun17.pfx password C1sco.123
% Importing pkcs12...Reading file from bootflash:cat9k-25jun17.pfx
CRYPTO_PKI: Imported PKCS12 file successfully.
cat9k#

cat9k#show crypto pki certificates svs_cat9k_25jun17
Certificate
  Status: Available
  Certificate Serial Number (hex): 5860BF33A2033365
  Certificate Usage: General Purpose
  Issuer:
    cn=SVS LabCA
    ou=SVS
    o=Cisco
    l=Raleigh
    st=North Carolina
    c=US
  Subject:
    Name: cat9k.svs.lab
    e=pkalkur@cisco.com
    cn=cat9k.svs.lab
    ou=svs
    o=cisco
    l=rtp
    st=nc
    c=us
  Validity Date:
    start date: 17:56:00 UTC Jun 17 2025
    end   date: 17:56:00 UTC Jun 17 2026
  Associated Trustpoints: svs_cat9k_25jun17

CA Certificate
  Status: Available
  Certificate Serial Number (hex): 20CD7402C4DA37F5
  Certificate Usage: General Purpose
  Issuer:
    cn=SVS LabCA
    ou=SVS
    o=Cisco
    l=Raleigh
    st=North Carolina
    c=US
  Subject:
    cn=SVS LabCA
    ou=SVS
    o=Cisco
    l=Raleigh
    st=North Carolina
    c=US
  Validity Date:
    start date: 17:05:00 UTC Apr 28 2025
    end   date: 17:05:00 UTC Apr 28 2035
  Associated Trustpoints: svs_cat9k_25jun17 svs_cat9k
  Storage: nvram:SVSLabCA#37F5CA.cer
TACACS & AAA with TLS Configuration
Step 1. Create TACACS server and AAA groups, associate the client (router) trustpoint.
tacacs server svs_tacacs
 address ipv4 10.225.253.209
 single-connection
 tls port 6049
 tls idle-timeout 60
 tls connection-timeout 60
 tls trustpoint client svs_cat9k
 tls ip tacacs source-interface GigabitEthernet0/0
 tls ip vrf forwarding Mgmt-vrf
!
aaa group server tacacs+ svs_tls
 server name svs_tacacs
 ip vrf forwarding Mgmt-vrf
!
tacacs-server directed-request
Step 2. Configure AAA methods.
aaa authentication login default group svs_tls local enable
aaa authentication login console local enable
aaa authentication enable default group svs_tls enable
aaa authorization config-commands
aaa authorization exec default group svs_tls local if-authenticated
aaa authorization commands 1 default group svs_tls local if-authenticated
aaa authorization commands 15 default group svs_tls
aaa accounting exec default start-stop group svs_tls
aaa accounting commands 1 default start-stop group svs_tls
aaa accounting commands 15 default start-stop group svs_tls
aaa session-id common
Verification
Verify the configuration.
show tacacs
show crypto pki certificates <>
show crypto pki trustpoints <>
Debug for AAA & TACACS+.
debug aaa authentication
debug aaa authorization
debug aaa accounting
debug aaa subsys
debug aaa protocol local
debug tacacs authentication
debug tacacs authorization
debug tacacs accounting
debug tacacs events
debug tacacs packet
debug tacacs
debug tacacs secure

! Below debugs will be needed only if there is any issue with SSL Handshake
debug ip tcp transactions
debug ip tcp packet
debug crypto pki transactions
debug crypto pki API
debug crypto pki messages
debug crypto pki server
debug ssl openssl errors
debug ssl openssl msg
debug ssl openssl states
clear logging
Revision History
| Revision | Publish Date | Comments |
|---|---|---|
2.0 |
21-Jan-2026
|
Updated for Components Used and Contributor List. |
1.0 |
30-Sep-2025
|
Initial Release |
Contributed by Cisco Engineers
- Pam Martinez BarajasCisco Consulting Engineer
- Pravardhan KalkurCustomer Delivery Architect
- Garrett FincherCisco Consulting Engineer
 Feedback
Contact Cisco
- Open a Support Case

- (Requires a Cisco Service Contract)