Introduction
This document describes a step-by-step guide on how to install NFVIS software over CIMC environment via the Host Image Mapping (HIM) utility.
Prerequisites
The NFVIS .iso image must be served by a file transfer service that is reachable by the device. These protocols for such service can be used:
Requirements
Cisco recommends you have knowledge of these topics:
- NFVIS capable/compatible hardware unit that has a CIMC implementation.
- CIMC must have basic network configuration over the CIMC Management interface to reach the remote server with the NFVIS image available.
- Basic knowledge on CIMC CLI and WebUI.
Components Used
The information in this document is based on these software and hardware versions:
- Host: Remote PC with reachabiliy over HTTP to the CIMC MGMT IP
- Hardware: ENCS5412/K9
- CIMC Firmware Version: 3.2(14.19)
- NFVIS 4.15.3 ISO image. (This method can also be used with newest and oldest NFVIS ISO images)
The information in this document was created from the devices in a specific lab environment. All of the devices used in this document started with a cleared (default) configuration. If your network is live, ensure that you understand the potential impact of any command.
Boot Devices
Throughout the installation process, prioritize using the M.2 SSD for the host OS installation (NFVIS). If an M.2 SSD is not available, use HDD Slot 0 as the install media. You have two possibilities:
Legacy boot, UEFI boot and UEFI secure boot are the three boot modes. Secure boot can only be used on a disk that has UEFI partition.
Boot Order without UEFI
On the ENCS devices, for virtual devices (vKVM-Mapped vDVD and CIMC-Mapped vDVD), ensure they are always at the top of the boot order. This is essential because they are activated based on a specific fresh install method.
-
Mapping an image for HIM, activates vCIMC-Mapped vDVD and relates the host image to this storage medium.
-
Mapping an image for KVM Console, activates vKVM-Mapped vDVD and relates the host image to this storage medium via a network drive mount. 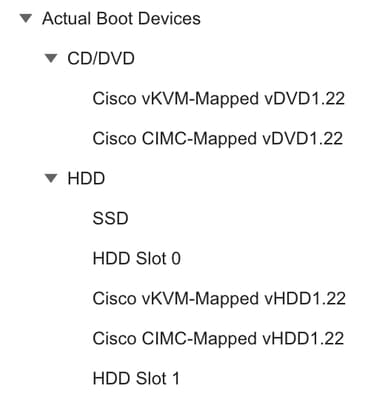 Image 1 - Boot Order Example from CIMC GUI without UEFI
If nothing is mapped with the vKVM and CIMC, these boot devices are ignored and the 3rd device in the boot order list is used for boot (For Image 1, this is SSD)
Boot Order with UEFI
ENCS Platform
Since CIMC cannot be used to configure UEFI boot order on ENCS devices, the BootOrderRules setting must be changed to Loose when secure boot is enabled. If BootOrderRules is set to Loose, the boot order is changed on the BIOS setup menu. When an operating system is installed in secure boot mode, the new UEFI boot option for the OS automatically appears at the top of the BIOS menu boot order list, to boot the installed operating system.
To set BootOrderRule to Loose:
DEVICE# scope bios/advanced
DEVICE /bios/advanced # set BootOrderRules Loose
DEVICE /bios/advanced *# commit
Changes to BIOS set-up parameters will require a reboot.
Do you want to reboot the system?[y|N]
Catalyst 8000 uCPE Platforms
On the Catalyst 8000 uCPE devices, you can change the boot order settings from CIMC when enabling secure-boot.
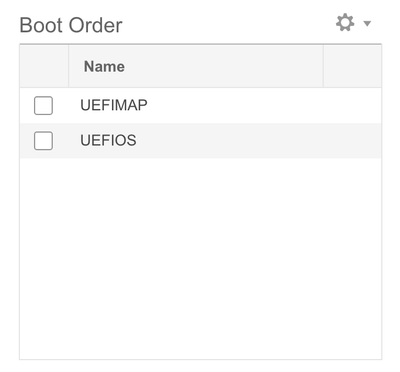 Image 2 - Boot Order Example from CIMC GUI with UEFI
-
Mapping an image for HIM activates UEFIMAP and relates the host image to this storage medium.
-
Mapping an image for KVM Console activates UEFIOS and relates the host image to this storage medium via a network drive mount.
Network Diagram
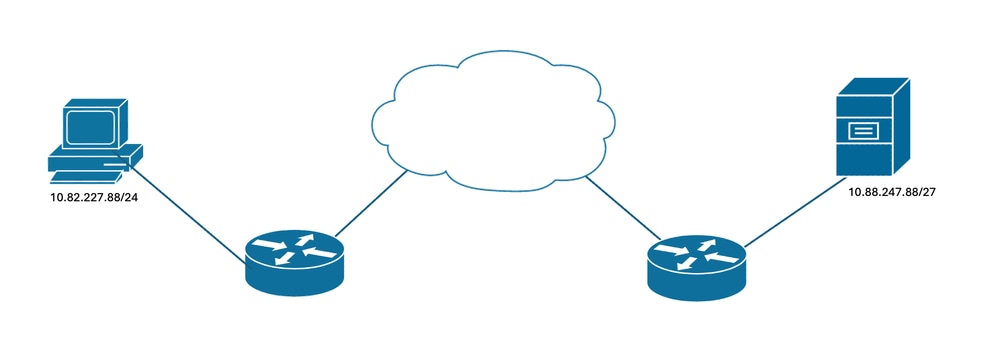 Image 3 - Topology Diagram Example
There is reachability between these 2 locations. An HTTP Server is listening on port 80 within the PC Host. CIMC server is able to reach remote host.
NFVIS Host Image Mapping Installation over CIMC CLI
Step 1. Download the desired NFVIS image on the remote host from Cisco Software Download webpage.
Step 2. Log in to CIMC over terminal connection.
Step 3. From terminal, move to the host-image-mapping scope:
DEVICE# scope host-image-mapping
DEVICE /host-image-mapping #
Step 4. On this scope, download the image from the remote host:

Note: For this guide, the remote host has the Cisco NFVIS 4.15.3 iso file downloaded and available over HTTP protocol. You can map and unmap only an ISO images.
DEVICE /host-image-mapping # download-image http 10.24.57.179 Cisco_NFVIS-4.15.3-FC1.iso
Username: admin
Password:
Image download has started.
The progress of the transference can be checked by using the show detail command:
DEVICE /host-image-mapping # show detail
Current Mapped Image : None
Host Image Status: "Downloading ..Please wait: 2.9%"
Once the image is already downloaded, a confirmation message is displayed:
DEVICE /host-image-mapping # show detail
Current Mapped Image : None
Host Image Status: Image Downloaded and Processed Successfully
DEVICE /host-image-mapping #
DEVICE /host-image-mapping # show filelist
Index Name
----- ---------------------------------------------
1 Cisco_NFVIS-4.15.3-FC1.iso
Step 5. On the same scope, map the desired image to be installed:
DEVICE /host-image-mapping # map-image Cisco_NFVIS-4.15.3-FC1.iso
Please check the status using "show detail".
DEVICE /host-image-mapping # show detail
Current Mapped Image : Cisco_NFVIS-4.15.3-FC1.iso
Host Image Status: Image mapped successfully, set CDROM as the Boot device.
Step 6. Move to the BIOS scope and set the boot order to make the virtual drive in which the image is mounted as the first boot device:
Note: The Boot Order values are hardware dependent. For more information, review the Boot Devices section.
DEVICE# scope bios
DEVICE /bios # set boot-order CDROM:Virtual-CD,CDROM:CIMC-VDVD,HDD:SSD,HDD:HDDslot0
To manage boot-order:
- Reboot server to have your boot-order settings take place
- Do not disable boot options via BIOS screens
- If a specified device type is not seen by the BIOS, it can be removed
from the boot order configured on the BMC
- Your boot order sequence can be applied subject to the previous rule.
The configured list can be appended by the additional device types
seen by the BIOS
DEVICE /bios *#
DEVICE /bios *# show detail
BIOS:
BIOS Version: "ENCS54_3.06 (Build Date: 05/04/2022)"
Boot Order: CDROM:Virtual-CD,CDROM:CIMC-VDVD,HDD:SSD,HDD:HDDslot0
FW Update/Recovery Status: None, OK
Active BIOS on next reboot: main
UEFI Secure Boot: disabled
Password: ******
Step 7. Save the configuration and reload the device.
DEVICE /bios *# commit
DEVICE /bios # top
DEVICE# scope chassis
DEVICE /chassis # power cycle
This operation can change the server's power state.
Do you want to continue?[y|N]y
DEVICE /chassis #
The installation process after the reload takes approximately 30 to 60 minutes.
Step 8. After the installation is complete, unmap the image.
DEVICE# scope host-image-mapping
DEVICE /host-image-mapping # unmap-image Cisco_NFVIS-4.15.3-FC1.iso
DEVICE /host-image-mapping *# commit
DEVICE /host-image-mapping # show detail
Current Mapped Image : None
Host Image Status: Unmap successfull!!!
NFVIS Host Image Mapping Installation over WebUI
Step 1. Log in to CIMC.
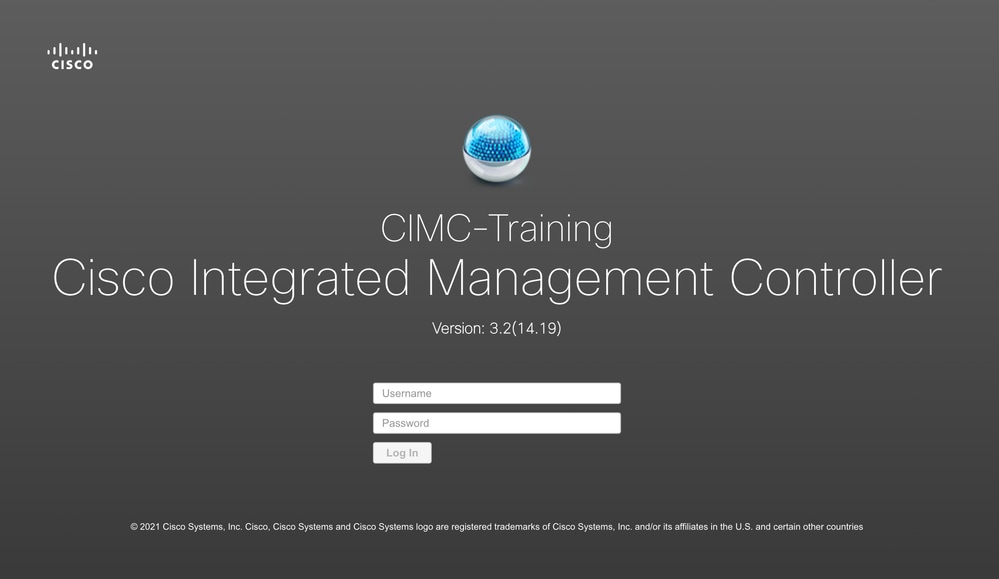 Image 4 - CIMC Login Screen
Step 2. In the Navigation panel, click the Compute menu.
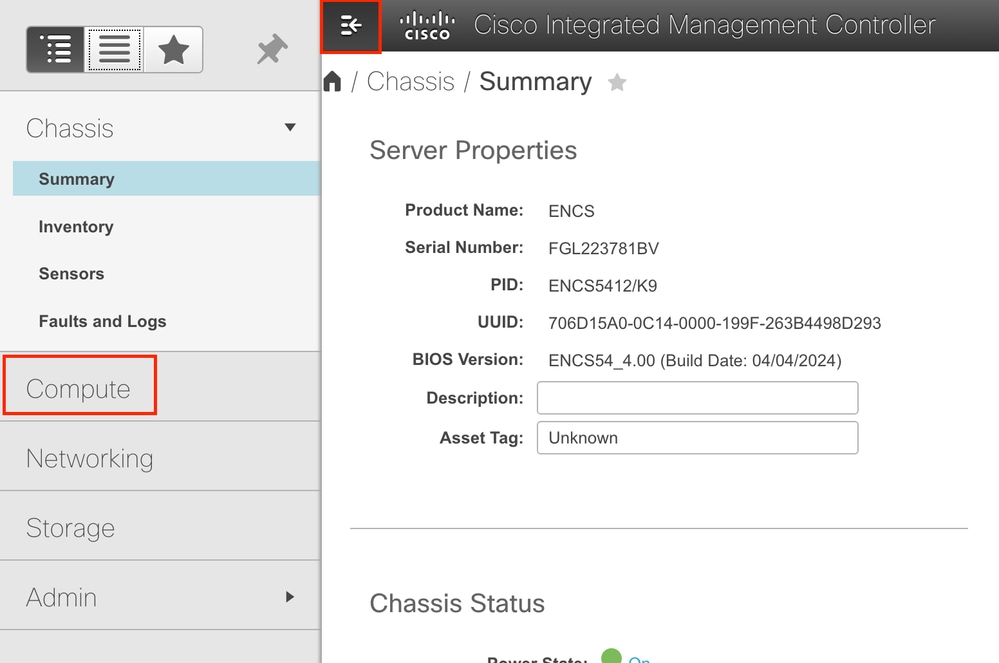 Image 5 - Default Page after Log In (/chassis/summary)
Step 3. In the work panel, click the Host Image Mapping tab.
 Image 6 - Host Image Mapping Tab (/compute/Host Image Mapping)
Step 4. From theHost Image Mappingpage, clickAdd Image. A newdialog box opens. Complete the corresponding fields:
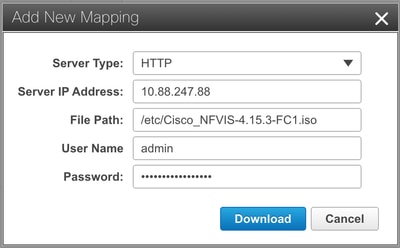 Image 7 - Pop-up Dialog
| Name |
Description |
|
Server Typedrop-down list
|
The type of remote server on which the image is located. This can be one of the following:
Note: Depending on the remote server that you select, the fields that display changes.
|
|
Server IP Addressfield
|
The IP address of the remote host/server.
|
|
File Pathfield
|
The path and filename of the remote host/server.
The path and filename can contain up to 80 characters.
-
If you are installing a host image, that image must have .iso or .img as the file extension.
-
If you are installing a diagnostics image, that image must have .diag as the file extension.
|
|
Usernamefield
|
The username of the remote server.
The username can contain 1 to 20 characters.
|
|
Passwordfield
|
The password for the username.
The password can contain 1 to 20 characters.
|
Note: If the username is not configured, enter anonymous for the username and any character(s) for the password.
Step 5. ClickDownload.
TheHost Image Mappingfeature begin to download the image. You can view the status of the image download in theHost Image Mapping Statusarea. Once the image is downloaded and processed successfully, refresh the page. After the page refreshes, the new image displays in theImage Informationarea.
Step 6. From theImage Informationarea, select the image to map, and then clickMap Selected Image.
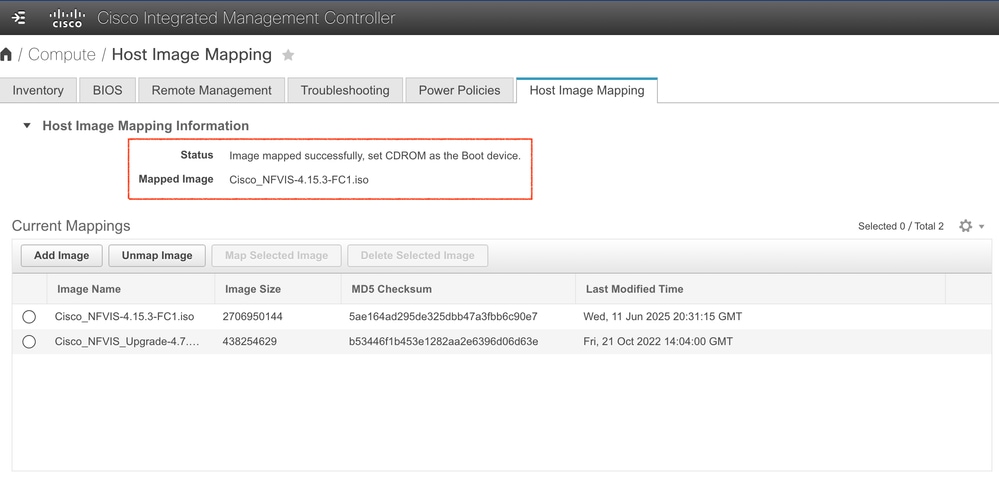 Image 8 - Host Image Mapping tab after Image Download
The image is mapped and mounted on the virtual drive of a USB controller. The virtual drive can be one of the following:
Step 7. Set the boot order to make the virtual drive in which the image is mounted as the first boot device.

Tip: To determine in which virtual drive the image is mounted, see the Host Image Update Status area in the Host Image Mapping page.
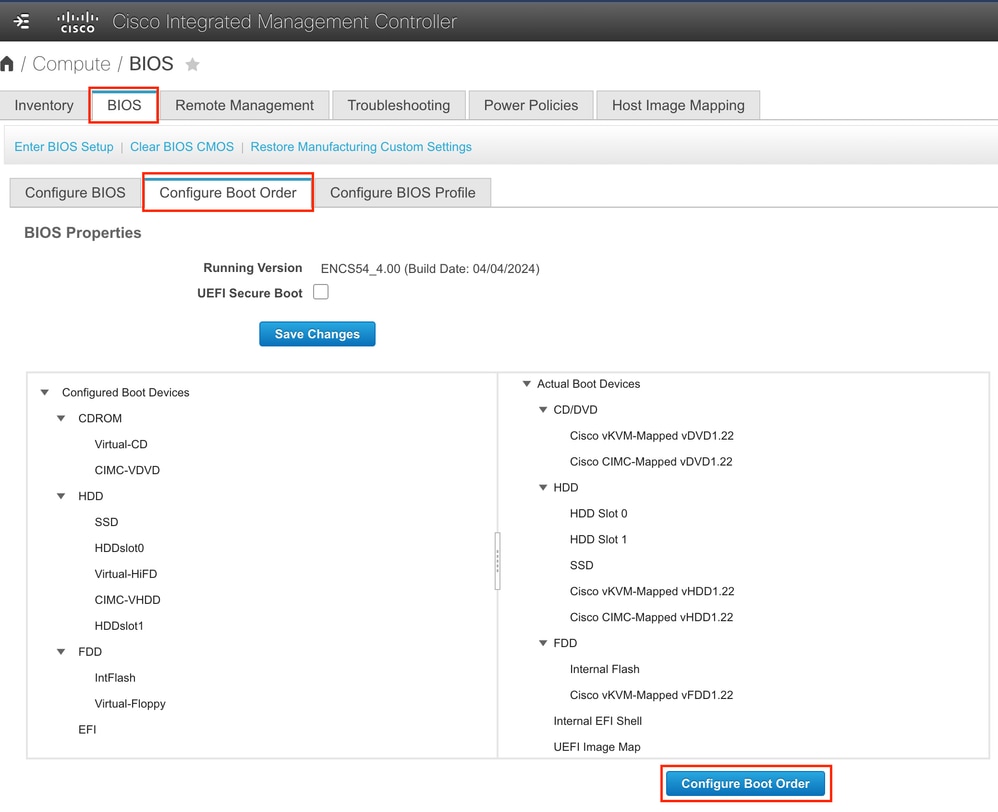 Image 9 - Configure Boot Order Tab (/compute/bios)
Note: For this example, the mapped image is located on the CIMC CDROM Virtual Media. KVM CDROM Virtual media is at first position but since there is nothing in this space, CIMC loads the next media available.
Step 8. Ensure the correct boot order is configured. vKVM and CIMC mapped virtual devices are in the top and boot media is on the 3rd place: SSD or HDD Slot X (If no SSD is present).
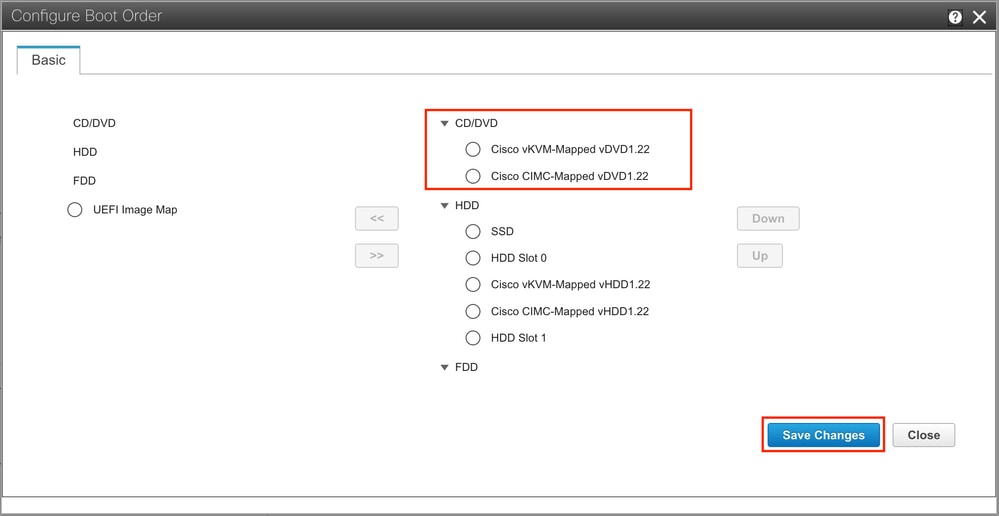 Image 10 - Pop-up Dialog
Step 9. Save the changes and reboot the server.
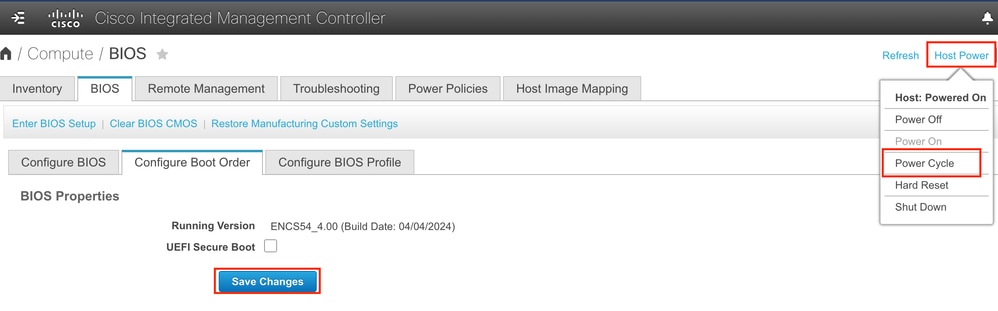 Image 11 - Boot Order Tab
The installation process after the reload takes approximately 30 to 60 minutes.
Step 10. After installation is complete, log in back into CIMC and unmap the image on the Host Image Mapping tab by selecting the image and clicking Unmap Image.
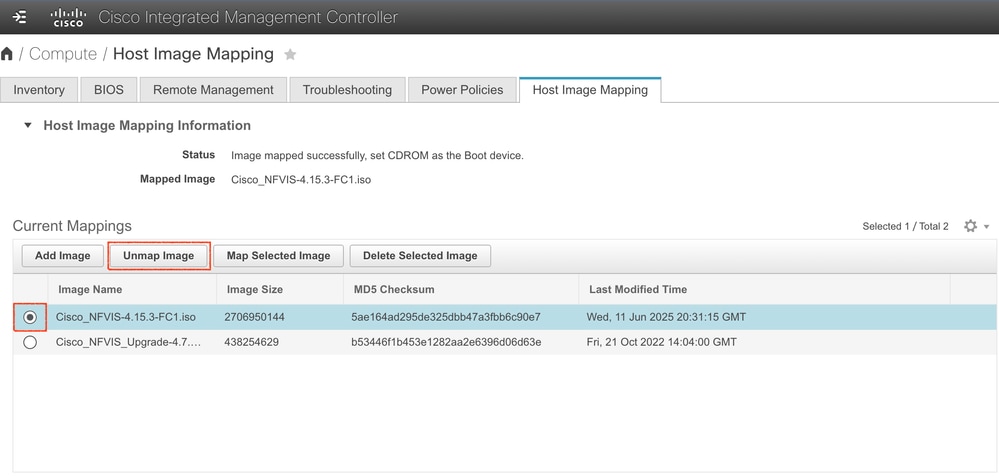 Image 12 - Image Unmapping on Host Image Mapping Tab
This information is displayed after this action:
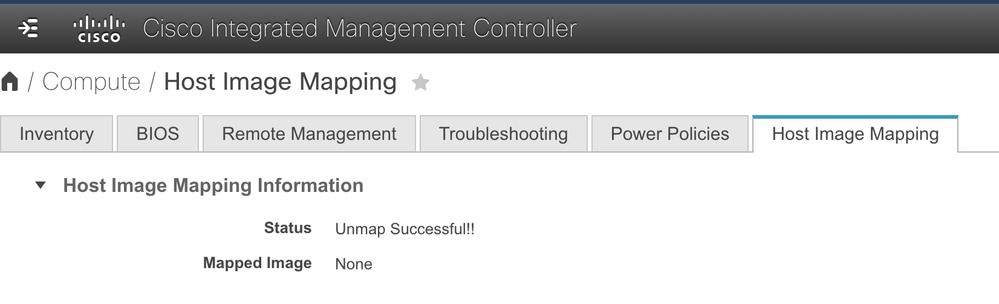 Image 13 - Host Image Mapping Tab after Unmap
Verification
Once the installation is finished, you can access to the NFVIS CLI over the CPU console port (or over the Serial-over-LAN method from CIMC CLI) using the default credentials:
Note: Default credentials for NFVIS are admin as the default user name and Admin123# as the default password.
Troubleshoot
- If the "Bad Request" error message is displayed after clicking the Download button, you are recommended to check that the remote server has its socket available for the corresponding protocol.
- If the "Download Error:512 Please try again." error is displayed during download process, this means that communications between CIMC and the remote host is not working properly. Please verify the reachability over the socket in use or attempt using a different server type that can serve the image.
 Feedback