Configure Webex AI Agent for CCE
Available Languages
Contents
Introduction
This document describes how to configure Webex AI Agent for Contact Center Enterprise (CCE).
Prerequisites
Requirements
Cisco recommends that you have knowledge of these topics:
- Packaged Contact Center Enterprise (PCCE) Release 15.0
- Customer Voice Portal (CVP) Release 15.0
- CVP Call Studio
- Cisco Virtualized Voice Browser (VVB)
Components Used
The information in this document is based on these software versions:
- PCCE 15.0
- CVP 15.0
-
VVB 15.0
-
Cloud Connect
The information in this document was created from the devices in a specific lab environment. All of the devices used in this document started with a cleared (default) configuration. If your network is live, ensure that you understand the potential impact of any command.
Webex AI Agent Overview
The Webex AI Agent is a virtual artificial intelligence agent integrated into Cisco Webex CCE or CCE. It is designed to improve service and support by the use of automated interactions, assist live agents, and deflect repetitive interaction with human agents. .
Background
The AI Agent is built to engage with contact center callers, interpret the input, generate appropriate responses based on how it is trained, and execute predefined tasks. This guide outlines the steps needed to implement an AI Agent within Contact Center Enterprise (CCE).
The Webex AI Agent is introduced as part of the new CCE 15.0 release.
Webex Agent AI Architecture
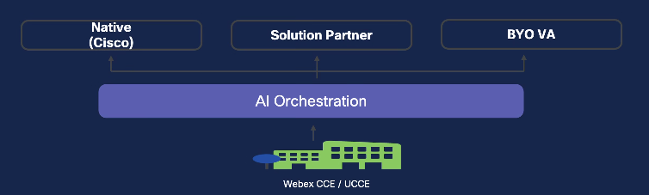 Webex Agent AI Architecture
Native: Cisco in-house solution for Virtual Agent.
Webex Agent AI Components
 Webex Agent AI Components
In both the CCE on-premises solution and the Webex CCE (WxCCE) tenant, several core components form the foundation of the Webex AI Agent solution. These components span both on-prem and cloud environments and work together to enable intelligent, AI-driven interactions.
On-Premises Components
- CVP:CVP acts as an Interactive Voice Response (IVR) system integrated with CCE/WxCCE. It enables automated self-service and call routing. CVP collaborates with the VVB and Speech Server to integrate the AI Agent within the IVR flow.
- CVP Call Studio: a development environment used to design and build voice applications for CVP.
- VVB / Speech Server:VVB handles multimedia and IVR processing. The Speech Server communicates caller requests to the AI orchestration services using gRPC protocol.
- CCE Core: CCE Core includes key components such as Peripheral Gateways, the Router, and Admin Workstation (AW). These work together to process requests and determine the appropriate destination. The AW is used to configure and manage the entire CCE environment.
- Cloud Connect: Cloud Connect acts as the secure bridge between the on-prem CCE infrastructure and Cisco cloud services, enabling seamless integration.
Cloud Components
- Webex Cloud Services – Control Hub:a centralized management interface for configuring Webex cloud solutions. From Control Hub, users can provision and launch the AI Agent Studio
- AI Orchestration Services: Cisco’s cloud-based orchestration layer that receives incoming requests from the CCE or WxCCE system and routes them to the Webex Connect AI Agent via a Cisco Connector
- Webex Connect AI Agent: a cloud-hosted AI Agent powered by Webex Connect, designed to handle interactions intelligently
- AI Agent Studio: a visual interface used to design workflows and scripts for the Scripted AI Agent, enabling tailored engagement experiences
Configure Webex Services - Control Hub
Webex Control Hub serves as the central interface for managing your organization, users, service entitlements, and the configuration of Webex Contact Center and other services. It enables provisioning of all Webex services within a single user organization.
Here are the Webex AI Agent configuration tasks you have to perform within your Control Hub organization.
- Register Cloud Connect
- Launch the AI Agent Studio
Register Cloud Connect
Step 1. Open a web browser and navigate to Control Hub: admin.webex.com
 Control hub signin
Step 2. In Control Hub, navigate to the Contact Center section from the left-hand menu.
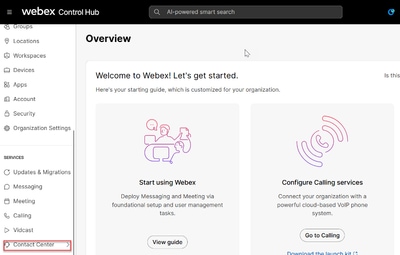 Control hub overview
Step 3. On the Contact Center page, click Cloud Connect to begin the registration process.
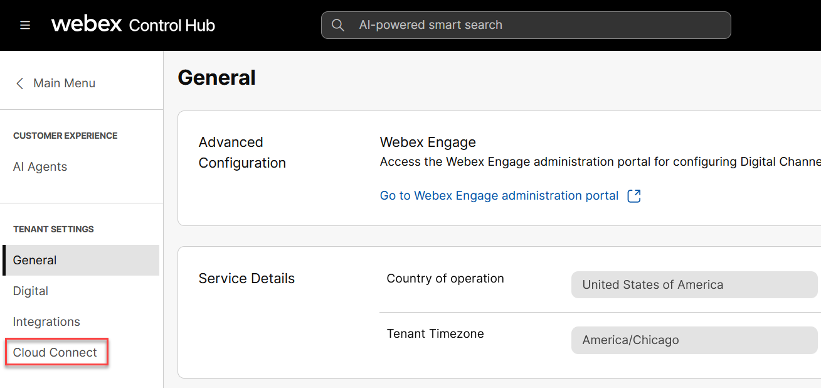 Control hub cloud connect
Step 4. On the Cloud Connect page, click Add Cloud Connect.
 Add cloud connect
Step 5. Enter the Display Name and the Fully Qualified Domain Name (FQDN), then click Register.
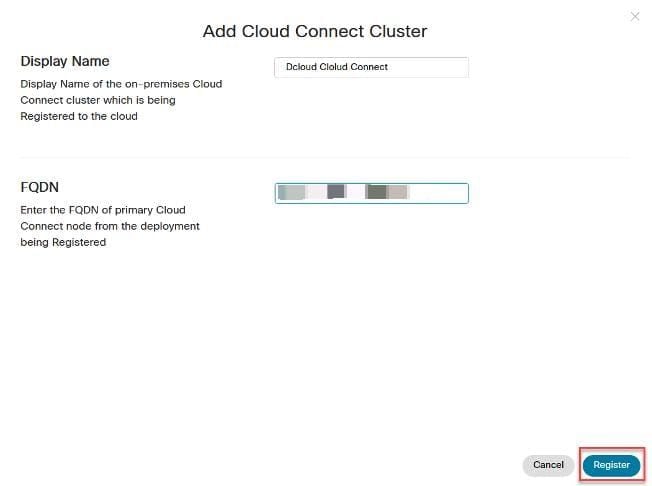 add cc cluster
Step 6. In the Allow Access window, check the box for Allow Access to the Cloud Connect Node, then click Continue.
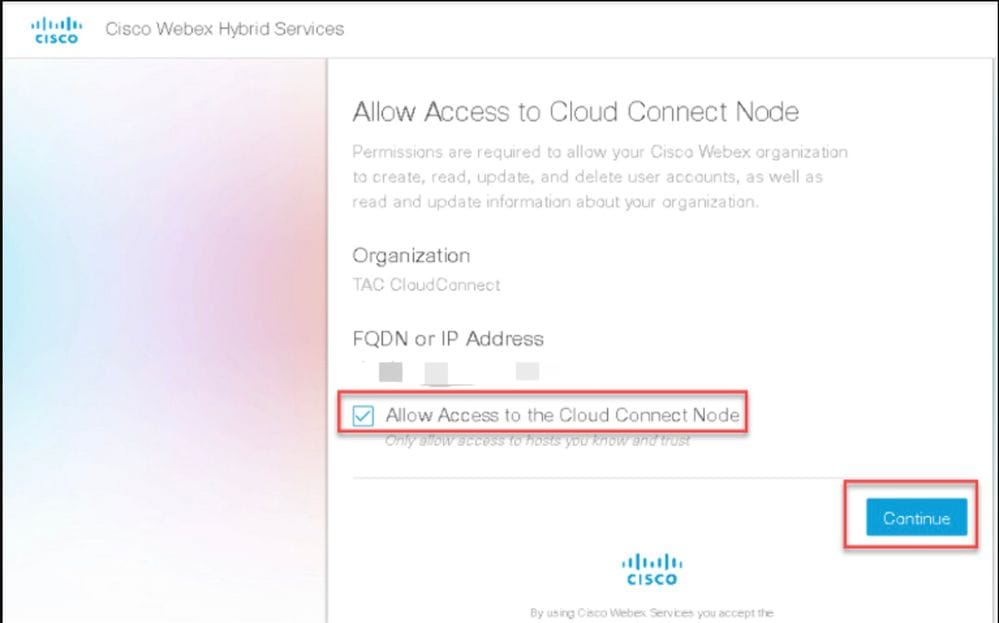 Allow Access to CC
Step 7. Once you see the confirmation that registration is complete, you can close the window.
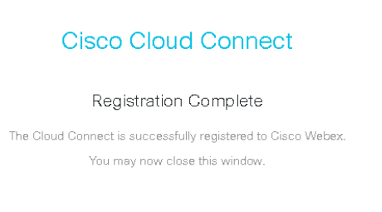 Cloud connect registeration complete
Launch the AI Agent Studio
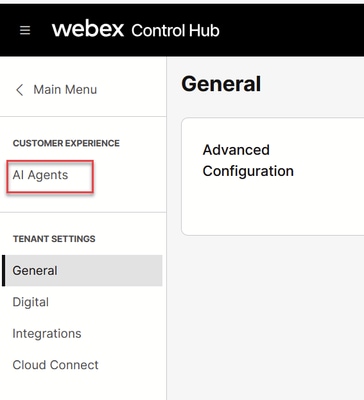
Step 1. In Control Hub, navigate to the Contact Center section from the left-hand menu.
Step 2. On the Contact Center page, click AI Agents to begin building the scripted or autonomous agent.
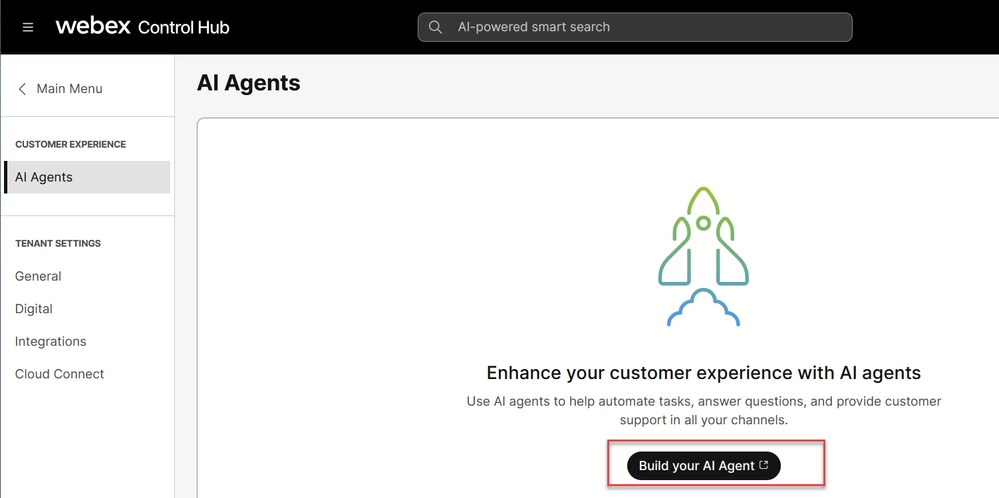
Step 3. On the AI Agents page select Build your AI Agent.
Step 3. In the AI Agents Studio page select Create Agent.
Create Scripted And Autonomous AI Agent
For information on how to create a Scripted or Autonomous agent, please refer to this document.
Configure CCE
The tasks required to configure CCE for Webex AI Agent implementation are:
- Cloud Connect registration (Validation)
- Cloud Connect proxy configuration
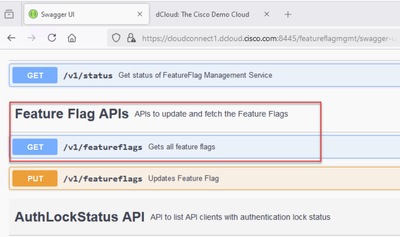
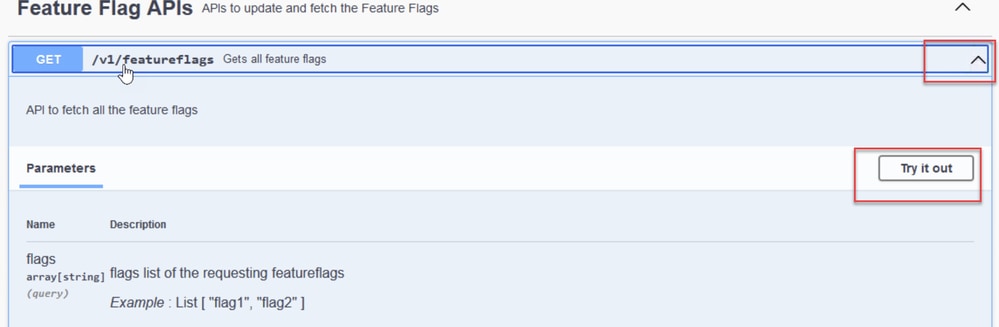
- Feature Flag Management
Cloud Connect Registration (Validation)
Step 1. Open a Web browser and navigate to the PCCE CCE Administration Tool also known as the Single Pane of Glass (SPOG).
Step 2. Log in with your administrator credentials.
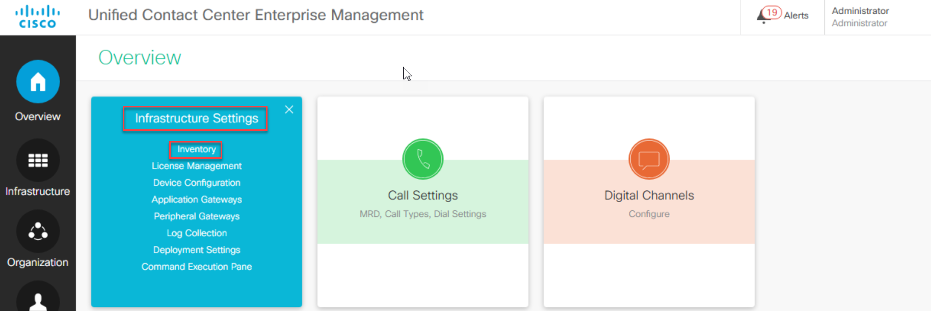
Step 3. In the CCE Admin interface, select Infrastructure Settings, then choose Inventory.
 Inventory
Step 4. On the Inventory page, locate the Cloud Connect server. Ensure its status is green and no alerts are present.
In this example, only one Cloud Connect Server (Publisher) is shown. In a production environment, you typically see two servers: Publisher and Subscriber.
 CC Publisher
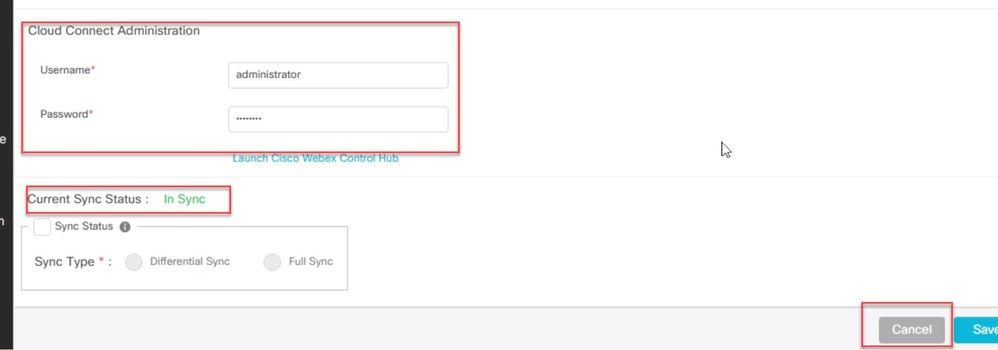
Step 5. Click on the Cloud Connect server to ensure the Admin credentials are correct and synchronization status with the AW server is In Sync. If you need to add Cloud Connect, review the Post installation configuration steps of PCCE Administration Guide:
 Save
Save
Cloud Connect Proxy Configuration
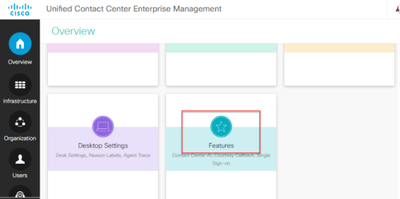
Step 1. In the PCCE Admin, navigate to the Overview page and scroll down if needed to locate and select the Features card.
 Feature
Step 2. On the Features card, click Cloud Connect Integration.
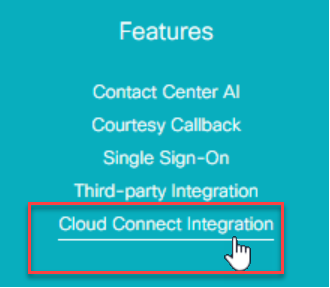 Feature selection
Step 3. View the registration status of Cloud Connect along with the proxy configuration details.
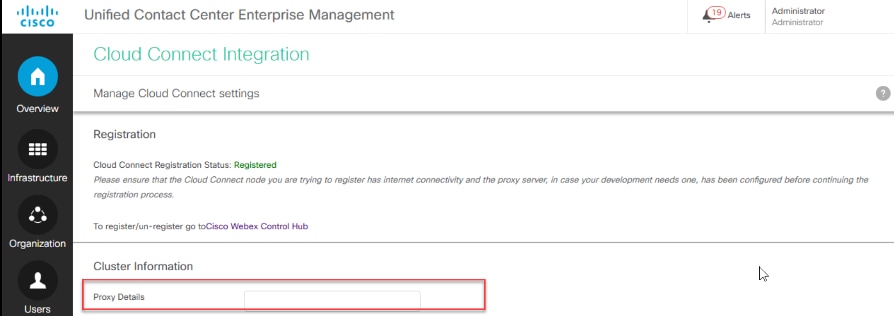 CC Integration
If your environment requires a proxy to communicate with Webex Services, enter the proxy details used by Cloud Connect.
For example: abc.cisco.com:8080
By default, HTTP uses port 80, but you can specify a different port number in the proxy configuration.
Configure CVP Call Studio Application - Scripted AI Agent
In this section an example Call Studio Application is shown. Your specific Call Studio implementation can differ.
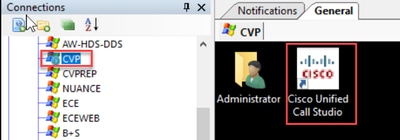
Step 1. Open the Call Studio application on your desktop.
Step 2. In CVP Call Studio, open your application. Within your applicationfolder, click on app.callflow to open the app canvas.
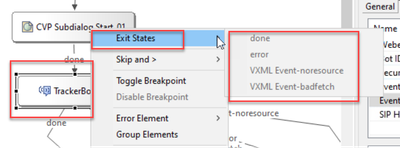
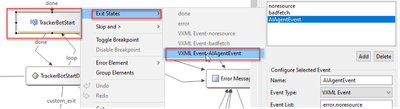
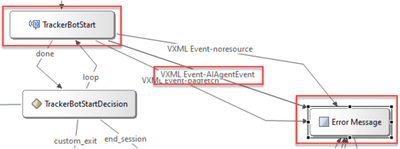
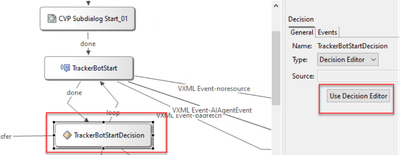
Step 3. You now see the call flow for this application. It is a simple flow designed to demonstrate AI Agent interaction. The application begins the conversation with the virtual agent using the VAV (Virtual Agent Voice) element.
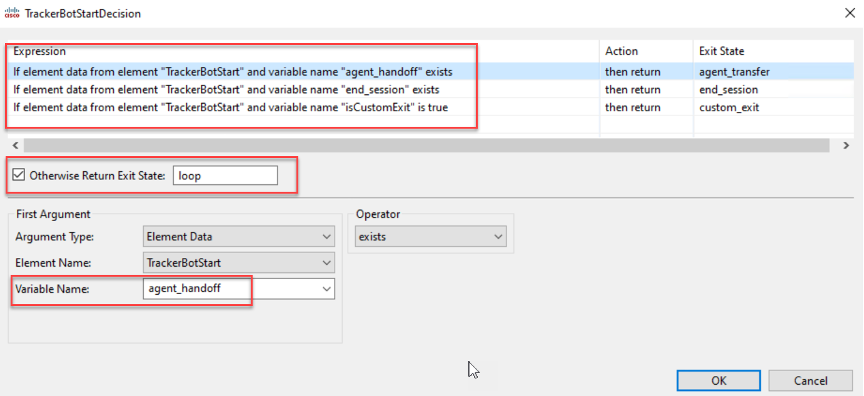
After the virtual agent finishes the conversation, the application takes one of three different decision branches:
- Hand-off to a live agent - Shown as, AgentHandoffFlag
- Custom exit - Shown as, Other Business Logic
- End the session
If none of these three states match, the session loops back to the virtual agent.
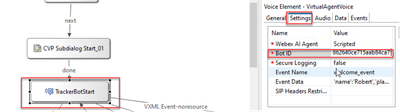
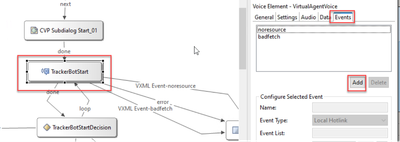
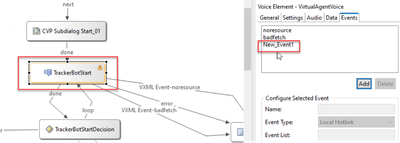
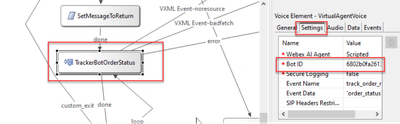
Step 4. Select the Virtual Agent Voice element, then go to the Settings tab on the right-hand side to access its configuration.
Step 5. Add the AI agent details. For the Webex AI Agent Type, select Scripted. Once selected, the Bot ID field appears.
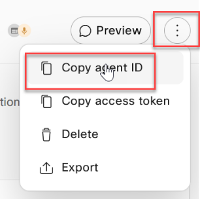
Step 6. Copy the Bot ID from the AI Agent Studio and paste it into the Bot ID field.
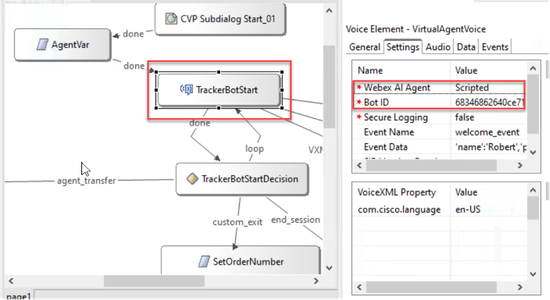
Step 7. Configure the additional settings.
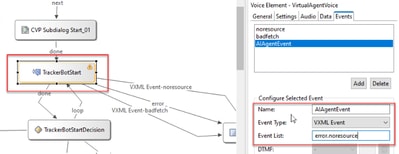
Secure Logging: This setting controls whether potentially sensitive data from the element is logged. When enabled (set to true), the element output, such as query text, fulfillment text, and JSON, from the AI Agent is masked.
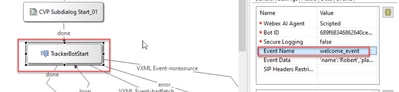
Event Name: You need to pass an event to the AI Agent. Ensure that the Event Name matches the one configured in the welcome intent. By default, this value is set to welcome_event in the AI Agent default welcome intent.
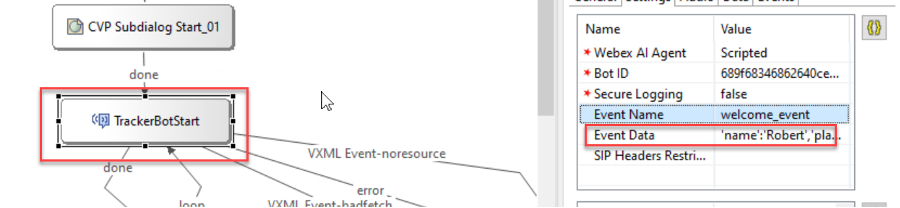
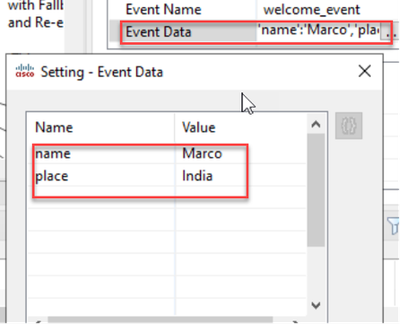
Event data: You can send information to the AI Agent by adding variables and values in the Event Data Field. For example, you can enter Name and Place variable as shown:
- Name: name
- Value: Marco
- Name: place
- Value: India
 Call Studio Screenshot
Step 8. After completing the configuration of the Virtual Agent Voice element and the remaining components of your Call Studio application, proceed to save and deploy the application in both Call Studio and on the VXML Server.
Step 9. Click the save icon to save your changes.
Configure CVP Call Studio Application - Autonomous AI Agent
In this section an example Call Studio Application is shown. Your specific Call Studio implementation can differ.
Step 1. Open the Call Studio application on your desktop.
Step 2. In CVP Call Studio, open your application. Within your applicationfolder, click on app.callflow to open the app canvas.
Step 3. You now see the call flow for this application. It is a simple flow designed to demonstrate AI Agent interaction. The application begins the conversation with the virtual agent using the VAV (Virtual Agent Voice) element.
After the virtual agent finishes the conversation, the application takes one of two different decision branches:
- Hand-off to a live agent - Shown as, Agent HandoffFlag
- End the session
Step 4. Select the Virtual Agent Voice element, then go to the Settings tab on the right-hand side to access its configuration.
Step 5. Add the AI agent details. For the Webex AI Agent Type, select Autonomous. Once selected, the Bot ID field appears.
Step 6. Copy the Bot ID from the AI Agent Studio and paste it into the Bot ID field.
Step 7. Configure the additional settings.
Secure Logging: This setting controls whether potentially sensitive data from the element is logged. When enabled (set to true), the element output, such as query text, fulfillment text, and JSON, from the AI Agent is masked.
Event Name: This is not used for Autonomous AI Agent.
Event data: This is currently not used for Autonomous AI Agent.
Step 8. After completing the configuration of the Virtual Agent Voice element and the remaining components of your Call Studio application, proceed to save and deploy the application in both Call Studio and on the VXML Server.
Step 9. Click the Save icon to save your changes.
Deploy Call Studio Application
Step 1. After saving the Call Studio application, validate the application. To validate the application, right-click on your application and select Validate.
 Call Studio Screenshot
Step 2. Deploy the application. To deploy the application on the VXML Server, right-click on your application and select Deploy.
 Call Studio Screenshot
Step 3. In the next window, leave the default settings unchanged, ensuring your Call Studio Application is checked and the folder is set to C:\Cisco\CVP\VXMLServer, then click Finish.
Step 4. On the VXML server deploy or update the application. If the application has already been deployed, navigate to C:\Cisco\CVP\VXMLServer\applications\{your_application}\admin. Then run updateApp.bat by either double-clicking it or executing it in a Command Prompt.
Step 5. In the new command window that opens, type yes to confirm that you want to update the application.
Revision History
| Revision | Publish Date | Comments |
|---|---|---|
3.0 |
17-Jul-2026
|
Alt text, reformatting |
2.0 |
14-Oct-2025
|
2.0 |
1.0 |
03-Oct-2025
|
Initial Release |
 Feedback
Contact Cisco
- Open a Support Case

- (Requires a Cisco Service Contract)