Introduction
This document describes the steps to create a certificate template on a Windows Server running the Certificate Authority (CA) tool.
Prerequisites
Requirements
Cisco recommends that you have knowledge of these topics:
- Cisco Catalyst Center
- A Windows Server with the Certification Authority (CA) role installed and configured
- Administrator privileges on the Windows Server
- Access to the Certification Authority Management Console
- Basic knowledge of certificate templates and Certificate Signing Requests (CSR)
Components Used
The information in this document is based on Microsoft Windows Server 2022 Standard.
The information in this document was created from the devices in a specific lab environment. All of the devices used in this document started with a cleared (default) configuration. If your network is live, ensure that you understand the potential impact of any command.
Background Information
This custom template solves the issue where the default CA templates remove the Client Authentication from Extended Key Usages. The custom template is able to sign the Certificate Signing Request (CSR) generated by Catalyst Center.
Configure
Steps to review and configure Certificate Templates on Windows Server with the Certification Authority (CA).
-
Log in to the Windows Server hosting the CA using Remote Desktop.
-
Open a command prompt (CMD) or powerShell session.
-
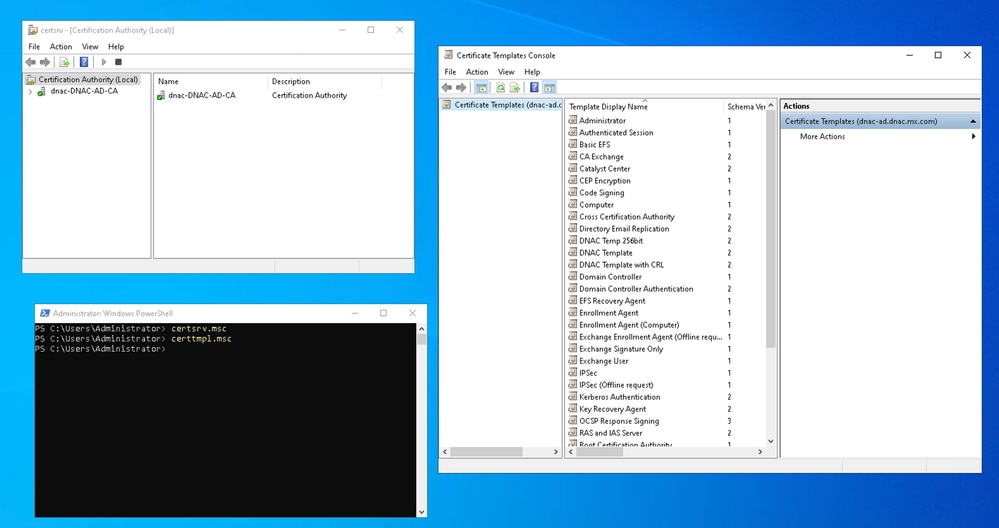
Launch the certificate authority and certificate template consoles by running:
certsrv.msc
certtmpl.msc
 Administration Powershell Commands
 Windows Server Example
4. In the Certificate Template Console, locate the template to be cloned to create a new customizable template.

Tip: Use the Web Server template since it already includes all the required parameters for the Catalyst Center certificate.
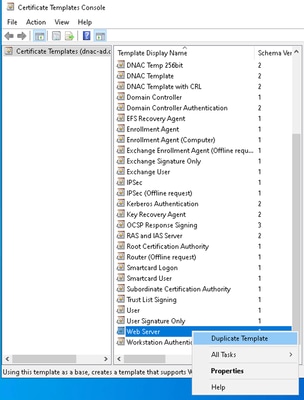 Duplicate Template
5. A new template is open, modify it with the required characteristics.
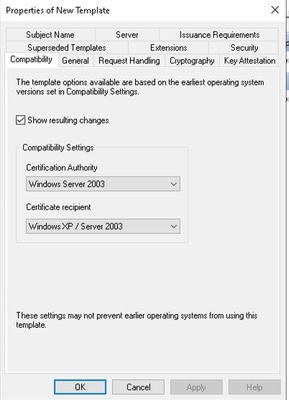 Template Required Characteristics
6. Modify the new template as follows:
6.1 General Tab.
- Enter a template name (for example, Catalyst Center Template).
- Define the validity period (default: 2 years).
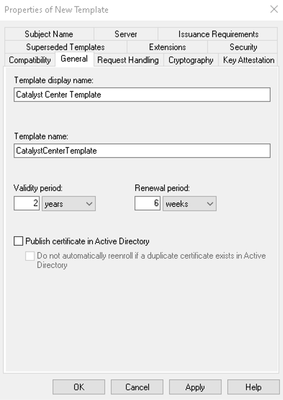 Template Name
6.2 Extensions Tab.
- Navigate to application policies and click edit.

Note: In this tab, confirm that the template includes the mandatory Key Usage extensions required by the Catalyst Center certificate, such as keyEncipherment and digitalSignature. These are already present in the default Web Server template used as the base.
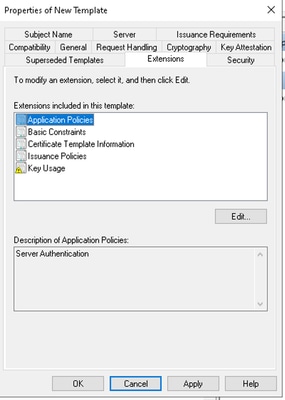 Template Application Policies
- Click add, locate client authentication, and click ok to include it.
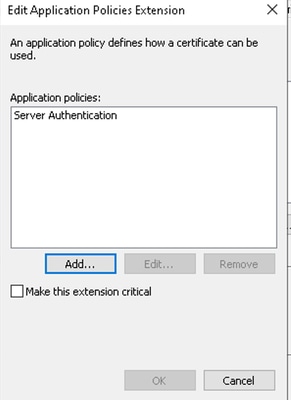 Client Authentication
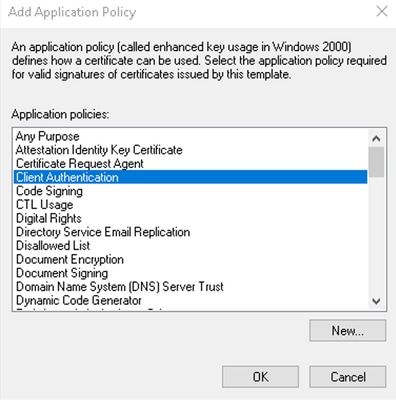 Add Application Policy
- Confirm the template shows Client Authentication along with the default usages.
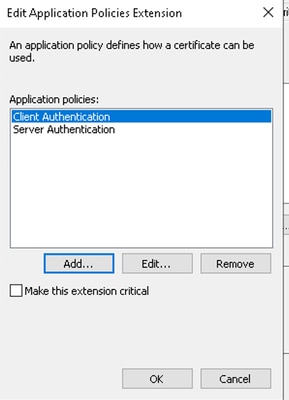 Application Policies Extension
7. Click apply and then ok.
8. In the Certificate Authority console, expand the CA tree and select the certificate templates folder.
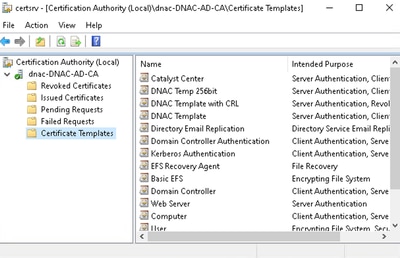 CA Tree Certificate Templates
9. Right-click the certificate templates folder and select:
New > Certificate Template to Issue.
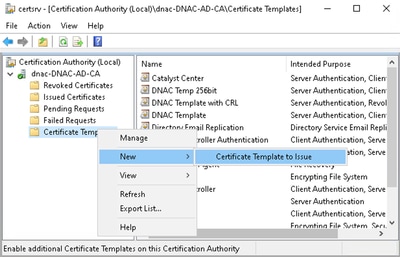 New Certificate Template to Issue
10. In the new window, select the newly created template (for example, Catalyst Center Template) and click ok.
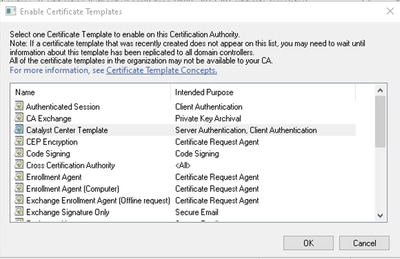 Catalyst Center Template
11. The template now appears under the Certificate Templates list in the CA.
12. Open a browser and navigate to:
http://localhost/certsrv/
 Log In Page http://localhost/certsrv/
13. Select request a certificate, then advanced certificate request, to verify that the new template is available.
14. On this page, submit the CSR and select the newly created template to generate the signed certificate.
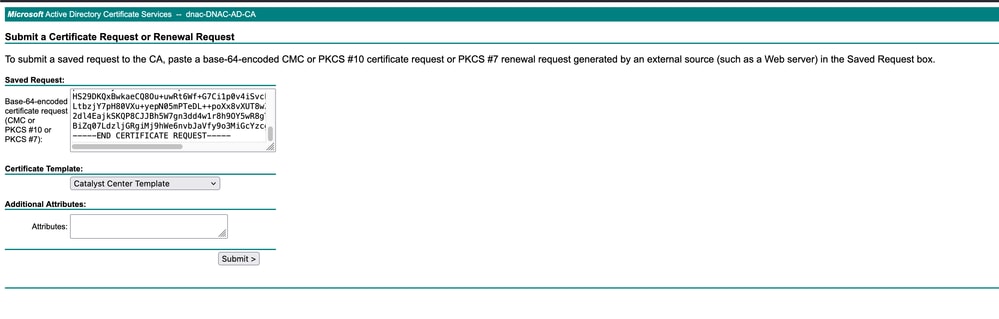 Request a Certificate
13. The certificate is generated with the correct extensions, as shown in the example.
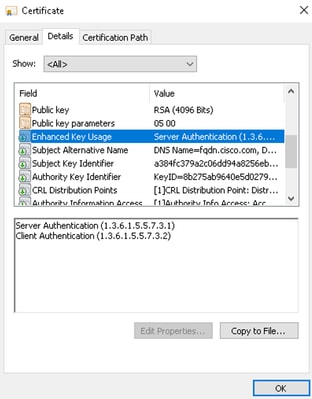 Certificate Example
Troubleshoot
If you encounter errors while signing the CSR, review the Windows Server logs for more details:
Error:
 Troubleshoot Error
1. Open the event viewer by running:
eventvwr.msc
2. Navigate to Event Viewer > Windows Logs > Application.
-
Filter or search for events where:
-
Source = CertificationAuthority
-
Event ID = 53, 54, 55, or similar (these indicate that a request was issued, denied, or is pending).
-
The event message contains details about the reason for denial (if applicable).
4. Use the Find option (right-click on Application > Find…) and search by:
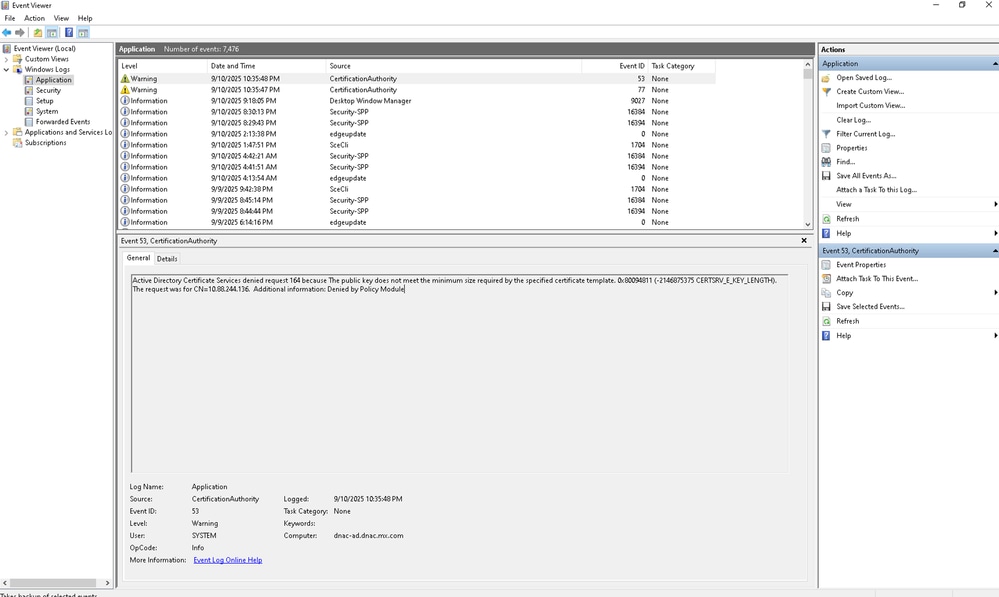 Troubleshoot Windows Server Logs
 Feedback