Feedback
Table Of Contents
Entitled Entities for a Resource
Entitled Groups for a Resources
Auditing and Reporting
Auditing and Reporting enables the user to monitor the activities carried on the application at any point of time. It is a regular observation and recording of ongoing activities. The user can view a variety of logs generated, such as runtime log, admin log, various permitted resources and their entitlements, and also the user can review SoD roles for any particular role.
This chapter explains the various operations that you can perform on the Auditing and Reporting tab in the PAP administration console. This Chapter contains the following sections:
•
Audit Entitlements—This feature provides audit entitlements for users, groups, and roles.
•
•
•
•
•
•
•
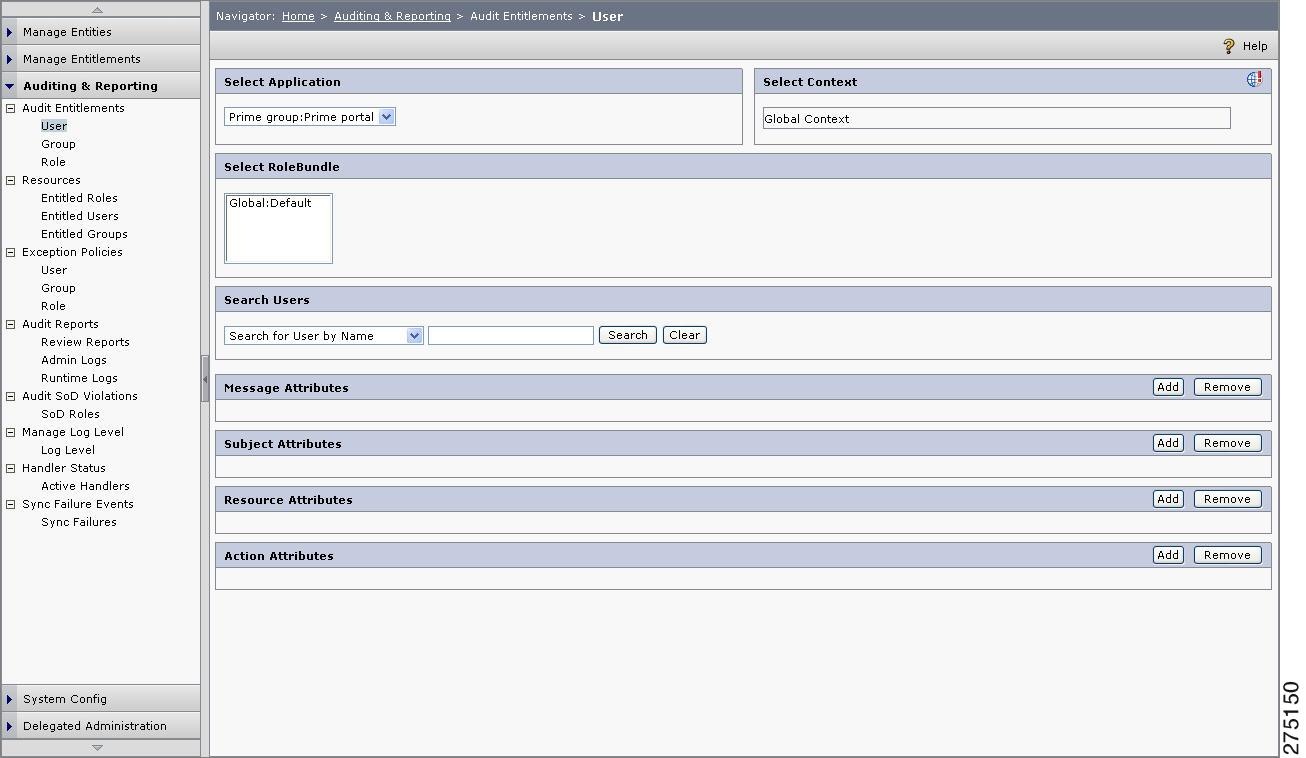
Figure 6-1 Audit Entitlement Home page
This section in the admin console allows you to view details pertaining to individual users, groups, roles, and resources. Apart from these, it also enables you to review entitlements, allow and deny policies on a selected resource. For example, in a banking organization, to know about who all are authorized to view details of Account No: xxxx009, you can use `Users entitled to a resource' feature on the Monitor Entitlements page. Search for that particular resource named Account No, xxxx009 and click the Account No to view all Allowed users to that resource.
Audit Entitlements
The Cisco Enterprise Policy Manager (CEPM) has extensive capabilities to review policies as well as analyze audit logs (administration and decision). The CEPM provides the users information on who has access to what and why a particular user or group of users are allowed or denied access to a resource. This allows users to quickly analyze policy settings from the administration console.
The Review Entitlements functionality illustrates what resources have been granted to a user at any point in time. It makes the user explore the details related to the user, group, role, and resource entitlement.
Note
In CEPM, when $resource-id is selected as the Resource Attribute in the LHS, the resource name passed in the XacmlRequest is taken as its value. Similarly, if Resource is selected in the RHS, the value is the requested resource or the child resource.
While configuring rule on an Allow policy for a resource or action, if $resource-id (or $action-id) is selected as the Resource Attribute (or Action Attribute) in the LHS and Resource (or Action) is selected in the RHS, a mismatch in the decision can be observed in the PAP UI in the Auditing and Reporting tab because of the AJAX tree limitation. At the same time, the right decision is rendered in the Runtime log (in the UI) and in the server log.
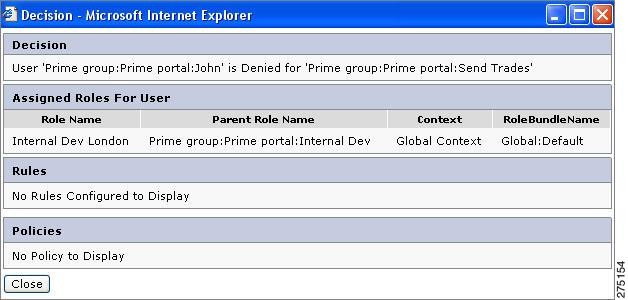
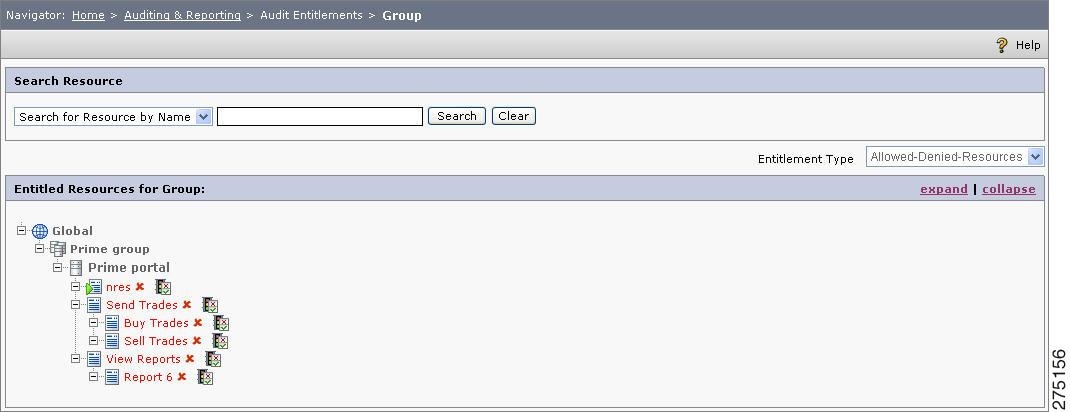
For example, create an 'Allow' policy for Mary for the resource Prime group:Prime portal:Send trades and configure the rule (LHS=$resourceid, Operator=EQ or In, RHS=Resource) on that policy.
In the UI, if you check the decision for Mary in a Home > Auditing and Reporting > Audit Entitlements > users tab, the resource is rendered in with a red label (denied) but at the same time the Runtime log for the same resource shows Permit for the same user.
This happens because, in the Auditing and Reporting tab, by clicking on Prime group:Prime portal, the evaluation is done based on the $resourceid=Prime group:Prime portal and RHS=Resource is replaced with Prime group:Prime portal, Prime group:Prime portal:Send Trades, Prime group:Prime portal:View Reports. Hence the resource is rendered with a red label for Prime group:Prime portal:Send Trades, View reports.
If you ask the decision for Prime group:Prime portal:Send Trades by clicking on Prime group:Prime portal:Send Trades, the evaluation happens based on the $resourceid=Prime group:Prime portal:Send Trades and RHS=Resource is replaced with Prime group:Prime portal, Prime group:Prime portal:Send Trades and Prime group:Prime portal:View Reports while evaluating each resource and again the resource is rendered in red label for Prime group:Prime portal:Send Trades,View reports.
The same scenario for rule evaluation can also be observed in the case of $Action-id.
Audit Entitlements for User
To review entitlement for a particular user to verify how the policy comes into effect, you must:
Step 1
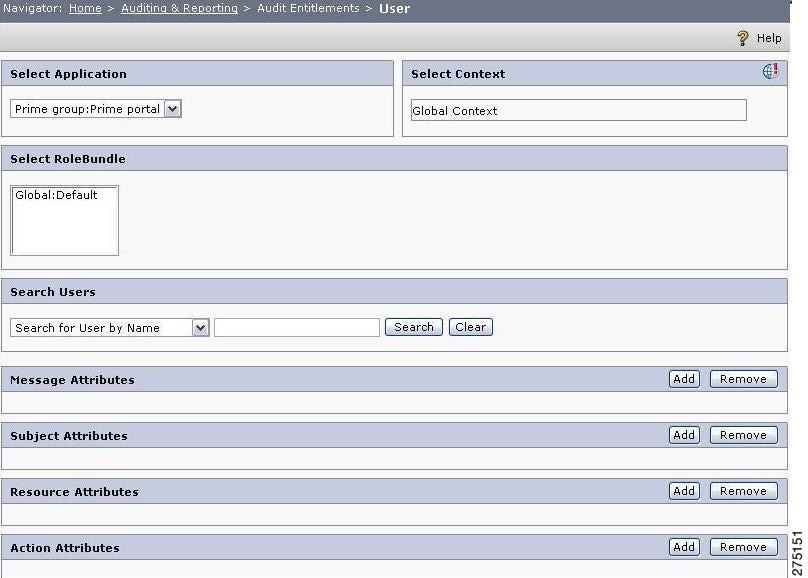
The User page is displayed.
Figure 6-2 Audit Entitlement for Users
Step 2
Step 3
Step 4
Step 5
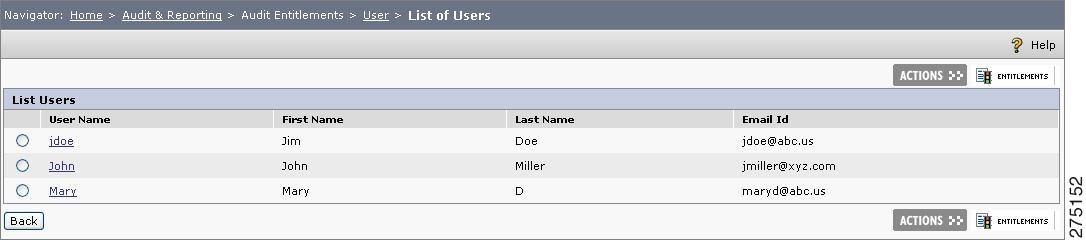
Figure 6-3 Audit Entitlement Users search
Step 6
Figure 6-4 Entitled Resource for User
Step 7
You can use the following criteria for filtering the policies.
•
•
•
Step 8
Figure 6-5 View Decision for Users
Audit Entitlements for Group
You can view the entitlements defined on a particular group under an application group or application. The process is similar to what is followed in the case of auditing users with a few exceptions, such as viewing the decision policy is not permitted for groups.
To audit entitlement for a group, you must:
Step 1
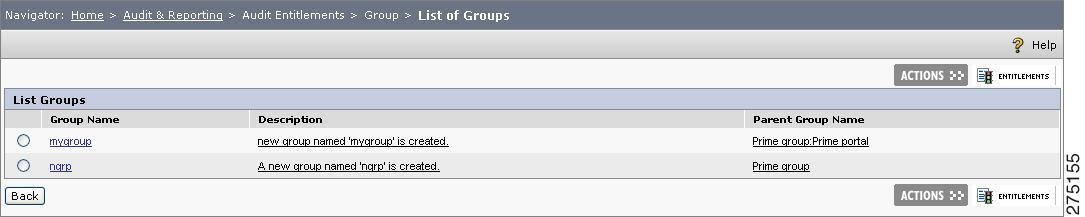
The Group page is displayed which displays a list of groups created under that application.
Step 2
Step 3
Step 4
Step 5
Figure 6-6 Audit Entitlement Group search
Step 6
Step 7
•
•
•
Step 8
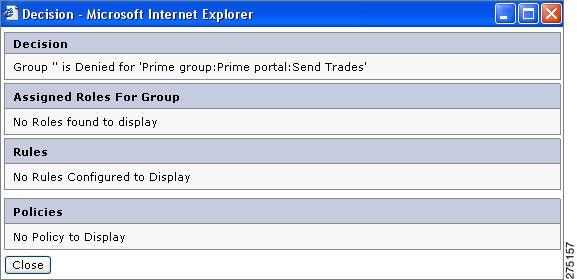
Figure 6-7 View Decision for Groups
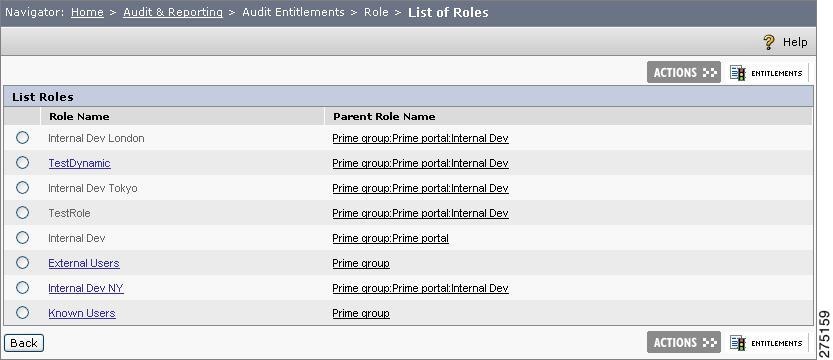
Audit Entitlements for Role
To view the roles and policies on the resources created under a selected application group or application, you must:
Step 1
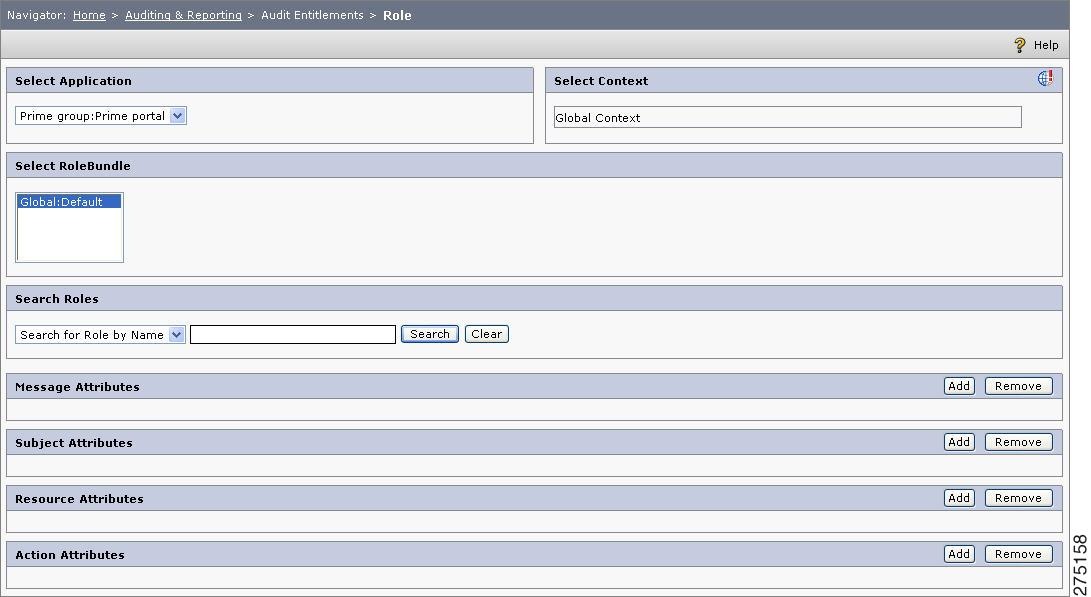
The Role page is displayed, which lists the roles created under that application.
Figure 6-8 Audit Entitlement for Roles
Step 2
Step 3
Step 4
Step 5
Figure 6-9 Audit Entitlement Role search
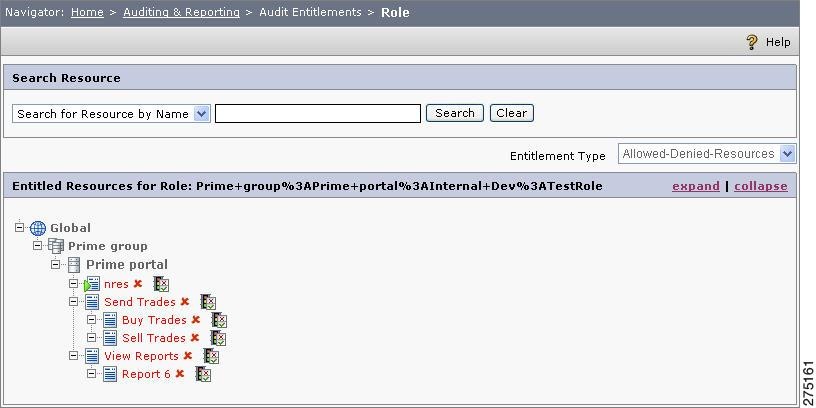
Step 6
Figure 6-10 Entitled Resources for Role
Step 7
•
•
•
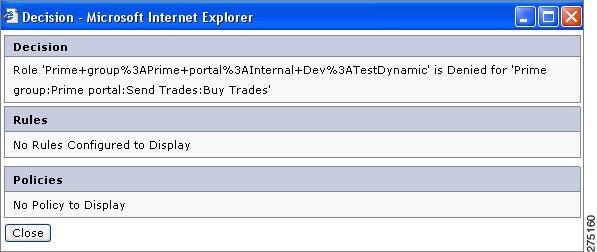
Step 8
Figure 6-11 View Decisions for Roles.
Entitled Entities for a Resource
This tab helps you retrieving users, roles and groups mapped to a particular resource at any given point of time.
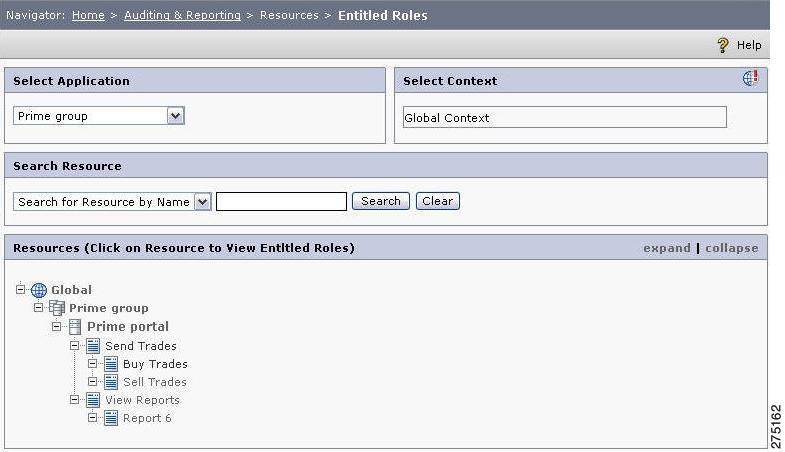
Entitled Roles for a Resource
This feature allows you to choose a resource and get back a list of roles that are permitted for the chosen resource.
After viewing a list of roles, to further enquire into which roles get permission in which application or resource, you must:
Step 1
Figure 6-12 Entitled Roles
Step 2
Step 3
Step 4
Step 5
Step 6
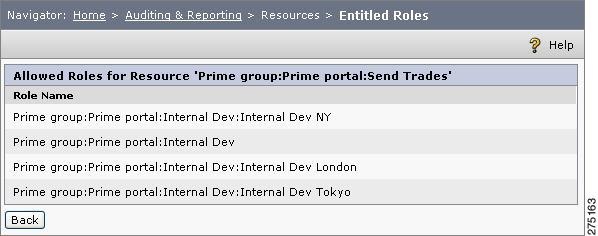
Figure 6-13 Allowed Roles for Resource
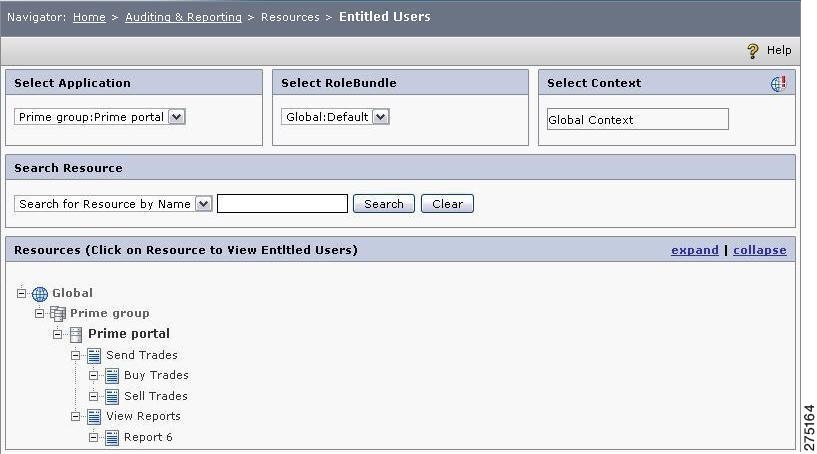
Entitled Users for a Resource
This feature allows you to choose a resource and get back a list of users who are permitted for the chosen resource. The list includes all users belonging to the roles and groups mapped to the selected resources.
To view users entitled to a resource, you must:
Step 1
The Users Entitled to Resources page is displayed.
Figure 6-14 Entitled Users
Step 2
Step 3
Step 4
Step 5
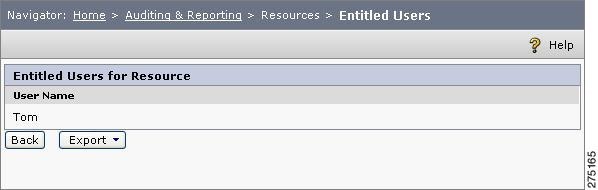
Figure 6-15 Entitled Users for Resources
The users table lists all the users that are entitled to the selected resource, irrespective of the roles and group that they belong to. You can export the list of users entitled for the selected resource into an Excel file. Click Export to save the Excel file (named EntitledUsers.xls) at an appropriate location.
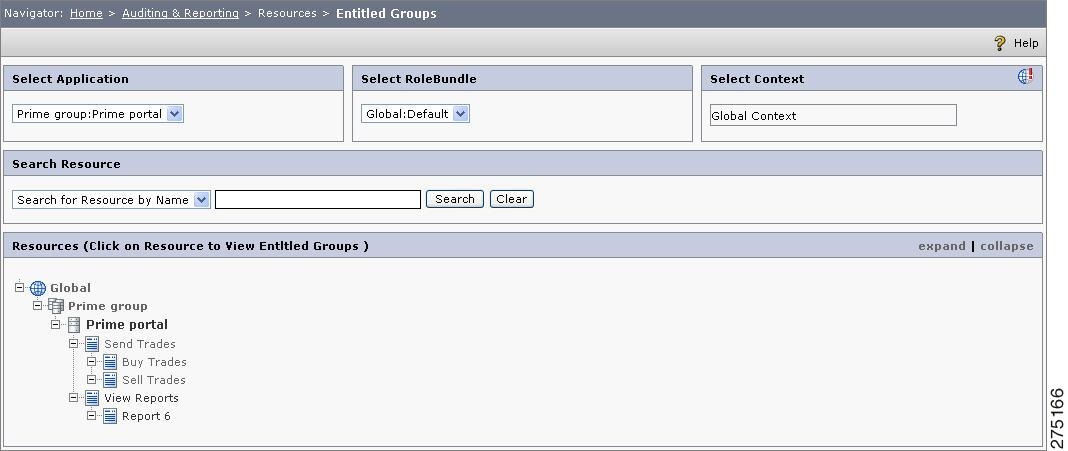
Entitled Groups for a Resources
This feature allows you to choose a resource and get back a list of groups that are permitted for the chosen resource. The list includes all the groups that belong to the roles and groups mapped to the selected resource.
To view groups entitled to a resource, you must:
Step 1
Figure 6-16 Entitled Groups to Resources
Step 2
Step 3
Step 4
Step 5
Exception Policies
When you have a large number of users/roles/groups, it is difficult to review which user is denied what resource. Keeping track on the direct deny policies for a given user/role/group, CEPM provides the Exception Policy section in the navigation pane, which enables you to view explicitly deny policies of the selected user/role/group. This feature allows you to get a list of resources based on user/group/role for which there is a direct Deny policy associated. Given a user/group/role, this functionality does not evaluate the policies, but just displays the direct Deny policy associations. Using this list, you can analyze what resources are not allowed for which user/group/role. The same list can be viewed by clicking Permitted Resources for any user/role/group in the Audit Entitlements page, but along with the allowed resources.
The Exception Policies work well if the user/role/group are exclusively assigned Deny permission while assigning resources.
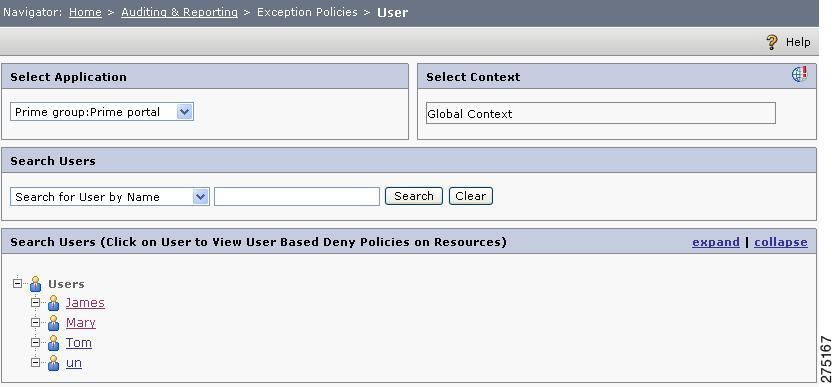
Exception Policies for User
To find out which resources are not allowed for a selected user irrespective of the role associated, you must:
Step 1
Figure 6-17 Exception Policies User Home page
Step 2
The resources are displayed in a tabular format. It is important to note that this outcome is based on all types of policies involving the specified user, for example, user-based, group-based, resource-based, and role-based entitlement.
Figure 6-18 Exception Policies for User
For example a user, Mary is mapped with a role called Agent. As a part of the user-based entitlement, Mary is denied to the resource called View Reports. The role Agent has Deny policies on Send Trades and Buy Trades. While viewing explicit Deny policies of Mary, the resource table contains only View Reports.
Exception Policies for Group
To find out which resources are not allowed for a selected group irrespective of the role associated, you must:
Step 1
The Group page is displayed, which displays all the groups under the selected application.
Figure 6-19 Exception Policies Group Home page
Step 2
Figure 6-20 Exception Policies for Group
Step 3
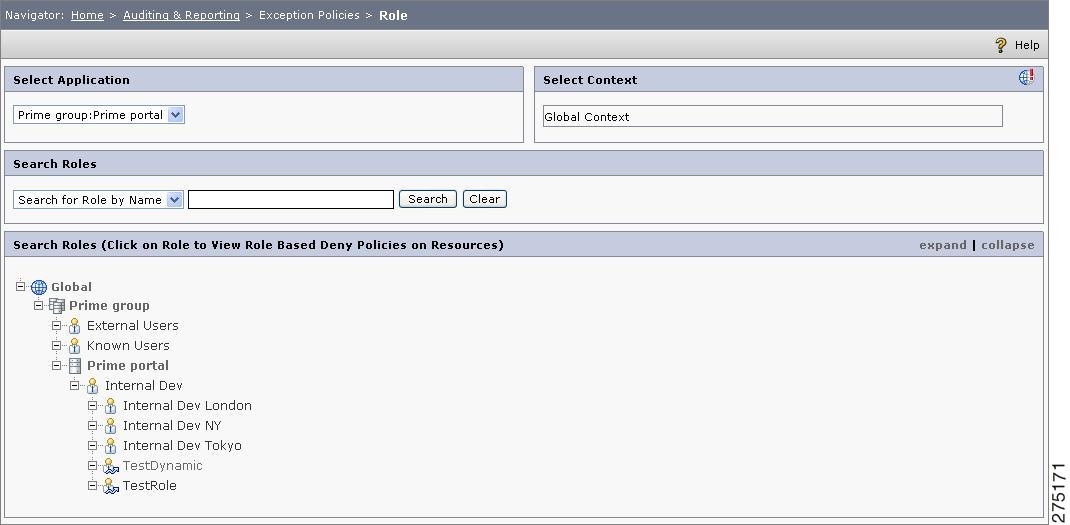
Exception Policies for Role
To find out which resources are not allowed for a selected role, you must:
Step 1
The role page is displayed, which displays all the roles under the selected application
Figure 6-21 Exception Policies Role Home page
Step 2
This functionality narrows down the resources to only role-based Deny policies defined on these listed resources
Figure 6-22 Exception Policies for Roles
Audit Reports
Audit Reports deal with logging and reporting of the activities that take place within the administration console for a specified time period. Review Reports enables you to view the entities status. The entity status provides statistics on how many users, groups, resources, roles, policies, and mappings are created/updated/deleted in a given time frame and for a given application.
As a security measure, all the activities carried out in the PDP and PAP are recorded in the database. The Superuser can view activity logs of other admin users and also the type of permission granted by the PDP to any PEP user for accessing a resource. CEPM supports two types of logs:
•
•
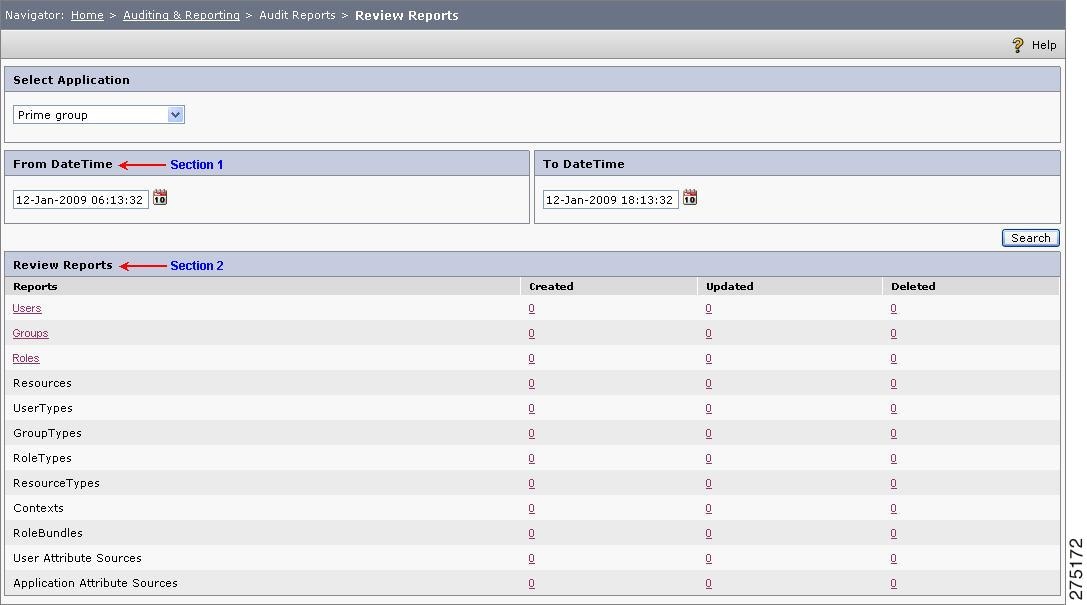
Review Reports
Review Reports allows you to create, update, and delete entities within a specified time frame. It generates event-based reports of the entities, such as users, groups, roles, resources, resourceTypes, userTypes, contexts, role bundles, user attribute sources, and application attribute sources. Events include creation, updating, and deletion. It also generates a report of resource-based, role-based, group-based, and user-based.
It is important to note that in order to view the deleted entities using this functionality, you must update the pap_config.xml file by setting the <eventenable> tag to true. No such settings are required for the other events.
To view the reports, you must:
Step 1
Step 2
•
•
Step 3
Figure 6-23 Review Reports Home Page
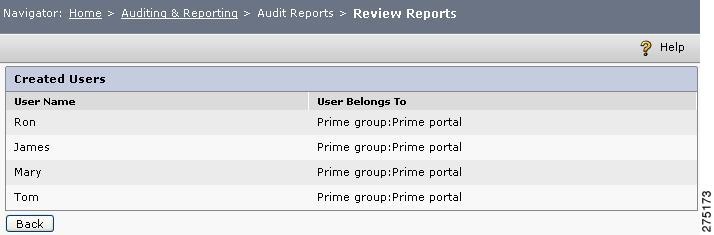
Step 4
Figure 6-24 Review Reports-created users
Similarly, you can view the updated and deleted users, groups, roles, resources, user types, group types, role types, resource types, contexts, role bundles, user attribute sources and application attribute sources.
Step 5
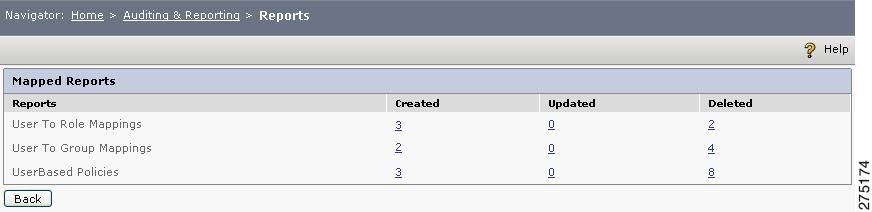
Figure 6-25 Mapped Reports
Step 6
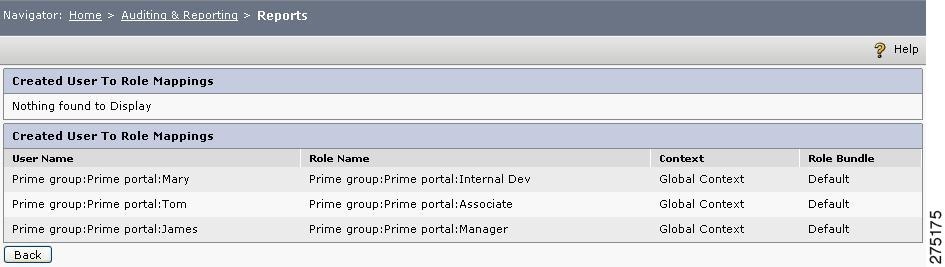
Figure 6-26 Mapped Users and Roles
Similarly, you can click Group and Role buttons in the table to view all the related mappings along with the policies that are created.
Runtime Log
You can view the runtime logs associated with an application, a PDP, any users, and roles, for a specified time range. The following criteria must be fulfilled to view the runtime logs:
•
•
•
To view a runtime log, you must:
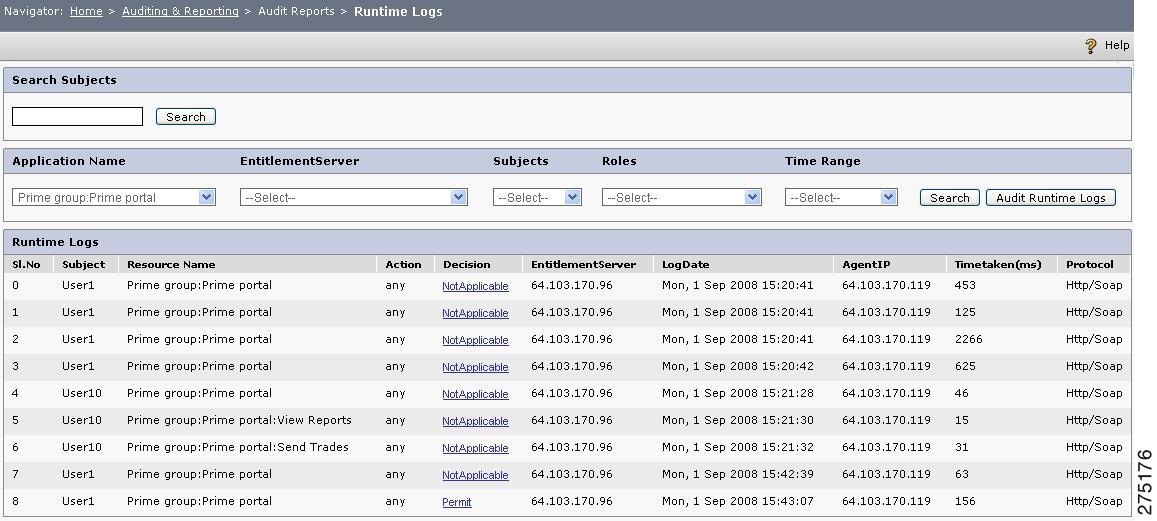
Step 1
Figure 6-27 Runtime Log
Step 2
All runtime logs related to the selected parameters are generated. As far as user-related logs are concerned, a search option is available that provides you the logs for any selected user.
Step 3
Step 4
In case of a large data, the runtime logs are spread across multiple pages. In such instance, you use the navigation buttons such as Prev, Next, First, and Last buttons to view the required logs.
Audit Runtime Logs
This feature is applicable for new APIs only. Using this feature, you can search within the runtime log (XACML Response), for a particular user under the specific user decision (permit/deny) on any resource and action with respect to a set of environmental attributes. In the runtime log, the XacmlResponse for the given inputs is filtered on the basis of the message attributes and PIP attributes and the final outcome can be displayed.
To audit the runtime logs, you must:
Step 1
Figure 6-28 Audit Runtime Logs
Step 2
Step 3
Step 4
Step 5
Step 6
Step 7
Step 8
The required logs are displayed on the Access Runtime Logs section of the page. You can export these logs to your local drives using the Export button. When you click this button, you are prompted to save the AuditRuntimeLogs.xls /AuditRuntimeLogs.csv file, which contains the generated logs as per the given inputs.
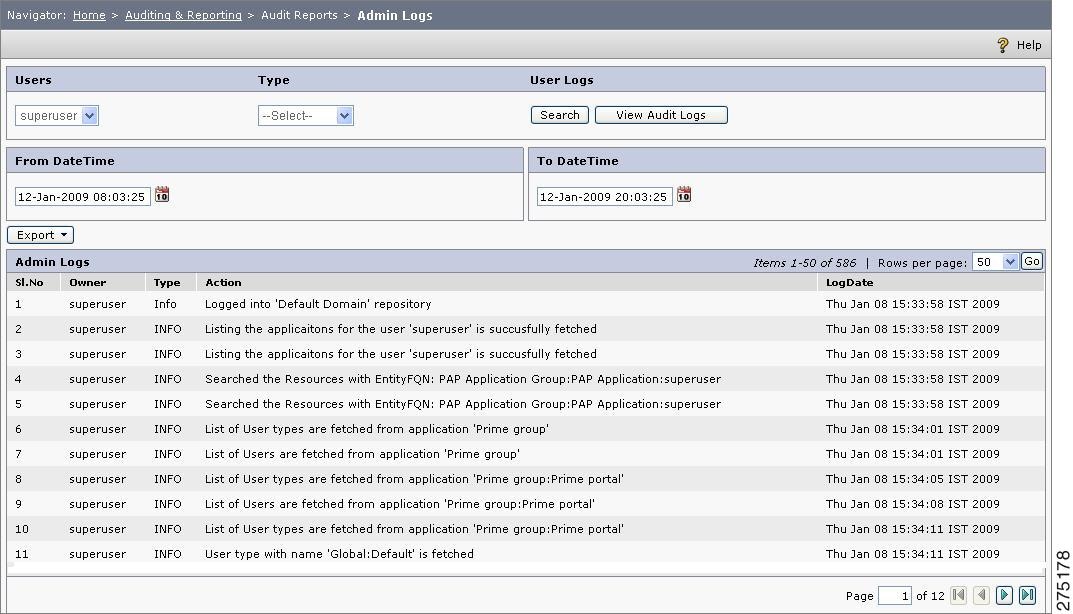
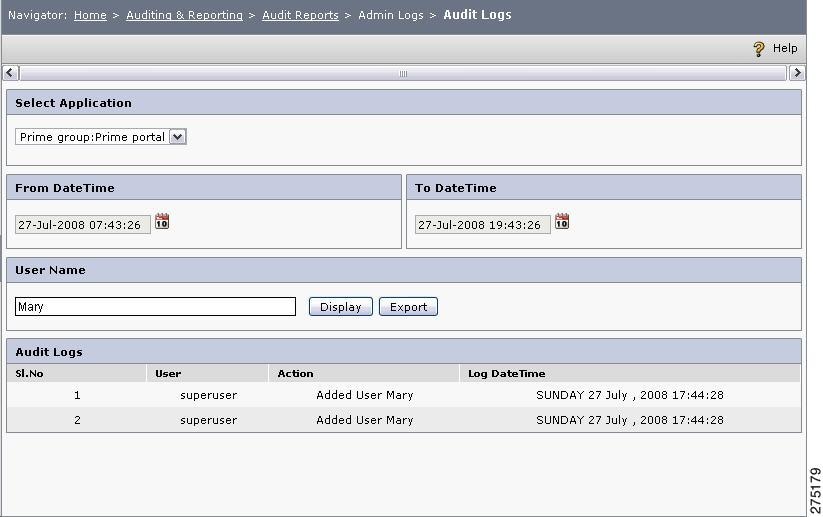
Admin Logs
The admin log works in coherence with the PAP. The admin log discloses the user activity, type, and actions taken by the user along with the time stamps.
To view the Admin logs, you must:
Step 1
The Admin Log page is displayed.
Figure 6-29 Admin Logs
Step 2
Step 3
Step 4
Step 5
Step 6
Figure 6-30 Audit Logs
Step 7
Step 8
Audit SoD Violation
In the CEPM, in a few instances, SoD role are configured for roles much after necessary policies are created for these roles on same resources. A similar situation might arise for users and groups, when they are mapped to the roles which are SoD to each other.
For example, Role1 has an existing policy on a Resource called MyReport. Role1 and Role2 are SoD roles. In this case, you cannot create the desired policy for Role2 in MyReport due to SoD violation, but in certain circumstances, if you have already created policies for Role1 and Role2 on the same resource (MyReport) before declaring the SoD roles, no such SoD violation is known unless and until it is detected by the PDP while giving decision to a PEP request. Similarly, if SoD roles are defined after mapping users and group to the roles, a similar situation arises.
The policy administrator can look up all the SoD violations for user, group, role. to avoid such situation by periodical verification of SoD violations listed in this page. To view what SoD roles are created after defining the policies, you must:
Step 1
The SoD Violated Roles page is displayed.
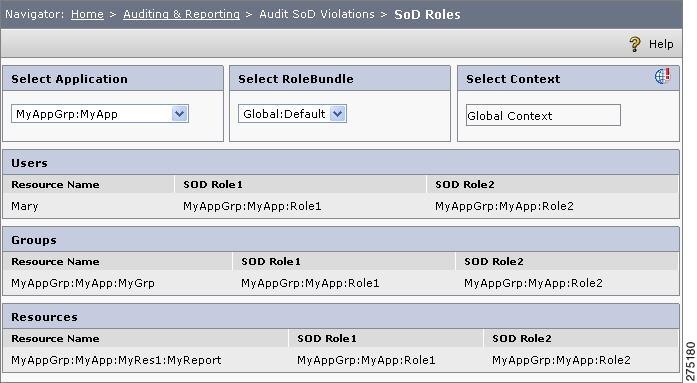
Figure 6-31 SoD Roles
Step 2
Step 3
Step 4
The Users, Groups, and Resources tables list the SoD roles. For example, the User table shows a list of users and the SoD Roles to which the user (or the group to which the user belongs to) is mapped. Similarly, the Group table lists all groups and the SoD roles that are mapped with the groups. The Resource table lists all the resources where SoD role violation has occurred, that is, SoD roles are defined after a policy has been created on the specified resource.
Consider a user called Mary who is mapped to two roles (Role1 and Role2) and policies are created for these two roles in the same resource. After creating policies, you set Role2 as SoD role for Role1. As you already defined the policies, this setting does not have a direct impact of SoD role violation. When you review the SoD roles using this functionality, the Users table shows Mary along with the roles that are SoD roles to each other.
Manage Log Level
A server log is automatically created and maintained for all the activities performed by the concerned PDP server. In CEPM, these logs are generated from com.cisco.epm.pdp for any application only if the xacml log is enabled when that application is created. For example, when the PEP sends a request to the PDP, the PDP server maintains a history of that requests along with the response it returns.
The logs are separated into the following distinct categories called as log levels:
•
•
•
•
•
After you select the log level, click the set button to generate logs in the console according to the LogLevel type that you have chosen, logs will be generated in the console according to the selected LogLevel type.
Note
Debug Level displays the logs when the log level is set to DEBUG level.
Figure 6-32 Debug Level
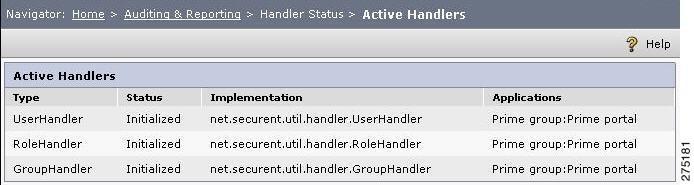
Handler Status
This feature allows checking for all the handlers that are running and also the LDAP Sync status. (For more information about the advantages of using prehook handlers in the CEPM). You can see the handlers status from Home> Auditing and Reporting > Handler status > Active Handlers. A list of handlers that are enabled in the pap_config file and their initialization status is displayed.
Figure 6-33 Active Handlers
Note
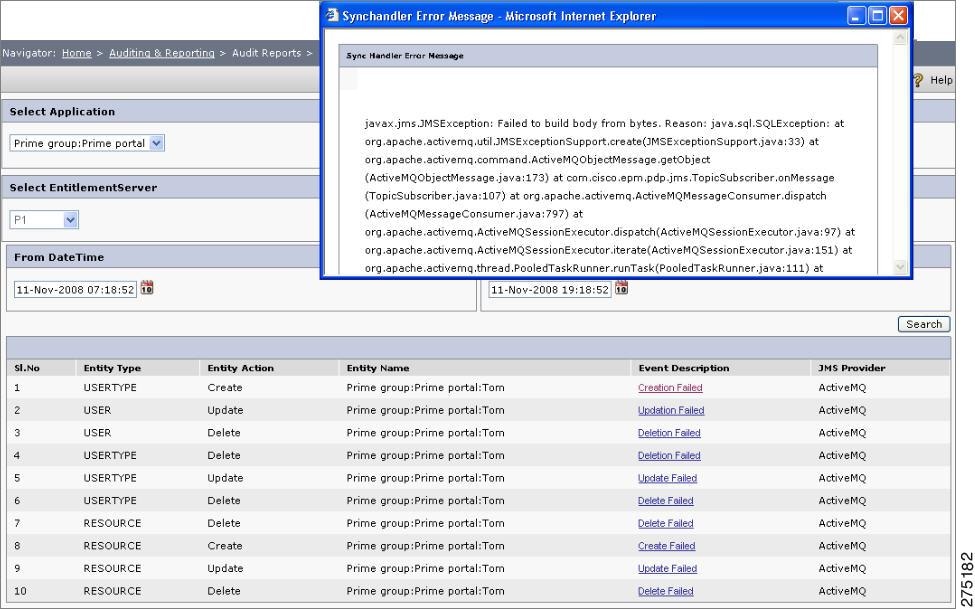
Sync Failure Events
Synchronization Failure occurs if there is a lack of harmony between events of any system in unison.
Here, in CEPM, events are Actions (Creation, Updating, and Deletion) and harmony is within PAP and the PDP.
For example, a new user named Mary is to be created. Assuming that there exist 3 instances of PDP named PDP1, PDP2, and PDP3. The user Mary is successfully created at PDP1 and PDP2, but at PDP3 due to database failure, an creation error occurred. PDP3 sends the creation failure message to PAP. As soon as PAP receives that message, it performs a roll back operation on PDP1 and PDP2 to maintain consistency.
To view the Sync Failures, you must:
Step 1
The Sync Failure page is displayed.
Step 2
Step 3
Step 4
Figure 6-34
Sync Failure