Feedback
Table Of Contents
Configuring Membership and Role Provider
Creating Extranet IIS Web Site
Creating Internet IIS Web Site
Configuring Web Application to Communicate with Form Authentication Data Store
Configuring the web.config File of the Extranet Site
Configuring web.config File of the Internet Site
Configuring SharePoint Central Administration
Enable Form Authentication for Internet Site
Configuring Membership and Role Provider
The process of configuring the membership and role provider goes in the following sequence:
•
Create web applications
–
–
•
–
–
•
•
Creating Web Applications
This section explains creating web applications using SharePoint Central Administration (one is extranet site, which will be used by the content owners and configured to Windows authentication and another site is internet site specifically for internet users and configured to form authentication).
Creating Extranet IIS Web Site
Before you can create a new site, you must create a new web application.
To create a new web application, follow these steps:
Step 1
Step 2
Step 3
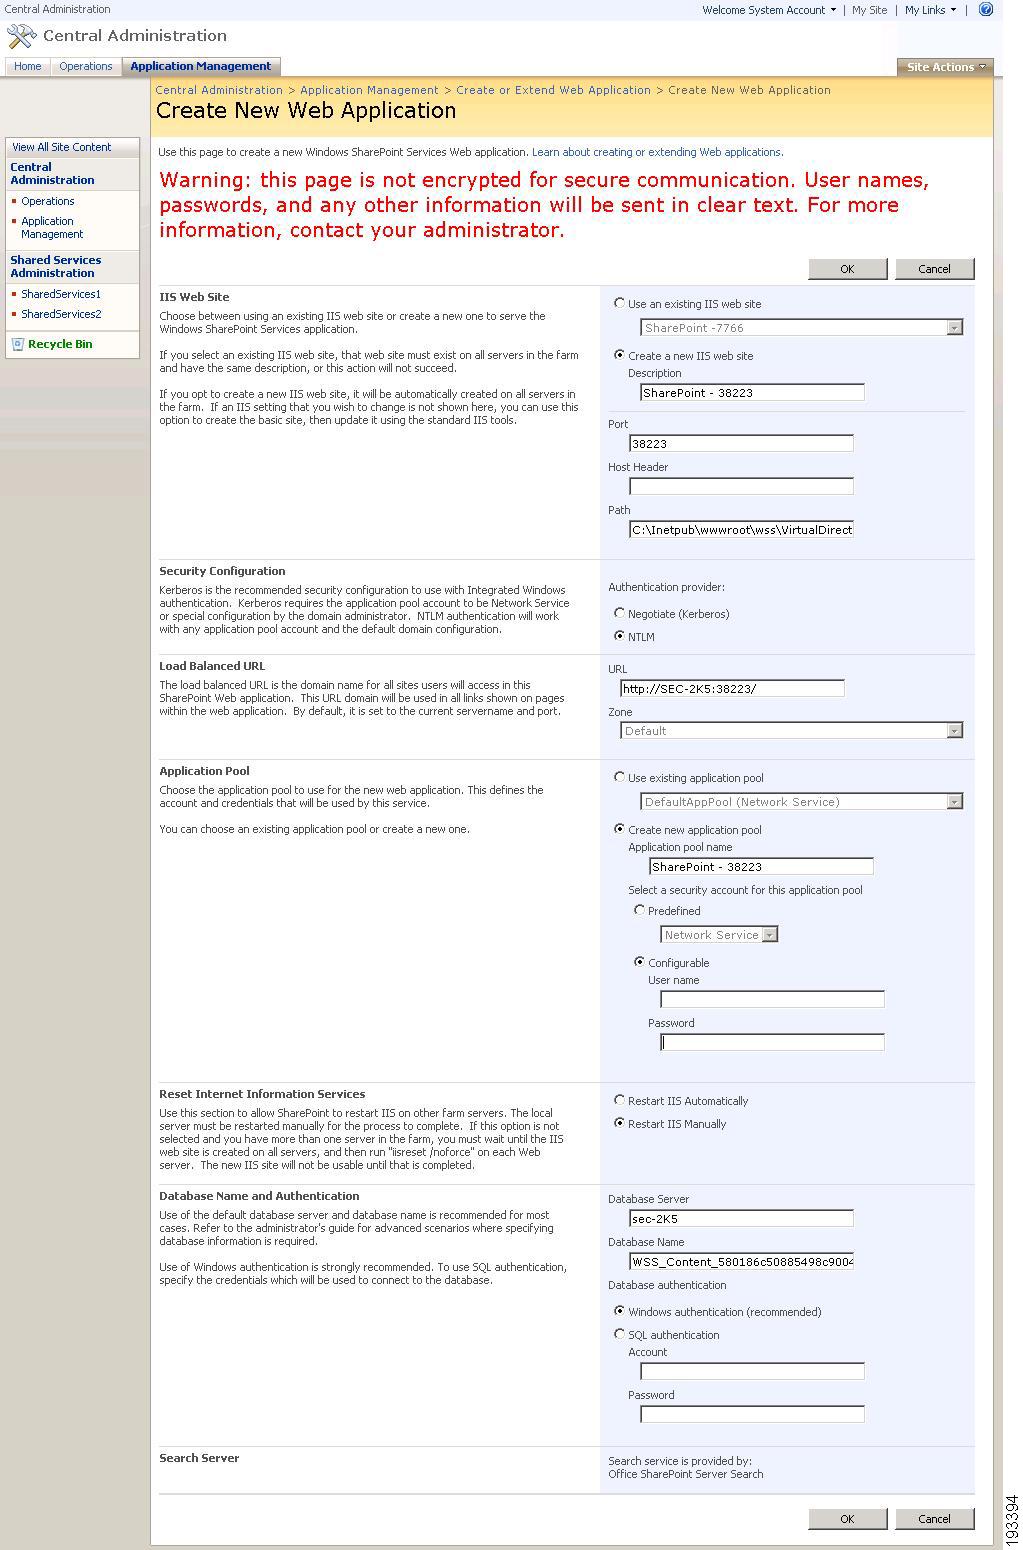
Figure A-1 Create new web application
Step 4
This creates the web application which can be verified by checking the VirtualDirectories folder (C:\Inetpub\wwwroot\wss\VirtualDirectories). In this folder, you can see a new folder is created with the port number that is mentioned in the URL of the web application. For example, if you enter 38223 as the port number of the new web application as shown in Figure A-2, you will find a folder named '38223' in the VirtualDirectories.
Step 5
Step 6
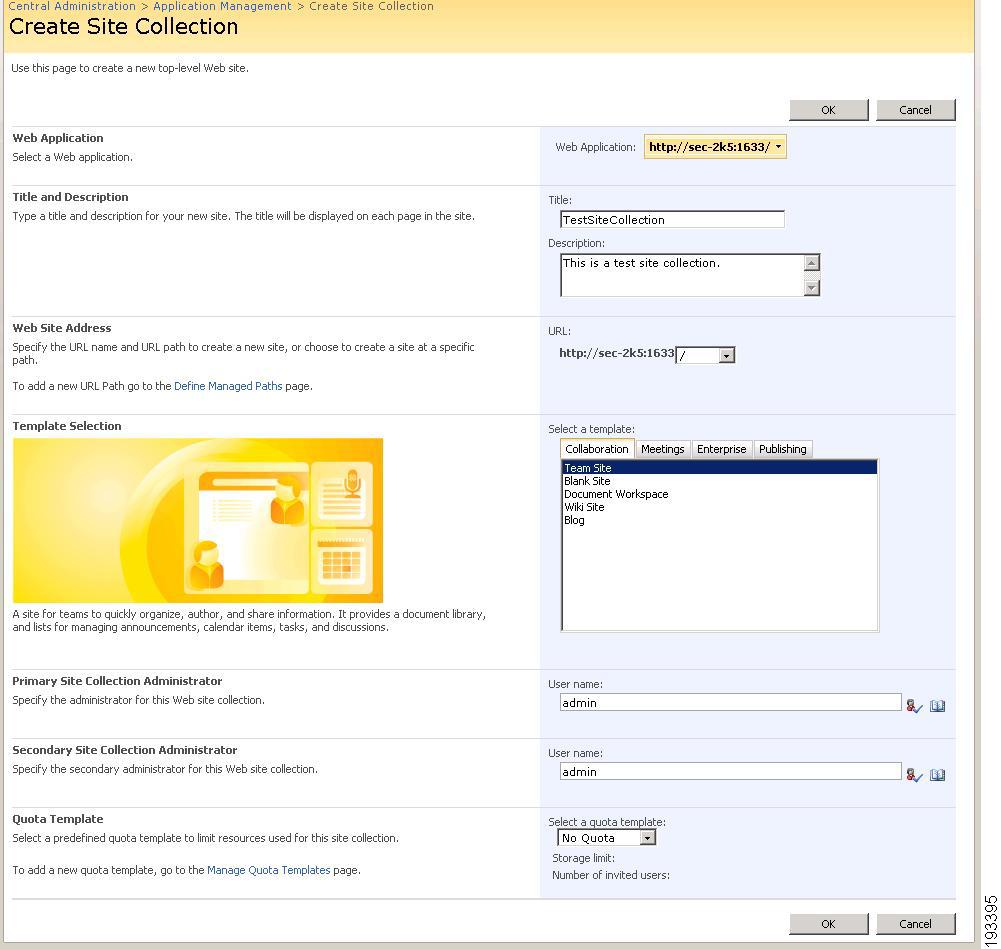
Figure A-2 Create site collection
Step 7
This opens the Top-level Site successfully created page which notifies the creation of the top-level site by displaying the specified site URL. Click OK to return to the SharePOint Central Administration.
Creating Internet IIS Web Site
To extend your web application to another internet site, follow these steps:
Step 1
Step 2
Step 3
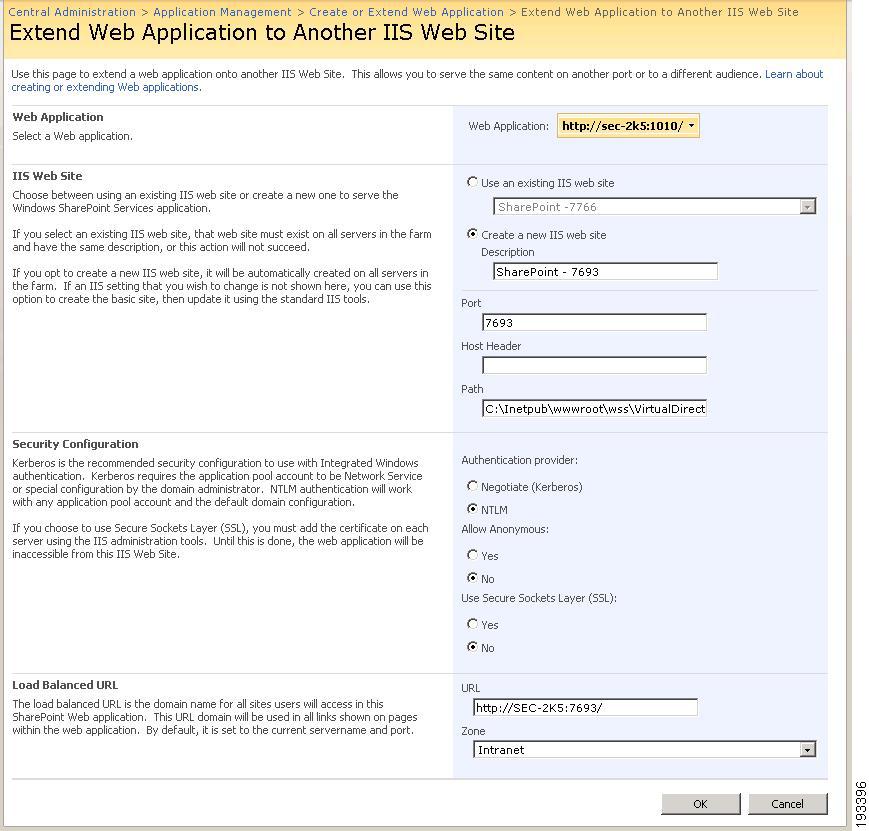
Figure A-3 Extend Web Application
In the Extend an existing Web application to Another IIS Web Site page, choose the web application under which you want to create a site. In the IIS Website section, you can create a new IIS website under the application or use an existing IIS website by checking the appropriate option. Figure A-3 shows an example of extending Web Application to a new IIS website.
Enter the Description and Port number for the new site. Click OK. This opens the confirmation page showing the specified site URL.
After creating the extranet and internet site, open the browser and test both sites by typing the URL. But these two sites ask about Windows authentication because these sites are not yet configured to form authentication.
Configuring Web Application to Communicate with Form Authentication Data Store
This section describes how to modify the web.config file of the two sites. This file is located in the root directory of the site, that is, c:\Inetpub\wwwroot\wss\Virtual Directories. Under this, the 4040 and 4041 folders are available. The web.config file of the specific site is available inside these folders.
Configuring the web.config File of the Extranet Site
The web.config file of the extranet site is available in the c:\Inetpub\wwwroot\wss\VirtualDirectories\<xxxx> folder, where <xxxx> refers to the port number of the extranet site.
Step 1
MembershipProvider<membership defaultProvider="CEPMMembershipProvider"><providers><add name="CEPMMembershipProvider" type="Com.Cisco.Agent.Sharepoint.CEPMMembershipProvider, Com.Cisco.Agent.SharePoint, Version=3.3.0.0, Culture=neutral, PublicKeyToken=5e4be1f4e6ef363a" enablePasswordRetrieval="false" enablePasswordReset="true" requiresQuestionAndAnswer="true" applicationName="/" requiresUniqueEmail="false" passwordFormat="Hashed" maxInvalidPasswordAttempts="5" minRequiredPasswordLength="7" minRequiredNonalphanumericCharacters="1" passwordAttemptWindow="10" passwordStrengthRegularExpression="" /></providers></membership>RoleProvider<roleManager defaultProvider="CEPMRoleProvider" enabled="true"><providers><add name="CEPMRoleProvider" applicationName="/" type="Com.Cisco.Agent.Sharepoint.CEPMRoleProvider, Com.Cisco.Agent.SharePoint, Version=3.3.0.0, Culture=neutral, PublicKeyToken=5e4be1f4e6ef363a" /></providers></roleManager>Step 2
Step 3
Configuring web.config File of the Internet Site
The web.config file of the internet site is available in the c:\Inetpub\wwwroot\wss\VirtualDirectories\<xxxx> folder, where <xxxx> refers to the port number of the internet site.
Step 1
Step 2
Configuring SharePoint Central Administration
The web.config file of the Central Administration site is available in the c:\Inetpub\wwwroot\wss\VirtualDirectories\13035 folder.
To find the virtual directory, open IIS. In the Web Site folder, find Sharepoint Central Administration v3. Right click to open Properties. In the Properties page, click the Home Directory tab and find the Local Path.
Step 1
Step 2
<add name="CEPMMembershipProvider" type="Com.Cisco.Agent.Sharepoint.CEPMMembershipProvider, Com.Cisco.Agent.SharePoint, Version=3.3.0.0, Culture=neutral, PublicKeyToken=5e4be1f4e6ef363a" enablePasswordRetrieval="false" enablePasswordReset="true" requiresQuestionAndAnswer="true" applicationName="/" requiresUniqueEmail="false" passwordFormat="Hashed" maxInvalidPasswordAttempts="5" minRequiredPasswordLength="7" minRequiredNonalphanumericCharacters="1" passwordAttemptWindow="10" passwordStrengthRegularExpression="" />Step 3
        <add name="CEPMRoleProvider"
             connectionStringName=""
             applicationName="/"
             type="Com.Cisco.Agent.Sharepoint.CEPMRoleProvider,
                   Com.Cisco.Agent.SharePoint, Version=3.3.0.0,
                   Culture=neutral, PublicKeyToken=5e4be1f4e6ef363a" />
Step 4
Step 5
Enable Form Authentication for Internet Site
To enable form authentication for internet sites, follow these steps:
Step 1
Step 2
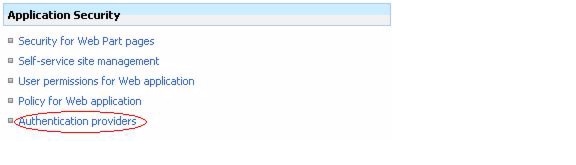
Figure A-4 Application Security
Step 3
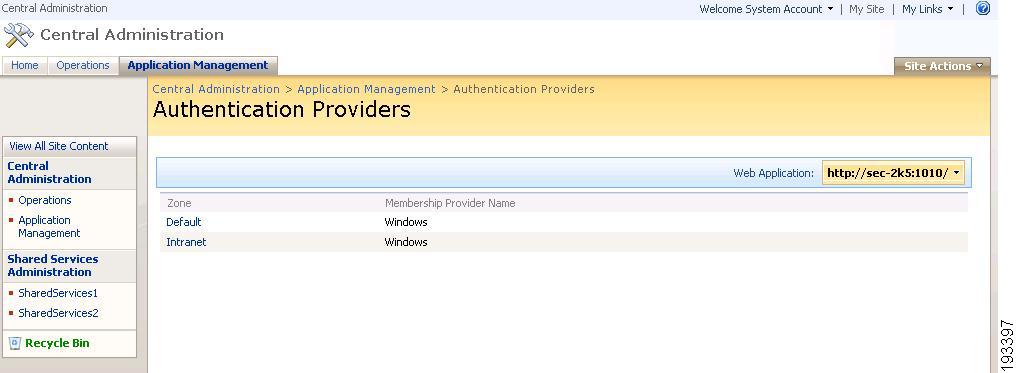
Figure A-5 Authentication providers
Step 4
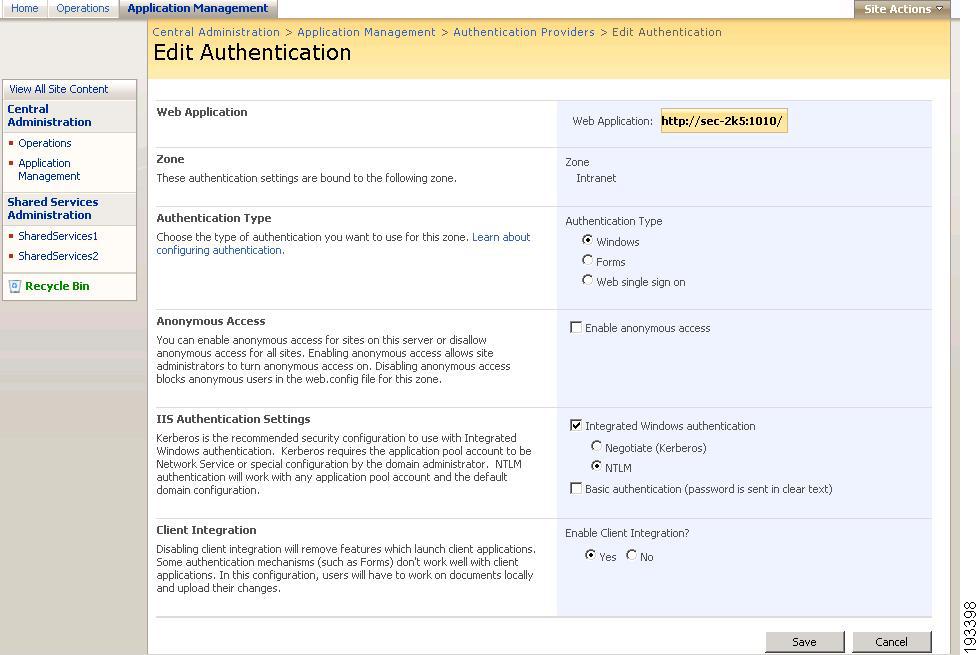
Figure A-6 Edit Authentication
The form authentication for the internet site has been successfully enabled. To prove form authentication is actually working with the data store, you must add the user to the site. The following steps explain how to add the user to the site.
Step 5
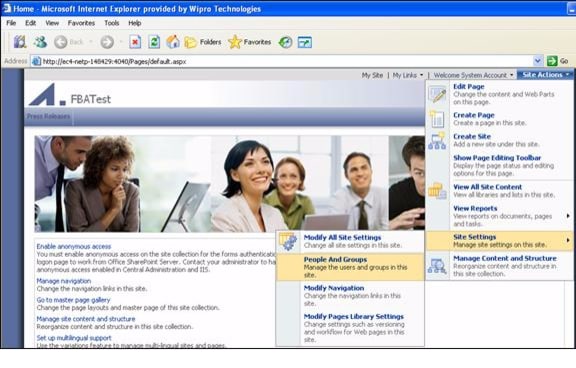
Step 6
Figure A-7 People and Groups
Step 7
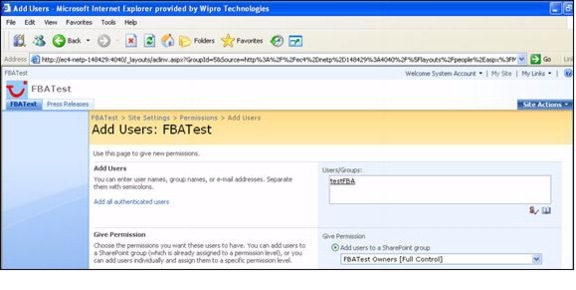
Step 8
Figure A-8 Add Users
After creating a user and granting the permission successfully, continue with the following steps, which explain how to test form authentication.
Step 9
Step 10
Step 11
You are successfully logged in into internet site with form authentication.