- A through C
- D through F
- identity policy policy-map through ip rsvp pq-profile
- ip rsvp precedence through load protocol
- match access-group through mls ip pbr
- mls qos global configuration mode through mpls experimental
- N through P
- Q through R
- send qdm message through show atm bundle svc statistics
- show auto discovery qos through show ip rsvp hello client lsp detail
- show ip rsvp hello client lsp summary through show lane qos database
- show mls qos through wrr-queue threshold
- Index
- identity policy (policy-map)
- ingress-class-map
- ip header-compression disable-feedback
- ip header-compression max-header
- ip header-compression max-period
- ip header-compression max-time
- ip header-compression recoverable-loss
- ip header-compression old-iphc-comp
- ip header-compression old-iphc-decomp
- ip nbar attribute-map
- ip nbar attribute-set
- ip nbar classification tunneled-traffic
- ip nbar custom
- ip nbar pdlm
- ip nbar port-map
- ip nbar protocol-discovery
- ip nbar protocol-pack
- ip nbar resources
- ip nbar resources protocol
- ip nbar resources system
- ip options
- ip rsvp admission-control compression predict
- ip rsvp aggregation ip
- ip rsvp aggregation ip map
- ip rsvp aggregation ip reservation dscp
- ip rsvp aggregation ip role interior
- ip rsvp atm-peak-rate-limit
- ip rsvp authentication
- ip rsvp authentication challenge
- ip rsvp authentication key
- ip rsvp authentication key-chain
- ip rsvp authentication lifetime
- ip rsvp authentication neighbor
- ip rsvp authentication type
- ip rsvp authentication window-size
- ip rsvp bandwidth
- ip rsvp bandwidth ignore
- ip rsvp bandwidth percent
- ip rsvp burst policing
- ip rsvp data-packet classification none
- ip rsvp dsbm candidate
- ip rsvp dsbm non-resv-send-limit
- ip rsvp flow-assist
- ip rsvp layer2 overhead
- ip rsvp listener
- ip rsvp listener outbound
- ip rsvp msg-pacing
- ip rsvp neighbor
- ip rsvp policy cops minimal
- ip rsvp policy cops report-all
- ip rsvp policy cops servers
- ip rsvp policy cops timeout
- ip rsvp policy default-reject
- ip rsvp policy identity
- ip rsvp policy local
- ip rsvp policy preempt
- ip rsvp policy vrf
- ip rsvp pq-profile
identity policy policy-map through ip rsvp pq-profile
identity policy (policy-map)
To create an identity policy, use the identitypolicy command in policy-map class configuration mode. To remove the policy, use the no form of this command.
Syntax Description
| policy-name |
Name of the policy. |
Command Default
An identity policy is not created.
Command Modes
Policy-map class configuration (config-pmap-class)
Command History
| Release |
Modification |
|---|---|
| 12.4(6)T |
This command was introduced. |
Usage Guidelines
This command refers to the global identity policy that is configured on the device that contains the access policies that are to be applied. Only a single identity policy can be configured under the policy class configuration submode. If the identity policy is not defined on the device, an error is generated during the application of the policy.
Examples
The following example shows how create an identity policy called healthy_identity:
Router(config)# policy-map type control tag healthy_pmap
Router(config-pmap)# class healthy_class
Router(config-pmap-class)# identity policy healthy_identity
Router(config-pmap-class)# end
The following example shows how to add an access group called healthy_acl to the identity policy named healthy_identity:
Router(config)# identity policy healthy_identity
Router(config-identity-policy)# access-group healthy_acl
Router(config-identity-policy)# end
Related Commands
| Command |
Description |
|---|---|
| class type tag |
Associates a class map with a policy map. |
| policy-map |
Creates or modifies a policy map that can be attached to one or more interfaces to specify a service policy. |
ingress-class-map
T o classify the IPv4, IPv6, and MPLS packets for POS, channelized, and clear-channel SPAs, use the ingress-class-mapcommandin global configuration mode to first define the ingress classification template. The ingress classification template is identified by the index-id that will be applied to an interface later. Use the no form of this command to remove the template.
Syntax Description
| class-map index |
Class-map index-id to identify the ingress classification template that is a combination of IPv4, IPv6, and MPLS classifications. The valid range for the maximum number of index class maps per carrier card (CC) is 1 to 62 multiplied-by maximum number of carrier card slots. |
Command Default
No ingress-class-map index-ids are configured.
Command Modes
Global configuration (config)
Command History
| Release |
Modification |
|---|---|
| Cisco IOS XE Release 3.1S |
This command was introduced. |
Usage Guidelines
To classify high priority packets such as IPv4, IPv6, or MPLS in a SIP or SPA, the classification template is defined using the ingress-classmapclass-mapindexcommand. The classification template-specific details are defined in the template, and the template is attached to an interface using the plimqosinputclass-mapcommand. The classification template can be deleted using the no command form. Each SIP supports 62 ingress classification templates. The total number of ingress classification templates that can be applied on Cisco ASR 1000 Series Router = number of carrier cards multiplied-by 62.
 Note |
The classification template cannot be deleted if the template is being used by an interface. |
Examples
The following example shows how to define a classification template using the ingress-class-map command:
Router# config
Router(config)# ingress-class-map 1
Router(config-ing-class-map)#
Related Commands
| Command |
Description |
|---|---|
| plim qos input class-map |
Attaches the classification template to an interface. |
ip header-compression disable-feedback
To disable the context-status feedback messages from the interface or link, use the ipheader-compressiondisable-feedback command in interface configuration mode. To enable context-status feedback messages from the interface or link, use the no form of this command.
Syntax Description
This command has no arguments or keywords.
Command Default
Context-status feedback messages are enabled by default.
Command Modes
Interface configuration (config-if)
Command History
| Release |
Modification |
|---|---|
| 12.3(2)T |
This command was introduced. |
| 12.2(25)S |
This command was integrated into Cisco IOS Release 12.2(25)S. |
Usage Guidelines
The ipheader-compressiondisable-feedback command is designed for use with satellite links where the path for the upward link is different from the path for the downward link. When the paths are different, context-status messages are not useful.
The ipheader-compressiondisable-feedback command can be used with either Real-Time Transport Protocol (RTP) or TCP header compression.
Examples
The following example disables the context-status messages on serial interface 2/0:
Router> enable
Router# configure terminal
Router(config)# interface Serial2/0
Router(config-if)# ip header-compression disable-feedback
Router(config-if)# end
Related Commands
| Command |
Description |
|---|---|
| ip header-compression max-header |
Specifies the maximum size of the compressed IP header. |
| ip header-compression max-period |
Specifies the maximum number of compressed packets between full headers. |
| ip header-compression max-time |
Specifies the maximum amount of time to wait before the compressed IP header is refreshed. |
ip header-compression max-header
To specify the maximum amount of time to wait before the compressed IP header is refreshed, use the ipheader-compressionmax-header command in interface configuration mode. To return the amount of time to wait before the compressed IP header is refreshed to the default value, use the no form of this command.
Syntax Description
| max-header-size |
Size of the IP header, in bytes. The size of the IP header can be in the range of 20 to 168. |
Command Default
168 bytes
Command Modes
Interface configuration (config-if)
Command History
| Release |
Modification |
|---|---|
| 12.3(2)T |
This command was introduced. |
| 12.2(25)S |
This command was integrated into Cisco IOS Release 12.2(25)S. |
Usage Guidelines
The max-header-size argument of the ipheader-compressionmax-header command can be used to restrict the size of the header to be compressed.
Examples
The following example shows how to use the ipheader-compressionmax-headercommand to specify the maximum IP header size of the packet to 100 bytes:
Router> enable
Router# configure terminal
Router(config)# interface Serial2/0
Router(config-if)# ip header-compression max-header 100
Router(config-if)# end
Related Commands
| Command |
Description |
|---|---|
| ip header-compression disable-feedback |
Disables context-status feedback messages from the interface or link. |
| ip header-compression max-period |
Specifies the maximum number of compressed packets between full headers. |
| ip header-compression max-time |
Specifies the maximum amount of time to wait before the compressed IP header is refreshed. |
ip header-compression max-period
To specify the maximum number of compressed packets between full headers, use the ipheader-compressionmax-period command in interface configuration mode. To return the number of compressed packets to the default value, use the no form of this command.
Syntax Description
| number-of-packets |
Specifies a number of packets between full headers. The number can be in the range of 0 to 65535. |
Command Default
256 packets
Command Modes
Interface configuration
Command History
| Release |
Modification |
|---|---|
| 12.3(2)T |
This command was introduced. |
| 12.2(25)S |
This command was integrated into Cisco IOS Release 12.2(25)S. |
Usage Guidelines
With the ipheader-compressionmax-periodcommand, full IP packet headers are sent in an exponentially increasing period after there has been a change in the context status. This exponential increase in the time period avoids the necessity of exchanging messages between the mechanism compressing the header and the mechanism decompressing the header.
By default, the ipheader-compressionmax-periodcommand operates on User Datagram Protocol (UDP) traffic only. However, if the periodicrefresh keyword of either the frame-relayiprtpheader-compressioncommand or the frame-relaymapiprtpheader-compression command is configured, the ipheader-compressionmax-period command operates on both UDP and Real-Time Transport Protocol (RTP) traffic.
Examples
In the following example, the ipheader-compressionmax-periodcommand is configured to specify the number of packets between full header packets. In this configuration, the packet number specified is 160.
Router> enable
Router# configure terminal
Router(config)# interface Serial2/0
Router(config-if)# ip header-compression max-period 160
Router(config-if)# end
Related Commands
| Command |
Description |
|---|---|
| frame-relay ip rtp header-compression |
Enables RTP header compression for all Frame Relay maps on a physical interface. |
| frame-relay map ip rtp header-compression |
Enables RTP header compression per DLCI. |
| ip header-compression disable-feedback |
Disables context-status feedback messages from the interface or link. |
| ip header-compression max-header |
Specifies the maximum size of the compressed IP header. |
| ip header-compression max-time |
Specifies the maximum amount of time to wait before the compressed IP header is refreshed. |
ip header-compression max-time
To specify the maximum amount of time to wait before the compressed IP header is refreshed, use the ipheader-compressionmax-time command in interface configuration mode. To return to the default value, use the no form of this command.
Syntax Description
| length-of-time |
Specifies a different amount of time (other than the default) in seconds to wait before the IP header is refreshed. The range is 0 to 65535. |
Command Default
If not length of time is configured, the default value is 5 seconds.
Command Modes
Interface configuration (config-if)
Command History
| Release |
Modification |
|---|---|
| 12.3(2)T |
This command was introduced. |
| 12.2(25)S |
This command was integrated into Cisco IOS Release 12.2(25)S. |
Usage Guidelines
The ipheader-compressionmax-time command is designed to avoid losing too many packets if the context status of the receiver has been lost.
If a packet is to be sent and the maximum amount of time has elapsed since the last time the IP header was refreshed, a full header is sent.
By default, the ipheader-compressionmax-timecommand operates on User Datagram Protocol (UDP) traffic only. However, if the periodicrefresh keyword of either the frame-relayiprtpheader-compressioncommand or the frame-relaymapiprtpheader-compression command is configured, the ipheader-compressionmax-timecommand operates on UDP and Real-Time Transport Protocol (RTP) traffic.
Examples
In the following example, the ipheader-compressionmax-timecommand is configured to specify the maximum amount of time to wait before refreshing the compressed IP header. In this configuration the amount of time to wait is 30 seconds.
Router> enable
Router# configure terminal
Router(config)# interface Serial2/0
Router(config-if)# ip header-compression max-time 30
Router(config-if)# end
Related Commands
| Command |
Description |
|---|---|
| frame-relay ip rtp header-compression |
Enables RTP header compression for all Frame Relay maps on a physical interface. |
| frame-relay map ip rtp header-compression |
Enables RTP header compression per DLCI. |
| ip header-compression disable-feedback |
Disables context-status feedback messages from the interface or link. |
| ip header-compression max-header |
Specifies the maximum size of the compressed IP header. |
| ip header-compression max-period |
Specifies the maximum number of compressed packets between full headers. |
ip header-compression recoverable-loss
To enable Enhanced Compressed Real-Time Transport Protocol (ECRTP) on an interface, use the ipheader-compressionrecoverable-loss command in interface configuration mode. To disable ECRTP on an interface, use the no form of this command.
Syntax Description
| dynamic |
Dynamic recoverable loss calculation. |
| packet-drops |
Maximum number of consecutive packet drops. Ranges from 1 to 8. |
Command Default
When using the dynamickeyword, the default value is 4.
Command Modes
Interface configuration (config-if)
Command History
| Release |
Modification |
|---|---|
| 12.3(11)T |
This command was introduced. |
Usage Guidelines
Enhanced CRTP reduces corruption by changing the way the compressor updates the context at the decompressor. The compressor sends changes multiple times to keep the compressor and decompressor synchronized. This method is characterized by the number of packet-drops that represent the quality of the link between the hosts. By repeating the updates, the probability of context corruption due to packet loss is minimized.
The value for the packet-drops argument is maintained independently for each context and is not required to be the same for all contexts.
Examples
The following example shows how to configure a serial interface with Point-to-Point Protocol (PPP) encapsulation and to enable ECRTP with dynamic loss recovery:
Router(config)# interface serial 2/0
Router(config-if)# encapsulation ppp
Router(config-if)# ip rtp header-compression ietf-format
Router(config-if)# ip header-compression recoverable-loss dynamic
Router(config-if)# end
Related Commands
| Command |
Description |
|---|---|
| debug ip rtp error |
Displays RTP header compression errors. |
| debug ip rtp header-compression |
Displays events specific to RTP header compression. |
| ip rtp header-compression |
Enables RTP header compression. |
| show ip rtp header-compression |
Displays RTP header compression statistics. |
ip header-compression old-iphc-comp
To revert the IP Header Compression (IPHC) format of compression to the non-RFC-compliant format, use the ipheader-compressionold-iphc-compcommand in interface configuration mode. To disable the IPHC format of compression, use the no form of this command.
Syntax Description
This command has no arguments or keywords.
Command Default
IPHC format compression is not configured.
Command Modes
Interface configuration (config-if)
Command History
| Release |
Modification |
|---|---|
| 15.1(3)T |
This command was introduced. |
Usage Guidelines
The ipheader-compressionold-iphc-comp command must be configured only when the IPHC format of compression or service-policy-based compression is configured.
Examples
The following example shows how to revert the IPHC format of compression to the non-RFC-compliant format:
Router> enable

Router# configure terminal
Router(config)# interface serial 0/0
Router(config-if)# ip header-compression old-iphc-comp
Related Commands
| Command |
Description |
|---|---|
| ip header-compression old-iphc-decomp |
Reverts the IPHC format of decompression to the non-RFC-compliant format. |
ip header-compression old-iphc-decomp
To revert the IP Header Compression (IPHC) format of decompression to the non-RFC-compliant format, use the ipheader-compressionold-iphc-decompcommand in interface configuration mode. To retain the normal form of the IPHC format decompression, use the no form of this command.
Syntax Description
This command has no arguments or keywords.
Command Default
IPHC format decompression is not configured.
Command Modes
Interface configuration (config-if)
Command History
| Release |
Modification |
|---|---|
| 15.1(3)T |
This command was introduced. |
Usage Guidelines
The ipheader-compressionold-iphc-decomp command must be configured only when the IPHC format of compression or service-policy-based compression is configured.
Examples
The following example shows how to revert the IPHC format of decompression to the non-RFC-compliant format:
Router> enable

Router# configure terminal
Router(config)# interface serial 0/0
Router(config-if)# ip header-compression old-iphc-decomp
Related Commands
| Command |
Description |
|---|---|
| ip header-compression old-iphc-comp |
Reverts the IPHC format of compression to the non-RFC-compliant format. |
ip nbar attribute-map
To create an Network-Based Application Recognition (NBAR) attribute profile, use the ip nbar attribute-map command in global configuration mode. To remove an NBAR attribute profile, use the no form of this command.
Syntax Description
| profile-name |
Name of the protocol attribute profile. |
Command Default
A new attribute profile is not created.
Command Modes
Global configuration (config)
Command History
| Release |
Modification |
|---|---|
| 15.2(4)M2 |
This command was introduced. |
| Cisco IOS XE Release 3.8S |
This command was integrated into Cisco IOS XE Release 3.8S. |
Usage Guidelines
NBAR supports the use of custom protocols to identify custom applications. Custom protocols support static port-based protocols and applications that NBAR does not support.
NBAR allows you to configure attribute profiles for protocols and to attach the profiles with the protocols.
The ip nbar attribute-map command lets you create an NBAR attribute profile. Upon using this command, you enter the attribute-map submode, which lets you assign various attributes to custom protocols. This attribute profile can be attached to a protocol by using the ip nbar attribute-set protocol-name profile-name command.
Examples
The following example shows how to create an attribute profile for the Network News Transfer Protocol (NNTP):
Device# configure terminal
Device(config)# ip nbar attribute-map nntp-attrib
Related Commands
| Command |
Description |
|---|---|
| attribute |
Adds attributes to your attribute profiles. |
| ip nbar attribute-set |
Attaches a new attribute profile to a protocol. |
ip nbar attribute-set
To assign an attribute profile to a specific protocol, use the ip nbar attribute-set command in global configuration mode. To remove the mapping of the attribute profile to the protocol, use the no form of this command.
Syntax Description
| protocol-name |
Protocol to which you want to assign the attribute profile. |
| profile-name |
Name of the attribute profile. |
Command Modes
Global configuration (config)
Command History
| Release |
Modification |
|---|---|
| 15.2(4)M2 |
This command was introduced. |
| Cisco IOS XE Release 3.8S |
This command was integrated into Cisco IOS XE Release 3.8S. |
Usage Guidelines
Network-Based Application Recognition (NBAR) supports the use of custom protocols to identify custom applications. Custom protocols support static port-based protocols and applications that NBAR does not support.
NBAR lets you configure attribute profiles for protocols, and attach the profiles with the protocols.
You can attach an attribute profile to a protocol using the ip nbar attribute-set command. After a profile is attached to a protocol, you can edit the profile by adding or deleting its parameters. You can also remove an attached attribute profile from a protocol.
Examples
The following example shows how to map an attribute profile to the Application Communication Protocol (ACP):
Device# configure terminal
Device(config)# ip nbar attribute-set acp test-profile
Related Commands
| Command |
Description |
|---|---|
| ip nbar attribute-map |
Creates an attribute profile. |
ip nbar classification tunneled-traffic
To enable application classification of IPv6 traffic that is carried over IPv4 tunnels (IPv6 in IPv4 and teredo) in Network Based Application Recognition, use the ip nbar classification tunneled-traffic command in global configuration mode. To disable application classification, use the no form of this command.
Syntax Description
| ipv6inip |
Classifies IPv6 in IPv4 tunneling traffic. |
| teredo |
Classifies teredo tunneling traffic. |
Command Default
Application classification for IPv6 traffic that is tunneled over IPv6 in IPv4 or teredo tunnels is not enabled.
Command Modes
Global configuration (config)
Command History
| Release | Modification |
|---|---|
| 15.2(2)T |
This command was introduced. |
| Cisco IOS XE Release 3.5S |
This command was integrated into Cisco IOS XE Release 3.5S. |
| 15.2(1)S |
This command was integrated into Cisco IOS Release 15.2(1)S. |
Usage Guidelines
The ipv6inip keyword enables application classification of IPv6 traffic that is carried over IPv4 tunnels over protocol 41. Protocol 41 includes the tunnel types such as ISATAP, 6to4, and 6rd.
The teredo keyword enables application classification of IPv6 traffic that is carried over teredo tunnel. The teredo tunnel is identified by two common default ports, port 3544 and port 3545 over UDP, which are on IPv4 tunnel endpoints.
Examples
The following example shows how to enable application classification for IPv6 traffic carried over teredo tunnels:
Router(config)# ip nbar classification tunneled-traffic teredo
ip nbar custom
To extend the capability of Network-Based Application Recognition (NBAR) protocol discovery, use the ip nbar custom command in global configuration mode. To stop NBAR from classifying and monitoring additional static port application or classifying unsupported static port traffic, use the no form of this command.
Syntax Description
Command Modes
Global configuration (config)
Command History
| Release |
Modification |
|---|---|
| 12.3(4)T |
This command was introduced. |
| 12.3(11)T |
The variable field-name field-length keyword-argument pair was introduced. |
| 12.2(14)S |
This command was integrated into Cisco IOS Release 12.2(14)S. |
| 12.2(17a)SX1 |
This command was integrated into Cisco IOS Release 12.2(17a)SX1. |
| 15.2(4)M2 |
This command was integrated into Cisco IOS Release 15.2(4)M2. The http keyword and the host host-name and the url url-name keyword-argument pairs were introduced. |
| Cisco IOS XE Release 3.8S |
This command was integrated into Cisco IOS XE Release 3.8S. |
Usage Guidelines
Use the ip nbar custom command in global configuration mode to classify and monitor additional static port applications or to allow NBAR to classify unsupported static port traffic.
The first three characters of a custom protocol must be unique from any predefined protocol. Otherwise, you receive an ambiguous command error message.
NBAR can support up to 128 protocols.
If you enter the variable keyword when you configure a custom protocol, traffic statistics for the variable appear in some NBAR class map show outputs.
The protocol argument stands for the protocol that is implemented by the application. You specify the protocol as TCP or UDP before proceeding to the next set of elements given here:
Up to 24 variable values per custom protocol can be configured in class maps. For instance, in the following configuration, four variables are used:.
Device(config)# ip nbar custom ftdd 23 variable scid 1 tcp range 5001 5005
Device(config)# class-map match-any active-craft
Device(config-cmap)# match protocol ftdd scid 0x15
Device(config-cmap)# match protocol ftdd scid 0x21
Device(config-cmap)# exit
Device(config)# class-map match-any passive-craft
Device(config-cmap)# match protocol ftdd scid 0x11
Device(config-cmap)# match protocol ftdd scid 0x22
Examples
The following example shows how to classify HTTP packets based on any URL that contains the string "whatsnew/latest" preceded by zero or more characters:
Device(config)# ip nbar custom my_http http url "*whatsnew/latest"
The following example shows how to classify packets based on any hostname that contains the strings "sell" or "dell" followed by zero or more characters:
Device(config)# ip nbar custom my_http http host "*(s|d)ell"
The following example shows how to configure the custom protocol "app_sales1" to identify TCP packets that have a source port of 4567 and that contain the term SALES in the fifth byte of the payload:
Device(config)# ip nbar custom app_sales1 5 ascii SALES source tcp 4567
The following example shows how to set the custom protocol "virus_home" to identify UDP packets that have a destination port of 3000 and contain "0x56" in the seventh byte of the payload:
Device(config)# ip nbar custom virus_home 7 hex 0x56 destination udp 3000
The following example shows how to set the custom protocol "media_new" to identify TCP packets that have a destination or source port of 4500 and that have a value of 90 in the sixth byte of the payload:
Device(config)# ip nbar custom media_new 6 decimal 90 tcp 4500
The following example shows how to set the custom protocol msn1 to look for TCP packets that have a destination or source port of 6700:
Device(config)# ip nbar custom msn1 tcp 6700
The following example shows how to set the custom protocol mail_x to look for UDP packets that have a destination port of 8202:
Device(config)# ip nbar custom mail_x destination udp 8202
The following example shows how to configure the custom protocol mail_y to look for UDP packets that have destination ports between 3000 and 4000, inclusive:
Device(config)# ip nbar custom mail_y destination udp range 3000 4000
The following example shows how to create the custom protocol ftdd by using a variable. A class map matching this custom protocol based on the variable is also created. In this example, class map matchscidinftdd matches all traffic that has the value 804 at byte 23 entering or leaving TCP ports 5001 to 5005. The variable scid is 2 bytes in length.
Device(config)# ip nbar custom ftdd 23 variable scid 2 tcp range 5001 5005
Device(config)# class-map matchscidinftdd
Device(config-cmap)# match protocol ftdd scid 804
The same example above can also be done by using hexadecimal values in the class map as follows:
Router(config)# ip nbar custom ftdd 23 variable scid 2 tcp range 5001 5005
Router(config)# class-map matchscidinftdd
Router(config-cmap)# match protocol ftdd scid 0x324
The following example shows how to use the variable keyword to create a custom protocol, and how to configure class maps to classify different values within the variable field into different traffic classes. In the example below, variable scid values 0x15, 0x21, and 0x27 are classified into class map active-craft, while scid values 0x11, 0x22, and 0x25 are classified into class map passive-craft:
Router(config)# ip nbar custom ftdd 23 variable scid 1 tcp range 5001 5005
Router(config)# class-map match-any active-craft
Router(config-cmap)# match protocol ftdd scid 0x15
Router(config-cmap)# match protocol ftdd scid 0x21
Router(config-cmap)# match protocol ftdd scid 0x27
Device(config-cmap)# exit
Router(config)# class-map match-any passive-craft
Router(config-cmap)# match protocol ftdd scid 0x11
Router(config-cmap)# match protocol ftdd scid 0x22
Router(config-cmap)# match protocol ftdd scid 0x25
ip nbar pdlm
To extend or enhance the list of protocols recognized by network-based application recognition (NBAR) through a Cisco-provided Packet Description Language Module (PDLM), use the ipnbarpdlmcommandinglobalconfiguration mode. To unload a PDLM previously loaded, use the no form of this command.
Syntax Description
| pdlm-name |
URL at which the PDLM can be found on the flash card. |
Command Default
No default behavior or values
Command Modes
Global configuration (config)
Command History
| Release |
Modification |
|---|---|
| 12.0(5)XE2 |
This command was introduced. |
| 12.1(1)E |
This command was integrated into Cisco IOS Release 12.1(1)E. |
| 12.1(5)T |
This command was integrated into Cisco IOS Release 12.1(5)T. |
| 12.1(13)E |
This command was implemented on Catalyst 6000 family switches without FlexWAN modules. |
| 12.2(14)S |
This command was integrated into Cisco IOS Release 12.2(14)S. |
| 12.2(17a)SX1 |
This command was integrated into Cisco IOS Release 12.2(17a)SX1. |
| 12.2(33)SRA |
This command was integrated into Cisco IOS Release 12.2(33)SRA. |
Usage Guidelines
The ipnbarpdlm command is used to extend the list of protocols recognized by a given version of NBAR or to enhance an existing protocol recognition capability. NBAR can be given an external PDLM at run time. In most cases, the PDLM enables NBAR to recognize new protocols without requiring a new Cisco IOS image or a router reload. Only Cisco can provide you with a new PDLM.
A list of the available PDLMs can be viewed online at Cisco.com.
Examples
The following example configures NBAR to load the citrix.pdlm PDLM from flash memory on the router:
ip nbar pdlm flash://citrix.pdlm
Related Commands
| Command |
Description |
|---|---|
| show ip nbar pdlm |
Displays the current PDLM in use by NBAR. |
ip nbar port-map
To configure network-based application recognition (NBAR) to search for a protocol or protocol name using a port number other than the well-known port, use the ipnbarport-mapcommand in global configuration mode. To look for the protocol name using only the well-known port number, use the no form of this command.
Syntax Description
| protocol-name |
Name of protocol known to NBAR. |
| tcp |
(Optional) Specifies that a TCP port will be searched for the specified protocol-name argument. |
| udp |
(Optional) Specifies that a User Datagram Protocol (UDP) port will be searched for the specified protocol-name argument. |
| port-number |
Assigned port for named protocol. The port-number argument is either a UDP or a TCP port number, depending on which protocol is specified in this command line. Up to 16 port-number arguments c an be specified in one command line. Port number values can range from 0 to 65535. |
Command Default
No protocol is configured.
Command Modes
Global configuration (config)
Command History
| Release |
Modification |
|---|---|
| 12.0(5)XE2 |
This command was introduced. |
| 12.1(1)E |
This command was integrated into Cisco IOS Release 12.1(1)E. |
| 12.1(5)T |
This command was integrated into Cisco IOS Release 12.1(5)T. |
| 12.1(13)E |
This command was implemented on Catalyst 6000 family switches without FlexWAN modules. |
| 12.2(14)S |
This command was integrated into Cisco IOS Release 12.2(14)S. |
| 12.2(17a)SX1 |
This command was integrated into Cisco IOS Release 12.2(17a)SX1. |
| 12.2(33)SRA |
This command was integrated into Cisco IOS Release 12.2(33)SRA. |
Usage Guidelines
Use the ipnbarport-map command to tell NBAR to look for the protocol or protocol name , using a port number or numbers other than the well-known Internet Assigned Numbers Authority (IANA)-assigned) port number. For example, use this command to configure NBAR to look for Telnet on a port other than 23. You can specify up to 16 ports with this command.
Some of the NBAR protocols look at the ports as well as follow the heuristic approach for traffic classification. If you apply different ports to a protocol using the ipnbarport-mapcommand, the heuristic nature of the protocol does not change. The advantage to adding a port number is better performance.
You can remove well-known ports from a predefined port map only if you first set the predefined port map to a port not belonging to any existing port map. For example, if you want to define a custom port map X and also associate it with port 20, you get an error saying that it is not possible. However, if you associate port map A with another port first, such as port 100, and then remove its association with port 20, you can associate custom port map X with port 20.
Note |
For best results, do not configure the Citrix or BitTorrent protocols. |
Examples
The following example configures NBAR to look for the protocol Structured Query Language (SQL)*NET on port numbers 63000 and 63001 instead of on the well-known port number:
Router(config)# ip nbar port-map sqlnet tcp 63000 63001
Related Commands
| Command |
Description |
|---|---|
| show ip nbar port-map |
Displays the current protocol-to-port mappings in use by NBAR. |
ip nbar protocol-discovery
To configure Network-Based Application Recognition (NBAR) to discover traffic for all protocols that are known to NBAR on a particular interface, use the ipnbarprotocol-discoverycommand in interface configuration mode or VLAN configuration mode. To disable traffic discovery, use the no form of this command.
Syntax Description
| ipv4 |
(Optional) Specifies protocol discovery only for IPv4 packets on the interface. |
| ipv6 |
(Optional) Specifies protocol discovery only for IPv6 packets on the interface. |
Command Default
Traffic discovery is disabled.
Command Modes
Interface configuration (config-if)
VLAN configuration (config-vlan)--Catalyst switches only
Command History
| Release |
Modification |
|---|---|
| 12.0(5)XE2 |
This command was introduced. |
| 12.1(1)E |
This command was integrated into Cisco IOS Release 12.1(1)E. |
| 12.1(5)T |
This command was integrated into Cisco IOS Release 12.1(5)T. |
| 12.1(13)E |
This command was implemented on Catalyst 6000 family switches without FlexWAN modules. |
| 12.2(14)S |
This command was integrated into Cisco IOS Release 12.2(14)S. |
| 12.2(17a)SX1 |
This command was integrated into Cisco IOS Release 12.2(17a)SX1. |
| 12.2(33)SRA |
This command was integrated into Cisco IOS Release 12.2(33)SRA. |
| 12.2(18)ZYA |
This command was integrated into Cisco IOS Release 12.2(18)ZYA. Support for Layer 2 Etherchannels, Layer 3 Etherchannels, and VLAN configuration mode was provided (Catalyst switches only). |
| Cisco IOS XE Release 3.3S |
This command was integrated into Cisco IOS XE Release 3.3S on the Cisco ASR 1000 Series Aggregation Services Routers. The ipv6 keyword was added. |
Usage Guidelines
Use theipnbarprotocol-discoverycommand to configure NBAR to keep traffic statistics for all protocols that are known to NBAR. Protocol discovery provides an easy way to discover application protocols passing through an interface so that QoS policies can be developed and applied. The protocol discovery feature discovers any protocol traffic supported by NBAR. Protocol discovery can be used to monitor both input and output traffic and may be applied with or without a service policy enabled.
In Cisco IOS XE Release 3.3S, L3 and L4 Internet Assigned Numbers Authority (IANA) protocols are supported for IPv4 and IPv6 packets.
Enter the ipv4 keyword to enable protocol discovery statistics collection for IPv4 packets, or enter the ipv6 keyword to enable protocol discovery statistics collection for IPv6 packets. Specifying either of these keywords enables the protocol discovery statistics collection for the specified IP version only. If neither keyword is specified, statistics collection is enabled for both IPv4 and IPv6. The no form of this command is not required to disable a keyword because the statistics collection is enabled for the specified keyword only.
Layer 2/3 Etherchannel Support
With Cisco IOS Release 12.2(18)ZYA, intended for use on the Cisco 6500 series switch that is equipped with a Supervisor 32/PISA, the ipnbarprotocol-discoverycommand is supported on both Layer 2 and Layer 3 Etherchannels.
Examples
The following example shows how to configure protocol discovery for both IPv4 and IPv6 on an Ethernet interface:
Router> enable
Router# configure terminal
Router(config)# interface ethernet 2/4
Router(config-if)# ip nbar protocol-discovery
Router(config-if)# end
Related Commands
| Command |
Description |
|---|---|
| show ip nbar protocol-discovery |
Displays the statistics gathered by the NBAR Protocol Discovery feature. |
ip nbar protocol-pack
To load a network based application recognition (NBAR)protocol pack, use the ip nbar protocol-pack command in global configuration mode. To remove the loaded protocol pack, use the no form of this command.
Syntax Description
| protocol-pack |
Protocol pack file path and name. |
| force |
(Optional) Loads a protocol pack of a lower version than the default protocol pack version. |
Command Default
The default protocol pack is loaded.
Command Modes
Global configuration (config)
Command History
| Release |
Modification |
|---|---|
| Cisco IOS XE Release 3.3S |
This command was introduced. |
| 15.2(2)T |
This command was integrated into Cisco IOS Release 15.2(2)T. |
Usage Guidelines
The ip nbar protocol-pack command provides an easy way to load a protocol pack, which is a single compressed file that contains multiple Protocol Description Language (PDL) files and a manifest file. Before this command was introduced, PDLs had to be loaded separately. You can use this command to load a set of protocols, which helps NBAR to recognize additional protocols for classification on your network.
Use the force keyword in the following situations:
- To load a specific protocol pack of a lower version other than the default protocol pack version present in the Cisco IOS image.
- To retain the existing protocol pack version irrespective of upgrading to newer version or reverting to a protocol pack of lower version.
- To override the active protocol checks.
Examples
The following example shows how to load a protocol pack named defProtoPack from the harddisk:
Router# configure terminal
Router(config)# ip nbar protocol-pack harddisk:defProtoPack
The following example shows how to load a protocol pack of lower version using the force keyword:
Router# configure terminal
Router(config)# ip nbar protocol-pack harddisk:olddefProtoPack force
Related Commands
| Command |
Description |
|---|---|
| default ip nbar protocol-pack |
Loads the base version of the protocol pack and removes all other loaded protocol packs. |
| show ip nbar protocol-pack |
Displays protocol pack information. |
ip nbar resources
The ipnbarresourcescommand is replaced by the ipnbarresourcesprotocol and theipnbarresourcessystem commands. See the ipnbarresourcesprotocol and theipnbarresourcessystemcommands for more information.
ip nbar resources protocol
To set the expiration time for network-based application recognition (NBAR) flow-link tables on a protocol basis, use the ip nbar resources protocol command in global configuration mode. To set the expiration time to its default value, use the no form of this command.
Syntax Description
Command Default
The link age for all protocols is 120 seconds.
Command Modes
Global configuration (config)
Command History
| Release |
Modification |
|---|---|
| 12.4(6)T |
This command was introduced. |
| Cisco IOS XE Release 3.2S |
This command was implemented on the Cisco ASR 1000 Series Routers. |
Usage Guidelines
The value of the link-age argument must be greater than or equal to the system-link-age value that is set by using the ip nbar resources system command.
If you enter an invalid value for the link-age argument, the following error message is displayed:
%NBAR ERROR: protocol link age entered must be greater than or equal to the system link age, <system link age>
To display a list of supported protocols, enter the match protocol ? or the show ip nbar port-map command.
The ip nbar resources protocol command must include the protocol-name argument to set the link age of a specific protocol. If you do not include the protocol-name argument, the link age timer of all protocols is set to the specified link age value.
The no ip nbar resources protocol command must include the protocol-name argument to reset the link age of a specific protocol. If you do not include the protocol-name argument, the link age timer of all protocols is set to 120 seconds.
If you enter a protocol name that does not exist, the following error message is displayed:
%NBAR ERROR: <entered string> is not a valid protocol
In addition to resetting the link age in all state nodes associated with a specified protocol, the protocol name, along with its link age, is saved in NVRAM for potential device resets.
Examples
The following example shows how to set the link age for all protocols to 360 seconds:
Device# configure terminal
Device(config)# ip nbar resources protocol 360
The following example shows how to set the link age for kazaa2 protocol to 180 seconds:
Device# configure terminal
Device(config)# ip nbar resources protocol 180 kazaa2
Related Commands
| Command |
Description |
|---|---|
| ip nbar resources system |
Sets the expiration time and memory requirements for NBAR flow-link tables on a systemwide basis. |
ip nbar resources system
To set the expiration time and memory requirements for network-based application recognition (NBAR) flow-link tables on a systemwide basis, use theipnbarresourcessystemcommand in global configuration mode. To remove the active links, use the no form of this command.
Syntax Description
| system-link-age |
Time, in seconds, at which the links for a system are aged (expire). The range is from 10 to 86400. The default is 30. |
||
| initial-memory |
Size of memory, in kilobytes, allocated for the links at initialization. The range is from 1 to 30000. The default is 10 percent of the total amount of free memory at system initialization and varies from platform to platform. |
||
| exp-memory |
Size of memory, in kilobytes, that can be expanded if NBAR detects that more space is needed for the links. The range is from 0 to 112. The default is 112.
|
Command Default
The default system link age is 30 seconds upon NBAR activation.
Command Modes
Global configuration (config)
Command History
| Release |
Modification |
|---|---|
| 12.4(6)T |
This command was introduced. |
Usage Guidelines
Because the ipnbarresourcessystem command affects NBAR on a systemwide basis, you should not change the parameters arbitrarily. Doing so may cause NBAR to perform inefficiently or incorrectly. The default values are effective in most instances.
Examples
In the following example, the system link age is 30 seconds, the initial memory is 200 kilobytes, and the expanded memory is 112 kilobytes:
Router# configure terminal
Router(config)# ip nbar resources system 30 200 112
Related Commands
| Command |
Description |
|---|---|
| ip nbar resources protocol |
Sets the expiration time for NBAR flow-link tables on a protocol basis. |
ip options
To drop or ignore IP options packets that are sent to the router, use the ip optionscommand in global configuration mode. To disable this functionality and allow all IP options packets to be sent to the router, use the no form of this command.
Syntax Description
| drop |
Router drops all IP options packets that it receives. |
||
| ignore |
Router ignores all options and treats the packets as though they did not have any IP options. (The options are not removed from the packet--just ignored.)
|
Command Default
This command is not enabled.
Command Modes
Global configuration
Command History
| Release |
Modification |
|---|---|
| 12.0(23)S |
This command was introduced. |
| 12.3(4)T |
This command was integrated into Cisco IOS Release 12.3(4)T. |
| 12.2(25)S |
This command was integrated into Cisco IOS Release 12.2(25)S. |
| 12.2(27)SBC |
This command was integrated into Cisco IOS Release 12.2(27)SBC. |
| 12.3(19) |
This command was integrated into Cisco IOS Release 12.3(19). |
| 12.2(31)SB2 |
This command was integrated into Cisco IOS Release 12.2(31)SB2 for the PRE3. |
Usage Guidelines
The ip options command allows you to filter IP options packets, mitigating the effects of IP options on the router, and on downstream routers and hosts.
Drop and ignore modes are mutually exclusive; that is, if the drop mode is configured and you configure the ignore mode, the ignore mode overrides the drop mode.
Cisco 10720 Internet Router
The ip options ignore command is not supported. Only drop mode (the ip options drop command) is supported.
Cisco 10000 Series Router
This command is only available on the PRE3. The PRE2 does not support this command.
The ip options ignore command is not supported. The router supports only the ip options drop command.
Examples
The following example shows how to configure the router (and downstream routers) to drop all options packets that enter the network:
ip options drop
% Warning:RSVP and other protocols that use IP Options packets may not function in drop or ignore modes.
end
ip rsvp admission-control compression predict
To configure Resource Reservation Protocol (RSVP) admission control compression prediction, use the iprsvpadmission-controlcompressionpredictcommand in interface configuration mode. To disable compression prediction, use the no form of this command.
Syntax Description
| method |
(Optional) Type of compression used. |
| rtp udp |
Real-Time Transport Protocol (RTP) or User Data Protocol (UDP) compression schemes. |
| bytes-saved N |
(Optional) Predicted number of bytes saved per packet when RSVP predicts that compression will occur using the specified method. Values for N for RTP are 1 to 38; for UDP, 1 to 26. |
Command Default
This command is enabled by default. The default value of bytes saved for RTP is 36; for UDP, 20.
Command Modes
Interface configuration (config-if)
Command History
| Release |
Modification |
|---|---|
| 12.2(15)T |
This command was introduced. |
Usage Guidelines
Use the iprsvpadmission-controlcompressionpredictcommand to disable or enable the RSVP prediction of compression for a specified method or all methods if neither rtp norudpis selected. You can adjust the default compressibility parameter that RSVP uses to compute the compression factor for each flow.
If you use the iprsvpadmission-controlcompressionpredictcommand to change the compression method or the number of bytes saved per packet, these values affect only new flows, not existing ones.
There are two approaches to compression--conservative and aggressive. When you predict compression conservatively, you assume savings of fewer bytes per packet, but receive a higher likelihood of guaranteed quality of service (QoS). You are allowed more bandwidth per call, but each link accommodates fewer calls. When you predict compression aggressively, you assume savings of more bytes per packet, but receive a lower likelihood of guaranteed QoS. You are allowed less bandwidth per call, but each link accommodates more calls.
Examples
The following example shows how to set the compressibility parameter for flows using the RTP method to 30 bytes saved per packet:
Router(config-if)# ip rsvp admission-control compression predict method rtp bytes-saved 30
The following example shows how to set the compressibility parameter for flows using the UDP method to 20 bytes saved per packet:
Router(config-if)# ip rsvp admission-control compression predict method udp bytes-saved 20
The following example shows how to disable RTP header compression prediction:
Router(config-if)# no ip rsvp admission-control compression predict method rtp
The following shows how to disable UDP header compression prediction:
Router(config-if)# no ip rsvp admission-control compression predict method udp
Note |
Disabling the compressibility parameter affects only those flows using the specified method. |
Related Commands
| Command |
Description |
|---|---|
| show ip rtp header-compression |
Displays statistics about RTP header compression. |
ip rsvp aggregation ip
To enable Resource Reservation Protocol (RSVP) aggregation on a router, use the iprsvpaggregationip command in global configuration mode. To disable RSVP aggregation, use the no form of this command.
Syntax Description
This command has no arguments or keywords.
Command Default
RSVP aggregation is disabled.
Command Modes
Global configuration (config)
Command History
| Release |
Modification |
|---|---|
| 12.2(33)SRC |
This command was introduced. |
| Cisco IOS XE Release 2.6 |
This command was integrated into Cisco IOS XE Release 2.6. |
Usage Guidelines
When you enable aggregation on a router, the router can act as an aggregator, a deaggregator, or an interior router. To perform aggregator and deaggregator functions, the RSVP process must see messages with the RSVP-E2E-IGNORE protocol type (134) on a router; otherwise, the messages are forwarded as data by the router's data plane. Theiprsvpaggregationip command enables RSVP to identify messages with the RSVP-E2E-IGNORE protocol. You then configure additional commands to specify the aggregation and deaggregation behavior of end-to-end (E2E) reservations.
The iprsvpaggregationip command registers a router to receive RSVP-E2E-IGNORE messages. It is not necessary to issue this command on interior routers because they are only processing RSVP aggregate reservations. If you do so, you may decrease performance because the interior router will then unnecessarily process all the RSVP-E2E-IGNORE messages.
Note |
If you enable RSVP aggregation globally on an interior router, then you should configure all interfaces as interior. Otherwise, interfaces default to exterior and discard RSVP-E2E-IGNORE packets. |
Examples
The following example shows how to enable RSVP aggregation on a router:
Router(config)# ip rsvp aggregation ip
Related Commands
| Command |
Description |
|---|---|
| show ip rsvp aggregation ip |
Displays RSVP summary aggregation information. |
ip rsvp aggregation ip map
To configure Resource Reservation Protocol (RSVP) aggregation rules that tell a router how to map end-to-end (E2E) reservations onto aggregate reservations, use the iprsvpaggregationipmap command in global configuration mode. To disable RSVP aggregation mapping rules, use the no form of this command.
Syntax Description
| access-list |
Specifies an Access Control List (ACL). |
| acl-number |
Number of the ACL. Values are 1 to 199. |
| any |
Indicates the match criteria used if all reservations between an aggregator and a deaggregator are to be aggregated onto a single DSCP. |
| dscp value |
Specifies the differentiated services code point (DSCP). Values can be the following:
|
Command Default
No aggregation mapping rules are configured.
Command Modes
Global configuration (config)
Command History
| Release |
Modification |
|---|---|
| 12.2(33)SRC |
This command was introduced. |
| Cisco IOS XE Release 2.6 |
This command was integrated into Cisco IOS XE Release 2.6. |
Usage Guidelines
Use the iprsvpaggregationipmap command to configure a single global rule for mapping E2E reservations onto aggregates.
Before using the iprsvpaggregationipmap command, you should configure an ACL to define a group of RSVP endpoints whose reservations are to be aggregated onto a single DSCP. The ACL can be a standard or extended ACL and matches as follows:
Standard ACLs
- IP address matches the RSVP PATH message sender template or RSVP RESV message filter spec; this is the IP source address or the RSVP sender.
Extended ACLs
The ACLs used within the iprsvpaggregationipmap command match the RSVP message objects as follows for an extended ACL:
- Source IP address and port match the RSVP PATH message sender template or RSVP RESV message filter spec; this is the IP source or the RSVP sender.
- Destination IP address and port match the RSVP PATH/RESV message session object IP address; this is the IP destination address or the RSVP receiver.
- Protocol matches the RSVP PATH/RESV message session object protocol; if protocol = IP, then it matches the source or destination address as above.
Note |
In classic (unaggregated) RSVP, a session is identified in the reservation message session object by the destination IP address and protocol information. In RSVP aggregation, a session is identified by the destination IP address and DSCP within the session object of the aggregate RSVP message. E2E reservations are mapped onto a particular aggregate RSVP session identified by the E2E reservation session object alone or a combination of the session object and sender template or filter spec. |
Examples
In the following example, access list 1 is defined for all RSVP messages whose RSVP PATH message session object destination address is in the 10.1.0.0 subnet so that the deaggregator maps those reservations onto an aggregate reservation for the DSCP associated with the AF41 per hop behavior:
Router(config)# access-list 1 permit host 10.1.0.0 0.0.255.255
Router(config)# ip rsvp aggregation ip map access-list 1 dscp af41
In the following example, all reservations between an aggregator and a deaggregator are to be aggregated onto a single DSCP:
Router(config)# ip rsvp aggregation ip map any dscp af41
Related Commands
| Command |
Description |
|---|---|
| ip rsvp aggregation ip |
Enables RSVP aggregation on a router. |
| show ip rsvp aggregation ip |
Displays RSVP summary aggregation information. |
ip rsvp aggregation ip reservation dscp
To configure Resource Reservation Protocol (RSVP) aggregate reservation attributes (also called token bucket parameters) on a per-differentiated services code point (DSCP) basis, use the iprsvpaggregationipreservationdscpcommand in global configuration mode. To remove aggregation reservation attributes, use the no form of this command.
Syntax Description
| value |
The DSCP value for aggregate reservations. Values can one of the following:
|
||
| aggregator agg-ip-address |
(Optional) Specifies the IP address of the aggregator for which the data-rate,burst-size, and peak-rate traffic parameters apply.
|
||
| traffic-params |
Specifies the traffic parameter attributes. |
||
| static |
Specifies the static traffic parameter attributes. |
||
| rate data-rate |
Specifies the average data rate, in kilobits per second. Range is from 1 to 10000000. |
||
| burst burst-size |
(Optional) Specifies the maximum data burst size, in kilobytes. Range is from 1 to 8192.
|
||
| peak peak-rate |
(Optional) Specifies the peak data rate, in kilobits per second. Range is from 1 to 10000000.
|
Command Default
No aggregation reservation attributes (token bucket parameters) are configured.
Command Modes
Global configuration (config)
Command History
| Release |
Modification |
|---|---|
| 12.2(33)SRC |
This command was introduced. |
| Cisco IOS XE Release 2.6 |
This command was integrated into Cisco IOS XE Release 2.6. |
Usage Guidelines
You can use the iprsvpaggregationipreservationdscpcommand to configure the token bucket parameters statically.
The data-rate, burst-size, and peak-ratearguments are required on deggregators to help construct the flowspec object for aggregate RESV messages. Existing RSVP procedures specify that the size of a reservation established for a flow is set to the minimum of the PATH sender_tspec and the RESV flowspec. So if the aggregate PATH sender_tspec data-rate, burst-size, or peak-ratearguments are greater than the data-rate, burst-size, or peak-ratearguments configured on the deaggregator, the aggregate RESV flowspec object will contain the minimum of data-rate, burst-size, and peak-rate from the PATH message and the configured values.
When the aggregate reservation size is changed to a value less strict than the total bandwidth of the end-to-end (E2E) reservations mapped to the aggregate, preemption may occur.
When the aggregate bandwidth is lowered, if preemption is required and has not been enabled by issuing the iprsvppolicypreempt command, then the change is rejected and the following messages may appear:
RSVP:AGG: Command not accepted.
RSVP-AGG: This change requires some E2E reservations to be removed and
RSVP:AGG: preemption is not enabled. Issue 'ip rsvp policy preempt'
RSVP:AGG: in order to make this change.
Examples
The following example shows how to configure an aggregate RESV message for an aggregate reservation established with aggregator 10.10.10.10, for DSCP = AF11, including a flowspec that requests an average rate and peak rate of 10 kbps and a burst size of 8 KB:
Router(config)# ip rsvp aggregation ip reservation dscp af11 aggregator 10.10.10.10 traffic-params static rate 10 burst 8 peak 10
Related Commands
| Command |
Description |
|---|---|
| ip rsvp aggregation ip |
Enables RSVP aggregation on a router. |
| ip rsvp policy preempt |
Redistributes bandwidth from lower-priority reservations to high-priority reservations. |
| show ip rsvp aggregation ip |
Displays RSVP summary aggregation information. |
ip rsvp aggregation ip role interior
To configure Resource Reservation Protocol (RSVP) aggregation on aggregator and deaggregator interior routers facing an aggregation region, use the iprsvpaggregationiproleinterior command in interface configuration mode. To disable RSVP aggregation on aggregator and deaggregator routers, use the no form of this command.
Syntax Description
This command has no arguments or keywords.
Command Default
RSVP aggregation is not configured on aggregator and deaggregator interior routers.
Command Modes
Interface configuration (config-if)
Command History
| Release |
Modification |
|---|---|
| 12.2(33)SRC |
This command was introduced. |
| Cisco IOS XE Release 2.6 |
This command was integrated into Cisco IOS XE Release 2.6. |
Usage Guidelines
This command does not have any effect on a router until end-to-end (E2E) messages arrive on an interface.
If a router is an interior node for all E2E flows, you do not have to configure any aggregation commands. RSVP will not get notifications on any of the RSVP-E2E-IGNORE messages that are forwarded as IP datagrams; however, because the router is loaded with an image that supports aggregation, the router will process aggregate signaling messages correctly.
If you enable aggregation on an interior node, all its interfaces must be configured as interior. Otherwise, all the interfaces have the exterior role, and any E2E Path (E2E-IGNORE) messages arriving at the router are discarded.
In summary, there are two options for an interior router:
- No RSVP aggregation configuration commands are entered.
- Aggregation is enabled and all interfaces are configured as interior.
If the interior role of an interface is unconfigured, all aggregate and E2E reservations installed on that interface are brought down.
Additional Required Configuration Commands
If you enable aggregation on any RSVP interface on an aggregator or deaggregator as well as interfaces of interior routers, you must also configure the following commands:
- ip rsvp resource-provider none
- ip rsvp data-packet classification none
The reason for configuring these commands is because Cisco IOS Release 12.2(33)SRC and Cisco IOS XE Release 2.6 support control plane aggregation only. The RSVP data packet classifier does not support aggregation. Data plane aggregation must be achieved by using the RSVP Scalability Enhancements feature.
Examples
The following example shows how to configure the Ethernet 0/0 interface on an aggregator or deaggregator interior router:
Router(config)# interface Ethernet0/0
Router(config-if)# ip rsvp aggregation ip role interior
Related Commands
| Command |
Description |
|---|---|
| ip rsvp aggregation ip |
Enables RSVP aggregation on a router. |
| ip rsvp data-packet classification none |
Disables RSVP data packet classification. |
| ip rsvp resource-provider none |
Configures a resource provider for an aggregate flow. |
| show ip rsvp aggregation ip |
Displays RSVP summary aggregation information. |
ip rsvp atm-peak-rate-limit
To set a limit on the peak cell rate (PCR) of reservations for all newly created Resource Reservation Protocol (RSVP) switched virtual circuits (SVCs) established on the current interface or any of its subinterfaces, use the iprsvpatm-peak-rate-limit command in interface configuration mode. To remove the current peak rate limit, in which case the reservation peak rate is limited by the line rate, use the no form of this command.
Syntax Description
| limit |
The peak rate limit of the reservation specified, in KB. The minimum value allowed is 1 KB; the maximum value allowed is 2 GB. |
Command Default
The peak rate of a reservation defaults to the line rate.
Command Modes
Interface configuration (config-if)
Command History
| Release |
Modification |
|---|---|
| 12.0(3)T |
This command was introduced. |
| 12.2(33)SRA |
This command was integrated into Cisco IOS Release 12.2(33)SRA. |
| 12.2SX |
This command is supported in the Cisco IOS Release 12.2SX train. Support in a specific 12.2SX release of this train depends on your feature set, platform, and platform hardware. |
Usage Guidelines
Each RSVP reservation corresponds to an ATM SVC with a certain peak cell rate (PCR), sustainable cell rate (SCR), and maximum burst size. The PCR, also referred to as the peak rate, can be configured by the user or allowed to default to the line rate.
RSVP controlled-load reservations do not define any peak rate for the data. By convention, the allowable peak rate in such reservations is taken to be infinity, which is usually represented by a very large number. Under these circumstances, when a controlled-load reservation is converted to an ATM SVC, the PCR for the SVC becomes correspondingly large and may be out of range for the switch. You can use the iprsvpatm-peak-rate-limit command to limit the peak rate.
The following con ditions determine the peak rate limit on the RSVP SVC:
- The peak rate defaults to the line rate.
- If the peak rate is greater than the configured peak rate limiter, the peak rate is lowered to the peak rate limiter.
- The peak rate cannot be less than the reservation bandwidth. If this is the case, the peak rate is raised to the reservation bandwidth.
Note |
Bandwidth conversions applied to the ATM space from the RSVP space are also applied to the peak rate. |
The peak rate limit is local to the router; it does not affect the normal messaging of RSVP. Only the SVC setup is affected. Large peak rates are sent to the next host without modification.
For RSVP SVCs established on subinterfaces, the peak rate limit applied to the subinterface takes effect on all SVCs created on that subinterface. If a peak rate limit is applied to the main interface, the rate limit has no effect on SVCs created on a subinterface of the main interface even if the limit value on the main interface is lower than the limit applied to the subinterface.
For a given interface or subinterface, a peak rate limit applied to that interface affects only new SVCs created on the interface, not existing SVCs.
Note |
This command is available only on interfaces that support the iprsvpsvc-required command. |
Use the showiprsvpatm-peak-rate-limit command to determine the peak rate limit set for an interface or subinterface, if one is configured.
Examples
The following configuration sample sets the peak rate limit for ATM interface 2/0/0.1 to 100 KB:
interface atm2/0/0.1
 ip rsvp atm-peak-rate-limit 100
Related Commands
| Command |
Description |
|---|---|
| ip rsvp svc-required |
Enables creation of an SVC to service any new RSVP reservation made on the interface or subinterface. |
| show ip rsvp interface |
Displays RSVP-related interface information. |
ip rsvp authentication
To activate Resource Reservation Protocol (RSVP) cryptographic authentication, use the iprsvpauthenticationcommand in interface configuration mode. To deactivate authentication, use the no form of this command.
Syntax Description
This command has no arguments or keywords.
Command Default
RSVP cryptographic authentication is deactivated.
Command Modes
Interface configuration (config-if)
Command History
| Release |
Modification |
|---|---|
| 12.2(15)T |
This command was introduced. |
| 12.2(33)SRA |
This command was integrated into Cisco IOS Release 12.2(33)SRA. |
| 12.2(33)SXH |
This command was integrated into Cisco IOS Release 12.2(33)SXH. |
Usage Guidelines
Use the iprsvpauthentication command to deactivate and then reactivate RSVP authentication without reentering the other RSVP authentication configuration commands. You should not enable authentication unless you have previously configured a key. If you issue this command before the iprsvpauthenticationkey command, you get a warning message indicating that RSVP discards all messages until you specify a key. The noiprsvpauthenticationcommand disables RSVP cryptographic authentication. However, the command does not automatically remove any other authentication parameters that you have configured. You must issue a specific noiprsvpauthenticationcommand; for example, noiprsvpauthenticationkey,noiprsvpauthenticationtype, or noiprsvpauthenticationwindow-size, if you want to remove them from the configuration.
Theiprsvpauthenticationcommand is similar to theiprsvpneighbor command. However, the iprsvpauthentication command provides better authentication and performs system logging.
Examples
The following command activates authentication on an interface:
Router(config-if)# ip rsvp authentication
The following command deactivates authentication on an interface:
Router(config-if)# no ip rsvp authentication
Related Commands
| Command |
Description |
|---|---|
| ip rsvp authentication key |
Specifies the key (string) for the RSVP authentication algorithm. |
| ip rsvp authentication type |
Specifies the algorithm used to generate cryptographic signatures in RSVP messages. |
| ip rsvp authentication window-size |
Specifies the maximum number of RSVP authenticated messages that can be received out of order. |
| ip rsvp neighbor |
Enables neighbors to request a reservation. |
ip rsvp authentication challenge
To make Resource Reservation Protocol (RSVP) perform a challenge-response handshake with any new RSVP neighbors on a network, use the iprsvpauthenticationchallengecommand in interface configuration mode. To disable the challenge-response handshake, use the no form of this command.
Syntax Description
This command has no arguments or keywords.
Command Default
The challenge-response handshake initiated by this command is disabled.
Command Modes
Interface configuration (config-if)
Command History
| Release |
Modification |
|---|---|
| 12.2(15)T |
This command was introduced. |
| 12.2(33)SRA |
This command was integrated into Cisco IOS Release 12.2(33)SRA. |
| 12.2(33)SXH |
This command was integrated into Cisco IOS Release 12.2(33)SXH. |
Usage Guidelines
The iprsvpauthenticationchallenge command requires RSVP to perform a challenge-response handshake with any new RSVP neighbors that are discovered on a network. Such a handshake allows the router to thwart RSVP message replay attacks while booting, especially if there is a long period of inactivity from trusted RSVP neighbors following the reboot. If messages from trusted RSVP neighbors arrive very quickly after the router reboots, then challenges may not be required because the router will have reestablished its security associations with the trusted nodes before the untrusted nodes can attempt replay attacks.
If you enable RSVP authentication globally on an interface over which a Multiprotocol Label Switching (MPLS) Traffic Engineering (TE) label switched path (LSP) travels and the router on which authentication is enabled experiences a stateful switchover (SSO), the following occurs:
- If challenges are disabled (you did not specify the iprsvpauthenticationchallenge command), the LSP recovers properly.
- If challenges are enabled (you specified the iprsvpauthenticationchallenge command), more RSVP signaling messages are required and the LSP takes longer to recover or the forwarding state may time out and the LSP does not recover. If a timeout occurs, data packet forwarding is interrupted while the headend router signals a new LSP.
If you enable RSVP authentication challenges, you should consider enabling RSVP refresh reduction by using the iprsvpsignallingrefreshreduction command. While a challenge handshake is in progress, the receiving router that is initiating the handshake discards all RSVP messages from the node that is being challenged until the handshake-initiating router receives a valid challenge response.
Note |
If a neighbor does not reply to the first challenge message after 1 second, the Cisco IOS software sends another challenge message and waits 2 seconds. If no response is received to the second challenge, the Cisco IOS software sends another and waits 4 seconds. If no response to the third challenge is received, the Cisco IOS software sends a fourth challenge and waits 8 seconds. If there is no response to the fourth challenge, the Cisco IOS software stops the current challenge to that neighbor, logs a system error message, and does not create a security association for that neighbor. This kind of exponential backoff is used to recover from challenges dropped by the network or busy neighbors. |
Activating refresh reduction enables the challenged node to resend dropped messages more quickly once the handshake has completed. This causes RSVP to reestablish reservation state faster when the router reboots.
Enable authentication challenges wherever possible to reduce the router's vulnerability to replay attacks.
Examples
The following example shows how to enable RSVP to perform a challenge-response handshake:
Router(config-if)# ip rsvp authentication challenge
Related Commands
| Command |
Description |
|---|---|
| ip rsvp signalling refresh reduction |
Enables RSVP refresh reduction. |
ip rsvp authentication key
To specify the key (string) for the Resource Reservation Protocol (RSVP) authentication algorithm, use the iprsvpauthenticationkeycommand in interface configuration mode. To disable the key, use the no form of this command.
Syntax Description
| pass-phrase |
Phrase that ranges from 8 to 40 characters. See "Usage Guidelines" for additional information. |
Command Default
No key is specified.
Command Modes
Interface configuration (config-if)
Command History
| Release |
Modification |
|---|---|
| 12.2(15)T |
This command was introduced. |
| 12.2(33)SRA |
This command was integrated into Cisco IOS Release 12.2(33)SRA. |
| 12.2(33)SXH |
This command was integrated into Cisco IOS Release 12.2(33)SXH. |
Usage Guidelines
Use the iprsvpauthenticationkey command to select the key for the authentication algorithm. This key is a passphrase of 8 to 40 characters. It can include spaces; quotes are not required if spaces are used. The key can consist of more than one word. We recommend that you make the passphrase as long as possible. This key must be the same for all RSVP neighbors on this interface. As with all passwords, you should choose them carefully so that attackers cannot easily guess them.
Here are some guidelines:
- Use a mixture of upper- and lowercase letters, digits, and punctuation.
- If using just a single word, do not use a word contained in any dictionary of any language, spelling lists, or other lists of words.
- Use something easily remembered so you do not have to write it down.
- Do not let it appear in clear text in any file or script or on a piece of paper attached to a terminal.
By default, RSVP authentication keys are stored in clear text in the router configuration file, but they can optionally be stored as encrypted text in the configuration file. To enable key encryption, use the global configuration keyconfig-key1stringcommand. After you enter this command, the passphrase parameter of each iprsvpauthenticationkey command is encrypted with the Data Encryption Standard (DES) algorithm when you save the configuration file. If you later issue a nokeyconfig-key 1 stringcommand, the RSVP authentication key is stored in clear text again when you save the configuration.
The stringargumentis not stored in the configuration file; it is stored only in the router's private NVRAM and will not appear in the output of a showrunning-configor showconfig command. Therefore, if you copy the configuration file to another router, any encrypted RSVP keys in that file will not be successfully decrypted by RSVP when the router boots and RSVP authentication will not operate correctly. To recover from this, follow these steps on the new router:
- For each RSVP interface with an authentication key, issue a noiprsvpauthenticationkeycommand to clear the old key.
- For that same set of RSVP interfaces, issue an iprsvpauthenticationkey command to reconfigure the correct clear text keys.
- Issue a global keyconfig-key 1 stringcommand to reencrypt the RSVP keys for the new router.
- Save the configuration.
Examples
The following command shows how to set the passphrase to 11223344 in clear text:
Router(config-if)# ip rsvp authentication key 11223344
The following command shows how to encrypt the authentication key:
Router# configure terminal
Router(config)# key config-key 1 11223344
Router(config)# end
Related Commands
| Command |
Description |
|---|---|
| key config-key |
Defines a private DEF key for the router. |
ip rsvp authentication key-chain
To specify a list of keys for the Resource Reservation Protocol (RSVP) neighbors, use the iprsvpauthenticationkey-chaincommand in global configuration mode. To disable the key chain, use the no form of this command. To set the key chain to its default, use the noform of this command.
Syntax Description
| string |
Name of key chain. The range is from 1 to 2147483647 keys. |
Command Default
No key chain is specified.
Command Modes
Global configuration (config)
Command History
| Release |
Modification |
|---|---|
| 12.0(29)S |
This command was introduced. |
| 12.2(33)SRA |
This command was integrated into Cisco IOS Release 12.2(33)SRA. |
| 12.2(33)SXH |
This command was integrated into Cisco IOS Release 12.2(33)SXH. |
| 15.0(1)M |
This command was integrated into a release earlier than Cisco IOS Release 15.0(1)M. |
Usage Guidelines
Use the iprsvpauthenticationkey-chain command to select the key chain.
Note |
You cannot use theiprsvpauthenticationkey and the iprsvpauthenticationkey-chain commands on the same router interface. The commands supersede each other; however, no error message is generated. |
Examples
The following example shows how to set the global default key chain to RSVPkey:
Router(config)# ip rsvp authentication key-chain RSVPkey
Related Commands
| Command |
Description |
|---|---|
| ip rsvp authentication key |
Specifies the interface key (string) for the RSVP authentication algorithm. |
| show key chain |
Displays authentication key information. |
ip rsvp authentication lifetime
To control how long Resource Reservation Protocol (RSVP) maintains security associations with other trusted RSVP neighbors, use the iprsvpauthenticationlifetimecommand in interface configuration mode. To disable the lifetime setting, use the no form of this command.
Syntax Description
| hh : mm : ss |
Hours: minutes: seconds that RSVP maintains security associations with other trusted RSVP neighbors. The range is 1 second to 24 hours. The default is 30 minutes. The colons are required in the syntax. |
Command Default
If you do not specify a security association lifetime setting, 30 minutes is used.
Command Modes
Interface configuration (config-if)
Command History
| Release |
Modification |
|---|---|
| 12.2(15)T |
This command was introduced. |
| 12.2(33)SRA |
This command was integrated into Cisco IOS Release 12.2(33)SRA. |
| 12.2(33)SXH |
This command was integrated into Cisco IOS Release 12.2(33)SXH. |
Usage Guidelines
Use theiprsvpauthenticationlifetime command to indicate when to end security associations with RSVP trusted neighbors. If an association's lifetime expires, but at least one valid, RSVP authenticated message was received in that time period, RSVP resets the security association's lifetime to this configured value. When a neighbor stops sending RSVP signaling messages (that is, the last reservation has been torn down), the memory used for the security association is freed as well as when the association's lifetime period ends. The association can be re-created if that RSVP neighbor resumes its signaling. Setting the lifetime to shorter periods allows memory to be recovered faster when the router is handling a lot of short-lived reservations. Setting the lifetime to longer periods reduces the workload on the router when establishing new authenticated reservations.
Use the cleariprsvpauthentication command to free security associations before their lifetimes expire.
Examples
The following command sets the lifetime period for 30 minutes and 5 seconds:
Router(config-if)# ip rsvp authentication lifetime 00:30:05
Related Commands
| Command |
Description |
|---|---|
| clear ip rsvp authentication |
Eliminates RSVP security associations before their lifetimes expire. |
ip rsvp authentication neighbor
To activate Resource Reservation Protocol (RSVP) cryptographic authentication for a neighbor, use the iprsvpauthenticationneighborcommand in global configuration mode. To deactivate authentication for a neighbor, use the no form of this command.
Syntax Description
| access-list acl-name-or-number |
Specifies a standard numbered or named IP access list that describes the set of neighbor IP addresses that share this key. |
| address address |
Specifies a single IP address for a specific neighbor; usually one of the neighbor's physical or logical (loopback) interfaces. |
| challenge |
(Optional) Requires RSVP to perform a challenge-response handshake with an RSVP neighbor for which RSVP does not have an existing security association in memory. |
| key-chain name |
(Optional) Specifies the name of a key chain that contains the set of keys to be used to communicate with the neighbor. |
| type |
(Optional) Specifies the algorithm to generate cryptographic signatures in RSVP messages. |
| md5 |
(Optional) Specifies the RSA Message Digest 5 (md5) algorithm. |
| sha-1 |
(Optional) Specifies the National Institute of Standards and Technologies (NIST) Secure Hash Algorithm-1; it is newer and more secure than md5. |
| window-size number-of-messages |
(Optional) Specifies the maximum number of authenticated messages that can be received out of order. The range is from 1 to 64. The default value is 1. |
Command Default
Neighbor cryptographic authentication is disabled.
Command Modes
Global configuration (config)
Command History
| Release |
Modification |
|---|---|
| 12.0(29)S |
This command was introduced. |
| 12.2(33)SRA |
This command was integrated into Cisco IOS Release 12.2(33)SRA. |
| 12.2(33)SXH |
This command was integrated into Cisco IOS Release 12.2(33)SXH. |
| 15.0(1)M |
This command was integrated into a release earlier than Cisco IOS Release 15.0(1)M. |
Usage Guidelines
If you omit the optional keywords, the iprsvpauthenticationneighbor command enables RSVP cryptographic authentication for a neighbor. Using the optional keywords inherits the global defaults.
In order to enable per-neighbor authentication, you must issue the iprsvpauthenticationneighborcommand(or the noiprsvpauthenticationneighbor command to disable authentication ). If you issue the iprsvpauthentication command without neighbor, then this command enables authentication for all neighbors and interfaces, regardless of whether there are any per-neighbor or per-interface keys defined. If you issue the iprsvpauthenticationneighborcommand , then authentication is enabled only for that neighbor.
Access Control Lists
A single ACL can describe all the physical and logical interfaces that one neighbor can use to receive RSVP messages from a router; this can be useful when multiple routes exist between two neighbors. One ACL could also specify a number of different neighbors who, along with your router, will share the same key(s); however, this is generally not considered to be good network security practice.
If numbered, the ACL must be in the 1 to 99 range or the 1300 to 1999 range, giving a total of 798 numbered ACLs that can be used to configure neighbor keys (assuming some of them are not being used for other purposes). There is no enforced limit on the number of standard named IP ACLs. The IP addresses used in the ACL should contain at least the neighbor's physical interface addresses; router ID addresses can be added if necessary, especially when using Multi-Protocol Label Switching (MPLS) Traffic Engineering (TE).
The existingipaccess-liststandard command must be used for creating named or numbered standard IP ACLs for RSVP neighbors because standard ACLs deal with just source or destination addresses while extended ACLs deal with five tuples and are more complex to configure. The RSVP CLI returns an error message if any type of ACL other than standard is specified:
Router(config)# ip rsvp authentication neighbor access-list 10 key-chain wednesday
% Invalid access list name.
RSVP error: unable to find/create ACL
Named standard IP ACLs are also recommended because you can include the neighbor router's hostname as part of the ACL name, thereby making it easy to identify the per-neighbor ACLs in your router configuration.
The RSVP CLI displays an error message if a valid named or numbered ACL is specified, but a nonexistent or invalid key chain has not been associated with it, since the lack of a key chain could cause RSVP messages to or from that neighbor to be dropped:
Router(config)# ip rsvp authentication neighbor access-list myneighbor key-chain xyz
RSVP error: Invalid argument(s)
Key Chains
In the key-chain parameter, the keys are used in order of ascending expiration deadlines. The only restriction on the name is that it cannot contain spaces. The key-chain parameter is optional; that is, you could omit it if you were trying to change other optional authentication parameters for the RSVP neighbor. However, when searching for a key, RSVP ignores any iprsvpauthenticationneighboraccess-listcommand that does not include a key-chain parameter that refers to a valid key chain with at least one unexpired key.
Error and Warning Conditions
The RSVP CLI returns an error if any of the key IDs in the chain are duplicates of key IDs in any other chains already assigned to RSVP; for example,
Router(config)# ip rsvp authentication neighbor access-list myneighbor key-chain abc
RSVP error: key chains abc and xyz contain duplicate key ID 1
RSVP error: Invalid argument(s)
The RSVP CLI returns an error if the specified key chain does not exist or does not contain at least one unexpired key.
If a key chain is properly defined and RSVP later tries to send a message to that neighbor, but cannot find a valid, unexpired per-neighbor or per-interface key, RSVP generates the RSVP_AUTH_NO_KEYS_LEFT system message indicating that a key could not be obtained for that neighbor.
If the key chain contains keys with finite expiration times, RSVP generates the RSVP_AUTH_ONE_KEY_EXPIRED message to indicate when each key has expired.
If RSVP receives a message from a neighbor with the wrong digest type, it generates the RSVP_MSG_AUTH_TYPE_MISMATCH system message indicating that there is a digest type mismatch with that neighbor.
If RSVP receives a message that is a duplicate of a message already in the window or is outside the window, RSVP logs the BAD_RSVP_MSG_RCVD_AUTH_DUP or the BAD_RSVP_MSG_RCVD_AUTH_WIN error message indicating that the message sequence number is invalid.
If a challenge of a neighbor fails or times out, RSVP generates the BAD_RSVP_MSG_RCVD_AUTH_COOKIE system message or the RSVP_MSG_AUTH_CHALLENGE_TIMEOUT message, indicating that the specified neighbor failed to respond successfully to a challenge.
Examples
The following example shows how to create an access list and a key chain for neighbors V, Y, and Z enable authentication globally using inheritance for all other authentication parameters:
Router# configure terminal
Router(config)# ip access-list standard neighbor_V
Router(config-std-nacl)# permit 10.0.0.2
Router(config-std-nacl)#
permit 10.1.16.1
Router(config-std-nacl)# exit
Router(config)# ip access-list standard neighbor_Y
Router(config-std-nacl)# permit 10.0.1.2
Router(config-std-nacl)# permit 10.16.0.1
Router(config-std-nacl)# exit
Router(config)# ip access-list standard neighbor_Z
Router(config-std-nacl)# permit 10.16.0.2
Router(config-std-nacl)# permit 10.1.0.2
Router(config-std-nacl)# permit 10.0.1.2
Router(config-std-nacl)#
exit
Router(config)# ip rsvp authentication neighbor access-list neighbor_V key-chain neighbor_V
Router(config)# ip rsvp authentication neighbor access-list neighbor_Y key-chain neighbor_Y
Router(config)# ip rsvp authentication neighbor access-list neighbor_Z key-chain neighbor_Z
Router(config)# ip rsvp authentication
Router(config)# end
The following example shows how to create an access list and a key chain for neighbors V, Y, and Z and and enable the authentication explicitly for each neighbor:
Router(config)# ip rsvp authentication neighbor access-list neighbor_V key-chain neighbor_V
Router(config)# ip rsvp authentication neighbor access-list neighbor_V
Router(config)# ip rsvp authentication neighbor access-list neighbor_Y key-chain neighbor_Y
Router(config)# ip rsvp authentication neighbor access-list neighbor_Y
Router(config)# ip rsvp authentication neighbor access-list neighbor_Z key-chain neighbor_Z
Router(config)# ip rsvp authentication neighbor access-list neighbor_Z
Router(config)#
end
Related Commands
| Command |
Description |
|---|---|
| ip rsvp authentication |
Activates RSVP cryptographic authentication. |
ip rsvp authentication type
To specify the type of algorithm used to generate cryptographic signatures in Resource Reservation Protocol (RSVP) messages, use the iprsvpauthenticationtypecommand in interface configuration or global configuration mode. To specify that no type of algorithm is used, use the no form of this command. To remove the type from your configuration, use the default form of this command.
Note |
Before you use thenoiprsvpauthenticationtype command, see the "Usage Guidelines" section for more information. |
Syntax for T Releases
Syntax for 12.0S and 12.2S Releases
Syntax Description
| md5 |
RSA Message Digest 5 algorithm. |
| sha-1 |
National Institute of Standards and Technologies (NIST) Secure Hash Algorithm-1; it is newer and more secure than MD5. |
Command Default
If no algorithm is specifed, md5 is used.
Command Modes
Interface configuration (config-if)
Global configuration (config)
Command History
| Release |
Modification |
|---|---|
| 12.2(15)T |
This command was introduced. |
| 12.0(29)S |
This command was introduced in global configuration mode for all neighbors. A default form of the command was added. |
| 12.2(33)SRA |
This command was integrated into Cisco IOS Release 12.2(33)SRA. |
| 12.2(33)SXH |
This command was integrated into Cisco IOS Release 12.2(33)SXH. |
Usage Guidelines
Use the iprsvpauthenticationtype command to specify the algorithm to generate cryptographic signatures in RSVP messages. If you do not specify an algorithm, md5 is used.
If you use the iprsvpauthenticationtype command rather than the iprsvpauthenticationneighbortypecommand, the global default for type changes.
The noiprsvpauthenticationtypecommandisnotsupportedinCiscoIOSReleases12.0Sand12.2Sbecauseeverysecurityassociationmusthaveadigesttype,andyoucannotdisableit.Usethedefaultiprsvpauthenticationtypecommandtoremovetheauthenticationtypefromaconfigurationandforcethetypetoitsdefault.
Although the noiprsvpauthenticationtype command is supported in Cisco IOS T releases, the defaultiprsvpauthenticationtype command is recommended toremovetheauthenticationtypefromaconfigurationandforcethetypetoitsdefault.
Examples
T Releases Example
The following example shows how to set the type to sha-1 for interfaceauthentication:
Router(config-if)# ip rsvp authentication type sha-1
12.0S and 12.2S Releases Examples
The following examples show how to set the type to sha-1 for neighborauthentication:
Router(config)# ip rsvp authentication neighbor address 10.1.1.1 type sha-1
or
Router(config)# ip rsvp authentication neighbor access-list 1 type sha-1
The following example shows how to set the global default type to sha-1forauthentication:
Router(config)# ip rsvp authentication type sha-1
Default Command Example
The following example shows how to remove the type from your configuration and forces the type to its default:
Router(config)# default ip rsvp authentication type
Related Commands
| Command |
Description |
|---|---|
| ip rsvp authentication key |
Specifies the key (string) for the RSVP authentication algorithm. |
| ip rsvp authentication neighbor type |
Sets the type for a specific neighbor. |
ip rsvp authentication window-size
To specify the maximum number of Resource Reservation Protocol (RSVP) authenticated messages that can be received out of order, use the iprsvpauthenticationwindow-sizecommand in interface configuration mode. To disable the window size (or to use the default value of 1), use the no form of this command.
Syntax Description
| number-of-messages |
(Optional) Maximum number of authenticated messages that can be received out of order. The range is 1 to 64; the default value is 1. |
Command Default
If no window size is specified, a value of 1 is used.
Command Modes
Interface configuration (config-if)
Command History
| Release |
Modification |
|---|---|
| 12.2(15)T |
This command was introduced. |
| 12.2(33)SRA |
This command was integrated into Cisco IOS Release 12.2(33)SRA. |
| 12.2(33)SXH |
This command was integrated into Cisco IOS Release 12.2(33)SXH. |
Usage Guidelines
Use the iprsvpauthenticationwindow-sizecommand to specify the maximum number of RSVP authenticated messages that can be received out of order. All RSVP authenticated messages include a sequence number that is used to prevent replays of RSVP messages.
With a default window size of one message, RSVP rejects any duplicate authenticated messages because they are assumed to be replay attacks. However, sometimes bursts of RSVP messages become reordered between RSVP neighbors. If this occurs on a regular basis, and you can verify that the node sending the burst of messages is trusted, you can use the iprsvpauthenticationwindow-size command option to allow for the burst size such that RSVP will not discard such reordered bursts. RSVP will still check for duplicate messages within these bursts.
Examples
The following example shows how to set the window size to 2:
Router(config-if)# ip rsvp authentication window-size 2
Related Commands
| Command |
Description |
|---|---|
| ip rsvp authentication |
Activates RSVP cryptographic authentication. |
ip rsvp bandwidth
To enable Resource Reservation Protocol (RSVP) for IP on an interface, use the ip rsvp bandwidth command in interface configuration mode. To disable RSVP completely, use the no form of this command.
Syntax for Cisco IOS Release 15.1(2)T and Later Releases
Syntax for Cisco IOS Releases 12.0S and 12.2S, Cisco IOS XE Release 2.6, and Later Releases
Syntax Description
| interface-bandwidth |
(Optional) Maximum amount of bandwidth, in kbps, that can be allocated by RSVP flows. The range is from 1 to 10000000. |
||
| percent percent-bandwidth |
(Optional) Specifies a percentage of interface bandwidth. The range is from 1 to 1000. |
||
| single-flow-bandwidth |
(Optional) Maximum amount of bandwidth, in kbps, that may be allocated to a single flow. The range is from 1 to 10000000.
|
||
| sub-pool bandwidth |
(Optional) Specifies the amount of bandwidth, in kbps, on the interface that is to be reserved to a portion of the total. The range is from 1 to the value of the smaller of the interface-bandwidth and rdm bandwidth arguments. This keyword and argument pair is used in the traditional (pre-IETF)-Standard) implementation of Diffserv-aware traffic engineering (DS-TE). |
||
| ingress |
(Optional) Configures the RSVP ingress reservable bandwidth. |
||
| ingress-bandwidth |
(Optional) Ingress reservable bandwidth, in kbps. The range is from 1 to 10000000. |
||
| maximum-ingress-bandwidth |
(Optional) Maximum amount of ingress bandwidth, in kbps, that can be allocated to a single flow. The range is from 1 to 10000000; however, the amount you can configure depends on how much bandwidth remains in the pool. |
||
| rdm |
(Optional) Specifies the Russian Doll Model (RDM) for DS-TE. |
||
| bc0 interface-bandwidth |
(Optional) Specifies the amount of bandwidth, in kbps, on the interface to be reserved to the total (formerly called "global pool"). The range is from 1 to the value of the max-reservable-bw interface-bandwidth keyword and argument pair. |
||
| bc1 bandwidth |
(Optional) Specifies the same bandwidth portion as bc0 interface-bandwidth; namely, the amount of bandwidth, in kbps, on the interface that is to be reserved to a portion of the total. |
||
| mam |
(Optional) Specifies the Maximum Allocation Model (MAM) for DS-TE. |
||
| max-reservable-bw |
(Optional) Specifies the maximum reservable bandwidth and sets a limit on the size of the total pool. |
||
| bc1 bandwidth |
(Optional) Specifies the amount of bandwidth, in kbps, on the interface to be reserved to a portion of the total. (Formerly, this portion was called the "subpool".) The range is from 1 to the value of the max-reservable-bw interface-bandwidth keyword and argument. |
Command Default
RSVP is disabled by default. If you enter the ip rsvp bandwidth command without any bandwidth values (for example, ip rsvp bandwidth followed by pressing the Enter key), a default bandwidth value (that is, 75 percent of the link bandwidth) is assumed for both the interface-bandwidth and single-flow-bandwidth arguments.
Command Modes
Interface configuration (config-if)
Command History
| Release |
Modification |
|---|---|
| 11.2 |
This command was introduced. |
| 12.0(11)ST |
This command was integrated into Cisco IOS Release 12.0(11)ST. The sub-pool keyword was added. |
| 12.2(14)S |
This command was integrated into Cisco IOS Release 12.2(14)S. |
| 12.2(18)SXD |
This command was integrated into Cisco IOS Release 12.2(18)SXD. |
| 12.2(28)SB |
This command was integrated into Cisco IOS Release 12.2(28)SB. |
| 12.2(33)SRA |
This command was integrated into Cisco IOS Release 12.2(33)SRA. |
| 12.2(33)SRB |
This command was modified. The IETF Standard for DS-TE was added through the rdm and mam keywords, and their subsidiary arguments. |
| Cisco IOS XE Release 2.6 |
This command was integrated into Cisco IOS XE Release 2.6. |
| 15.1(2)T |
This command was modified. The percent percent-bandwidth keyword and argument pair was added. |
| 15.(1)3T |
This command was modified. The ingress keywordthe ingress-bandwidth argument, and the maximum-ingress-bandwidth argument were added. |
| 15.2(3)T |
This command was modified. Support for IPv6 was added. |
| 15.1(1)SY |
This command was integrated into Cisco IOS Release 15.1(1)SY. |
Usage Guidelines
RSVP cannot be configured with distributed Cisco Express Forwarding.
RSVP is disabled by default to allow backward compatibility with systems that do not implement RSVP.
Weighted Random Early Detection (WRED) or fair queueing must be enabled first.
When using this command for DS-TE in IETF Standard mode, you must use either rdm and its arguments or mam and its arguments; you cannot use both. For more details about each alternative, see Russian Dolls Bandwidth Constraints Model for Diffserv-aware MPLS Traffic Engineering by F. Le Faucheur (RFC 4127) and Maximum Allocation Bandwidth Constraints Model for Diffserv-aware MPLS Traffic Engineering by F. Le Faucheur and W. Lai (RFC 4125).
To eliminate only the subpool portion of the bandwidth, use the no form of this command with the sub-pool keyword.
You can use the ip rsvp bandwidth ingress command to enable the ingress Call Admission Control (CAC) functionality. You can use the no ip rsvp bandwidth command to disable the ingress CAC functionality on an interface. However, this command also disables RSVP on the interface. To disable only the ingress functionality on the interface, use the ip rsvp bandwidth interface-bandwidth single-flow-bandwidth command.
All the configurations related to the ip rsvp bandwidth command are applicable for both IPv4 and IPv6 sessions. The IPv4 and IPv6 sessions are admitted only if there is enough bandwidth available in the common bandwidth pool. It is not possible to apply a separate bandwidth limit for IPv4 reservations and IPv6 reservations.
Examples
The following example shows a T1 (1536 kb/s) link configured to permit RSVP reservation of up to 1158 kbps, but no more than 100 kbps for any given flow on serial interface 0. Fair queueing is configured with 15 reservable queues to support those reserved flows, should they be required.
Device(config)# interface serial 0
Device(config-if)# fair-queue 64 256 15
Device(config-if)# ip rsvp bandwidth 1158 100
Related Commands
| Command |
Description |
|---|---|
| fair-queue (WFQ) |
Enables WFQ for an interface. |
| ip rsvp neighbor |
Enables neighbors to request a reservation. |
| ip rsvp reservation |
Enables a device to behave like it is receiving and forwarding RSVP RESV messages. |
| ip rsvp sender |
Enables a device to behave like it is receiving and forwarding RSVP PATH messages. |
| ip rsvp udp-multicasts |
Instructs the device to generate UDP-encapsulated RSVP multicasts whenever it generates an IP-encapsulated multicast packet. |
| random-detect (interface) |
Enables WRED or DWRED. |
| show ip rsvp installed |
Displays RSVP-related installed filters and corresponding bandwidth information. |
| show ip rsvp interface |
Displays RSVP-related interface information. |
| show ip rsvp neighbor |
Displays current RSVP neighbors. |
| show ip rsvp reservation |
Displays RSVP-related receiver information currently in the database. |
| show ip rsvp sender |
Displays RSVP PATH-related sender information currently in the database. |
ip rsvp bandwidth ignore
To ignore the Resource Reservation Protocol (RSVP) tunnel bandwidth configuration, use the iprsvpbandwidthignore command in interface configuration mode.
Syntax Description
This command has no arguments or keywords.
Command Default
The RSVP tunnel bandwidth configuration is used.
Command Modes
Interface configuration (config-if)
Command History
| Release |
Modification |
|---|---|
| 15.1(2)T |
This command was introduced. |
| 15.1(1)S |
This command was integrated into Cisco IOS Release 15.1(1)S. |
Usage Guidelines
You can use the iprsvpbandwidthignore command to ignore any RSVP bandwidth configuration on the tunnel. If you need to reconfigure the RSVP bandwidth, use theiprsvpbandwidth or iprsvpbandwidthpercent command.
Examples
The following example shows how to ignore the RSVP bandwidth configuration on a tunnel interface:
Router(config)# interface tunnel 1
Router(config-if)# ip rsvp bandwidth ignore
Related Commands
| Command |
Description |
|---|---|
| ip rsvp bandwidth |
Enables RSVP for IP on an interface. |
| ip rsvp bandwidth percent |
Enables RSVP for IP on an interface and specifies a percentage of the total interface bandwidth as available in the RSVP bandwidth pool. |
| show ip rsvp interface detail |
Displays the hello configuration for all interfaces. |
ip rsvp bandwidth percent
To enable Resource Reservation Protocol (RSVP) for IP on an interface and to configure percentages of bandwidth available for RSVP and single flow bandwidth pools, use the iprsvpbandwidthpercentcommand in interface configuration mode. To disable RSVP on an interface, use the no form of this command.
Syntax Description
| interface-bandwidth |
Percentage of interface bandwidth configured for RSVP. The range is from 1 to 1000. |
| max-flow-bw |
(Optional) Maximum amount of bandwidth, in kb/s, configured for a single flow. The range is from 1 to 10000000; however, the amount you can configure depends on how much bandwidth remains in the pool. |
| percent flow-bandwidth |
(Optional) Specifies the percentage of the bandwidth to be used as flow bandwidth. The range is from 1 to 1000. |
Command Default
RSVP is disabled by default; therefore, no percentage of bandwidth is set.
Command Modes
Interface configuration (config-if)
Command History
| Release |
Modification |
|---|---|
| 12.2(33)SRB |
This command was introduced. |
| 15.1(2)T |
This command was modified. The percent and flow-bandwidthkeyword and argument combination was added. |
Usage Guidelines
RSVP cannot be configured with distributed Cisco Express Forwarding.
RSVP is disabled by default to allow backward compatibility with systems that do not implement RSVP.
Weighted Random Early Detection (WRED) or fair queueing must be enabled first.
Use the iprsvpbandwidthpercent command to set the RSVP bandwidth pool to a specified percentage of interface bandwidth. When you issue the iprsvpbandwidthpercent command, the RSVP bandwidth pool adjusts dynamically whenever the bandwidth of the interface changes.
You can use the iprsvpbandwidthpercentpercent-bandwidthpercentflow-bandwidthcommandtoconfigure a percentage of interface bandwidth as RSVP bandwidth. The RSVP bandwidth is used to perform RSVP Connection Admission Control (CAC). This command allows oversubscription. That is, you can configure more than 100 percent of the interface bandwidth to be used as RSVP bandwidth and per flow bandwidth.
You can choose to configure an absolute value as the amount of bandwidth used for RSVP by using the iprsvpbandwidthrsvp-bandwidth command on the member links of a bundle. If you use the iprsvpbandwidthpercentrsvp-bandwidth command, then the RSVP bandwidth changes in parallel with the change in the interface bandwidth. The RSVP bandwidth of the bundle depends only on the bundle interface's bandwidth, which in turn depends on the interface bandwidth of the member link and not on the RSVP bandwidth of member link.
The iprsvpbandwidthpercent command is blocked on interfaces on which dynamic update of RSVP bandwidth is not supported. A debug message appears if an RSVP client attempts to configure the iprsvpbandwidthpercent command on an unsupported interface.
In Cisco IOS Release 15.1(2)T, the iprsvpbandwidthpercent command is supported on Multilevel Precedence and Preemption (MLPP) and Multilink Frame Relay (MFR) interfaces.
Examples
The following example shows a serial link configured to permit an RSVP reservation of up to 90 percent of interface bandwidth but no more than 1000 kb/s for any given flow on serial interface 0:
Router# configure terminal
Enter configuration commands, one per line.  End with CNTL/Z.
Router(config)# interface serial 0
Router(config-if)# ip rsvp bandwidth percent 90 1000
The following example shows a multilink configured to permit 50 percent of the interface bandwidth as the RSVP bandwidth and 10 percent of the interface bandwidth as the flow bandwidth for any given multilink interface 2:
Router# configure terminal
Enter configuration commands, one per line.  End with CNTL/Z.
Router(config)# interface multilink 2
Router(config-if)# ip rsvp bandwidth percent 50 percent 10
Router(config-if)#
exit
Related Commands
| Command |
Description |
|---|---|
| fair-queue (WFQ) |
Enables WFQ for an interface. |
| ip rsvp bandwidth |
Enables RSVP for IP on an interface. |
| ip rsvp neighbor |
Enables neighbors to request a reservation. |
| ip rsvp reservation |
Enables a router to behave as though it were receiving and forwarding RSVP RESV messages. |
| ip rsvp sender |
Enables a router to behave as though it were receiving and forwarding RSVP PATH messages. |
| ip rsvp udp-multicasts |
Instructs the router to generate UDP-encapsulated RSVP multicasts whenever it generates an IP-encapsulated multicast packet. |
| random-detect (interface) |
Enables WRED or DWRED. |
| show ip rsvp installed |
Displays RSVP-related installed filters and corresponding bandwidth information. |
| show ip rsvp interface |
Displays RSVP-related interface information. |
| show ip rsvp neighbor |
Displays current RSVP neighbors. |
| show ip rsvp reservation |
Displays RSVP-related receiver information currently in the database. |
| show ip rsvp sender |
Displays RSVP PATH-related sender information currently in the database. |
ip rsvp burst policing
To configure a burst factor within the Resource Reservation Protocol (RSVP) token bucket policer on a per-interface basis, use the iprsvpburstpolicing command in interface configuration mode. To return to the default value, enter the no form of this command.
Syntax Description
| factor |
(Optional) Indicates a burst factor value as a percentage of the requested burst of the receiver. |
Command Default
The default value is 200; the minimum value is 100, and the maximum value is 700.
Command Modes
Interface configuration
Command History
| Release |
Modification |
|---|---|
| 12.1(3)T |
This command was introduced. |
| 12.2(33)SRA |
This command was integrated into Cisco IOS Release 12.2(33)SRA. |
| 12.2SX |
This command is supported in the Cisco IOS Release 12.2SX train. Support in a specific 12.2SX release of this train depends on your feature set, platform, and platform hardware. |
Usage Guidelines
You configure the burst police factor per interface, not per flow. The burst factor controls how strictly or loosely the traffic of the sender is policed with respect to burst.
The burst factor applies to all RSVP flows installed on a specific interface. You can configure each interface independently for burst policing.
Examples
The following example shows theiprsvpburstpolicing command with a burst factor of 200:
ip rsvp burst policing 200
ip rsvp data-packet classification none
To turn off (disable) Resource Reservation Protocol (RSVP) data packet classification, use the iprsvpdata-packetclassificationnonecommand in interface configuration mode. To turn on (enable) data-packet classification, use the no form of this command.
Syntax Description
This command has no arguments or keywords.
Command Default
RSVP data packet classification is disabled.
Command Modes
Interface configuration (config-if)
Command History
| Release |
Modification |
|---|---|
| 12.2(2)T |
This command was introduced. |
| 12.2(14)S |
This command was integrated into Cisco IOS Release 12.2(14)S. |
| 12.2(18)SXF2 |
This command was integrated into Cisco IOS Release 12.2(18)SXF2. |
| 12.2(33)SRB |
This command was integrated into Cisco IOS Release 12.2(33)SRB. |
| Cisco IOS XE Release 2.6 |
This command was integrated into Cisco IOS XE Release 2.6. |
Usage Guidelines
Use the iprsvpdata-packetclassificationnonecommand when you do not want RSVP to process every packet. Configuring RSVP so that not every packet is processed eliminates overhead and improves network performance and scalability.
Examples
This section contains two examples of the iprsvpdata-packetclassificationnone command. The first example shows how to turn off (disable) data packet classification:
Router# configure terminal
Router(config)# interface atm 6/0
Router(config-if)# ip rsvp data-packet classification none
The following example shows how to turn on (enable) data packet classification:
Router# configure terminal
Router(config)# interface atm 6/0
Router(config-if)# no ip rsvp data-packet classification none
Related Commands
| Command |
Description |
|---|---|
| show ip rsvp interface |
Displays RSVP-related interface information. |
ip rsvp dsbm candidate
To configure an interface as a Designated Subnetwork Bandwidth Manager (DSBM) candidate, use the iprsvpdsbmcandidatecommand in interface configuration mode. To disable DSBM on an interface, which exempts the interface as a DSBM candidate, use the no form of this command.
Syntax Description
| priority |
(Optional) A value in the range from 64 to 128. Among contenders for the DSBM, the interface with the highest priority number wins the DSBM election process. |
Command Default
An interface is not configured as a DSBM contender by default. If you use this command to enable the interface as a DSBM candidate and you do not specify a priority, the default priority of 64 is assumed.
Command Modes
Interface configuration (config-if)
Command History
| Release |
Modification |
|---|---|
| 12.0(5)T |
This command was introduced. |
| 12.1(1)T |
This command was integrated into Cisco IOS Release 12.1(1)T. |
| 12.2(33)SRA |
This command was integrated into Cisco IOS Release 12.2(33)SRA. |
| 12.2SX |
This command is supported in the Cisco IOS Release 12.2SX train. Support in a specific 12.2SX release of this train depends on your feature set, platform, and platform hardware. |
Usage Guidelines
SBM protocol entities, any one of which can manage resources on a segment, can reside in Layer 2 or Layer 3 devices. Many SBM-capable devices may be attached to a shared Layer 2 segment. When more than one SBM exists on a given segment, one of the SBMs is elected to be the DSBM. The elected DSBM is responsible for exercising admission control over requests for resource reservations on a segment, which, in the process, becomes a managed segment. A managed segment includes those interconnected parts of a shared LAN that are not separated by DSBMs. In all circumstances, only one, if any, DSBM exists for each Layer 2 segment.
You can configure an interface to have a DSBM priority in the range from 64 to 128. You can exempt an interface from participation in the DSBM election on a segment but still allow the system to interact with the DSBM if a DSBM is present on the segment. In other words, you can allow a Resource Reservation Protocol (RSVP)-enabled interface on a router connected to a managed segment to be managed by the DSBM even if you do not configure that interface to participate as a candidate in the DSBM election process. To exempt an interface from DSBM candidacy, do not issue the iprsvpdsbmcandidatecommand on that interface.
RSVP cannot be configured with Versatile Interface Processor (VIP)-distributed Cisco Express Forwarding (dCEF).
Examples
The following example shows how to configure Ethernet interface 2 as a DSBM candidate with a priority of 100:
interface Ethernet2
 ip rsvp dsbm candidate 100
Related Commands
| Command |
Description |
|---|---|
| debug ip rsvp |
Displays information about SBM message processing, the DSBM election process, and standard RSVP enabled message processing information. |
| debug ip rsvp detail |
Displays detailed information about RSVP and SBM. |
| debug ip rsvp detail sbm |
Displays detailed information about SBM messages only, and SBM and DSBM state transitions. |
| ip rsvp dsbm non-resv-send-limit |
Configures the NonResvSendLimit object parameters. |
| show ip rsvp sbm |
Displays information about an SBM configured for a specific RSVP-enabled interface or for all RSVP-enabled interfaces on the router. |
ip rsvp dsbm non-resv-send-limit
To configure the NonResvSendLimit object parameters, use the iprsvpdsbmnon-resv-send-limitcommand in interface configuration mode. To use the default NonResvSendLimit object parameters, use the no form of this command.
Syntax Description
| rate kbps |
The average rate, in kbps, for the Designated Subnetwork Bandwidth Manager (DSBM) candidate. The average rate is a number from 1 to 2147483. |
| burst kilobytes |
The maximum burst size, in kb, for the DSBM candidate. The maximum burst size is a number from 1 to 2147483. |
| peak kbps |
The peak rate, in kBps, for the DSBM candidate. The peak rate is a number from 1 to 2147483. |
| min-unit bytes |
The minimum policed unit, in bytes, for the DSBM candidate. The minimum policed unit is a number from 1 to 2147483647. |
| max-unit bytes |
The maximum packet size, in bytes, for the DSBM candidate. The maximum packet size is a number from 1 to 2147483647. |
Command Default
The default for the rate, burst, peak, min-unit, and max-unit keywords is unlimited; all traffic can be sent without a valid Resource Reservation Protocol (RSVP) reservation.
Command Modes
Interface configuration (config-if)
Command History
| Release |
Modification |
|---|---|
| 12.1(1)T |
This command was introduced. |
| 12.2(33)SRA |
This command was integrated into Cisco IOS Release 12.2(33)SRA. |
| 12.2SX |
This command is supported in the Cisco IOS Release 12.2SX train. Support in a specific 12.2SX release of this train depends on your feature set, platform, and platform hardware. |
Usage Guidelines
To configure the per-flow limit on the amount of traffic that can be sent without a valid RSVP reservation, configure the rate, burst, peak, min-unit, and max-unit values for finite values greater than 0.
To allow all traffic to be sent without a valid RSVP reservation, configure the rate, burst, peak, min-unit, and max-unit values for unlimited traffic. To configure the parameters for unlimited traffic, you can either omit the command, or enter the no form of the command (for example, noiprsvpdsbmnon-resv-send-limitrate). Unlimited is the default value.
The absence of the NonResvSendLimit object allows any amount of traffic to be sent without a valid RSVP reservation.
RSVP cannot be configured with VIP-distributed Cisco Express Forwarding (dCEF).
Examples
The following example configures Ethernet interface 2 as a DSBM candidate with a priority of 100, an average rate of 500 kBps, a maximum burst size of 1000 KB, a peak rate of 500 kBps, and unlimited minimum and maximum packet sizes:
interface Ethernet2
 ip rsvp dsbm candidate 100
 ip rsvp dsbm non-resv-send-limit rate 500
 ip rsvp dsbm non-resv-send-limit burst 1000
 ip rsvp dsbm non-resv-send-limit peak 500
Related Commands
| Command |
Description |
|---|---|
| ip rsvp dsbm candidate |
Configures an interface as a DSBM candidate. |
| show ip rsvp sbm |
Displays information about an SBM configured for a specific RSVP-enabled interface or for all RSVP-enabled interfaces on the router. |
ip rsvp flow-assist
To enable Resource Reservation Protocol (RSVP) to integrate with the Cisco Express Forwarding (CEF) path for flow classification, policing, and marking, use the iprsvpflow-assist command in interface configuration mode. To disable integration of RSVP with CEF for this purpose, use the iprsvpdata-packetclassificationnone command.
Syntax Description
This command has no arguments or keywords.
Command Default
This command is on by default; RSVP integrates with CEF for classification, policing, and marking of data packets.
Command Modes
Interface configuration (config-if)
Command History
| Release |
Modification |
|---|---|
| 12.0(3)T |
This command was introduced. |
| 12.4 |
The behavior of this command was modified. See the "Usage Guidelines" section for additional information. |
| 12.2(33)SRA |
This command was integrated into Cisco IOS Release 12.2(33)SRA. |
| 12.2SX |
This command is supported in the Cisco IOS Release 12.2SX train. Support in a specific 12.2SX release of this train depends on your feature set, platform, and platform hardware. |
Usage Guidelines
To police and mark data packets of a reserved flow, RSVP must interact with the underlying packet forwarding mechanism, which is CEF.
In Cisco IOS Release 12.4, the no form of the iprsvpflow-assist command is no longer supported since you can use the existing iprsvpdata-packetclassificationnone command to disable RSVP from integrating with any mechanism for handling data packets.
Examples
The following example shows how to enable RSVP on ATM interface 2/0/0:
interface atm2/0/0
 ip rsvp flow-assist
Related Commands
| Command |
Description |
|---|---|
| ip rsvp data-packet classification none |
Avoids integrating RSVP with the data plane. |
| ip rsvp precedence |
Allows you to set the IP Precedence values to be applied to packets that either conform to or exceed the RSVP flowspec. |
| ip rsvp svc-required |
Enables creation of an SVC to service any new RSVP reservation made on the interface or subinterface. |
| ip rsvp tos |
Allows you to set the ToS values to be applied to packets that either conform to or exceed the RSVP flowspec. |
| show ip rsvp interface |
Displays RSVP-related interface information. |
ip rsvp layer2 overhead
To control the overhead accounting performed by Resource Reservation Protocol (RSVP)/weighted fair queueing (WFQ) when a flow is admitted onto an ATM permanent virtual circuit (PVC), use theiprsvplayer2overhead command in interface configuration mode. To disable the overhead accounting, use the no form of this command.
Syntax Description
| h |
(Optional) Layer 2 encapsulation header plus trailer size applied to each Layer 3 packet in bytes. Valid sizes are numbers from 0 to 65535. |
| c |
(Optional) Layer 2 cell header size applied to each Layer 2 cell in bytes. Valid sizes are numbers from 0 to 65535. |
| n |
(Optional) Layer 2 payload size in bytes. Valid sizes are numbers from 0 to 65534. |
Command Default
This command is enabled by default on ATM interfaces that are running RSVP and WFQ. You can also use this command on non-ATM interfaces.
The default version of the command, defaultiprsvplayer2overhead, or by omitting the parameters (h , c , and n ) and entering the iprsvplayer2overheadcommandcauses RSVP to determine the overhead values automatically, based on the interface/PVC encapsulation. (Currently, RSVP recognizes ATM Adaptation Layer 5 (AAL5) subnetwork access protocol (SNAP) and MUX (multiplexer) encapsulations.)
On non-ATM/PVC interfaces, the configured h , c , and n parameters determine the values that RSVP uses for its overhead.
Command Modes
Interface configuration (config-if)
Command History
| Release |
Modification |
|---|---|
| 12.2(2)T |
This command was introduced. |
Usage Guidelines
When an IP flow traverses a link, the overhead of Layer 2 encapsulation can increase the amount of bandwidth that the flow requires to exceed the advertised (Layer 3) rate.
In many cases, the additional bandwidth a flow requires because of Layer 2 overhead is negligible and can be transmitted as part of the 25 percent of the link, which is unreservable and kept for routing updates and Layer 2 overhead. This situation typically occurs when the IP flow uses large packet sizes or when the Layer 2 encapsulation allows for frames of variable size (such as in Ethernet and Frame Relay encapsulations).
However, when a flow's packet sizes are small and the underlying Layer 2 encapsulation uses fixed-size frames, the Layer 2 encapsulation overhead can be significant, as is the case when Voice Over IP (VoIP) flows traverse ATM links.
To avoid oversubscribing ATM PVCs, which use AAL5 SNAP or AAL5 MUX encapsulations, RSVP automatically accounts for the Layer 2 overhead when admitting a flow. For each flow, RSVP determines the total amount of bandwidth required, including Layer 2 overhead, and uses this value for admission control with the WFQ bandwidth manager.
Note |
The iprsvplayer2overheadcommand does not affect bandwidth requirements of RSVP flows on ATM switched virtual circuits (SVCs). |
Examples
In the following example, the total amount of bandwidth reserved with WFQ appears:
Router# show ip rsvp installed detail
RSVP:ATM6/0 has the following installed reservations
RSVP Reservation. Destination is 10.1.1.1, Source is 10.1.1.1,
  Protocol is UDP, Destination port is 1000, Source port is 1000
  Reserved bandwidth:50K bits/sec, Maximum burst:1K bytes, Peak rate:50K bits/sec
  Min Policed Unit:60 bytes, Max Pkt Size:60 bytes
  Resource provider for this flow:
    WFQ on ATM PVC 100/101 on AT6/0: PRIORITY queue 40.  Weight:0, BW 89 kbps
  Conversation supports 1 reservations
  Data given reserved service:0 packets (0M bytes)
  Data given best-effort service:0 packets (0 bytes)
  Reserved traffic classified for 9 seconds
  Long-term average bitrate (bits/sec):0M reserved, 0M best-effort
In the preceding example, the flow's advertised Layer 3 rate is 50 kbps. This value is used for admission control with theiprsvpbandwidth value. The actual bandwidth required, inclusive of Layer 2 overhead, is 89 kbps. WFQ uses this value for admission control.
Typically, you should not need to configure or disable the Layer 2 overhead accounting. RSVP uses the advertised Layer 3 flow rate, minimum packet size, and maximum unit size in conjunction with the Layer 2 encapsulation characteristics of the ATM PVC to compute the required bandwidth for admission control. However, you can disable or customize the Layer 2 overhead accounting (for any link type) with the iprsvplayer2overhead command. The parameters of this command are based on the following steps that show how a Layer 3 packet is fragmented and encapsulated for Layer 2 transmission.
-
Start with a Layer 3 packet, as shown in Figure 1, which includes an IP header and a payload.

-
Add an encapsulation header or trailer, as shown in Figure 2, of size h
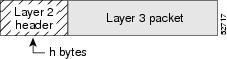
-
Segment the resulting packet into fixed-sized cells, as shown in Figure 3, with a cell header of c bytes and a cell payload of n bytes.

- Transmit the resulting Layer 2 cells.
More Configuration Examples
In the following example, Layer 2 overhead accounting is disabled for all reservations on the interface and its PVCs:
Router(config-if)# no ip rsvp layer2 overhead
In the following example, Layer 2 overhead accounting is configured with ATM AAL5 SNAP encapsulation:
Router(config-if)# no ip rsvp layer2 overhead 8 5 48
In the following example, Layer 2 overhead accounting is configured with ATM AAL5 MUX encapsulation:
Router(config-if)# ip rsvp layer2 overhead 0 5 48
In the following example, Layer 2 overhead accounting is configured with Ethernet V2.0 encapsulation (including 8-byte preamble, 6-byte source-active (SA) messages, 6-byte destination-active (DA) messages, 2-byte type, and 4-byte frame check sequence (FCS) trailer):
Router(config-if)# ip rsvp layer2 overhead 26 0 1500
Related Commands
| Command |
Description |
|---|---|
| show ip rsvp installed |
Displays RSVP-related installed filters and corresponding bandwidth information. |
ip rsvp listener
To configure a Resource Reservation Protocol (RSVP) router to listen for PATH messages, use the iprsvplistener command in global configuration mode. To disable listening, use the no form of this command.
Syntax Description
| vrf vrf-name |
(Optional) Specifies the Virtual routing and forwarding (VRF) instance name. |
| destination-ip |
IP address of the receiving interface. |
| udp |
Specifies the UDP for the receiving interface. |
| tcp |
Specifies the TCP for the receiving interface. |
| any |
Specifies that any protocol can be used for the receiving interface. |
| number |
Source port number from 0 to 255; the protocol is IP. |
| any |
Specifies that any destination port can be used for the receiving interface. |
| destination-port |
Port number for the receiving interface. Range is from 0 to 65535. |
| announce |
Receiver announces the arrival of the flow at its destination, but does not send a RESV message in response. |
| reply |
Sender requests a reply when the flow is received and sends a RESV message when a matching PATH message arrives. |
| reject |
Router sends a PATHERROR (reject) message in response to an incoming PATH message that matches specified listener parameters. |
Command Default
This command is disabled by default; therefore, no listeners are configured.
Command Modes
Global configuration (config)
Command History
| Release |
Modification |
|---|---|
| 12.2(13)T |
This command was introduced. |
| 12.4(6)T |
This command was modified. Support for the RSVP application identity (ID) was added. |
| 12.2(33)SRB |
This command was integrated into Cisco IOS Release 12.2(33)SRB. |
| 15.0(1)M |
This command was modified. The optional vrfvrf-name keyword and argument combination was added. |
| Cisco IOS XE Release 2.6 |
This command was integrated into Cisco IOS Release XE 2.6. |
Usage Guidelines
Note |
The syntax of the command depends on your platform and release. The vrfvrf-namekeyword and argument combination is not supported on ASR 1000 Series Aggregation Services Routers. |
Use the iprsvplistener command to allow a router to send a matching RESV message when a PATH message arrives with the desired destination address, port, and protocol. This command copies the application ID and preemption priority value, if present, from the PATH message and includes them in the RESV message.
Use the iprsvplistenervrfvrf-namecommand to create a listener in the context of the routing domain as defined by VRF. You should be aware of the hierarchy of listener configuration. If you configure a listener for the VRF without specifying the IP address and other fields, then subsequent configuration for a more specific listener configuration with a VRF, an IP address, and a port is not accepted.
This command is similar to the iprsvpreservation andiprsvpreservation-hostcommands . However, they do not allow you to specify more than one port or protocol per command; so you may have to enter many commands to proxy for a set of ports and protocols. In contrast, the iprsvplistener command allows you to use a wildcard for a set of ports and protocols by using just that one command.
You can use the debugiprsvpapicommand to look for a matching PATH message, but no RESV message will be sent.
Examples
In the following example, the sender is requesting that the receiver reply with a RESV message for the flow if the PATH message destination is 192.168.2.1:
Router# configure terminal
Router(config)# ip rsvp listener 192.168.2.1 any any reply
The following example creates a listener in the VRF routing domain:
Router# configure terminal
Router(config)# ip rsvp listener vrf vpn1 10.10.10.10 any any reply
Related Commands
| Command |
Description |
|---|---|
| ip rsvp reservation |
Enables a router to simulate receiving and forwarding RSVP RESV messages. |
| ip rsvp reservation-host |
Enables a router to simulate a host generating RSVP RESV messages. |
| show ip rsvp listeners |
Displays configured RSVP listeners. |
ip rsvp listener outbound
To configure a Resource Reservation Protocol (RSVP) device to listen for PATH messages sent through a specified interface, use the ip rsvp listener outbound command in interface configuration mode. To disable listening for PATH messages, use the no form of this command.
Syntax Description
| reply |
For a PATH message exiting from a specified interface, the device does the following: |
| reject |
For a PATH message exiting from a specified interface, the device does the following: |
Command Default
Listeners are not configured.
Command Modes
Interface configuration (config-if)
Command History
| Release |
Modification |
|---|---|
| 12.2(18)SFX5 |
This command was introduced. |
| 12.2(33)SRB |
This command was integrated into Cisco IOS Release 12.2(33)SRB. |
| 12.2SX |
This command is supported in the Cisco IOS Release 12.2SX train. Support in a specific 12.2SX release of this train depends on your feature set, platform, and platform hardware. |
| Cisco IOS XE Release 2.6 |
This command was integrated into Cisco IOS XE Release 2.6. |
| 15.2(3)T |
This command was modified. Support for IPv6 was added. |
Usage Guidelines
Use the ip rsvp listener outbound command to match all PATH messages that are being sent from a specified interface.
When you configure an interface-based receiver proxy to reply, RSVP performs Call Admission Control (CAC) on the outbound (or egress) interface for the flow. If CAC fails, the reservation is not generated. This is the same behavior for the global RSVP receiver proxy command.
The outbound interface that a flow uses is determined when the flow is set up, and the interface-based receiver proxy is consulted. The interface-based receiver proxy is not consulted if there is a change in routing for an existing flow.
If the interface-based receiver proxy receives a RESVERR message with an admission control failure error or a policy reject error, the interface-based receiver proxy generates a PATHERR message with the same error to provide explicit notification to the sender of the reservation failure.
The ip rsvp listener outbound configuration will be applicable for both IPv4 and IPv6 PATH messages sent through a specified interface.
Examples
In the following example, PATH messages sent through Ethernet interface 3/0 are rejected and PATHERROR messages are generated:
Device# configure terminal
Enter configuration commands, one per line.  End with CNTL/Z.
Device(config)# interface Ethernet3/0
Device(config-if)# ip rsvp listener outbound reject
Related Commands
| Command |
Description |
|---|---|
| ip rsvp listener |
Configures an RSVP device to listen for PATH messages. |
| ipv6 rsvp reservation |
Enables a networking device to simulate receiving and forwarding IPv6 RSVP RESV messages. |
| ip rsvp reservation-host |
Enables a networking device to simulate a host generating IPv6 RSVP RESV messages. |
| show ipv6 rsvp listeners |
Displays configured IPv6 RSVP listeners. |
ip rsvp msg-pacing
Note |
Effective with Cisco IOS Release 12.2(13)T, the ip rsvp msg-pacing command is replaced by the ip rsvp signalling rate-limit command. See the ip rsvp signalling rate-limit command for more information. |
To configure the transmission rate for Resource Reservation Protocol (RSVP) messages, use the ip rsvp msg-pacing command in global configuration mode. To disable this feature, use the no form of this command.
Syntax Description
| period ms |
(Optional) Length of the interval, in milliseconds, during which a router can send the number of RSVP messages specified in the burst keyword. The value can be from 1 to 1000 milliseconds. |
| burst msgs |
(Optional) Maximum number of RSVP messages that a router can send to an output interface during each interval specified in the period keyword. The value can be from 1 to 2000. |
| maxsize qsize |
(Optional) Size of per-interface output queues in the sending router. Valid values are from 1 to 2000. |
Command Default
RSVP messages are not paced. If you enter the command without the optional burst keyword, the transmission rate for RSVP messages is limited to 200 messages per second per outgoing interface. The default output queue size, specified in the maxsize keyword, is 500.
Command Modes
Global configuration (config)
Command History
| Release |
Modification |
|---|---|
| 12.0(14)ST |
This command was introduced. |
| 12.2(11)S |
This command was integrated into Cisco IOS Release 12.2(11)S. |
| 12.0(22)S |
This command was integrated into Cisco IOS Release 12.0(22)S. |
| 12.2(28)SB |
This command was integrated into Cisco IOS Release 12.2(28)SB. |
| 12.2(33)SRA |
This command was integrated into Cisco IOS Release 12.2(33)SRA. |
| 12.2SX |
This command is supported in the Cisco IOS Release 12.2SX train. Support in a specific 12.2SX release of this train depends on your feature set, platform, and platform hardware. |
| 12.2(13)T |
This command was replaced with the ip rsvp signalling rate-limit command. |
Usage Guidelines
You can use this command to prevent a burst of RSVP traffic engineering signaling messages from overflowing the input queue of a receiving router. Overflowing the input queue with signaling messages results in the router dropping some messages. Dropped messages substantially delay the completion of signaling for LSPs for which messages have been dropped.
If you enter the ip rsvp msg-pacing command without the optional burst keyword, the transmission rate for RSVP messages is limited to 200 messages per second per outgoing interface. The default output queue size, specified in the maxsize keyword, is 500.
Examples
The following example shows how to configure a router to send a maximum of 150 RSVP traffic engineering signaling messages in 1 second to a neighbor, and the size of the output queue is 750:
Router(config)# ip rsvp msg-pacing period 1 burst 150 maxsize 750
Related Commands
| Command |
Description |
|---|---|
| clear ip rsvp msg-pacing |
Clears the RSVP message pacing output from the show ip rsvp neighbor command. |
ip rsvp neighbor
To enable neighbors to request a reservation, use the iprsvpneighborcommand in interface configuration mode. To disable this function, use the no form of this command.
Syntax Description
| access-list-number |
Number of a standard or extended IP access list. It can be any number in the range from 1 to 199. |
Command Default
The router accepts messages from any neighbor.
Command Modes
Interface configuration (config-if)
Command History
| Release |
Modification |
|---|---|
| 11.2 |
This command was introduced. |
| 12.2(33)SRA |
This command was integrated into Cisco IOS Release 12.2(33)SRA. |
| 12.2SX |
This command is supported in the Cisco IOS Release 12.2SX train. Support in a specific 12.2SX release of this train depends on your feature set, platform, and platform hardware. |
Usage Guidelines
Use this command to allow only specific Resource Reservation Protocol (RSVP) neighbors to make a reservation. If no limits are specified, any neighbor can request a reservation. If an access list is specified, only neighbors meeting the specified access list requirements can make a reservation.
RSVP cannot be configured with Versatile Interface Processor (VIP)-distributed Cisco Express Forwarding (dCEF).
Examples
The following example shows how to allows neighbors meeting access list 1 requirements to request a reservation:
interface ethernet 0
 ip rsvp neighbor 1
Related Commands
| Command |
Description |
|---|---|
| fair-queue (WFQ) |
Enables WFQ for an interface. |
| ip rsvp bandwidth |
Enables RSVP for IP on an interface. |
| ip rsvp reservation |
Enables a router to simulate receiving and forwarding RSVP RESV messages. |
| ip rsvp sender |
Enables a router to simulate receiving and forwarding RSVP PATH messages. |
| ip rsvp udp-multicasts |
Instructs the router to generate UDP-encapsulated RSVP multicasts whenever it generates an IP-encapsulated multicast packet. |
| random-detect (interface) |
Enables WRED or DWRED. |
| show ip rsvp installed |
Displays RSVP-related installed filters and corresponding bandwidth information. |
| show ip rsvp interface |
Displays RSVP-related interface information. |
| show ip rsvp neighbor |
Displays current RSVP neighbors. |
| show ip rsvp reservation |
Displays RSVP-related receiver information currently in the database. |
| show ip rsvp sender |
Displays RSVP PATH-related sender information currently in the database. |
ip rsvp policy cops minimal
To lower the load of the Common Open Policy Service (COPS) server and to improve latency times for messages on the governed router, use the iprsvppolicycopsminimalcommand in global configuration mode to restrict the COPS RSVP policy to adjudicate only PATH and RESV messages. To turn off the restriction, use the noform of this command.
Syntax Description
This command has no arguments or keywords.
Command Default
The default state is OFF, causing all adjudicable RSVP messages to be processed by the configured COPS policy.
Command Modes
Global configuration (config)
Command History
| Release |
Modification |
|---|---|
| 12.1(1)T |
This command was introduced. |
| 12.2(33)SRA |
This command was integrated into Cisco IOS Release 12.2(33)SRA. |
| 12.2SX |
This command is supported in the Cisco IOS Release 12.2SX train. Support in a specific 12.2SX release of this train depends on your feature set, platform, and platform hardware. |
Usage Guidelines
When this command is used, COPS does not attempt to adjudicate PATHERROR and RESVERROR messages. Instead, those messages are all accepted and forwarded.
Examples
The following example shows how COPS authentication is restricted to PATH and RESV messages:
ip rsvp policy cops minimal
The following example shows how to remove that restriction:
no ip rsvp policy cops minimal
ip rsvp policy cops report-all
To enable a router to report on its success and failure with outsourcing decisions, use theiprsvppolicycopsreport-allcommand in global configuration mode. To return the router to its default, use the no form of this command.
Syntax Description
This command has no arguments or keywords.
Command Default
The default state of this command is to send reports to the Policy Decision Point (PDP) about configuration decisions only.
Command Modes
Global configuration (config)
Command History
| Release |
Modification |
|---|---|
| 12.1(1)T |
This command was introduced. |
| 12.2(33)SRA |
This command was integrated into Cisco IOS Release 12.2(33)SRA. |
| 12.2SX |
This command is supported in the Cisco IOS Release 12.2SX train. Support in a specific 12.2SX release of this train depends on your feature set, platform, and platform hardware. |
Usage Guidelines
In the default state, the router reports to the PDP when the router has succeeded or failed to implement Resource Reservation Protocol (RSVP) configuration decisions.
A configuration decision contains at least one of the following:
- A RESV ALLOC context (with or without additional contexts)
- A stateless or named decision object
A decision that does not contain at least one of those elements is an outsourcing decision.
Some brands of policy server might expect reports about RSVP messaging, which the default state of the Cisco Common Open Policy Service (COPS) for RSVP does not issue. In such cases, use the iprsvppolicycopsreport-all command to ensure interoperability between the router and the policy server. Doing so does not adversely affect policy processing on the router.
Unicast FF reservation requests always stimulate a report from the router to the PDP, because those requests contain a RESV ALLOC context (combined with an IN CONTEXT and an OUT CONTEXT).
Examples
In order to show the Policy Enforcement Point (PEP)-to-PDP reporting process, the debugcops command in the following example already is enabled when a new PATH message arrives at the router:
Router(config)# ip rsvp policy cops report-all
00:02:48:COPS:** SENDING MESSAGE **
Contents of router's request to PDP:
 COPS HEADER:Version 1, Flags 0, Opcode 1 (REQ), Client-type:1, Length:216
 HANDLE (1/1) object. Length:8.    00 00 02 01
 CONTEXT (2/1) object. Length:8.   R-type:5.     M-type:1
 IN_IF (3/1) object. Length:12.   Address:10.1.2.1.    If_index:4
 OUT_IF (4/1) object. Length:12.   Address:10.33.0.1.    If_index:3 CLIENT SI (9/1) object. Length:168.   CSI data:
 [A 27-line Path message omitted here]
00:02:48:COPS:Sent 216 bytes on socket,
00:02:48:COPS:Message event!
00:02:48:COPS:State of TCP is 4
00:02:48:In read function
00:02:48:COPS:Read block of 96 bytes, num=104 (len=104)
00:02:48:COPS:** RECEIVED MESSAGE **
Contents of PDP's decision received by router:
 COPS HEADER:Version 1, Flags 1, Opcode 2 (DEC), Client-type:1, Length:104
 HANDLE (1/1) object. Length:8.    00 00 02 01
 CONTEXT (2/1) object. Length:8.   R-type:1.     M-type:1
 DECISION (6/1) object. Length:8.   COMMAND cmd:1, flags:0
 DECISION (6/3) object. Length:56.   REPLACEMENT
 [A 52-byte replacement object omitted here]
 CONTEXT (2/1) object. Length:8.   R-type:4.     M-type:1
 DECISION (6/1) object. Length:8.   COMMAND cmd:1, flags:0
00:02:48:Notifying client (callback code 2)
00:02:48:COPS:** SENDING MESSAGE **
Contents of router's report to PDP:
 COPS HEADER:Version 1, Flags 1, Opcode 3 (RPT), Client-type:1, Length:24
 HANDLE (1/1) object. Length:8.    00 00 02 01
 REPORT (12/1) object. Length:8.   REPORT type COMMIT (1)
00:02:48:COPS:Sent 24 bytes on socket,
ip rsvp policy cops servers
To specify that Resource Reservation Protocol (RSVP) should use Common Open Policy Service (COPS) policy for remote adjudication, use the iprsvppolicycopsservers command in global configuration mode. To turn off the use of COPS for RSVP, use the noform of this command.
Syntax Description
| acl |
(Optional) Specifies the access control list (ACL) whose sessions will be governed by the COPS policy. |
| server-ip |
(Optional) Specifies the IP addresses of the servers governing the COPS policy. As many as eight servers can be specified, with the first being treated as the primary server. |
Command Default
If no ACL is specified, the default behavior is for all reservations to be governed by the specified policy servers.
Command Modes
Global configuration (config)
Command History
| Release |
Modification |
|---|---|
| 12.1(1)T |
This command was introduced. |
| 12.2(33)SRA |
This command was integrated into Cisco IOS Release 12.2(33)SRA. |
| 12.2SX |
This command is supported in the Cisco IOS Release 12.2SX train. Support in a specific 12.2SX release of this train depends on your feature set, platform, and platform hardware. |
Usage Guidelines
If more than one server is specified, the first server is treated by RSVP as the primary serer, and functions as such for all ACLs specified.
All servers in the list must have the same policy configuration.
If the connection of the router to the server breaks, the router tries to reconnect to that same server. If the reconnection attempt fails, the router then obeys the following algorithm:
If the connection to the Policy Decision Point (PDP) is closed (either because the PDP closed the connection, a TCP/IP error occurred, or the keepalives failed), the Policy Enforcement Point (PEP) issues a CLIENT-CLOSE message and then attempts to reconnect to the same PDP. If the PEP receives a CLIENT-CLOSE message containing a PDP redirect address, the PEP attempts to connect to the redirected PDP.
Note the following points:
- If either attempt fails, the PEP attempts to connect to the PDPs previously specified in the iprsvppolicycopsservers configuration command, obeying the sequence of servers given in that command, always starting with the first server in that list.
- If the PEP reaches the end of the list of servers without connecting, it waits a certain time (called the reconnect delay ) before trying again to connect to the first server in the list. This reconnect delay is initially 30 seconds, and doubles each time the PEP reaches the end of the list without having connected, until the reconnect delay becomes its maximum of 30 minutes. As soon as a connection is made, the delay is reset to 30 seconds.
The no form of this command need not contain any server IP addresses, but it must contain all the previously specified access lists (see the last example in the following section).
Examples
This first example applies the COPS policy residing on server 172.27.224.117 to all reservations passing through router-9. It also identifies the backup COPS server for this router as the one at address 172.27.229.130:
Router(config)# ip rsvp policy cops servers 172.27.224.117 172.27.229.130
The next example applies the COPS policy residing on server 172.27.224.117 to reservations passing through router-9 only if they match access lists 40 and 160. Other reservations passing through that router will not be governed by this server. The command statement also identifies the backup COPS server for that router to be the one at address 172.27.229.130:
Router(config)# ip rsvp policy cops 40 160 servers 172.27.224.117 172.27.229.130
The following example turns off COPS for the previously specified access lists 40 and 160 (you cannot turn off just one of the previously specified lists):
Router(config)# no ip rsvp policy cops 40 160 servers
ip rsvp policy cops timeout
To configure the amount of time the Policy Enforcement Point (PEP) router will retain policy information after losing connection with the Common Open Policy Service (COPS) server, use the iprsvppolicycopstimeout command in global configuration mode. To restore the router to the default value (5 minutes), use the no form of this command.
Syntax Description
| policy-timeout |
Duration of timeout, from 1 to 10,000 seconds. |
Command Default
Timeout default is 300 seconds (5 minutes).
Command Modes
Global configuration (config)
Command History
| Release |
Modification |
|---|---|
| 12.1(1)T |
This command was introduced. |
| 12.2(33)SRA |
This command was integrated into Cisco IOS Release 12.2(33)SRA. |
| 12.2SX |
This command is supported in the Cisco IOS Release 12.2SX train. Support in a specific 12.2SX release of this train depends on your feature set, platform, and platform hardware. |
Examples
The following example shows how to configure the router to time out all policy information relating to a lost server in 10 minutes:
ip rsvp policy cops timeout 600
The following example shows how to reset the timeout to the default value:
no ip rsvp policy cops timeout
ip rsvp policy default-reject
To reject all messages that do not match the policy access control lists (ACLs), use the iprsvppolicydefault-reject command in global configuration mode. To restore the default behavior, which passes along all messages that do not match the ACLs, use the no form of this command.
Syntax Description
This command has no arguments or keywords.
Command Default
Without this command, the default behavior of Resource Reservation Protocol (RSVP) is to accept, install, or forward all unmatched RSVP messages. Once this command is invoked, all unmatched RSVP messages are rejected.
Command Modes
Global configuration (config)
Command History
| Release |
Modification |
|---|---|
| 12.1(1)T |
This command was introduced. |
| 12.2(33)SRA |
This command was integrated into Cisco IOS Release 12.2(33)SRA. |
| 12.2SX |
This command is supported in the Cisco IOS Release 12.2SX train. Support in a specific 12.2SX release of this train depends on your feature set, platform, and platform hardware. |
Usage Guidelines
If COPS is configured without an ACL, or if any policy ACL is configured to use the permitipanyany command, the behavior of that ACL will take precedence, and no session will go unmatched.
Note |
This command makes one exception to its blocking of unmatched messages. It forwards RESVERROR and PATHERROR messages that were generated by its own rejection of RESV and PATH messages. That is done to ensure that the default-reject operation does not remain totally hidden from network managers. |
 Caution |
Be extremely careful with this command. It will shut down all RSVP processing on the router if access lists are too narrow or if no Common Open Policy Service (COPS) server has been specified. (Use the iprsvppolicycopsservers command to specify a COPS server.) |
Examples
The following example shows how to configure RSVP to reject all unmatched reservations:
ip rsvp policy default-reject
The following example shows how to configure RSVP to accept all unmatched reservations:
no ip rsvp policy default-reject
ip rsvp policy identity
To define Resource Reservation Protocol (RSVP) application identities (IDs), use the iprsvppolicyidentity command in global configuration mode. To delete RSVP application IDs, use the no form of this command.
Syntax Description
| alias |
String used within the router to reference the identity in RSVP configuration commands and show displays. The string can have as many as 64 printable characters (in the range 0x20 to 0x7E).
|
||
| policy-locator locator |
Specifies string that is signaled in RSVP messages and contains application IDs in X.500 Distinguished Name (DN) format. (See the "UsageGuidelines" section for detailed information.) |
Command Default
This command is disabled by default; therefore, no RSVP application identities are defined.
Command Modes
Global configuration (config)
Command History
| Release |
Modification |
|---|---|
| 12.4(6)T |
This command was introduced. |
| 12.2(33)SRB |
This command was integrated into Cisco IOS Release 12.2(33)SRB. |
| Cisco IOS XE Release 2.6 |
This command was integrated into Cisco IOS XE Release 2.6. |
Usage Guidelines
You can use RSVP identities as criteria for matching RSVP PATH and RESV messages to local policies. Identities can also be used to configure static senders and receivers. When you use an RSVP identity as the match criterion for a local policy, RSVP treats the policylocator string as a type of pattern-matching string known as a regular expression. Regular expressions allow you to configure a single identity for use with a local policy that can match multiple X.500 DNs. Regular expressions, by default, are not exact matches unless you add appropriate control characters to the expression to force it to be an exact match.
In Cisco IOS and Cisco IOX XE software, the locator is the primary piece of information that the router uses to find the correct policy to apply to RSVP messages that contain application IDs. This string assumes the format of an X.500 DN and includes the following attributes as recommended in RFC 2872:
- APP = Application identifier, a required attribute.
- VER = Version number of the application, a required attribute.
- SAPP = Subapplication identifier, an optional attribute. An arbitrary number of subapplication elements can be included.
- GUID = Global unique identifier, an optional attribute.
Here are some examples:
- APP = CCM, VER = 1.1, SAPP = Voice
- GUID = http://www.cisco.com/apps, APP = VideoConference, VER = 1.2.3
You can create a maximum of 100 identities on a router. If you attempt to create more, the command fails and the following error message is generated: "RSVP error: maximum number of identities already created".
When you use the iprsvppolicyidentity command, be aware of the following behavior:
- If you specify alias or locator strings that are empty or invalid, the command is rejected and an error message is generated.
- Cisco IOS software automatically adds quotes to the alias or locator strings in the configuration if quotes are required.
- If you specify the optional policy-locator keyword in the no form of this command, the command is rejected if the locator does not match the configured locator string for the alias being deleted.
- If you specify an alias that is missing, empty, or contains invalid characters, the command is rejected and an error message is generated.
- RSVP does not check the locator string for a valid X.500 DN; therefore, the locator string can be anything that you want.
Command Restrictions
- User identities are not supported in Cisco IOS Release 12.4(6)T.
- You cannot configure a single router with more than 100 identities at a time.
Examples
Exact Application ID Match
The following example shows an application ID for RSVP messages containing a locator string whose contents are the exact string "APP=Voice":
Router# configure terminal
Router(config)# ip rsvp policy identity "rsvp-voice" policy-locator "^APP=Voice$"
Router(config-rsvp-id)# end
Wildcard (or Partial) Application ID Match
The following example shows an application ID that is a partial match for RSVP messages containing a locator string with the substring "APP=Voice" anywhere in the signaled application ID:
Router# configure terminal
Router(config)# ip rsvp policy identity "rsvp-voice" policy-locator ".*APP=Voice.*"
Router(config-rsvp-id)# end
Related Commands
| Command |
Description |
|---|---|
| ip rsvp policy local |
Creates a local procedure that determines the use of RSVP resources in a network. |
| show ip rsvp policy identity |
Displays selected RSVP identities in a router configuration. |
| show ip rsvp policy local |
Displays selected local policies that have been configured. |
ip rsvp policy local
To determine how to perform authorization on Resource Reservation Protocol (RSVP) requests and enter local policy configuration mode, use the iprsvppolicylocalcommand in global configuration or interface configuration mode. To disable this function, use the no form of this command.
Syntax Description
| acl acl1 [acl2...acl8 |
Specifies an access control list (ACL). Values for each ACL are 1 to 199.
|
||
| dscp-ip value1 [value2...value8 |
Specifies the differentiated services code point (DSCP) for matching aggregate reservations. Values can be the following:
|
||
| default |
Specifies a default when an RSVP message does not match any ACL, DSCP, identity, or autonomous system. |
||
| identity alias1 [alias2...alias4 |
Specifies an application ID alias for an application ID previously configured using the iprsvppolicyidentity command.
|
||
| origin-as as1 [as2...as8 |
Specifies an autonomous system. Values for each autonomous system are 1 to 65535.
|
Command Default
This command is disabled by default; therefore, no local policies are configured.
Command Modes
Global configuration (config)
Interface configuration (config-if)
Command History
| Release |
Modification |
|---|---|
| 12.2(13)T |
This command was introduced. |
| 12.0(29)S |
This command was modified. Theorigin-asas keyword and argument combination and new submode commands were added. |
| 12.0(30)S |
This command was modified. You can no longer use 0 as the protocol when you configure an ACL. |
| 12.4(4)T |
This command was integrated into Cisco IOS Release 12.4(4)T. |
| 12.4(6)T |
The command was modified. The following changes were made: |
| 12.2(33)SRA |
This command was integrated into Cisco IOS Release 12.2(33)SRA. |
| 12.2SX |
This command is supported in the Cisco IOS Release 12.2SX train. Support in a specific 12.2SX release of this train depends on your feature set, platform, and platform hardware. |
| 12.2(33)SRC |
This command was modified. The dscp-ipvaluekeyword and argument combination was added. |
| Cisco IOS XE Release 2.6 |
This command was integrated into Cisco IOS XE Release 2.6. |
Usage Guidelines
Use the iprsvppolicylocalcommand to determine how to perform authorization on RSVP requests.
Note |
When you enter the origin-asas keyword and argument combination, an RSVP warning message appears stating that the autonomous-system-based policy will be ineffective until BGP is running. |
You can use all types of match criteria with non-Traffic-Engineering (TE) reservations. You can use all types of match criteria except application ID with TE reservations because TE PATH and RESV messages sent by Cisco routers do not contain application IDs.
There are five types of local policies--one default local policy, one or more ACL-based policies, one or more autonomous-system-based policies, one or more application-ID-based policies, and one or more DSCP-based policies. The default policy is used when an RSVP message does not match any ACL-, autonomous-system-, application-ID-, or DSCP-based policies.
You can configure a mixture of local policy types including ACL, autonomous system, application ID, DSCP, or default on the same interface or globally. Policies have the following priority (from highest to lowest):
- Nondefault interface policies
- Default interface policy
- Nondefault global policies
- Global default policy
Note |
If you configure an ACL to use with a TE tunnel, do not use 0 as the protocol because RSVP cannot accept any messages since they do not match the ACL. |
Policy-Match Criteria
Note |
You cannot specify a policy-match criteria more than once using the iprsvppolicylocal command. |
An ACL-based policy must have at least one ACL associated with it, but it can optionally have up to eight ACLs. The ACLs can be standard or extended IP ACLs. They are matched against source/destination addresses/ports based on RSVP objects inside RSVP signaling messages as described below.
- ACL source address--Matched against the source address in the SENDER_TEMPLATE object in RSVP messages. If this object is not present, the source address in the IP header is used.
- ACL destination address--Matched against the destination address in the SESSION object in RSVP messages. If this object is not present, the destination address in the IP header is used.
- ACL source port--Matched against the source port in the SENDER_TEMPLATE object in RSVP messages. If this object is not present, the source port of 0 is used.
- ACL destination port--Matched against the destination port in the SESSION object in RSVP messages. If this object is not present, the destination port of 0 is used.
- ACL IP protocol--Matched against the IP protocol in the SESSION object in RSVP messages. If this object is not present, the IP protocol of 0 is used. If the IP protocol is for a TE session, then the ACL IP protocol should be UDP.
- ACL differentiated services code point (DSCP) values--Matched against the DSCP value in the IP header of the RSVP message.
Note |
The same policy-match criteria apply when you create ACLs for the debugiprsvpfiltercommand except that the command does not use DSCP and the protocol is ignored for TE sessions. |
An autonomous-system-based policy must have at least one autonomous system associated with it, but it can optionally have up to eight autonomous systems. They are matched against the incoming interface/source IP address contained in RSVP objects inside RSVP signaling messages, not on the IP headers of the RSVP messages.
An application-ID-based policy must have at least one application ID associated with it, but it can optionally have up to four application IDs. They are matched against the incoming interface/source IP address contained in RSVP objects inside RSVP signaling messages, not on the IP headers of the RSVP messages.
A DSCP-based policy must have at least one DSCP associated with it, but it can optionally have up to four DSCPs. RSVP extracts the DSCP from the aggregate message SESSION object and applies the local policy that matches the DSCP criteria.
Command Restrictions
- You cannot configure more than 300 local policies per router. This limit is independent of policy location (global or per interface) or match criteria such as application IDs, ACLs, or autonomous systems.
- You cannot configure a single local policy with more than four RSVP identities.
CLI Submodes
Once you type the iprsvppolicylocal command, you enter the local policy CLI submode where you define the properties of the local policy that you are creating.
Note |
The local policy that you create automatically rejects all RSVP messages unless you enter a submode command that instructs RSVP on the types of messages to accept or forward. |
The submode commands are as follows:
accept {all | path | path-error | resv | resv-error}
-
- all --Accepts all incoming RSVP messages.
- path --Accepts incoming PATH messages that meet the match criteria for this policy, which includes ACL(s), autonomous system(s), application ID(s), or default(s). If you omit this command, incoming PATH messages that meet the policy-match criteria are rejected and a PATHERROR message is sent in reply. However, the PATHERROR reply is also subject to local policy.
- path-error --Accepts incoming PATHERROR messages that meet the match criteria for this policy. If you omit this command, incoming, including locally-generated, PATHERROR messages that meet the policy-match criteria are rejected.
- resv --Accepts incoming RESV messages that meet the match criteria for this policy and performs any required admission control. If you omit this command, incoming RESV messages that meet the policy-match criteria are rejected and a RESVERROR message is sent in reply. However, the RESVERROR reply is also subject to local policy.
The default bandwidth for a policy is unlimited. Therefore, if the policy has no configured bandwidth, a RESV message is always accepted by the local policy because any bandwidth request is less than or equal to unlimited. However, the RESV message may subsequently fail admission control if there is insufficient bandwidth in the RSVP pool on the input interface to which the RESV message applies. (See the iprsvpbandwidth command for more information.) If the bandwidth requested by the RESV messages is too large, a RESVERROR message that is also subject to local policy is transmitted to the RESV sender.
- default --Sets a command to its defaults.
- exit --Exits local policy configuration mode.
- fast-reroute --Allows TE LSPs that request Fast Reroute service. The default value is accept.
- forward --Accepts and forwards RSVP messages.
forward {all|path | path-error | resv | resv-error}
-
- all --Accepts and forwards all RSVP messages.
- path --Accepts and forwards PATH messages that meet the match criteria for this policy. If you omit this command, PATH messages that meet the policy-match criteria are not forwarded to the next (downstream) hop.
- path-error --Accepts and forwards PATHERROR messages that meet the match criteria for this policy. If you omit this command, the PATHERROR messages that meet the match criteria are not forwarded to the previous (upstream) hop. You may want to reject outbound PATHERROR messages if you are receiving PATH messages from an untrusted node because someone could be trying to port-scan for RSVP. If you reply with a PATHERROR message, the untrusted node knows that you support RSVP and your IP address. Such information could be used to attempt RSVP-based attacks.
- resv --Accepts and forwards RESV messages that meet the match criteria for this policy. If you omit this command, RESV messages that meet the match criteria are not forwarded to the previous (upstream) hop.
- resv-error --Accepts and forwards RESVERROR messages that meet the match criteria for this policy. If you omit this command, the RESVERROR messages that meet the match criteria are not forwarded to the next (downstream) hop. You may want to reject outbound RESVERROR messages if you are receiving RESV messages from an untrusted node because someone could be trying to port-scan for RSVP. If you reply with a RESVERROR message, then the untrusted node knows that you support RSVP and your IP address. Such information could be used to attempt RSVP-based attacks.
- local-override --Overrides any other policy sources by enforcing this local policy. Finalizes any decisions by this policy. If local-override is omitted, RSVP holds onto the local policy decision to see if another local or remote policy exists that will make a decision on the RSVP message, and only if there is no other policy decision will the local policy decision be enforced.
-
maximum [bandwidth[groupx] [singley] | sendersn]--Sets the limits for resources.
- bandwidth[groupx] [singley]--Indicates bandwidth limits for RSVP reservations. The group keyword specifies the amount of bandwidth that can be requested by all reservations covered by this policy. The single keyword specifies the maximum bandwidth that can be requested by any specific RSVP reservation covered by this policy. The x and y values are in kilobits per second and can range from 1 to 10,000,000 (similar in concept to the existing interface mode iprsvpbandwidthcommand). Absence of a bandwidth command implies that there is no policy limit on bandwidth requests.
Previously, the maximumbandwidthcommand applied only to PATH messages. However, as part of the application ID enhancement, this command now applies only to RESV messages. This change has the following benefits: Allows the local policy bandwidth limit to be used by RSVP's admission control process for both shared and nonshared reservations. Previous releases that performed group bandwidth checks on PATH messages could not account for bandwidth sharing, and, as a result, you had to account for sharing by creating a larger maximum group bandwidth for the policy. Allows a local policy to trigger preemption during the admission control function if there is insufficient policy bandwidth to meet the needs of an incoming RESV message.
Note |
If you do not configure the iprsvppolicypreempt command, the maximumcommand may be rejected, resulting in the following error message: "RSVPerror:insufficientpreemptablebandwidth"iftherearereservationsadmittedagainstthepolicy,andyoutrytoreducethegroupbandwidthtolessthantheamountofadmittedbandwidthonthepolicy. |
- no --Negates a command or sets its defaults.
- preempt-priority [traffic-engx] setup-priority [hold-priority] --Specifies the RSVP QoS priorities to be inserted into PATH and RESV messages if they were not signaled from an upstream or downstream neighbor or local client application, and the maximum setup or hold priority that RSVP QoS or MPLS/TE sessions can signal. A PATHERROR, RESVERROR, or local application error is returned if these limits are exceeded.
The xvalue indicates the upper limit of the priority for TE reservations. The range of xvalues is 0 to 7 in which the smaller the number, the higher the reservation's priority. For non-TE reservations, the range of xvalues is 0 to 65535 in which the higher the number, the higher the reservation's priority.
The setup-priority argument indicates the priority of a reservation when it is initially installed. The optional hold-priorityargument indicates the priority of a reservation after it has been installed; if omitted, it defaults to the setup-priority. Values for the setup-priority and hold-priority arguments range from 0 to 7 where 0 is considered the highest priority.
If the incoming message has a preemption priority that requests a priority higher than the policy allows, the message is rejected. Use the tunnelmplstraffic-engpriority command to configure preemption priority for TE tunnels.
A single policy can contain a preempt-prioritytraffic-eng and a preempt-priority command, which may be useful if the policy is bound to an ACL that identifies a subnet containing a mix of TE and non-TE endpoints or midpoints.
Note |
If you exit local policy configuration mode without entering any submode commands, the policy that you have created rejects all RSVP messages. |
Per-Interface Local Policies
All the local policy submode commands are also supported on a per-interface basis. You simply enter Cisco IOS interface configuration mode for the selected interface and type in any number and mix of the submode commands.
Per-interface local policies take precedence over global local policies. However, if there is a default local policy configured for an interface, the router does not try to match any RSVP messages arriving on that interface to any of the global local policies. Policies have the following priority (from highest to lowest):
- Nondefault interface policies
- Default interface policy
- Nondefault global policies
- Global default policy
There are some important points to note about per-interface local policies:
- Per-interface local policies do not take the place of the iprsvpbandwidth command. The iprsvpbandwidth command indicates if RSVP is enabled on an interface as well as the size of the RSVP bandwidth pool. The iprsvpbandwidth pool is used by the admission control function of RSVP; per-interface policies are used by the policy control function of RSVP. Policy control is the third phase of RSVP message processing, which consists of validation, authentication, policy control (authorization), and admission control.
- The sum of the group bandwidth of all the local policies assigned to an interface can be greater than the maximum total bandwidth configured in the iprsvpbandwidth command. However, the iprsvpbandwidth command makes the final decision as to whether there is sufficient bandwidth to admit the reservation.
Examples
ACL-, Default-, and Autonomous-System-Based Policies
In the following example, any RSVP nodes in the 192.168.101.0 subnet can initiate or respond to reservation requests, but all other nodes can respond to reservation requests only. This means that any 192.168.101.x node can send and receive PATH, PATHERROR, RESV, or RESVERROR messages. All other nodes can send only RESV or RESVERROR messages, and all reservations for autonomous system 1 are rejected.
Router# configure terminal
Router(config)# access-list 104 permit ip 192.168.101.0 0.0.0.255 any
Router(config)# ip rsvp policy local acl 104
Router(config-rsvp-policy-local)# forward all
Router(config-rsvp-policy-local)# exit
Router(config)# ip rsvp policy local default
Router(config-rsvp-policy-local)# forward resv
Router(config-rsvp-policy-local)# forward resverror
Router(config-rsvp-policy-local)# exit
Router(config)# ip rsvp policy local origin-as 1
Router(config-rsvp-policy-local)# end
Application-ID-Based Policy
RSVP matches incoming RSVP messages with IDs to configured IDs and policies. The following example configures a global RSVP local policy that limits voice calls to 200 kbps for the whole router regardless of which interface the RSVP signaling occurs on:
Router# configure terminal
Router(config)# ip rsvp policy local identity rsvp-voice policy-locator "GUID=www.cisco.com, APP=Voice"
Router(config)# ip rsvp policy local identity rsvp-voice
Router(config-rsvp-local-policy)# forward all
Router(config-rsvp-local-policy)# maximum bandwidth group 200
Router(config-rsvp-local-policy)# end
Per-Interface Application ID-Based Policy
The following example configures a local policy that limits all RSVP voice calls on serial interface 2/0/0 to a total of 200 kbps:
Router# configure terminal
Router(config)# ip rsvp policy local identity rsvp-voice policy-locator APP=Voice
Router(config)# interface serial2/0/0
Router(config-if)# ip rsvp policy local identity rsvp-voice
Router(config-rsvp-local-policy)# forward all
Router(config-rsvp-local-policy)# maximum bandwidth group 200
Router(config-rsvp-local-policy)# exit
Router(config-if)# ip rsvp policy local default
Router(config-rsvp-local-policy)# forward all
Router(config-rsvp-local-policy)# maximum bandwidth group 50
Router(config-rsvp-local-policy)# end
DSCP-Based Policy
The following example configures a local policy to match RSVP aggregation reservations with an RSVP session object DSCP value of 46 and sets the preempt-priority with a setup and hold priority equal to 5.
Router# configure terminal
Router(config)# ip rsvp policy local dscp-ip 46
Router(config-rsvp-local-policy)# forward all
Router(config-rsvp-local-policy)# preempt-priority 5 5
Router(config-rsvp-local-policy)# end
Related Commands
| Command |
Description |
|---|---|
| debug ip rsvp filter |
Displays debug messages for RSVP debug message filter. |
| ip rsvp policy preempt |
Enables RSVP to redistribute bandwidth from lower-priority reservations to new, higher-priority reservations. |
| show ip rsvp policy |
Displays the configured local policies. |
| show ip rsvp policy cops |
Displays the policy server addresses, ACL IDs, and current state of the router's TCP connections to COPS servers. |
| show ip rsvp policy local |
Displays selected local policies that have been configured. |
| tunnel mpls traffic-eng priority |
Configures the setup and reservation priority for an MPLS traffic engineering tunnel. |
ip rsvp policy preempt
To enable Resource Reservation Protocol (RSVP) to take bandwidth from lower-priority reservations and give it to new, higher-priority reservations, use the iprsvppolicypreemptcommand in global configuration mode. To disable this function, use the no form of this command.
Syntax Description
This command has no arguments or keywords.
Command Default
RSVP does not reassign bandwidth from lower-priority reservations to higher-priority reservations.
Command Modes
Global configuration (config)
Command History
| Release |
Modification |
|---|---|
| 12.2(13)T |
This command was introduced. |
Usage Guidelines
Use the iprsvppolicypreempt command to enable or disable the preemption parameter for all configured local and remote policies without setting the preemption parameter for each policy individually. This command allows you to give preferential quality of service (QoS) treatment to one group of RSVP hosts or applications over another.
Examples
The following example shows how to enable preemption:
Router(config)# ip rsvp policy preempt
The following example shows how to disable preemption:
Router(config)# no ip rsvp policy preempt
Related Commands
| Command |
Description |
|---|---|
| show ip rsvp policy |
Displays the configured local policies. |
ip rsvp policy vrf
To configure a Resource Reservation Protocol (RSVP) policy for a virtual routing and forwarding (VRF) instance, use the iprsvppolicyvrf command in global configuration mode. To remove a VRF-specific policy, use theno form of this command.
Syntax Description
| vrf-name |
Name of a specified VRF. |
||
| identity |
Unique information that is conveyed in the POLICY-DATA object for RSVP messages. |
||
| alias |
A string used within the router to reference the identity in RSVP configuration commands and show displays. The string can have as many as 64 printable characters (in the range 0x20 to 0x7E).
|
||
| policy-locator |
A string that is signaled in RSVP messages and contains application IDs in X.500 Distinguished Name (DN) format. |
||
| regular-expression |
A type of pattern-matching string that allows you to configure a single identity for use with a local policy that can match multiple X.500 DNs. |
||
| local |
A local policy. |
||
| acl |
Access control list (ACL) for the local policy. |
||
| acl1 acl2...acl8 |
An ACL. Values for each ACL are 1 to 199.
|
||
| default |
The policy used when an RSVP message does not match any ACL, identity, or autonomous system. |
||
| identity |
An application ID. |
||
| alias1 [alias2...alias4] |
An application ID alias for an application ID previously configured using the iprsvppolicyidentity command.
|
||
| origin-as |
An autonomous system (AS). |
||
| as1 [as2...as8] |
An AS. Values for each autonomous system are 1 to 65535.
|
Command Default
No policies for VRFs are configured.
Command Modes
Global configuration (config)
Command History
| Release |
Modification |
|---|---|
| 15.0(1)M |
This command was introduced. |
Usage Guidelines
If you enter a VRF that does not exist, the following error message appears:
RSVP error: VRF: myvrf doesn't exist.First create this VRF.
To delete the error message, create the VRF called myvrf and issue the command again.
If you configure some VRF-specific policies on a router and the VRF has been removed from the router, then all the policies configured for that VRF are also removed from the configurations.
Examples
The following example shows how to configure a local default policy for the VRF called myvrf after it has been created:
Router(config)# ip rsvp policy vrf myvrf local default
Related Commands
| Command |
Description |
|---|---|
| ip rsvp policy identity |
Defines RSVP application IDs. |
| ip rsvp policy local |
Defines an RSVP local policy. |
ip rsvp pq-profile
To specify the criteria for Resource Reservation Protocol (RSVP) to use to determine which flows to direct into the priority queue (PQ) within weighted fair queueing (WFQ), use the iprsvppq-profile command in global configuration mode. To disable the specified criteria, use the no form of this command.
Syntax Description
| voice-like |
(Optional) Indicates pq-profile parameters sufficient for most voice flows. The default values for r', b', and p-to-r' are used. These values should cause all voice flows generated from Cisco IOS applications and most voice flows from other RSVP applications, such as Microsoft NetMeeting, to be directed into the PQ. |
| r' |
(Optional) Indicates maximum rate of a flow in bytes per second. Valid range is from 1 to 1048576 bytes per second. |
| b' |
(Optional) Indicates maximum burst of a flow in bytes. Valid range is from 1 to 8192 bytes. |
| p-to-r' |
(Optional) Indicates maximum ratio of peak rate to average rate as a percentage. Valid range is from 100 to 4000 percent. |
| ignore-peak-value |
(Optional) Indicates that the peak rate to average rate ratio of the flow is not evaluated when RSVP identifies flows. |
Command Default
The default value for r' is 12288 bytes per second.
The default value for b' is 592 bytes.
The default value for p-to-r' is 110 percent.
Command Modes
Global configuration (config)
Command History
| Release |
Modification |
|---|---|
| 12.1(3)T |
This command was introduced. |
| 12.2(33)SRA |
This command was integrated into Cisco IOS Release 12.2(33)SRA. |
| 12.2SX |
This command is supported in the Cisco IOS Release 12.2SX train. Support in a specific 12.2SX release of this train depends on your feature set, platform, and platform hardware. |
Usage Guidelines
Use this command to define the profile of RSVP flows to be placed in the PQ within the WFQ system. You can have only one profile in effect at a time. Changes to this configuration affect only new flows, not existing flows.
This command applies only on interfaces that are running RSVP and WFQ.
RSVP recognizes voice flows based upon the r, b, and p values within the flowspec of a receiver. A reserved flow is granted to the PQ as long as the flowspec parameters of a receiver meet the following default criteria:
(r <= r') AND (b <= b') AND (p/r <= p-to-r')
Examples
The following example shows how to put voice-like flows (with the default criteria for voice) into the PQ:
Router(config)# ip rsvp pq-profile
Router(config)# ip rsvp pq-profile voice-like
Router(config)# ip rsvp pq-profile 12288 592 110
Router(config)# default ip rsvp pq-profile
Router# show running-config | include pq-profile
The following example shows how to put all flows matching the voice criteria into the PQ:
Router(config)# ip rsvp pq-profile 10240 512 100
Router# show running-config | include pq-profile
ip rsvp pq-profile 10240 512 100
The following example shows how to define that no flows are put into the PQ:
Router(config)# no ip rsvp pq-profile
Router# show running-config | include pq-profile
no ip rsvp pq-profile
The following example shows how to put flows with the criteria given for r' and b' and the default value for p-to-r' into the PQ:
Router(config)# ip rsvp pq-profile 9000 300
Router# show running-config | include pq-profile
ip rsvp pq-profile 9000 300 110
The following example shows how to put flows with the criteria given for r' and b' and ignoring the peak value of the flow into the PQ:
Router(config)# ip rsvp pq-profile 9000 300 ignore-peak-value
Router# show running-config | include pq-profile
ip rsvp pq-profile 9000 300 ignore-peak-value
The following example shows how to put Microsoft NetMeeting voice flows with G.711 or adaptive differential pulse code modulation (ADPCM) codecs into the PQ:
Router(config)# ip rsvp pq-profile 10200 1200
 Feedback