Feedback
Table Of Contents
Password Policy Configuration Scenario
Limitation on Ability of the Administrator to Change Passwords
Summary of Configuration Steps
Step 1: Add and Edit a New Administrator Account
Step 2: Configure Password Policy
Specify Password Validation Options
Specify Password Lifetime Options
Specify Password Inactivity Options
Specify Incorrect Password Attempt Options
Step 3: Configure Session Policy
Step 4: Configure Access Policy
Viewing Administrator Entitlement Reports
Password Policy Configuration Scenario
Cisco Secure ACS 4.1, hereafter referred to as ACS, provides new password features to support corporate requirements mandated by the Sarbanes-Oxley Act of 2002. Sarbanes-Oxley (SOX) requires stricter enforcement of password restrictions.
ACS provides SOX support, which includes:
•
Enforcement of password lifetime policy
•
•
To enable password configuration that includes these new features, ACS 4.1 provides a new password policy page.
All administrator logins are subject to the policy that you configure for passwords and accounts, unless you check the Account Never Expires check box. For example, ACS provides configurable limits on password lifetime and activity, and incorrect password attempts. These options can force password change and can result in automatic account lockout. Privileged administrators can also lock out an account. In addition, you can monitor the last password change and last account activity for each administrator.
Limitation on Ability of the Administrator to Change Passwords
With ACS 4.1, if an administrator is not granted full administrative access, the only action the administrator can take is to change his or her own password.
Summary of Configuration Steps
To configure password policy in ACS 4.1:
Step 1
Add a new administrator account, specify the administrator name and password, and grant access privileges. See Step 1: Add and Edit a New Administrator Account for details.
Step 2
Configure restrictions on the admin user password. See Step 2: Configure Password Policy for details.
Step 3
Configure restrictions on the admin user's session. See Step 3: Configure Session Policy for details.
Step 4
Configure restrictions on admin access, such as the IP addresses from which administrators can log in. See Step 4: Configure Access Policy for details.
Step 1: Add and Edit a New Administrator Account
To add a new administrator account:
Step 1
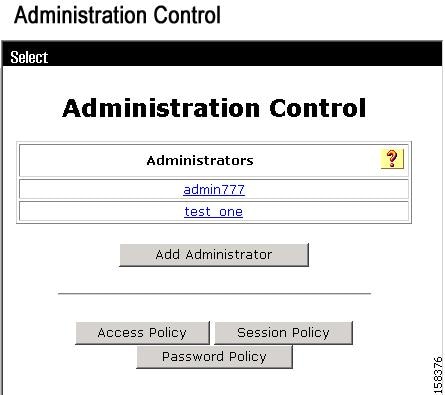
The Administration Control page appears, as shown in Figure 3-1.
Figure 3-1 Administration Control Page
The Administration Control page initially lists no administrators. If administrators have been configured, the page lists the configured administrators.
Step 2
The Add Administrator page opens.
Step 3
Step 4
Step 5
Note
Step 6
Step 2: Configure Password Policy
To configure password policy:
Step 1
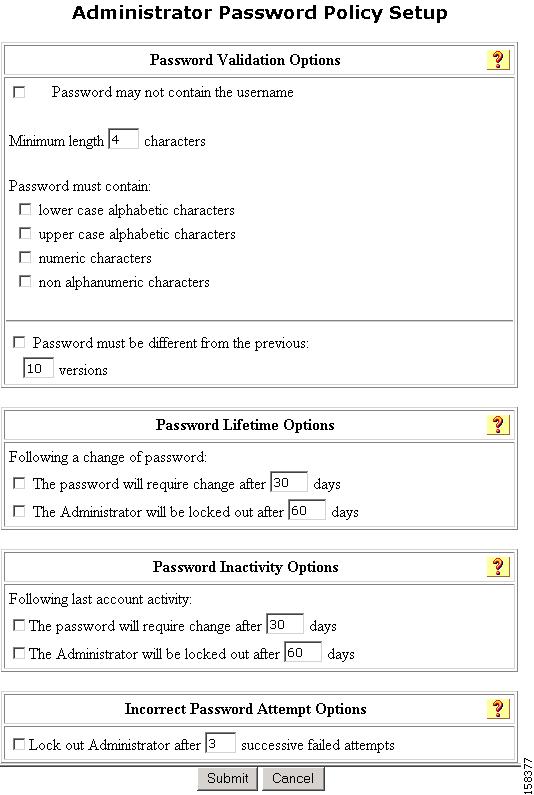
The Administrator Password Policy Setup page appears, shown in Figure 3-2.
Figure 3-2 The Administrator Password Policy Setup Page
Step 2
•
See Specify Password Validation Options.
•
See Specify Password Lifetime Options.
•
See Specify Password Inactivity Options.
•
See Specify Incorrect Password Attempt Options.
Specify Password Validation Options
In the Password Validation Options section, configure:
•
•
•
•
•
•
•
Specify Password Lifetime Options
In the Password Lifetime Options section, configure:
•
•
Specify Password Inactivity Options
In the Password Inactivity Options section, configure:
•
Note
•
Note
Specify Incorrect Password Attempt Options
In the Incorrect Password Attempt Options section, configure:
Lock out Administrator after n successive failed attempts—If checked (enabled), n specifies the allowable number of incorrect password attempts. When checked, n cannot be set to zero (0). If not checked (disabled), ACS allows unlimited successive failed login attempts. The default value is 3 days; the range = 1 to 98 days.
Note
Step 3: Configure Session Policy
To configure session policy:
Step 1
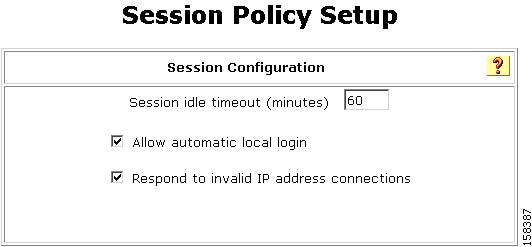
The Session Policy Setup page opens, as shown in Figure 3-3.
Figure 3-3 The Session Policy Setup Page
Step 2
You can specify:
•
When an administrative session terminates, ACS displays a dialog box asking whether the administrator wants to continue. If the administrator chooses to continue, ACS starts a new administrative session.
This parameter only applies to the ACS administrative session in the browser. It does not apply to an administrative dial-up session.
•
When unchecked (disabled), administrators must log in by using administrator names and passwords.
Note
The local_login administrator account requires the Administration Control privilege. ACS records administrative sessions that use the local_login account in the Administrative Audit report under the local_login administrator name.
•
Disabling this option can help to prevent unauthorized users from discovering ACS.
Step 4: Configure Access Policy
This section describes how to configure administrative access policy.
Before You Begin
If you want to enable the SSL for administrator access, you must have completed the steps in Install the CA Certificate, page 5-4, and Add a Trusted Certificate, page 5-4. After you have enabled SSL, ACS begins using the SSL at the next administrator login. This change does not affect current administrator sessions. In the absence of a certificate, ACS displays an error message when you attempt to configure SSL.
To set up an ACS access policy:
Step 1
ACS displays the Administration Control page.
Step 2
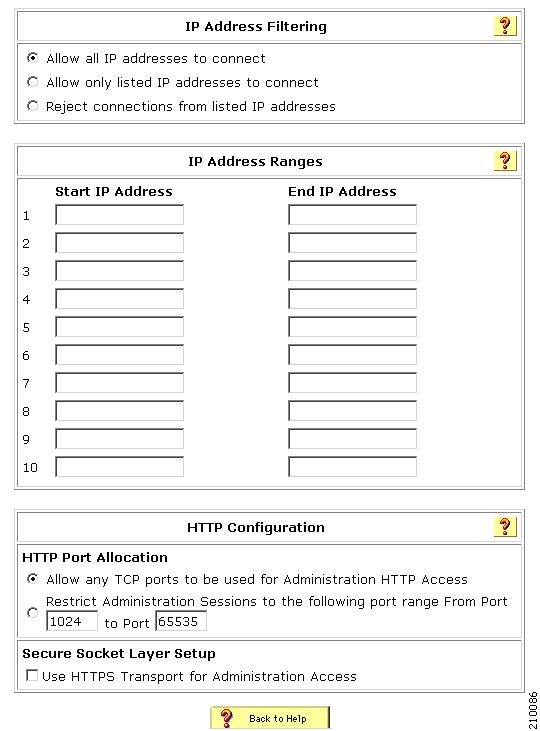
The Access Policy Setup page appears, as shown in Figure 3-4.
Figure 3-4 Access Policy Setup Page
Step 3
Step 4
Step 5
Step 6
Step 7
ACS saves and begins enforcing the access policy settings.
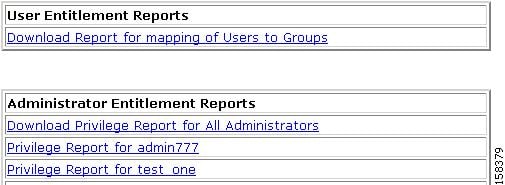
Viewing Administrator Entitlement Reports
To assist in SOX compliance, ACS 4.1 produces entitlement report, which contain data extracted from the ACS configuration and formatted into text based files.
ACS produces entitlement reports for administrators and users. The reports that you can generate are:
•
•
•
View Privilege Reports
To view privilege reports:
Step 1
The Reports page opens.
Step 2
A list of the available entitlement reports appears. Figure 3-5 shows an example list.
Figure 3-5 List of Entitlement Reports
Step 3
Each report is downloaded to the local computer in the form of an Excel spreadsheet.