连接防火墙的电缆
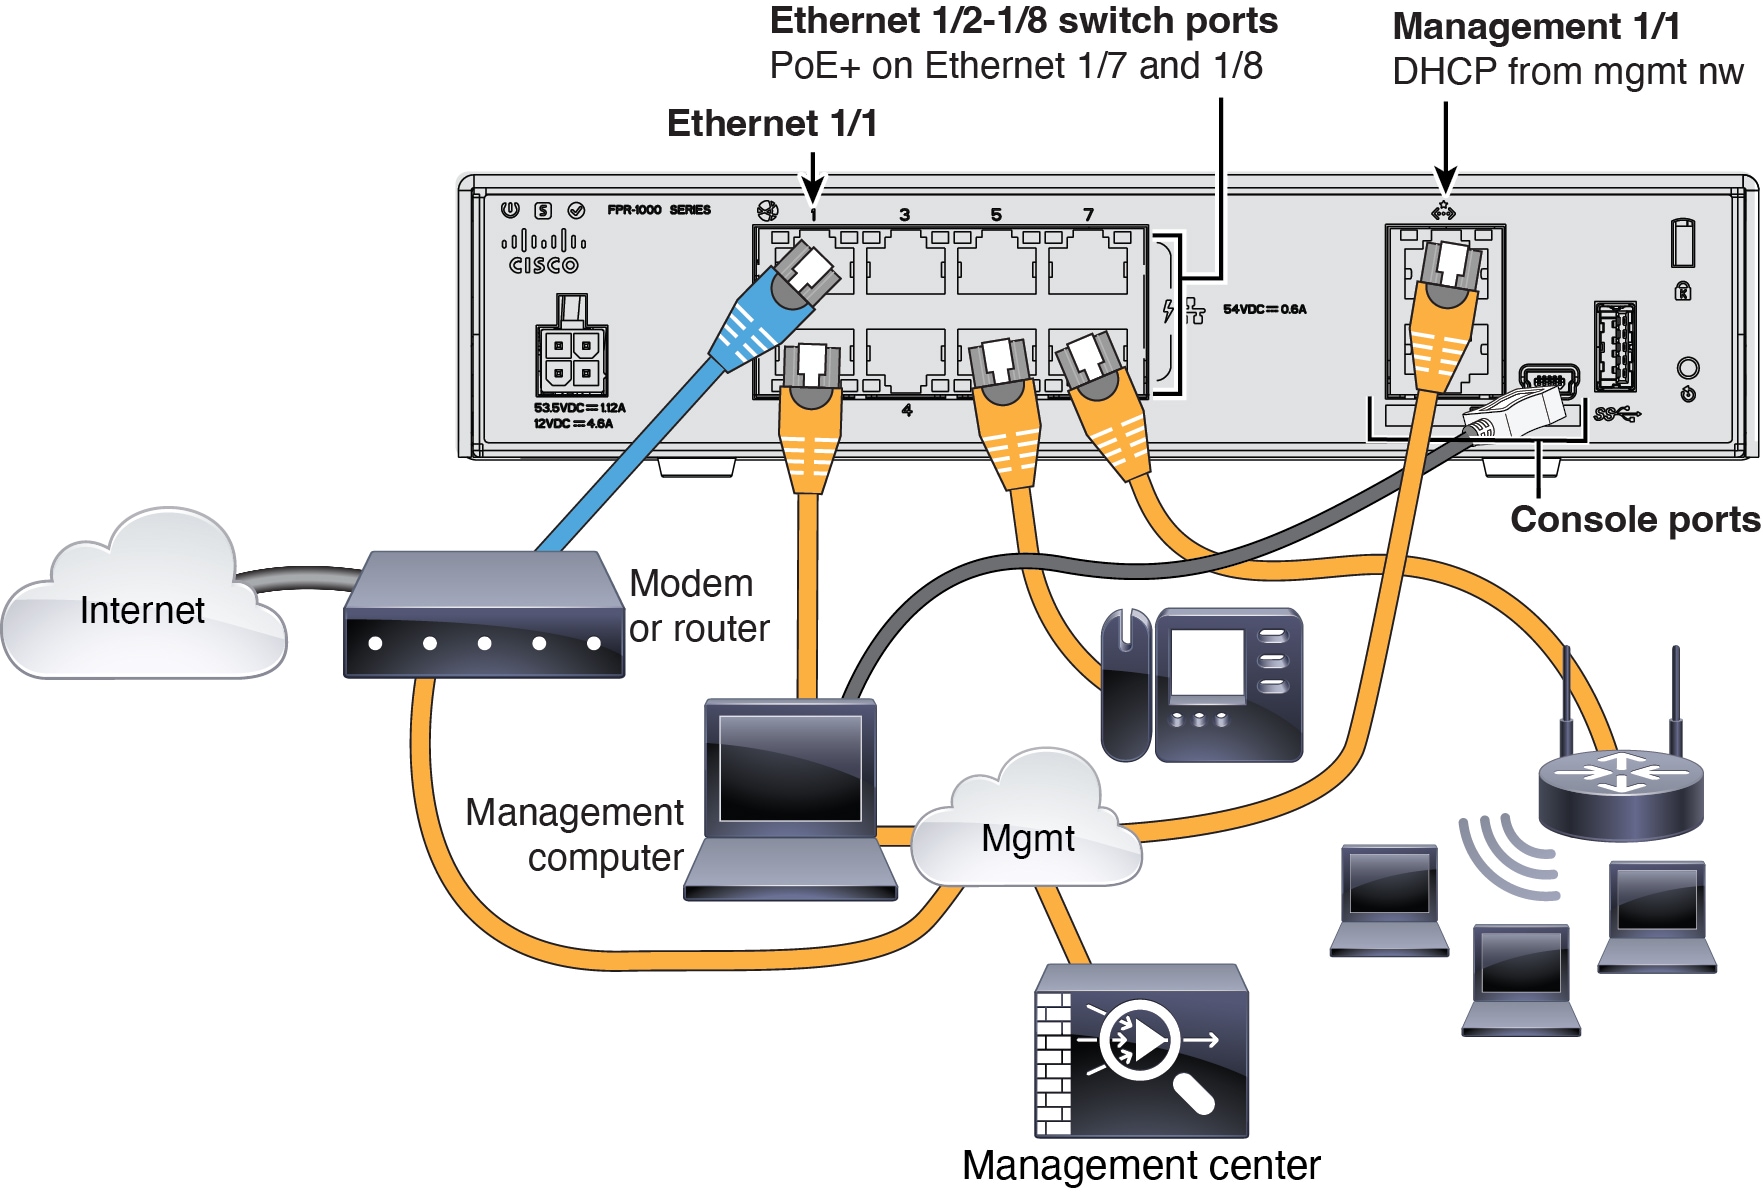
将 管理中心 连接到专用管理 1/1 接口。管理网络需要访问互联网以进行更新。例如,您可以通过防火墙本身将管理网络与互联网连接(如连接到内部网络)。
有关详细信息,请参阅硬件安装指南。
此产品的文档集力求使用非歧视性语言。在本文档集中,非歧视性语言是指不隐含针对年龄、残障、性别、种族身份、族群身份、性取向、社会经济地位和交叉性的歧视的语言。由于产品软件的用户界面中使用的硬编码语言、基于 RFP 文档使用的语言或引用的第三方产品使用的语言,文档中可能无法确保完全使用非歧视性语言。 深入了解思科如何使用包容性语言。
思科可能会在某些地方提供本内容的当地语言翻译版本。请注意,翻译版本仅供参考,如有任何不一致之处,以本内容的英文版本为准。
连接防火墙,然后将防火墙注册到管理中心。
将 管理中心 连接到专用管理 1/1 接口。管理网络需要访问互联网以进行更新。例如,您可以通过防火墙本身将管理网络与互联网连接(如连接到内部网络)。
有关详细信息,请参阅硬件安装指南。
使用 Cisco Secure Firewall 设备管理器 或 CLI 来执行行初始配置。
使用这种方法,在注册防火墙后,除管理接口外还将预先配置以下接口:
以太网 1/1 - outside,IP 地址来自 DHCP、IPv6 自动配置
VLAN1 - inside,192.168.95.1/24
默认路由 - 通过外部接口上的 DHCP 获取
其他接口 - 保留 设备管理器 中的任何接口配置。
不会保留其他设置,如内部的 DHCP 服务器、访问控制策略或安全区域。
|
步骤 1 |
将计算机连接到内部接口(以太网 1/2 至 1/8)。 |
||
|
步骤 2 |
登录设备管理器。
|
||
|
步骤 3 |
使用设置向导。 
|
||
|
步骤 4 |
(可选) 使用静态 IP 地址来配置管理接口。请参阅上的管理接口。 |
||
|
步骤 5 |
如果要配置其他接口,请选择设备 (Device),然后点击接口 (Interfaces) 摘要中的链接。 |
||
|
步骤 6 |
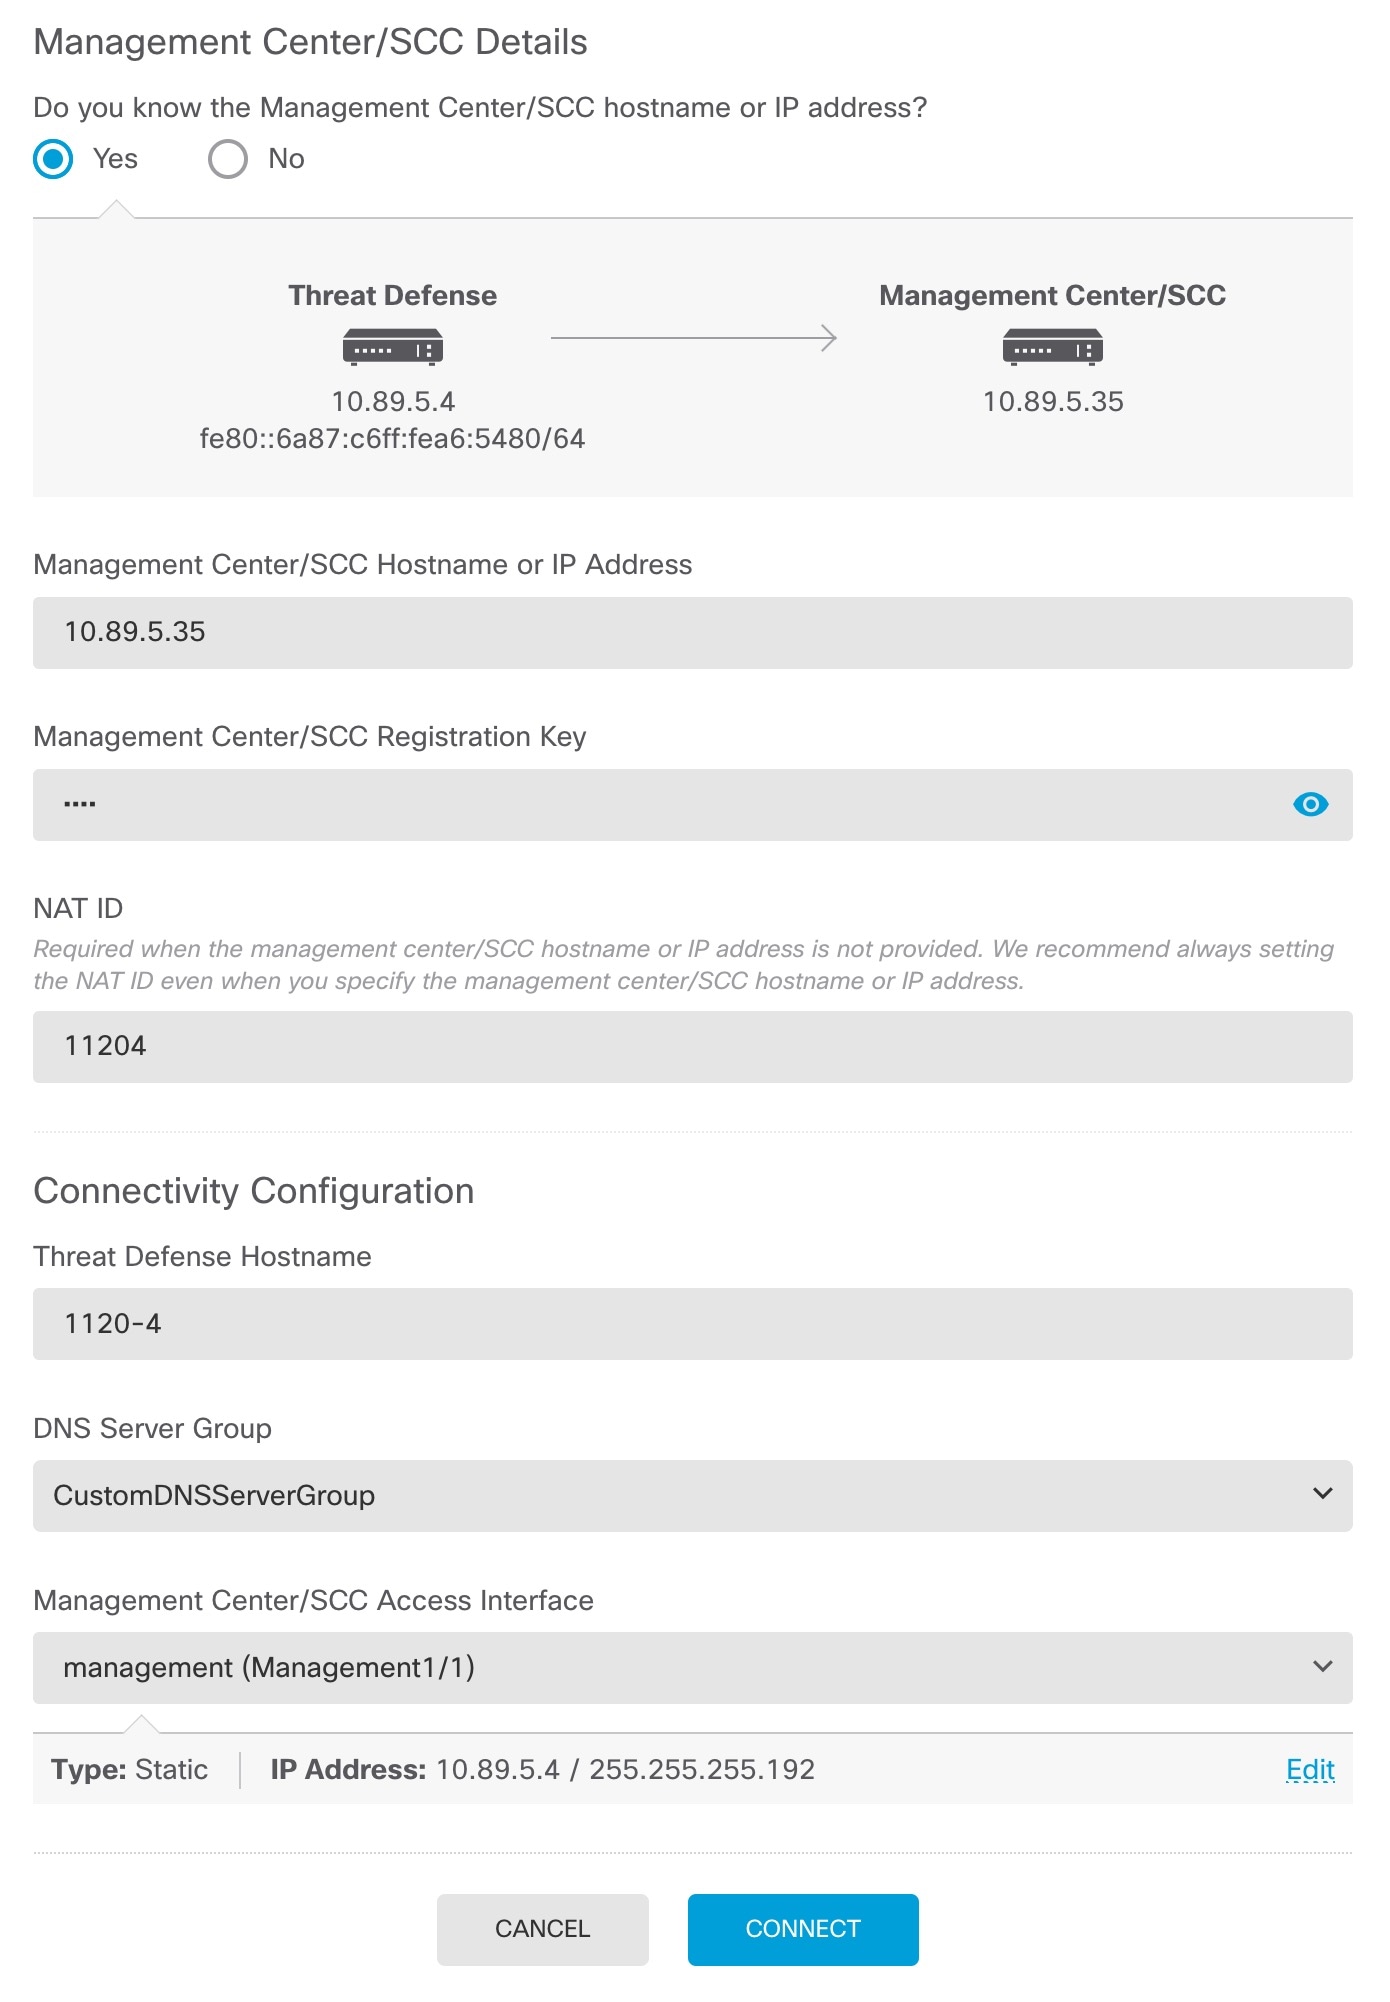
通过选择 并点击继续 (Proceed),向 管理中心CDO 注册 配置 管理中心/SCC/详细信息 (Management Center/SCC/Details)。
|
||
|
步骤 7 |
配置连接配置。 |
||
|
步骤 8 |
点击连接 (Connect)。 注册状态 (Registration Status) 对话框将显示 管理中心CDO 注册的当前状态。 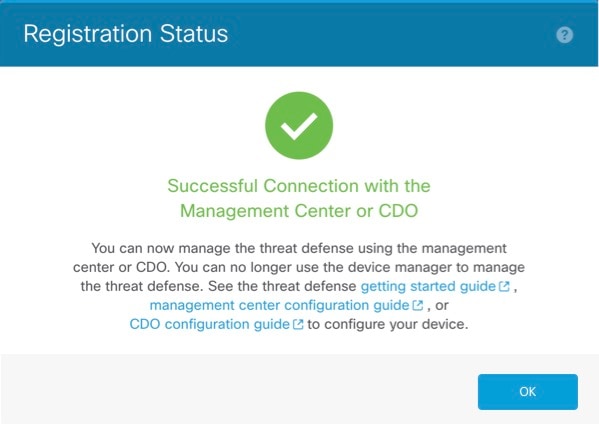
|
||
|
步骤 9 |
在状态屏幕上完成 保存管理中心/SCC 注册设置 步骤之后,转到 管理中心CDO ,然后添加防火墙。请参阅向管理中心注册防火墙。 |
使用 CLI 设置脚本设置专用管理 IP 地址、网关和其他基本网络设置。
|
步骤 1 |
连接控制台端口并访问 威胁防御 CLI。请参阅访问威胁防御 CLI。 |
||
|
步骤 2 |
完成管理界面设置的 CLI 设置脚本。
指南:为至少其中一种地址类型输入 y。 指南:输入 no 以使用 管理中心。 |
||
|
步骤 3 |
识别 管理中心。 configure manager add {主机名 | IPv4_address | IPv6_address | DONTRESOLVE} reg_key nat_id
示例: |
将防火墙手动注册到 管理中心。
|
步骤 1 |
登录管理中心。 |
|
步骤 2 |
选择。 |
|
步骤 3 |
从添加下拉列表中,选择添加设备。 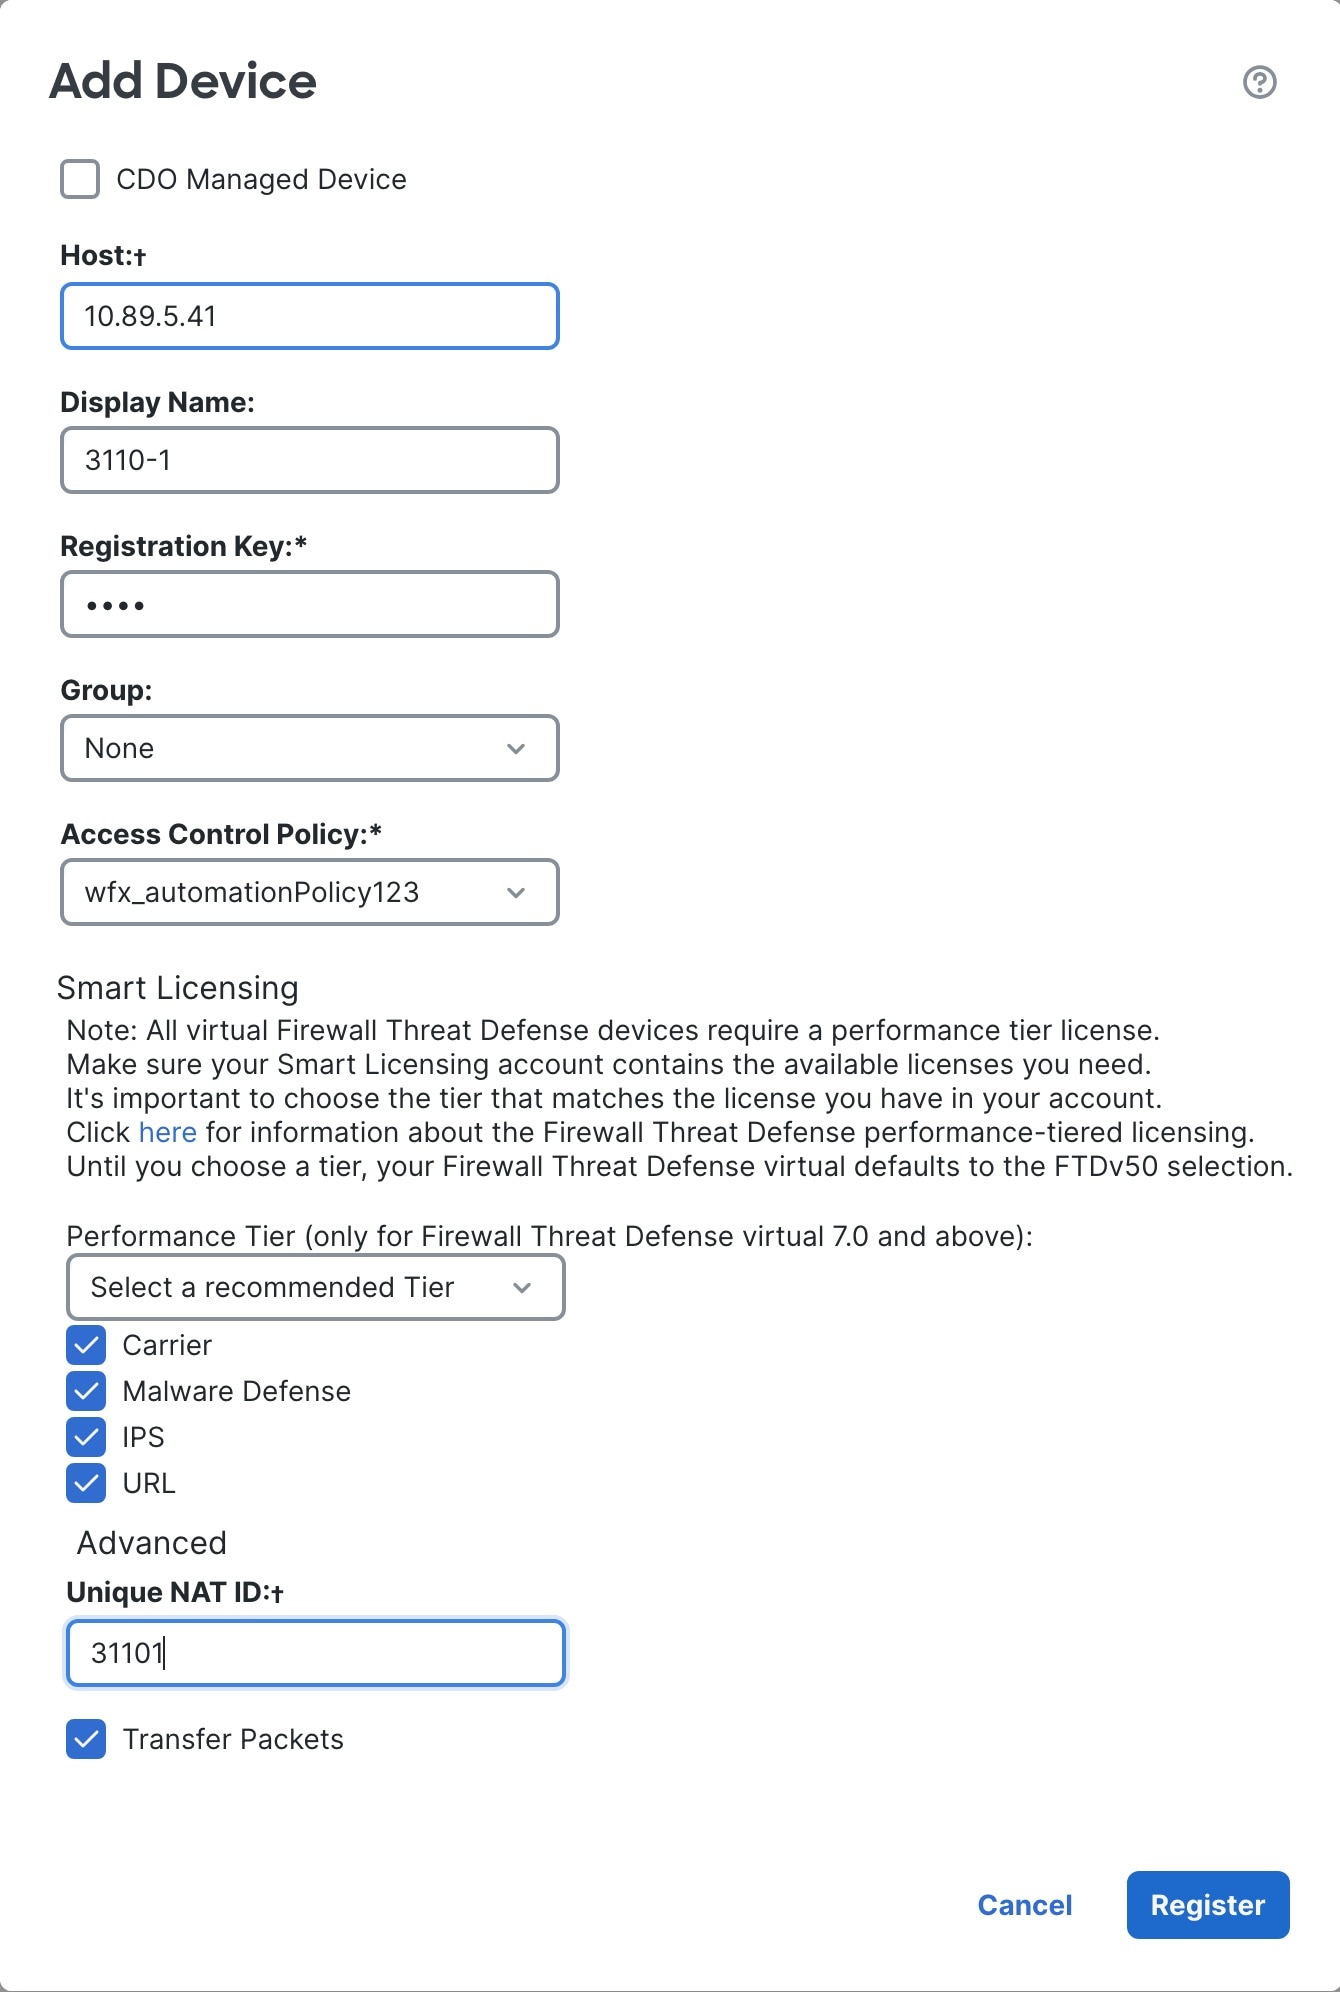
设置以下参数:
|
|
步骤 4 |
点击 Register。 如果 威胁防御注册失败,请检查以下项:
有关更多故障排除信息,请参阅 https://cisco.com/go/fmc-reg-error。 |


 反馈
反馈