- Preface
- Chapter 1 - Product Overview
- Chapter 2 - Preparing for Installation
- Chapter 3 - Installing the Client Adapter
- Chapter 4 - Using the Profile Manager
- Chapter 5 - Configuring the Client Adapter
- Chapter 6 - Using EAP Authentication
- Chapter 7 - Viewing Status and Statistics
- Chapter 8 - Using the Aironet System Tray Utility (ASTU)
- Chapter 9 - Routine Procedures
- Chapter 10 - Troubleshooting
- Appendix A - Technical Specifications
- Appendix B - Translated Safety Warnings
- Appendix C - Declarations of Conformity and Regulatory Information
- Appendix D - Channels, Power Levels, and Antenna Gains
- Appendix E - Configuring the Client Adapter through the Windows XP Operating System
- Appendix F - Performing a Site Survey
- Appendix G - Using the Profile Migration Tool
- Glossary
- Index
Cisco Aironet 802.11a/b/g Wireless LAN Client Adapters (CB21AG and PI21AG) Installation and Configuration Guide, Release 4.0
Bias-Free Language
The documentation set for this product strives to use bias-free language. For the purposes of this documentation set, bias-free is defined as language that does not imply discrimination based on age, disability, gender, racial identity, ethnic identity, sexual orientation, socioeconomic status, and intersectionality. Exceptions may be present in the documentation due to language that is hardcoded in the user interfaces of the product software, language used based on RFP documentation, or language that is used by a referenced third-party product. Learn more about how Cisco is using Inclusive Language.
- Updated:
- October 12, 2007
Chapter: Chapter 9 - Routine Procedures
Routine Procedures
This chapter provides procedures for common tasks related to the client adapter.
The following topics are covered in this chapter:
•![]() Client Adapter Software Procedures
Client Adapter Software Procedures
•![]() Enabling or Disabling Your Client Adapter's Radio
Enabling or Disabling Your Client Adapter's Radio
Removing a Client Adapter
Follow the instructions in this section to remove a PC-Cardbus card or PCI card from a computing device, when necessary.

Removing a PC-Cardbus Card
To remove a PC-Cardbus card after it is successfully installed and configured (such as when your laptop is to be transported), completely shut down your computer and pull the card directly out of the Cardbus slot. When the card is reinserted and the computer is rebooted, your connection to the network should be re-established.

Note ![]() If you need to remove your PC-Cardbus card but do not want to shut down your computer, double-click the Safely Remove Hardware icon in the Windows system tray, choose the Cisco Aironet client adapter you want to remove under Hardware devices, click Stop, and click OK to close each open window. Then pull the card directly out of the card slot.
If you need to remove your PC-Cardbus card but do not want to shut down your computer, double-click the Safely Remove Hardware icon in the Windows system tray, choose the Cisco Aironet client adapter you want to remove under Hardware devices, click Stop, and click OK to close each open window. Then pull the card directly out of the card slot.
Removing a PCI Card
Because PCI client adapters are installed inside desktop computers, which are not designed for portable use, you should have little reason to remove the adapter. However, instructions are provided below in case you need to remove your PCI card.
Step 1 ![]() Completely shut down your computer.
Completely shut down your computer.
Step 2 ![]() Remove the computer cover.
Remove the computer cover.
Step 3 ![]() Remove the screw from the top of the CPU back panel above the PCI expansion slot that holds your client adapter.
Remove the screw from the top of the CPU back panel above the PCI expansion slot that holds your client adapter.
Step 4 ![]() Disassemble the antenna from the base.
Disassemble the antenna from the base.
Step 5 ![]() Pull up firmly on the client adapter to release it from the slot and carefully tilt the adapter to slip its antenna through the opening near the slot.
Pull up firmly on the client adapter to release it from the slot and carefully tilt the adapter to slip its antenna through the opening near the slot.
Step 6 ![]() Reinstall the screw on the CPU back panel and replace the computer cover.
Reinstall the screw on the CPU back panel and replace the computer cover.
Client Adapter Software Procedures
This section provides instructions for the following procedures:
•![]() Upgrading the client adapter software, page 3
Upgrading the client adapter software, page 3
•![]() Manually installing or upgrading the client adapter driver, page 6
Manually installing or upgrading the client adapter driver, page 6
•![]() Uninstalling the client adapter software, page 6
Uninstalling the client adapter software, page 6
•![]() ADU procedures, page 7
ADU procedures, page 7
•![]() ASTU procedures, page 11
ASTU procedures, page 11
Upgrading the Client Adapter Software
Follow these steps to upgrade your Cisco Aironet CB21AG or PI21AG client adapter software to a more recent release using the settings that were selected during the last installation.
Note ![]() If you want to upgrade your client adapter software using new installation settings, uninstall the previous installation (see the instructions on page 6); then install the new software (see the instructions on page 3-9).
If you want to upgrade your client adapter software using new installation settings, uninstall the previous installation (see the instructions on page 6); then install the new software (see the instructions on page 3-9).
Step 1 ![]() Make sure the client adapter is inserted into your computer.
Make sure the client adapter is inserted into your computer.
Note ![]() If your client adapter is not inserted, the installation continues, but the driver installation is incomplete. You must manually upgrade the driver later using the Update Device Driver Wizard. See the "Manually Installing or Upgrading the Client Adapter Driver" section for instructions.
If your client adapter is not inserted, the installation continues, but the driver installation is incomplete. You must manually upgrade the driver later using the Update Device Driver Wizard. See the "Manually Installing or Upgrading the Client Adapter Driver" section for instructions.
Step 2 ![]() Use Windows Explorer to find the Install Wizard file.
Use Windows Explorer to find the Install Wizard file.
Step 3 ![]() Double-click the file. The "Starting InstallShield Wizard" message appears followed by the Preparing Setup window (see Figure 9-1) and the Previous Installation Detected window (see Figure 9-2).
Double-click the file. The "Starting InstallShield Wizard" message appears followed by the Preparing Setup window (see Figure 9-1) and the Previous Installation Detected window (see Figure 9-2).
Figure 9-1 Preparing Setup Window
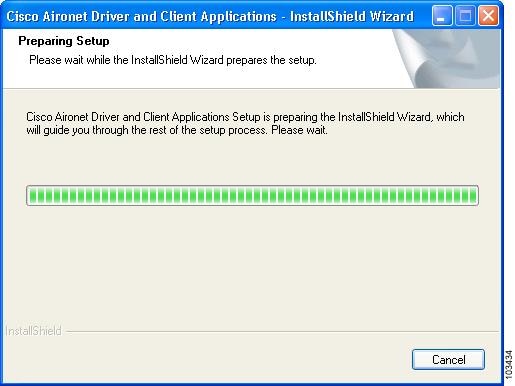
Figure 9-2 Previous Installation Detected Window
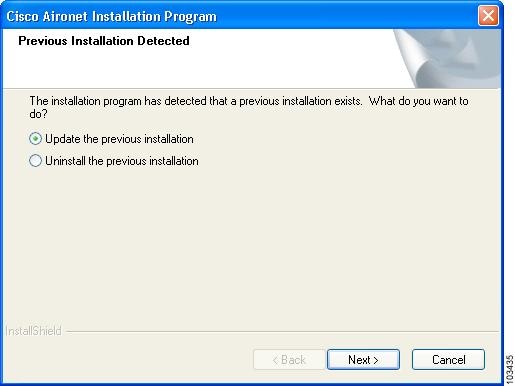
Step 4 ![]() Choose Update the previous installation and click Next.
Choose Update the previous installation and click Next.
Step 5 ![]() When a message appears indicating that you are required to restart your computer at the end of the installation process, click Yes.
When a message appears indicating that you are required to restart your computer at the end of the installation process, click Yes.
Note ![]() If you click No, you are asked to confirm your decision. If you proceed, the installation process terminates.
If you click No, you are asked to confirm your decision. If you proceed, the installation process terminates.
The Setup Status window appears (see Figure 9-3).
Figure 9-3 Setup Status Window
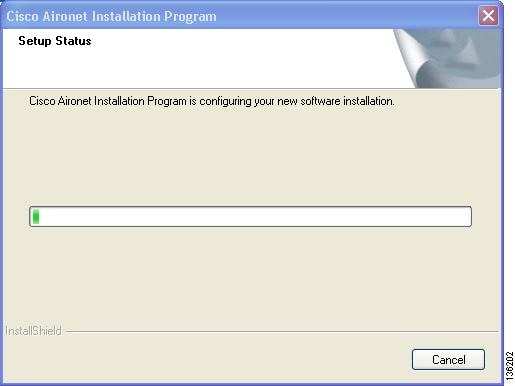
The upgrade process begins, and you are notified as each software component is installed.
Step 6 ![]() When a message appears indicating that your computer needs to be rebooted, click OK and allow your computer to restart. The client adapter's software has been upgraded.
When a message appears indicating that your computer needs to be rebooted, click OK and allow your computer to restart. The client adapter's software has been upgraded.
Manually Installing or Upgrading the Client Adapter Driver
If you installed or upgraded the client adapter software without the client adapter inserted into your computer, the driver installation is incomplete. Follow these steps to manually install or upgrade the client adapter driver.
Step 1 ![]() Insert the client adapter into your computer.
Insert the client adapter into your computer.
Step 2 ![]() Click Start > Settings > Control Panel > Administrative Tools > Computer Management > Device Manager > Network Adapters.
Click Start > Settings > Control Panel > Administrative Tools > Computer Management > Device Manager > Network Adapters.
Step 3 ![]() Right-click Cisco Aironet 802.11a/b/g Wireless Adapter.
Right-click Cisco Aironet 802.11a/b/g Wireless Adapter.
Step 4 ![]() Click Properties.
Click Properties.
Step 5 ![]() Choose the Driver tab and click Update Driver.
Choose the Driver tab and click Update Driver.
Step 6 ![]() Use the update wizard to select the driver from the root\windows\system32 directory (such as C:\Windows\system32) and finish the update procedure.
Use the update wizard to select the driver from the root\windows\system32 directory (such as C:\Windows\system32) and finish the update procedure.
Step 7 ![]() Follow these steps to activate the newly updated driver:
Follow these steps to activate the newly updated driver:
a. ![]() Click Start > Settings > Control Panel > Network Connections or Network and Dial-up Connections.
Click Start > Settings > Control Panel > Network Connections or Network and Dial-up Connections.
b. ![]() Right-click the wireless connection.
Right-click the wireless connection.
c. ![]() Choose Disable.
Choose Disable.
d. ![]() Repeat Steps a and b.
Repeat Steps a and b.
e. ![]() Choose Enable.
Choose Enable.
Uninstalling the Client Adapter Software
This section provides instructions for uninstalling the software for your Cisco Aironet CB21AG or PI21AG client adapter. This procedure is necessary if you want to remove installed client adapter software from your computer or downgrade to a previous release.
Note ![]() If you want to downgrade to an earlier release of client adapter software, use this procedure to uninstall the current software. Then install the older software.
If you want to downgrade to an earlier release of client adapter software, use this procedure to uninstall the current software. Then install the older software.
Note ![]() When you uninstall the client adapter software, any existing profiles and stored PAC files are removed. If you want to save your profiles for later use, follow the instructions in Chapter 4 to export your profiles before uninstalling the software.
When you uninstall the client adapter software, any existing profiles and stored PAC files are removed. If you want to save your profiles for later use, follow the instructions in Chapter 4 to export your profiles before uninstalling the software.
Step 1 ![]() Make sure the client adapter is inserted into your computer.
Make sure the client adapter is inserted into your computer.
Note ![]() If your client adapter is not inserted, the driver cannot be uninstalled.
If your client adapter is not inserted, the driver cannot be uninstalled.
Step 2 ![]() Use Windows Explorer to find the Install Wizard file.
Use Windows Explorer to find the Install Wizard file.
Note ![]() If you do not have the Install Wizard's setup.exe file, you can access the client adapter software by clicking Control Panel > Add/Remove Programs > Cisco Aironet Installation Program > Remove. Then follow the steps below beginning with the Preparing Setup window in Step 3.
If you do not have the Install Wizard's setup.exe file, you can access the client adapter software by clicking Control Panel > Add/Remove Programs > Cisco Aironet Installation Program > Remove. Then follow the steps below beginning with the Preparing Setup window in Step 3.
Step 3 ![]() Double-click the file. The "Starting InstallShield Wizard" message appears followed by the Preparing Setup window (see Figure 9-1) and the Previous Installation Detected window (see Figure 9-2).
Double-click the file. The "Starting InstallShield Wizard" message appears followed by the Preparing Setup window (see Figure 9-1) and the Previous Installation Detected window (see Figure 9-2).
Step 4 ![]() Choose Uninstall the previous installation and click Next.
Choose Uninstall the previous installation and click Next.
Step 5 ![]() When a message appears indicating that you are required to restart your computer at the end of the operation, click Yes. (If you click No, you are asked to confirm your decision. If you proceed, the installation process terminates.)
When a message appears indicating that you are required to restart your computer at the end of the operation, click Yes. (If you click No, you are asked to confirm your decision. If you proceed, the installation process terminates.)
Step 6 ![]() When prompted to confirm your decision, click OK. The process to uninstall the files begins.
When prompted to confirm your decision, click OK. The process to uninstall the files begins.
Step 7 ![]() When prompted to uninstall the device driver, click Yes.
When prompted to uninstall the device driver, click Yes.
Step 8 ![]() When a message appears indicating that your computer needs to be rebooted, click OK and allow your computer to restart. The client adapter software and its program folder have been uninstalled.
When a message appears indicating that your computer needs to be rebooted, click OK and allow your computer to restart. The client adapter software and its program folder have been uninstalled.
Note ![]() This procedure does not remove the Install Wizard file. If you want to remove it from your computer, find the file using Windows Explorer and delete it.
This procedure does not remove the Install Wizard file. If you want to remove it from your computer, find the file using Windows Explorer and delete it.
ADU Procedures
This section provides instructions for the following procedures:
•![]() Opening ADU, page 8
Opening ADU, page 8
•![]() Exiting ADU, page 8
Exiting ADU, page 8
•![]() Finding the version of ADU and other software components, page 9
Finding the version of ADU and other software components, page 9
•![]() Viewing client adapter information, page 10
Viewing client adapter information, page 10
•![]() Accessing online help, page 10
Accessing online help, page 10
Opening ADU
To open ADU, perform one of the following:
•![]() Double-click the Aironet Desktop Utility icon on your desktop.
Double-click the Aironet Desktop Utility icon on your desktop.
•![]() Choose Aironet Desktop Utility from the folder in the Windows Start Menu that you chose during installation (the default location is Start > Programs > Cisco Aironet > Aironet Desktop Utility).
Choose Aironet Desktop Utility from the folder in the Windows Start Menu that you chose during installation (the default location is Start > Programs > Cisco Aironet > Aironet Desktop Utility).
•![]() Right-click the ASTU icon in the Windows system tray and choose Open Aironet Desktop Utility.
Right-click the ASTU icon in the Windows system tray and choose Open Aironet Desktop Utility.
Exiting ADU
To exit ADU, perform one of the following:
•![]() Choose Exit from the Action drop-down menu (see Figure 9-4).
Choose Exit from the Action drop-down menu (see Figure 9-4).
•![]() Right-click the ASTU icon in the Windows system tray and choose Exit.
Right-click the ASTU icon in the Windows system tray and choose Exit.
Figure 9-4 Action Drop-Down Menu

Finding the Version of ADU and Other Software Components
Follow these steps to find the current version of ADU and other software components.
Step 1 ![]() Open ADU.
Open ADU.
Step 2 ![]() Choose the About Aironet Desktop Utility option from the Help drop-down menu. The About window appears (see Figure 9-5).
Choose the About Aironet Desktop Utility option from the Help drop-down menu. The About window appears (see Figure 9-5).
Figure 9-5 About Window
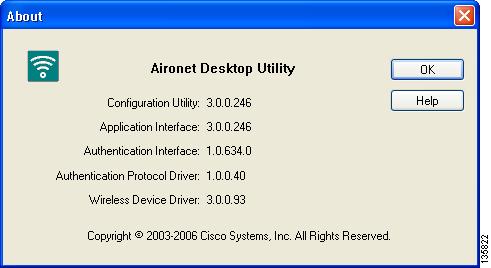
Table 9-1 lists and describes the software components shown in the About window.
Viewing Client Adapter Information
To view information about your client adapter, open ADU. Click the Diagnostics tab and Adapter Information. The Adapter Information window appears (see Figure 9-6).
Figure 9-6 Adapter Information Window
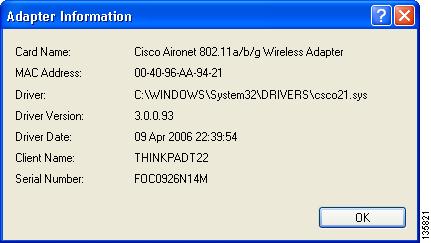
Table 9-2 interprets each element of the Adapter Information window.
|
|
|
|
|---|---|---|
Card Name |
A description of your client adapter. |
|
MAC Address |
The MAC address assigned to your client adapter at the factory. |
|
Driver |
The filename and location of your client adapter's driver. |
|
Driver Version |
The version of the NDIS device driver that is currently installed on your computer. |
|
Driver Date |
The date that your client adapter's driver was created. |
|
Client Name |
The name your client adapter uses when it associates to an access point. Note |
|
Serial Number |
The serial number of your client adapter. |
|
Click OK to close the Adapter Information window.
Accessing Online Help
To access the ADU online help, open ADU. Then choose the Aironet Desktop Utility Help option from the Help drop-down menu.
ASTU Procedures
Refer to Chapter 8 for instructions on using ASTU.
Enabling or Disabling Your Client Adapter's Radio
Your client adapter's radio can be enabled or disabled. Disabling the radio prevents the adapter from transmitting RF energy. You might want to disable the client adapter's radio in the following situations:
•![]() You are not transmitting data and want to conserve battery power.
You are not transmitting data and want to conserve battery power.
•![]() You are using a laptop on an airplane and want to prevent the adapter's transmissions from potentially interfering with the operation of certain devices.
You are using a laptop on an airplane and want to prevent the adapter's transmissions from potentially interfering with the operation of certain devices.
When the radio is enabled, it periodically sends out probes even if it is not associated to an access point (in infrastructure mode) or another client (in ad hoc mode), as required by the 802.11 specification. Therefore, it is important to disable it around devices that are susceptible to RF interference.
Note ![]() Your client adapter is not associated while its radio is disabled.
Your client adapter is not associated while its radio is disabled.
Note ![]() If your client adapter's radio is disabled before your computer enters standby or hibernate mode or before you reboot the computer, the radio remains disabled when the computer resumes. You must enable the radio to resume operation.
If your client adapter's radio is disabled before your computer enters standby or hibernate mode or before you reboot the computer, the radio remains disabled when the computer resumes. You must enable the radio to resume operation.
You can use ADU or ASTU to enable or disable the client adapter's radio. Follow the instructions below to use ADU or refer to the "Enable/Disable Radio" section on page 8-7 to use ASTU.
If your client adapter's radio is enabled, open ADU and choose Disable Radio from the Action drop-down menu (see Figure 9-4) to disable the radio.
If your client adapter's radio is disabled, open ADU and choose Enable Radio from the Action drop-down menu (see Figure 9-4) to enable the radio.
 Feedback