Catalyst 2960-XR Switch IPv6 Configuration Guide, Cisco IOS Release 15.0(2)EX1
Bias-Free Language
The documentation set for this product strives to use bias-free language. For the purposes of this documentation set, bias-free is defined as language that does not imply discrimination based on age, disability, gender, racial identity, ethnic identity, sexual orientation, socioeconomic status, and intersectionality. Exceptions may be present in the documentation due to language that is hardcoded in the user interfaces of the product software, language used based on RFP documentation, or language that is used by a referenced third-party product. Learn more about how Cisco is using Inclusive Language.
- Updated:
- May 23, 2014
Chapter: Configuring IPv6 Unicast Routing
- Finding Feature Information
- Information About Configuring IPv6 Unicast Routing
- Understanding IPv6
- IPv6 Addresses
- Supported IPv6 Unicast Routing Features
- 128-Bit Wide Unicast Addresses
- DNS for IPv6
- Path MTU Discovery for IPv6 Unicast
- ICMPv6
- Neighbor Discovery
- Default Router Preference
- IPv6 Stateless Autoconfiguration and Duplicate Address Detection
- IPv6 Applications
- Dual IPv4 and IPv6 Protocol Stacks
- DHCP for IPv6 Address Assignment
- Static Routes for IPv6
- RIP for IPv6
- OSPF for IPv6
- OSPFv3 Graceful Restart
- SNMP and Syslog Over IPv6
- HTTP(S) Over IPv6
- Unsupported IPv6 Unicast Routing Features
- IPv6 Feature Limitations
- IPv6 and Switch Stacks
- Default IPv6 Configuration
- Configuring IPv6 Addressing and Enabling IPv6 Routing
- Configuring Default Router Preference (CLI)
- Configuring IPv4 and IPv6 Protocol Stacks
- Configuring IPv6 ICMP Rate Limiting (CLI)
- Configuring CEF and dCEF for IPv6
- Configuring Static Routing for IPv6 (CLI)
- Configuring RIP for IPv6 (CLI)
- Configuring OSPF for IPv6 (CLI)
- Displaying IPv6
- Understanding IPv6
- Configuring DHCP for IPv6 Address Assignment
- Configuration Examples for IPv6 Unicast Routing
- Configuring IPv6 Addressing and Enabling IPv6 Routing: Example
- Configuring Default Router Preference: Example
- Configuring IPv4 and IPv6 Protocol Stacks: Example
- Enabling DHCPv6 Server Function: Example
- Enabling DHCPv6 Client Function: Example
- Configuring IPv6 ICMP Rate Limiting: Example
- Configuring Static Routing for IPv6: Example
- Configuring RIP for IPv6: Example
- Displaying IPv6: Example
Configuring IPv6 Unicast Routing
- Finding Feature Information
- Information About Configuring IPv6 Unicast Routing
- Configuring DHCP for IPv6 Address Assignment
- Configuration Examples for IPv6 Unicast Routing
Finding Feature Information
Your software release may not support all the features documented in this module. For the latest feature information and caveats, see the release notes for your platform and software release.
Use Cisco Feature Navigator to find information about platform support and Cisco software image support. To access Cisco Feature Navigator, go to http://www.cisco.com/go/cfn. An account on Cisco.com is not required.
Information About Configuring IPv6 Unicast Routing
This chapter describes how to configure IPv6 unicast routing on the switch.
 Note | To use all IPv6 features in this chapter, the switch or stack master must be running the IP Lite feature set. Switches running the LAN base feature set support only IPv6 host functionality. |
- Understanding IPv6
- Default IPv6 Configuration
- Configuring IPv6 Addressing and Enabling IPv6 Routing
- Configuring Default Router Preference (CLI)
- Configuring IPv4 and IPv6 Protocol Stacks
- Configuring IPv6 ICMP Rate Limiting (CLI)
- Configuring CEF and dCEF for IPv6
- Configuring Static Routing for IPv6 (CLI)
- Configuring RIP for IPv6 (CLI)
- Configuring OSPF for IPv6 (CLI)
- Displaying IPv6
Understanding IPv6
IPv4 users can move to IPv6 and receive services such as end-to-end security, quality of service (QoS), and globally unique addresses. The IPv6 address space reduces the need for private addresses and Network Address Translation (NAT) processing by border routers at network edges.
For information about how Cisco Systems implements IPv6, go to:
http://www.cisco.com/en/US/products/ps6553/products_ios_technology_home.html
For information about IPv6 and other features in this chapter
- IPv6 Addresses
- Supported IPv6 Unicast Routing Features
- Unsupported IPv6 Unicast Routing Features
- IPv6 Feature Limitations
- IPv6 and Switch Stacks
IPv6 Addresses
The switch supports only IPv6 unicast addresses. It does not support site-local unicast addresses, or anycast addresses.
The IPv6 128-bit addresses are represented as a series of eight 16-bit hexadecimal fields separated by colons in the format: n:n:n:n:n:n:n:n. This is an example of an IPv6 address:
2031:0000:130F:0000:0000:09C0:080F:130B
For easier implementation, leading zeros in each field are optional. This is the same address without leading zeros:
2031:0:130F:0:0:9C0:80F:130B
You can also use two colons (::) to represent successive hexadecimal fields of zeros, but you can use this short version only once in each address:
2031:0:130F::09C0:080F:130B
For more information about IPv6 address formats, address types, and the IPv6 packet header, see the “Implementing IPv6 Addressing and Basic Connectivity” chapter of Cisco IOS IPv6 Configuration Library on Cisco.com.
In the “Information About Implementing Basic Connectivity for IPv6” chapter, these sections apply to the switch:
Supported IPv6 Unicast Routing Features
The switch supports hop-by-hop extension header packets, which are routed in software.
The switch provides IPv6 routing capability over Routing Information Protocol (RIP) for IPv6, and Open Shortest Path First (OSPF) Version 3 Protocol. It supports up to 16 equal-cost routes and can simultaneously forward IPv4 and IPv6 frames at line rate.
- 128-Bit Wide Unicast Addresses
- DNS for IPv6
- Path MTU Discovery for IPv6 Unicast
- ICMPv6
- Neighbor Discovery
- Default Router Preference
- IPv6 Stateless Autoconfiguration and Duplicate Address Detection
- IPv6 Applications
- Dual IPv4 and IPv6 Protocol Stacks
- DHCP for IPv6 Address Assignment
- Static Routes for IPv6
- RIP for IPv6
- OSPF for IPv6
- OSPFv3 Graceful Restart
- SNMP and Syslog Over IPv6
- HTTP(S) Over IPv6
128-Bit Wide Unicast Addresses
The switch supports aggregatable global unicast addresses and link-local unicast addresses. It does not support site-local unicast addresses.
- Aggregatable global unicast addresses are IPv6 addresses from the aggregatable global unicast prefix. The address structure enables strict aggregation of routing prefixes and limits the number of routing table entries in the global routing table. These addresses are used on links that are aggregated through organizations and eventually to the Internet service provider. These addresses are defined by a global routing prefix, a subnet ID, and an interface ID. Current global unicast address allocation uses the range of addresses that start with binary value 001 (2000::/3). Addresses with a prefix of 2000::/3(001) through E000::/3(111) must have 64-bit interface identifiers in the extended unique identifier (EUI)-64 format.
- Link local unicast addresses can be automatically configured on any interface by using the link-local prefix FE80::/10(1111 1110 10) and the interface identifier in the modified EUI format. Link-local addresses are used in the neighbor discovery protocol (NDP) and the stateless autoconfiguration process. Nodes on a local link use link-local addresses and do not require globally unique addresses to communicate. IPv6 routers do not forward packets with link-local source or destination addresses to other links.
For more information, see the section about IPv6 unicast addresses in the “Implementing IPv6 Addressing and Basic Connectivity” chapter in the Cisco IOS IPv6 Configuration Library on Cisco.com.
DNS for IPv6
IPv6 supports Domain Name System (DNS) record types in the DNS name-to-address and address-to-name lookup processes. The DNS AAAA resource record types support IPv6 addresses and are equivalent to an A address record in IPv4. The switch supports DNS resolution for IPv4 and IPv6.
Path MTU Discovery for IPv6 Unicast
The switch supports advertising the system maximum transmission unit (MTU) to IPv6 nodes and path MTU discovery. Path MTU discovery allows a host to dynamically discover and adjust to differences in the MTU size of every link along a given data path. In IPv6, if a link along the path is not large enough to accommodate the packet size, the source of the packet handles the fragmentation.
ICMPv6
The Internet Control Message Protocol (ICMP) in IPv6 generates error messages, such as ICMP destination unreachable messages, to report errors during processing and other diagnostic functions. In IPv6, ICMP packets are also used in the neighbor discovery protocol and path MTU discovery.
Neighbor Discovery
The switch supports NDP for IPv6, a protocol running on top of ICMPv6, and static neighbor entries for IPv6 stations that do not support NDP. The IPv6 neighbor discovery process uses ICMP messages and solicited-node multicast addresses to determine the link-layer address of a neighbor on the same network (local link), to verify the reachability of the neighbor, and to keep track of neighboring routers.
The switch supports ICMPv6 redirect for routes with mask lengths less than 64 bits. ICMP redirect is not supported for host routes or for summarized routes with mask lengths greater than 64 bits.
Neighbor discovery throttling ensures that the switch CPU is not unnecessarily burdened while it is in the process of obtaining the next hop forwarding information to route an IPv6 packet. The switch drops any additional IPv6 packets whose next hop is the same neighbor that the switch is actively trying to resolve. This drop avoids further load on the CPU.
Default Router Preference
The switch supports IPv6 default router preference (DRP), an extension in router advertisement messages. DRP improves the ability of a host to select an appropriate router, especially when the host is multihomed and the routers are on different links. The switch does not support the Route Information Option in RFC 4191.
An IPv6 host maintains a default router list from which it selects a router for traffic to offlink destinations. The selected router for a destination is then cached in the destination cache. NDP for IPv6 specifies that routers that are reachable or probably reachable are preferred over routers whose reachability is unknown or suspect. For reachable or probably reachable routers, NDP can either select the same router every time or cycle through the router list. By using DRP, you can configure an IPv6 host to prefer one router over another, provided both are reachable or probably reachable.
For more information about DRP for IPv6, see the Cisco IOS IPv6 Configuration Library on Cisco.com.
IPv6 Stateless Autoconfiguration and Duplicate Address Detection
The switch uses stateless autoconfiguration to manage link, subnet, and site addressing changes, such as management of host and mobile IP addresses. A host autonomously configures its own link-local address, and booting nodes send router solicitations to request router advertisements for configuring interfaces.
For more information about autoconfiguration and duplicate address detection, see the “Implementing IPv6 Addressing and Basic Connectivity” chapter of Cisco IOS IPv6 Configuration Library on Cisco.com.
IPv6 Applications
The switch has IPv6 support for these applications:
- Ping, traceroute, Telnet, and TFTP
- Secure Shell (SSH) over an IPv6 transport
- HTTP server access over IPv6 transport
- DNS resolver for AAAA over IPv4 transport
- Cisco Discovery Protocol (CDP) support for IPv6 addresses
For more information about managing these applications, see the Cisco IOS IPv6 Configuration Library on Cisco.com.
Dual IPv4 and IPv6 Protocol Stacks
You must use the dual IPv4 and IPv6 template to allocate hardware memory usage to both IPv4 and IPv6 protocols.
This figure shows a router forwarding both IPv4 and IPv6 traffic through the same interface, based on the IP packet and destination addresses.
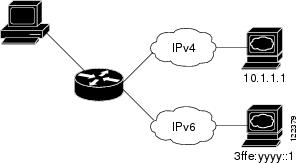
Use the dual IPv4 and IPv6 switch database management (SDM) template to enable IPv6 routing dual stack environments (supporting both IPv4 and IPv6). For more information about the dual IPv4 and IPv6 SDM template, see Configuring SDM Templates.
The dual IPv4 and IPv6 templates allow the switch to be used in dual stack environments.
- If you try to configure IPv6 without first selecting a dual IPv4 and IPv6 template, a warning message appears.
- In IPv4-only environments, the switch routes IPv4 packets and applies IPv4 QoS and ACLs in hardware. IPv6 packets are not supported.
- In dual IPv4 and IPv6 environments, the switch applies IPv4 QoS and ACLs in hardware .
- The switch supports QoS for both IPv4and IPv6 traffic.
- If you do not plan to use IPv6, do not use the dual stack template because this template results in less hardware memory capacity for each resource.
For more information about IPv4 and IPv6 protocol stacks, see the “Implementing IPv6 Addressing and Basic Connectivity” chapter of Cisco IOS IPv6 Configuration Library on Cisco.com.
DHCP for IPv6 Address Assignment
DHCPv6 enables DHCP servers to pass configuration parameters, such as IPv6 network addresses, to IPv6 clients. The address assignment feature manages non-duplicate address assignment in the correct prefix based on the network where the host is connected. Assigned addresses can be from one or multiple prefix pools. Additional options, such as default domain and DNS name-server address, can be passed back to the client. Address pools can be assigned for use on a specific interface, on multiple interfaces, or the server can automatically find the appropriate pool.
For more information and to configure these features, see the Cisco IOS IPv6 Configuration Guide.
This document describes only the DHCPv6 address assignment. For more information about configuring the DHCPv6 client, server, or relay agent functions, see the “Implementing DHCP for IPv6” chapter in the Cisco IOS IPv6 Configuration Library on Cisco.com.
Static Routes for IPv6
Static routes are manually configured and define an explicit route between two networking devices. Static routes are useful for smaller networks with only one path to an outside network or to provide security for certain types of traffic in a larger network.
For more information about static routes, see the “Implementing Static Routes for IPv6” chapter in the Cisco IOS IPv6 Configuration Library on Cisco.com.
RIP for IPv6
Routing Information Protocol (RIP) for IPv6 is a distance-vector protocol that uses hop count as a routing metric. It includes support for IPv6 addresses and prefixes and the all-RIP-routers multicast group address FF02::9 as the destination address for RIP update messages.
For more information about RIP for IPv6, see the “Implementing RIP for IPv6” chapter in the Cisco IOS IPv6 Configuration Library on Cisco.com.
OSPF for IPv6
The switch running the IP Base feature set supports Open Shortest Path First (OSPF) for IPv6, a link-state protocol for IP. For more information, seeCisco IOS IPv6 Configuration Library on Cisco.com.
OSPFv3 Graceful Restart
Beginning with Cisco IOS Release 12.2(58)SE, switches running the IP Lite feature set support the graceful restart feature in OSPFv3. This feature allows nonstop data forwarding along known routes while the OSPFv3 routing protocol information is restored. A switch uses graceful restart either in restart mode (for a graceful-restart-capable switch) or in helper mode (for a graceful-restart-aware switch).
To use the graceful restart function, a switch must be in high-availability stateful switchover (SSO) mode (dual route processor). A switch capable of graceful restart uses it when these failures occur:
- A route processor failure that results in changeover to the standby route processor
- A planned route processor changeover to the standby route processor
The graceful restart feature requires that neighboring switches be graceful-restart aware.
For more information, see the “Implementing OSPF for IPv6” chapter in the Cisco IOS IPv6 Configuration Library on Cisco.com.
SNMP and Syslog Over IPv6
To support both IPv4 and IPv6, IPv6 network management requires both IPv6 and IPv4 transports. Syslog over IPv6 supports address data types for these transports.
SNMP and syslog over IPv6 provide these features:
- Support for both IPv4 and IPv6
- IPv6 transport for SNMP and to modify the SNMP agent to support traps for an IPv6 host
- SNMP- and syslog-related MIBs to support IPv6 addressing
- Configuration of IPv6 hosts as trap receivers
For support over IPv6, SNMP modifies the existing IP transport mapping to simultaneously support IPv4 and IPv6. These SNMP actions support IPv6 transport management:
- Opens User Datagram Protocol (UDP) SNMP socket with default settings
- Provides a new transport mechanism called SR_IPV6_TRANSPORT
- Sends SNMP notifications over IPv6 transport
- Supports SNMP-named access lists for IPv6 transport
- Supports SNMP proxy forwarding using IPv6 transport
- Verifies SNMP Manager feature works with IPv6 transport
For information on SNMP over IPv6, including configuration procedures, see the “Managing Cisco IOS Applications over IPv6” chapter in the Cisco IOS IPv6 Configuration Library on Cisco.com.
For information about syslog over IPv6, including configuration procedures, see the “Implementing IPv6 Addressing and Basic Connectivity” chapter in the Cisco IOS IPv6 Configuration Library on Cisco.com.
HTTP(S) Over IPv6
The HTTP client sends requests to both IPv4 and IPv6 HTTP servers, which respond to requests from both IPv4 and IPv6 HTTP clients. URLs with literal IPv6 addresses must be specified in hexadecimal using 16-bit values between colons.
The accept socket call chooses an IPv4 or IPv6 address family. The accept socket is either an IPv4 or IPv6 socket. The listening socket continues to listen for both IPv4 and IPv6 signals that indicate a connection. The IPv6 listening socket is bound to an IPv6 wildcard address.
The underlying TCP/IP stack supports a dual-stack environment. HTTP relies on the TCP/IP stack and the sockets for processing network-layer interactions.
Basic network connectivity (ping) must exist between the client and the server hosts before HTTP connections can be made.
For more information, see the “Managing Cisco IOS Applications over IPv6” chapter in the Cisco IOS IPv6 Configuration Library on Cisco.com.
Unsupported IPv6 Unicast Routing Features
The switch does not support these IPv6 features:
- IPv6 policy-based routing
- IPv6 virtual private network (VPN) routing and forwarding (VRF) table support
- IPv6 packets destined to site-local addresses
- Tunneling protocols, such as IPv4-to-IPv6 or IPv6-to-IPv4
- The switch as a tunnel endpoint supporting IPv4-to-IPv6 or IPv6-to-IPv4 tunneling protocols
- IPv6 unicast reverse-path forwarding
- IPv6 Web Cache Communication Protocol (WCCP)
IPv6 Feature Limitations
Because IPv6 is implemented in switch hardware, some limitations occur due to the IPv6 compressed addresses in the hardware memory. These hardware limitations result in some loss of functionality and limits some features.
These are feature limitations.
IPv6 and Switch Stacks
The switch supports IPv6 forwarding across the stack and IPv6 host functionality on the stack master. The stack master runs the IPv6 unicast routing protocols and computes the routing tables. They receive the tables and create hardware IPv6 routes for forwarding. The stack master also runs all IPv6 applications.
Note | To route IPv6 packets in a stack, all switches in the stack should be running the IP Base feature set. |
If a new switch becomes the stack master, it recomputes the IPv6 routing tables and distributes them to the member switches. While the new stack master is being elected and is resetting, the switch stack does not forward IPv6 packets. The stack MAC address changes, which also changes the IPv6 address. When you specify the stack IPv6 address with an extended unique identifier (EUI) by using the ipv6 address ipv6-prefix/prefix length eui-64 interface configuration command, the address is based on the interface MAC address. See the Configuring IPv6 Addressing and Enabling IPv6 Routing (CLI).
If you configure the persistent MAC address feature on the stack and the stack master changes, the stack MAC address does not change for approximately 4 minutes.
These are the functions of IPv6 stack master and members:
Default IPv6 Configuration
|
Feature |
Default Setting |
||
|---|---|---|---|
|
SDM template |
Advance desktop. Default is advanced template |
||
|
IPv6 routing |
Disabled globally and on all interfaces |
||
|
CEFv6 or dCEFv6 |
Disabled (IPv4 CEF and dCEF are enabled by default)
|
||
|
IPv6 addresses |
None configured |
Configuring IPv6 Addressing and Enabling IPv6 Routing
This section describes how to assign IPv6 addresses to individual Layer 3 interfaces and to globally forward IPv6 traffic on the switch.
Before configuring IPv6 on the switch, consider these guidelines:
- Not all features discussed in this chapter are supported by the switch. See the Unsupported IPv6 Unicast Routing Features.
- In the ipv6 address interface configuration command, you must enter the ipv6-address and ipv6-prefix variables with the address specified in hexadecimal using 16-bit values between colons. The prefix-length variable (preceded by a slash [/]) is a decimal value that shows how many of the high-order contiguous bits of the address comprise the prefix (the network portion of the address).
To forward IPv6 traffic on an interface, you must configure a global IPv6 address on that interface. Configuring an IPv6 address on an interface automatically configures a link-local address and activates IPv6 for the interface. The configured interface automatically joins these required multicast groups for that link:
- solicited-node multicast group FF02:0:0:0:0:1:ff00::/104 for each unicast address assigned to the interface (this address is used in the neighbor discovery process.)
- all-nodes link-local multicast group FF02::1
- all-routers link-local multicast group FF02::2
To remove an IPv6 address from an interface, use the no ipv6 address ipv6-prefix/prefix length eui-64 or no ipv6 address ipv6-address link-local interface configuration command. To remove all manually configured IPv6 addresses from an interface, use the no ipv6 address interface configuration command without arguments. To disable IPv6 processing on an interface that has not been explicitly configured with an IPv6 address, use the no ipv6 enable interface configuration command. To globally disable IPv6 routing, use the no ipv6 unicast-routing global configuration command.
For more information about configuring IPv6 routing, see the “Implementing Addressing and Basic Connectivity for IPv6” chapter in the Cisco IOS IPv6 Configuration Library on Cisco.com.
Beginning in privileged EXEC mode, follow these steps to assign an IPv6 address to a Layer 3 interface and enable IPv6 routing:
Configuring Default Router Preference (CLI)
Router advertisement messages are sent with the default router preference (DRP) configured by the ipv6 nd router-preference interface configuration command. If no DRP is configured, RAs are sent with a medium preference.
A DRP is useful when two routers on a link might provide equivalent, but not equal-cost routing, and policy might dictate that hosts should prefer one of the routers.
For more information about configuring DRP for IPv6, see the “Implementing IPv6 Addresses and Basic Connectivity” chapter in the Cisco IOS IPv6 Configuration Library on Cisco.com.
Beginning in privileged EXEC mode, follow these steps to configure a DRP for a router on an interface.
Configuring IPv4 and IPv6 Protocol Stacks
Beginning in privileged EXEC mode, follow these steps to configure a Layer 3 interface to support both IPv4 and IPv6 and to enable IPv6 routing.
Note | To disable IPv6 processing on an interface that has not been configured with an IPv6 address, use the no ipv6 enable interface configuration command. |
Configuring IPv6 ICMP Rate Limiting (CLI)
ICMP rate limiting is enabled by default with a default interval between error messages of 100 milliseconds and a bucket size (maximum number of tokens to be stored in a bucket) of 10.
Beginning in privileged EXEC mode, follow these steps to change the ICMP rate-limiting parameters:
| Command or Action | Purpose | |
|---|---|---|
| Step 1 | configure
terminal
Example:
Switch# configure terminal
|
Enters global configuration mode. |
| Step 2 | ipv6 icmp
error-interval
interval [bucketsize]
Example:
Switch(config)# ipv6 icmp error-interval 50 20
|
Configures the interval and bucket size for IPv6 ICMP error messages: |
| Step 3 | end
Example:
Switch(config)# end
|
Returns to privileged EXEC mode. |
| Step 4 | show ipv6 interface
[interface-id]
Example:
Switch# show ipv6 interface gigabitethernet 1/0/1
|
Verifies your entries. |
| Step 5 | copy
running-config
startup-config
Example:
Switch# copy running-config startup-config
|
(Optional) Saves your entries in the configuration file. |
Configuring CEF and dCEF for IPv6
Cisco Express Forwarding (CEF) is a Layer 3 IP switching technology to improve network performance. CEF implements an advanced IP look-up and forwarding algorithm to deliver maximum Layer 3 switching performance. It is less CPU-intensive than fast-switching route-caching, allowing more CPU processing power to be dedicated to packet forwarding. In a switch stack, the hardware uses distributed CEF (dCEF) in the stack. IPv4 CEF and dCEF are enabled by default. IPv6 CEF and dCEF are disabled by default, but automatically enabled when you configure IPv6 routing.
IPv6 CEF and dCEF are automatically disabled when IPv6 routing is unconfigured. IPv6 CEF and dCEF cannot disabled through configuration. You can verify the IPv6 state by entering the show ipv6 cef privileged EXEC command.
To route IPv6 unicast packets, you must first globally configure forwarding of IPv6 unicast packets by using the ipv6 unicast-routing global configuration command, and you must configure an IPv6 address and IPv6 processing on an interface by using the ipv6 address interface configuration command.
For more information about configuring CEF and dCEF, see Cisco IOS IPv6 Configuration Library on Cisco.com.
Configuring Static Routing for IPv6 (CLI)
Before configuring a static IPv6 route, you must enable routing by using the ip routing global configuration command, enable the forwarding of IPv6 packets by using the ipv6 unicast-routing global configuration command, and enable IPv6 on at least one Layer 3 interface by configuring an IPv6 address on the interface.
For more information about configuring static IPv6 routing, see the “Implementing Static Routes for IPv6” chapter in the Cisco IOS IPv6 Configuration Library on Cisco.com.
| Command or Action | Purpose | |||
|---|---|---|---|---|
| Step 1 | configure
terminal
Example:
Switch# configure terminal
|
Enters global configuration mode. | ||
| Step 2 | ipv6 route
ipv6-prefix/prefix length {ipv6-address |
interface-id [ipv6-address]} [administrative distance]
Example:
Switch(config)# ipv6 route 2001:0DB8::/32 gigabitethernet2/0/1 130
|
Configures a static IPv6 route.
| ||
| Step 3 | end
Example:
Switch(config)# end
|
Returns to privileged EXEC mode. | ||
| Step 4 | Use one of the
following:
Example: Switch# show ipv6 static 2001:0DB8::/32 interface gigabitethernet2/0/1
or Switch# show ipv6 route static
|
Verifies your entries by displaying the contents of the IPv6 routing table.
| ||
| Step 5 | copy
running-config
startup-config
Example:
Switch# copy running-config startup-config
|
(Optional) Saves your entries in the configuration file. |
Configuring RIP for IPv6 (CLI)
Before configuring the switch to run IPv6 RIP, you must enable routing by using the ip routing global configuration command, enable the forwarding of IPv6 packets by using the ipv6 unicast-routing global configuration command, and enable IPv6 on any Layer 3 interfaces on which IPv6 RIP is to be enabled.
For more information about configuring RIP routing for IPv6, see the “Implementing RIP for IPv6” chapter in the Cisco IOS IPv6 Configuration Library on Cisco.com,
| Command or Action | Purpose | |||
|---|---|---|---|---|
| Step 1 | configure
terminal
Example:
Switch# configure terminal
|
Enters global configuration mode. | ||
| Step 2 | ipv6 router rip
name
Example:
Switch(config)# ipv6 router rip cisco
|
Configures an IPv6 RIP routing process, and enters router configuration mode for the process. | ||
| Step 3 | maximum-paths
number-paths
Example:
Switch(config-router)# maximum-paths 6
|
(Optional) Define the maximum number of equal-cost routes that IPv6 RIP can support. The range is from 1 to 32, and the default is 16 routes. | ||
| Step 4 | exit
Example:
Switch(config-router)# exit
|
Returns to global configuration mode. | ||
| Step 5 | interface
interface-id
Example:
Switch(config)# interface gigabitethernet 1/0/1
|
Enters interface configuration mode, and specifies the Layer 3 interface to configure. | ||
| Step 6 | ipv6 rip
name
enable
Example:
Switch(config-if)# ipv6 rip cisco enable
|
Enables the specified IPv6 RIP routing process on the interface. | ||
| Step 7 | ipv6 rip
name
default-information {only |
originate}
Example:
Switch(config-if)# ipv6 rip cisco default-information only
|
(Optional) Originates the IPv6 default route (::/0) into the RIP routing process updates sent from the specified interface.
| ||
| Step 8 | end
Example:
Switch(config)# end
|
Returns to privileged EXEC mode. | ||
| Step 9 | Use one of the
following:
Example: Switch# show ipv6 rip cisco interface gigabitethernet2/0/1
or Switch# show ipv6 rip
| |||
| Step 10 | copy
running-config
startup-config
Example:
Switch# copy running-config startup-config
|
(Optional) Saves your entries in the configuration file. |
Configuring OSPF for IPv6 (CLI)
You can customize OSPF for IPv6 for your network. However, the defaults for OSPF in IPv6 are set to meet the requirements of most customers and features.
Follow these guidelines:
- Be careful when changing the defaults for IPv6 commands. Changing the defaults might adversely affect OSPF for the IPv6 network.
- Before you enable IPv6 OSPF on an interface, you must enable routing by using the ip routing global configuration command, enable the forwarding of IPv6 packets by using the ipv6 unicast-routing global configuration command, and enable IPv6 on Layer 3 interfaces on which you are enabling IPv6 OSPF.
For more information about configuring OSPF routing for IPv6, see the “Implementing OSPF for IPv6” chapter in the Cisco IOS IPv6 Configuration Library on Cisco.com.
| Command or Action | Purpose | |
|---|---|---|
| Step 1 | configure
terminal
Example:
Switch# configure terminal
|
Enters global configuration mode. |
| Step 2 | ipv6 router ospf
process-id
Example:
Switch(config)# ipv6 router ospf 21
|
Enables OSPF router configuration mode for the process. The process ID is the number assigned administratively when enabling the OSPF for IPv6 routing process. It is locally assigned and can be a positive integer from 1 to 65535. |
| Step 3 | area
area-id
range
{ipv6-prefix/prefix
length} [advertise |
not-advertise] [cost
cost]
Example:
Switch(config)# area .3 range 2001:0DB8::/32 not-advertise
|
(Optional) Consolidates and summarizes routes at an area boundary.
|
| Step 4 | maximum paths
number-paths
Example:
Switch(config)# maximum paths 16
|
(Optional) Defines the maximum number of equal-cost routes to the same destination that IPv6 OSPF should enter in the routing table. The range is from 1 to 32, and the default is 16 paths. |
| Step 5 | exit
Example:
Switch(config-if)# exit
|
Returns to global configuration mode. |
| Step 6 | interface
interface-id
Example:
Switch(config)# interface gigabitethernet 1/0/1
|
Enters interface configuration mode, and specifies the Layer 3 interface to configure. |
| Step 7 | ipv6 ospf
process-id
area
area-id [instance
instance-id]
Example:
Switch(config-if)# ipv6 ospf 21 area .3
|
Enables OSPF for IPv6 on the interface. |
| Step 8 | end
Example:
Switch(config)# end
|
Returns to privileged EXEC mode. |
| Step 9 | Use one of the
following:
Example: Switch# show ipv6 ospf 21 interface gigabitethernet2/0/1
or Switch# show ipv6 ospf 21
| |
| Step 10 | copy
running-config
startup-config
Example:
Switch# copy running-config startup-config
|
(Optional) Saves your entries in the configuration file. |
Displaying IPv6
For complete syntax and usage information on these commands, see the Cisco IOS command reference publications.
|
Command |
Purpose |
|---|---|
|
show ipv6 access-list |
Displays a summary of access lists. |
|
show ipv6 cef |
Displays Cisco Express Forwarding for IPv6. |
|
show ipv6 interface interface-id |
Displays IPv6 interface status and configuration. |
|
show ipv6 mtu |
Displays IPv6 MTU per destination cache. |
|
show ipv6 neighbors |
Displays IPv6 neighbor cache entries. |
|
show ipv6 ospf |
Displays IPv6 OSPF information. |
|
show ipv6 prefix-list |
Displays a list of IPv6 prefix lists. |
|
show ipv6 protocols |
Displays IPv6 routing protocols on the switch. |
|
show ipv6 rip |
Displays IPv6 RIP routing protocol status. |
|
show ipv6 route |
Displays the IPv6 route table entries. |
|
show ipv6 routers |
Displays the local IPv6 routers. |
|
show ipv6 static |
Displays IPv6 static routes. |
|
show ipv6 traffic |
Displays IPv6 traffic statistics. |
|
Command |
Purpose |
|---|---|
|
show ipv6 eigrp [as-number] interface |
Displays information about interfaces configured for EIGRP IPv6. |
|
show ipv6 eigrp [as-number] neighbor |
Displays the neighbors discovered by EIGRP IPv6. |
|
show ipv6 eigrp [as-number] traffic |
Displays the number of EIGRP IPv6 packets sent and received. |
|
show ipv6 eigrp topology [as-number | ipv6-address] [active | all-links | detail-links | pending | summary | zero-successors| Base] |
Displays EIGRP entries in the IPv6 topology table. |
Configuring DHCP for IPv6 Address Assignment
- Default DHCPv6 Address Assignment Configuration
- DHCPv6 Address Assignment Configuration Guidelines
- Enabling DHCPv6 Server Function (CLI)
- Enabling DHCPv6 Client Function (CLI)
This section describes only the DHCPv6 address assignment. For more information about configuring the DHCPv6 client, server, or relay agent functions, see the “Implementing DHCP for IPv6” chapter in the Cisco IOS IPv6 Configuration Library on Cisco.com.
Default DHCPv6 Address Assignment Configuration
By default, no DHCPv6 features are configured on the switch.
DHCPv6 Address Assignment Configuration Guidelines
When configuring DHCPv6 address assignment, consider these guidelines:
- In the procedures, the specified interface must be one of these Layer 3 interfaces:
- The switch can act as a DHCPv6 client, server, or relay agent. The DHCPv6 client, server, and relay function are mutually exclusive on an interface.
- The DHCPv6 client, server, or relay agent runs only on the master switch. When there is a stack master re-election, the new master switch retains the DHCPv6 configuration. However, the local RAM copy of the DHCP server database lease information is not retained.
Enabling DHCPv6 Server Function (CLI)
Use the no form of the DHCP pool configuration mode commands to change the DHCPv6 pool characteristics. To disable the DHCPv6 server function on an interface, use the no ipv6 dhcp server interface configuration command.
Beginning in privileged EXEC mode, follow these steps to enable the DHCPv6 server function on an interface.
| Command or Action | Purpose | |
|---|---|---|
| Step 1 | configure
terminal
Example:
Switch# configure terminal
|
Enters global configuration mode. |
| Step 2 | ipv6 dhcp pool
poolname
Example:
Switch(config)# ipv6 dhcp pool 7
|
Enters DHCP pool configuration mode, and define the name for the IPv6 DHCP pool. The pool name can be a symbolic string (such as Engineering) or an integer (such as 0). |
| Step 3 | address prefix
IPv6-prefix {lifetime} {t1 t1 |
infinite}
Example:
Switch(config-dhcpv6)# address prefix 2001:1000::0/64 lifetime 3600
|
(Optional) Specifies an address prefix for address assignment. This address must be in hexadecimal, using 16-bit values between colons. lifetime t1 t1—Specifies a time interval (in seconds) that an IPv6 address prefix remains in the valid state. The range is 5 to 4294967295 seconds. Specify infinite for no time interval. |
| Step 4 | link-address
IPv6-prefix
Example:
Switch(config-dhcpv6)# link-address 2001:1002::0/64
|
(Optional) Specifies a link-address IPv6 prefix. When an address on the incoming interface or a link-address in the packet matches the specified IPv6 prefix, the server uses the configuration information pool. This address must be in hexadecimal, using 16-bit values between colons. |
| Step 5 | vendor-specific
vendor-id
Example:
Switch(config-dhcpv6)# vendor-specific 9
|
(Optional) Enters vendor-specific configuration mode and specifies a vendor-specific identification number. This number is the vendor IANA Private Enterprise Number. The range is 1 to 4294967295. |
| Step 6 | suboption
number
{address
IPv6-address |
ascii
ASCII-string |
hex
hex-string}
Example:
Switch(config-dhcpv6-vs)# suboption 1 address 1000:235D::
|
(Optional) Enters a vendor-specific suboption number. The range is 1 to 65535. Enter an IPv6 address, ASCII text, or a hex string as defined by the suboption parameters. |
| Step 7 | exit
Example:
Switch(config-dhcpv6-vs)# exit
|
Returns to DHCP pool configuration mode. |
| Step 8 | exit
Example:
Switch(config-dhcpv6)# exit
|
Returns to global configuration mode. |
| Step 9 | interface
interface-id
Example:
Switch(config)# interface gigabitethernet 1/0/1
|
Enters interface configuration mode, and specifies the interface to configure. |
| Step 10 | ipv6
dhcp
server [poolname |
automatic] [rapid-commit] [preference
value] [allow-hint]
Example:
Switch(config-if)# ipv6 dhcp server automatic
|
Enables DHCPv6 server function on an interface.
|
| Step 11 | end
Example:
Switch(config)# end
|
Returns to privileged EXEC mode. |
| Step 12 | Do one of the
following:
Example: Switch# show ipv6 dhcp pool
or Switch# show ipv6 dhcp interface
| |
| Step 13 | copy
running-config
startup-config
Example:
Switch# copy running-config startup-config
|
(Optional) Saves your entries in the configuration file. |
Enabling DHCPv6 Client Function (CLI)
This task explains how to enable the DHCPv6 client on an interface.
| Command or Action | Purpose | |
|---|---|---|
| Step 1 | configure
terminal
Example:
Switch# configure terminal
|
Enters global configuration mode. |
| Step 2 | interface
interface-id
Example:
Switch(config)# interface gigabitethernet 1/0/1
|
Enters interface configuration mode, and specifies the interface to configure. |
| Step 3 | ipv6 address dhcp [rapid-commit]
Example:
Switch(config-if)# ipv6 address dhcp rapid-commit
|
Enables the interface to acquire an IPv6 address from the DHCPv6 server. rapid-commit—(Optional) Allow two-message exchange method for address assignment. |
| Step 4 | ipv6 dhcp client
request [vendor-specific]
Example:
Switch(config-if)# ipv6 dhcp client request vendor-specific
|
(Optional) Enables the interface to request the vendor-specific option. |
| Step 5 | end
Example:
Switch(config)# end
|
Returns to privileged EXEC mode. |
| Step 6 | show
ipv6
dhcp
interface
Example:
Switch# show ipv6 dhcp interface
|
Verifies that the DHCPv6 client is enabled on an interface. |
Configuration Examples for IPv6 Unicast Routing
- Configuring IPv6 Addressing and Enabling IPv6 Routing: Example
- Configuring Default Router Preference: Example
- Configuring IPv4 and IPv6 Protocol Stacks: Example
- Enabling DHCPv6 Server Function: Example
- Enabling DHCPv6 Client Function: Example
- Configuring IPv6 ICMP Rate Limiting: Example
- Configuring Static Routing for IPv6: Example
- Configuring RIP for IPv6: Example
- Displaying IPv6: Example
Configuring IPv6 Addressing and Enabling IPv6 Routing: Example
This example shows how to enable IPv6 with both a link-local address and a global address based on the IPv6 prefix 2001:0DB8:c18:1::/64. The EUI-64 interface ID is used in the low-order 64 bits of both addresses. Output from the show ipv6 interface EXEC command is included to show how the interface ID (20B:46FF:FE2F:D940) is appended to the link-local prefix FE80::/64 of the interface.
Switch(config)# ipv6 unicast-routing
Switch(config)# interface gigabitethernet1/0/11
Switch(config-if)# no switchport
Switch(config-if)# ipv6 address 2001:0DB8:c18:1::/64 eui 64
Switch(config-if)# end
Switch# show ipv6 interface gigabitethernet1/0/11
GigabitEthernet1/0/11 is up, line protocol is up
  IPv6 is enabled, link-local address is FE80::20B:46FF:FE2F:D940
  Global unicast address(es):
  2001:0DB8:c18:1:20B:46FF:FE2F:D940, subnet is 2001:0DB8:c18:1::/64 [EUI]
  Joined group address(es):
    FF02::1
    FF02::2
    FF02::1:FF2F:D940
  MTU is 1500 bytes
  ICMP error messages limited to one every 100 milliseconds
  ICMP redirects are enabled
  ND DAD is enabled, number of DAD attempts: 1
  ND reachable time is 30000 milliseconds
  ND advertised reachable time is 0 milliseconds
  ND advertised retransmit interval is 0 milliseconds
  ND router advertisements are sent every 200 seconds
  ND router advertisements live for 1800 seconds
  Hosts use stateless autoconfig for addresses.
Configuring Default Router Preference: Example
This example shows how to configure a DRP of high for the router on an interface.
Switch# configure terminal
Switch(config)# interface gigabitethernet1/0/1
Switch(config-if)# ipv6 nd router-preference high
Switch(config-if)# end
Configuring IPv4 and IPv6 Protocol Stacks: Example
This example shows how to enable IPv4 and IPv6 routing on an interface.
Switch(config)# ip routing
Switch(config)# ipv6 unicast-routing
Switch(config)# interface fastethernet1/0/11
Switch(config-if)# no switchport
Switch(config-if)# ip address 192.168.99.1 255.255.255.0
Switch(config-if)# ipv6 address 2001:0DB8:c18:1::/64 eui 64
Switch(config-if)# end
Enabling DHCPv6 Server Function: Example
This example shows how to configure a pool called engineering with an IPv6 address prefix:
Switch# configure terminal
Switch(config)# ipv6 dhcp pool engineering
Switch(config-dhcpv6)#address prefix 2001:1000::0/64
Switch(config-dhcpv6)# end
This example shows how to configure a pool called testgroup with three link-addresses and an IPv6 address prefix:
Switch# configure terminal
Switch(config)# ipv6 dhcp pool testgroup
Switch(config-dhcpv6)# link-address 2001:1001::0/64
Switch(config-dhcpv6)# link-address 2001:1002::0/64
Switch(config-dhcpv6)# link-address 2001:2000::0/48
Switch(config-dhcpv6)# address prefix 2001:1003::0/64
Switch(config-dhcpv6)# end
This example shows how to configure a pool called 350 with vendor-specific options:
Switch# configure terminal
Switch(config)# ipv6 dhcp pool 350
Switch(config-dhcpv6)# address prefix 2001:1005::0/48
Switch(config-dhcpv6)# vendor-specific 9
Switch(config-dhcpv6-vs)# suboption 1 address 1000:235D::1
Switch(config-dhcpv6-vs)# suboption 2 ascii "IP-Phone"
Switch(config-dhcpv6-vs)# end
Enabling DHCPv6 Client Function: Example
This example shows how to acquire an IPv6 address and to enable the rapid-commit option:
Switch(config)# interface gigabitethernet2/0/1
Switch(config-if)# ipv6 address dhcp rapid-commit
Configuring IPv6 ICMP Rate Limiting: Example
This example shows how to configure an IPv6 ICMP error message interval of 50 milliseconds and a bucket size of 20 tokens.
Switch(config)#ipv6 icmp error-interval 50 20
Configuring Static Routing for IPv6: Example
This example shows how to configure a floating static route to an interface with an administrative distance of 130:
Switch(config)# ipv6 route 2001:0DB8::/32 gigabitethernet2/0/1 130
Configuring RIP for IPv6: Example
This example shows how to enable the RIP routing process cisco with a maximum of eight equal-cost routes and to enable it on an interface:
Switch(config)# ipv6 router rip cisco
Switch(config-router)# maximum-paths 8
Switch(config)# exit
Switch(config)# interface gigabitethernet2/0/11
Switch(config-if)# ipv6 rip cisco enable
Displaying IPv6: Example
This is an example of the output from the show ipv6 interface privileged EXEC command:
Switch# show ipv6 interface
Vlan1 is up, line protocol is up
  IPv6 is enabled, link-local address is FE80::20B:46FF:FE2F:D940
  Global unicast address(es):
    3FFE:C000:0:1:20B:46FF:FE2F:D940, subnet is 3FFE:C000:0:1::/64 [EUI]
  Joined group address(es):
    FF02::1
    FF02::2
    FF02::1:FF2F:D940
  MTU is 1500 bytes
  ICMP error messages limited to one every 100 milliseconds
  ICMP redirects are enabled
  ND DAD is enabled, number of DAD attempts: 1
  ND reachable time is 30000 milliseconds
  ND advertised reachable time is 0 milliseconds
  ND advertised retransmit interval is 0 milliseconds
  ND router advertisements are sent every 200 seconds
  ND router advertisements live for 1800 seconds
<output truncated>
 Feedback