Cisco Video Surveillance 3000 Series IP Camera Configuration Guide, Release 1.1.4
Bias-Free Language
The documentation set for this product strives to use bias-free language. For the purposes of this documentation set, bias-free is defined as language that does not imply discrimination based on age, disability, gender, racial identity, ethnic identity, sexual orientation, socioeconomic status, and intersectionality. Exceptions may be present in the documentation due to language that is hardcoded in the user interfaces of the product software, language used based on RFP documentation, or language that is used by a referenced third-party product. Learn more about how Cisco is using Inclusive Language.
- Updated:
- October 14, 2012
Chapter: Viewing Live Video
Viewing Live Video
After you install and set up the Cisco Video Surveillance IP Camera, you can connect to the IP camera through Internet Explorer and access the Camera Video & Control window to view live video from the IP camera.
The Camera Video & Control window also provides for controlling the video display, configuring preset positions, and controlling certain IP camera functions. Available controls depend on the privilege level of the user.
To view live video, log in to the IP camera and click View Video in the IP camera Main window menu bar. The Camera Video & Control window appears. This window displays live video from the camera and lets you control a variety of camera and display functions.
The controls that you see in the Camera Video & Control window depend on your IP camera privilege level and the configurations settings for the IP camera. Users with the Administrator privilege can access all controls. Users with the Viewer privilege do not have access to the following controls:
•![]() Video image controls
Video image controls
•![]() Motion detection controls
Motion detection controls
Table 3-1 describes the controls in the Camera Video & Control window.
|
|
|
|---|---|
Video controls |
|
Video Codec drop-down list |
Choose the codec for video transmission (H.264 or MJPEG). You can choose H.264 only if the primary video stream (channel 1) is enabled. You can choose MJPEG only if the secondary video stream (channel 2) is enabled. For information about enabling and disabling video streams, see the "Streaming Window" section. |
Video Resolution drop-down list |
Choose the resolution for video transmission. The resolutions in this drop-down list depend on the video standard that you selected. The default value for H.264 is 1280 x 800. The default value for MJPEG is 704 x 480. Note |
Right Arrow toggle button |
Click the Right Arrow to display the video image controls. The button changes to the Left Arrow button. Click the Left Arrow button to hide the video image controls. The button changes to the Right Arrow button. |
Left Arrow toggle button |
|
Video image controls Note |
|
Brightness slider 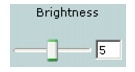
|
To control the brightness of the video image, drag the slider, or enter a value from 1 through 10 and press the Enter key. A higher value increases the brightness and a lower value decreases the brightness. For example, if the IP camera is facing a bright light and the video appears too dark, you can increase the brightness. The default value is 5. |
Contrast slider 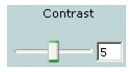
|
To control contrast of the video image, drag the slider, or enter a value from 1 through 10 and press the Enter key. A higher value increases the contrast and a lower value decreases the contrast. The default value is 5. |
Sharpness slider 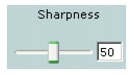
|
To control the sharpness of the video from the IP camera, drag the slider, or enter a value from 1 through 100 and press the Enter key. A higher value increases the sharpness and a lower value decreases the sharpness. The default value is 50. |
Saturation slider 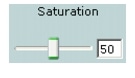
|
To control the saturation of the video from the IP camera, drag the slider, or enter a value from 1 through 100 and press the Enter key. A higher value increases the saturation and a lower value decreases the saturation. High saturation provides a vivid, intense color for a video image. With less saturation, the video image appears more muted and gray. The default value is 50. |
Restore button |
Resets white balance, brightness, contrast, sharpness, saturation, and hue to their default values. |
Image tools |
|
Hotspot Zoom button |
Click this latch button to enable the digital zoom feature, which provides five-step digital zooming in for the normal (not full screen) video display. Click this button again to disable the digital zoom feature. To perform a digital zoom, engage the Hotspot Zoom button and click the video display. The first five clicks zoom the display. The sixth click returns to unzoomed display. |
Hotspot Pan/Tilt button |
Click this latch button to enable the hotspot pan/tilt feature, which lets you pan and tilt the IP camera toward a point that you click in the video display. To perform a hotspot pan/tilt action, engage the Hotspot Pan/Tilt button, then click the video image at the location toward which you want the IP camera to pan and tilt. This feature requires that the IP camera be installed with a pan/tilt mount that supports the Pelco D protocol and that pan and tilt functions are enabled. |
Save Snapshot button |
Captures and saves the current video image as a .gif file or a .jpg file in the location of your choice and with the file name of your choice. When you click this button, the Snapshot window appears. Click Save and follow the on-screen prompts to save the image with the name and in the location that you want. |
Flip button |
Rotates the video image by 180 degrees. |
Mirror button |
Reverses the video image. |
Restore button |
Displays the default video image, which is not rotated and not reversed. |
Full Screen button |
Displays the video image in full screen mode. To return to normal display mode, click the full screen image. |
Motion detection |
|
Up Arrow toggle button |
Click the Up Arrow to display the motion detection controls. The button changes to the Down Arrow button. Click the Down Arrow button to hide the motion detection controls. The button changes to the Up Arrow button. |
Down Arrow toggle button |
|
Motion detection controls Note |
|
Enable Motion Detection check box |
Enables the motion detection feature and displays a grid over the video image. When motion detection is enabled, the IP camera monitors activity in regions of the video that you specify. If activity at a defined level occurs in any of these areas, the IP camera generates an alert and takes the actions that are configured as described in the "Event Notification Window" section. After motion detection has been enabled, you create specific regions that the IP camera monitors for activity. To create a motion detection region, right-click on the video image, choose Draw Region, and then click and drag across the motion detection grid to draw a green square or rectangle comprised of one or more grid squares. Up to eight of the following regions can be drawn: • • Foe each region listed under the Region Properties area, you can configure the following properties: • • • • • • To reset the sensitivity and threshold to their default values of 80 and 10 respectively, right-click on the region, and choose Restore Values. To remove a region, right-click it, and choose Delete Region. |
Save button |
Save the current motion detection configuration. |
 Feedback