- Installation Overview
- Installation Requirements
- Preparing for Installation
- Preparing the Oracle External Database
- Installing the Prime Network Gateway and Units Using the Installation Wizard
- Installing the Prime Network Gateway Using CLI
- Installing Prime Network Units
- Installing the Vision, Events, and Administration Clients
- Installing the Prime Network Integration Layer
- Upgrading and Rolling Back Prime Network
- Uninstalling Prime Network
- Next Steps
- Using Chinese Characters in Business Tags
Cisco Prime Network Installation Guide, 5.2
Bias-Free Language
The documentation set for this product strives to use bias-free language. For the purposes of this documentation set, bias-free is defined as language that does not imply discrimination based on age, disability, gender, racial identity, ethnic identity, sexual orientation, socioeconomic status, and intersectionality. Exceptions may be present in the documentation due to language that is hardcoded in the user interfaces of the product software, language used based on RFP documentation, or language that is used by a referenced third-party product. Learn more about how Cisco is using Inclusive Language.
- Updated:
- July 18, 2017
Chapter: Installing the Vision, Events, and Administration Clients
Installing the Vision, Events, and Administration Clients
There are two methods for installing/launching the clients:
This chapter covers the following:
- Launching the Clients From the Web Start Page
- Installing the Prime Network Clients on Your Computer
- Troubleshooting Clients

Note![]() The client installation methods in this chapter are only relevant if Prime Network is installed as a standalone product. If you installed Prime Network as part of a suite, see Configuring the Prime Network, Prime Optical, and Prime Fulfillment Servers as Suite Components” in the Cisco Prime Central Quick Start Guide.
The client installation methods in this chapter are only relevant if Prime Network is installed as a standalone product. If you installed Prime Network as part of a suite, see Configuring the Prime Network, Prime Optical, and Prime Fulfillment Servers as Suite Components” in the Cisco Prime Central Quick Start Guide.
Launching the Clients From the Web Start Page
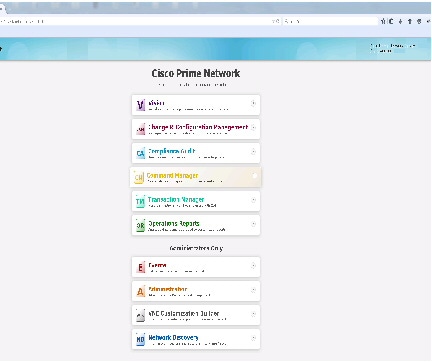
Prime Network enables you to access all its GUI clients from the Web Start page on the gateway. It provides single sign-on (SSO) for all GUI clients. After you enter your credentials, you can access any of the clients.
- All the client requirements are met. For more information on the requirements, see Prime Network Client Requirements.
- Java 8 update 60 is installed on your computer. If not, download it from the Java download site: http://www.java.com.
Note![]() Prime Network was tested on Java 8 update 60, however it is expected to work with lower Java 8 updates as well.
Prime Network was tested on Java 8 update 60, however it is expected to work with lower Java 8 updates as well.
- Ports 6080 and 6081 are open. For other ports required for Prime Network, see Required Ports for Prime Network.
To access the clients using Java Web Start technology:
Step 1![]() Log into the gateway by entering:
Log into the gateway by entering:
where gateway-host-IP is the gateway host name or IP address.
The Prime Network applications launch page is displayed and provides access to all of the Prime Network GUI clients.
Step 2![]() Enter your user name and password in the Prime Network login window and click Login.
Enter your user name and password in the Prime Network login window and click Login.
Step 3![]() Click on the Prime Network application you want to access. A.jnlp file is downloaded.
Click on the Prime Network application you want to access. A.jnlp file is downloaded.
Step 4![]() Click Continue in the Security Warning screens. The client application jar files are downloaded and the Prime Network application starts.
Click Continue in the Security Warning screens. The client application jar files are downloaded and the Prime Network application starts.
Step 5![]() Enter the gateway username and password, then click OK.
Enter the gateway username and password, then click OK.
Note![]() If you want to launch a client from a different gateway, repeat this procedure from the other gateway.
If you want to launch a client from a different gateway, repeat this procedure from the other gateway.
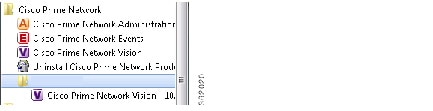
After the first Java Web Start application launch, a shortcut menu is added to the Start menu under the gateway IP address or hostname. Use this shortcut menu to launch the application for subsequent usage.
Installing the Prime Network Clients on Your Computer
This section provides procedures for installing the Prime Network client from the DVD or by downloading the client executable from the gateway server.
- All the client requirements are met. For more information on the requirements, see Prime Network Client Requirements.
- Disk 2: Client, Integration Layer, and Documentation is available. (See Installation DVDs.)
- There is IP connectivity between the gateway and the client workstation that you are about to install.
- Ports 6080 and 6081 are open. For other ports required for Prime Network, see Required Ports for Prime Network.
- Make sure that you do not have any outdated client files.
The client installation wizard guides you step-by-step through the client installation process.
Step 1![]() Use either of the following options to begin the client installation:
Use either of the following options to begin the client installation:
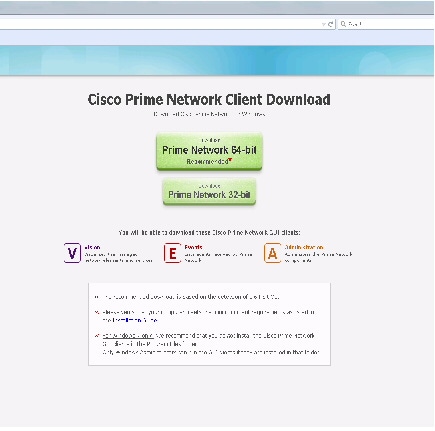
If the client installation wizard does not launch automatically, browse to the DVD directory and launch the client executable (CiscoPrimeNetwork.exe for 32-bit systems or CiscoPrimeNetwork_64bit.exe for 64-bit systems).
- Open a web browser and download the client installation executable from the gateway using this URL:
http:// gateway-IP-address :6080/ana/services/install/install/index.html
where gateway-IP-address is the IP address of the gateway.
The system makes a best effort to detect whether your operating system is 32-bit or 64-bit and indicates the recommended download. Click on the relevant link to download the exe file. You can also download Vision, Events, and Admin clients.
Step 2![]() Click Next. The Destination Location window is displayed. Click Browse to change the installation directory, if you do not want to use the default, then click Next.
Click Next. The Destination Location window is displayed. Click Browse to change the installation directory, if you do not want to use the default, then click Next.
Note![]() The default installation location is C:\Cisco Systems\Prime Network\. If you are installing on Windows 7, do not install the Prime Network clients in the Program Files folder. Only Windows administrators can run the clients if they are installed in that folder.
The default installation location is C:\Cisco Systems\Prime Network\. If you are installing on Windows 7, do not install the Prime Network clients in the Program Files folder. Only Windows administrators can run the clients if they are installed in that folder.
Step 3![]() In the Select Components window, select the clients you want to install (Vision, Events, and/or Administration) and click Next.
In the Select Components window, select the clients you want to install (Vision, Events, and/or Administration) and click Next.
Step 4![]() If you want to change the default Program Manager group, enter your preference and click Next.
If you want to change the default Program Manager group, enter your preference and click Next.
Note![]() Cisco Prime Network is the default Program Manager group. Cisco Prime Network overwrites any existing icons. If you choose to have multiple client installations, you should add a version number to the Program Manager group; for example, Prime Network 5.2.
Cisco Prime Network is the default Program Manager group. Cisco Prime Network overwrites any existing icons. If you choose to have multiple client installations, you should add a version number to the Program Manager group; for example, Prime Network 5.2.
Step 5![]() Click Next to start the installation.
Click Next to start the installation.
Step 6![]() When the installation is complete, choose the options displayed in the final installation window, according to your preference:
When the installation is complete, choose the options displayed in the final installation window, according to your preference:
Installing Prime Network Clients in a Remote Personal Computer
This section provides procedure for installing the Prime Network client in a remote Personal Computer (PC).
–![]() Processor-Intel Core i5 CPU @ 2.30GHz
Processor-Intel Core i5 CPU @ 2.30GHz
Step 1![]() Connect two Windows 10 machine to the network (local machine and Remote machine).
Connect two Windows 10 machine to the network (local machine and Remote machine).
Note![]() Do not install Prime Network GUI clients in a local machine.
Do not install Prime Network GUI clients in a local machine.
Step 2![]() Install Prime Network GUI clients (Administration, Vision, Events and so on) in a remote machine. Make a note of the IP address of the remote machine.
Install Prime Network GUI clients (Administration, Vision, Events and so on) in a remote machine. Make a note of the IP address of the remote machine.
Step 3![]() In the Client, open the Remote Desktop Connection application.
In the Client, open the Remote Desktop Connection application.
Note![]() Click Search for Remote Desktop Connection in Windows 10 and you can see the Application in Search results. Click on it and open that application in Windows 10.
Click Search for Remote Desktop Connection in Windows 10 and you can see the Application in Search results. Click on it and open that application in Windows 10.
Figure 8-1 Remote Desktop Connection

Step 4![]() In the Computer field, enter the IP address and click Connect.
In the Computer field, enter the IP address and click Connect.
Step 5![]() Now, you will be asked to enter credentials of the remote machine. Once you enter correct credentials, you can access the remote machine from local machine.
Now, you will be asked to enter credentials of the remote machine. Once you enter correct credentials, you can access the remote machine from local machine.
Step 6![]() After accessing the remote machine, launch the Prime Network Administration GUI, Vision GUI client, or Events GUI client.
After accessing the remote machine, launch the Prime Network Administration GUI, Vision GUI client, or Events GUI client.
After the client installation is finished, use Cisco Prime Network Administration to complete the deployment of Cisco Prime Network. For information, see the Cisco Prime Network 5.2 Administrator Guide.
Troubleshooting Clients
This table explains how to troubleshoot typical client problems and respond to client messages.
|
|
|
|---|---|
There may be issues establishing SSL connection or creating a cache folder to the Prime Network client. Follow the instructions in Using Prime Network Clients with Citrix. |
|
Message: An automatic upgrade of the Prime Network installer is required to connect to the specified server. The application will restart after the upgrade has completed. |
The server and client have different versions of the launcher. Let the automatic upgrade continue. |
You are trying to launch a client that is not compatible with the gateway. Install updated clients as described in: |
|
Message: Another Prime Network client accessing a different server is open on your computer. This additional Prime Network client will open using the same installer version as the currently open Prime Network client. |
This occurs when another Prime Network application is running and is connected to a different gateway—For example, a client is already connected to gateway1 and you are trying to connect to gateway2. Click OK. The client will connect to gateway2 but will use the client launcher from gateway. Consequently, the GUI might not match the host code. |
If you encounter a problem in opening a Prime Network application, try to regenerate the application files at the Prime Network server by logging in Prime Network gateway and execute the script clientregpacker.sh located at PRIME_NETWORK_HOME / Main/Scripts |
|
After the execution of changePrimeNetworkOSAndOracleUser.sh script, unable to dis-integrate Prime Network from Prime Central. |
This occurs when you change the SSH user name. After the execution of changePrimeNetworkOSAndOracleUser.sh script, follow the re-integration process of changePrimeNetworkOSAndOracleUser.sh script in the Prime Network-Prime Central setup. 1. |
 Feedback