- Cisco Broadband Troubleshooter Release 3.3 User Guide Title
- Preface
- Product Overview
- Installing, Downloading, and Upgrading CBT 3.3
- Configuring the Cisco Broadband Troubleshooter
- Using the Spectrum Management Tools
- Administrative Tasks for CBT 3.3
- Troubleshooting CBT 3.3
- Sample Code for Application Program Interfaces
Cisco Broadband Troubleshooter Release 3.3 User Guide
Bias-Free Language
The documentation set for this product strives to use bias-free language. For the purposes of this documentation set, bias-free is defined as language that does not imply discrimination based on age, disability, gender, racial identity, ethnic identity, sexual orientation, socioeconomic status, and intersectionality. Exceptions may be present in the documentation due to language that is hardcoded in the user interfaces of the product software, language used based on RFP documentation, or language that is used by a referenced third-party product. Learn more about how Cisco is using Inclusive Language.
- Updated:
- June 28, 2007
Chapter: Installing, Downloading, and Upgrading CBT 3.3
Installing, Downloading, and Upgrading CBT 3.3
Use the following steps to download and to install CBT 3.3 on a system with the Linux, Solaris, or Windows operating systems. This section contains the following topics:
•![]() Using TCP Ports for CBT 3.3 Upgrade and Operation
Using TCP Ports for CBT 3.3 Upgrade and Operation
•![]() Installing and Starting CiscoView on Solaris
Installing and Starting CiscoView on Solaris
•![]() Installing and Starting CBT on Windows
Installing and Starting CBT on Windows
•![]() Installing and Starting CBT on Linux
Installing and Starting CBT on Linux
•![]() Requirements for Installing Daylight Savings Time (DST) Operating System Patches
Requirements for Installing Daylight Savings Time (DST) Operating System Patches
•![]() Uninstalling Cisco Broadband Troubleshooter
Uninstalling Cisco Broadband Troubleshooter
Using TCP Ports for CBT 3.3 Upgrade and Operation

Note ![]() Cisco implements a default TCP port of 8105 on the licensing server for CBT 3.3 in XML script. This prevents port conflict with other applications. If you require a TCP port other than the default of 8105, then set the TCP port after installation of CBT 3.3, but prior to licensing. Refer to Step 5 below.
Cisco implements a default TCP port of 8105 on the licensing server for CBT 3.3 in XML script. This prevents port conflict with other applications. If you require a TCP port other than the default of 8105, then set the TCP port after installation of CBT 3.3, but prior to licensing. Refer to Step 5 below.
We recommend ports other than 8005, 8080, 9080, 9443, or 9082.
The following are the default ports used by CBT 3.3:
•![]() Port 8105: Java Virtual Machine (JVM) server port
Port 8105: Java Virtual Machine (JVM) server port
•![]() Port 9080: Non-SSL HTTP port
Port 9080: Non-SSL HTTP port
•![]() Port 9443: SSL HTTP port
Port 9443: SSL HTTP port
•![]() Port 9082: Apache JServ Protocol (AJP) 1.3 Connector
Port 9082: Apache JServ Protocol (AJP) 1.3 Connector
•![]() Port 2640: For Sybase database connectivity
Port 2640: For Sybase database connectivity
•![]() Port 8020: For Poller operation
Port 8020: For Poller operation
CBT 3.3 uses the following port ranges for spectrum operations. Spectrum events such as Trace Window, Spectrogram, CNR Trending, and the Generic Query use a specified range of port numbers for operation.
•![]() For both Trace Window events and the Spectrogram events, the port numbers range from 2100 to 2500.
For both Trace Window events and the Spectrogram events, the port numbers range from 2100 to 2500.
•![]() For the Spectrum tools, such as CNR Trending, port numbers range from 3100 to 3500.
For the Spectrum tools, such as CNR Trending, port numbers range from 3100 to 3500.
•![]() For the Diagnostic tools, such as Generic Query, the port numbers range from 5100 to 5500.
For the Diagnostic tools, such as Generic Query, the port numbers range from 5100 to 5500.
•![]() The usage of these spectrum port numbers should be in increments of 1, meaning the first trace Window launched obtains port number 2100, and the next Trace Window obtains port 2101. The next Spectrogram window would be port 2102, and continuing upward to port 2500.
The usage of these spectrum port numbers should be in increments of 1, meaning the first trace Window launched obtains port number 2100, and the next Trace Window obtains port 2101. The next Spectrogram window would be port 2102, and continuing upward to port 2500.
CBT 3.3 Download and Upgrade
Step 1 ![]() Download CBT 3.3 software for the desired platform from Cisco.com to your local directory <CBT3.3_DOWNLOAD_DIR>.
Download CBT 3.3 software for the desired platform from Cisco.com to your local directory <CBT3.3_DOWNLOAD_DIR>.
•![]() Cisco.com locations:
Cisco.com locations:
http://www.cisco.com/cgi-bin/tablebuild.pl/cbt
•![]() Platform files and release notes:
Platform files and release notes:
–![]() There is a single file for the Solaris platform—CBT33-Solaris.tar.gz
There is a single file for the Solaris platform—CBT33-Solaris.tar.gz
–![]() There is a single file for the Linux platform—CBT33-Linux.tar.gz
There is a single file for the Linux platform—CBT33-Linux.tar.gz
–![]() Platform files for the Windows platform—CBT33-Win.exe
Platform files for the Windows platform—CBT33-Win.exe
–![]() CBT 3.3 Release Notes—CBT33ReleaseNotes.pdf
CBT 3.3 Release Notes—CBT33ReleaseNotes.pdf
Step 2 ![]() Extract the software. For Solaris and Linux, use the commands below. For Windows 2000 and Windows XP, skip to Step 3.
Extract the software. For Solaris and Linux, use the commands below. For Windows 2000 and Windows XP, skip to Step 3.
•![]() Solaris:
Solaris:
a. ![]() cd <CBT3.3_DOWNLOAD_DIR>
cd <CBT3.3_DOWNLOAD_DIR>
b. ![]() gunzip CBT33-Solaris.tar.gz
gunzip CBT33-Solaris.tar.gz
c. ![]() tar xvf CBT33-Solaris.tar
tar xvf CBT33-Solaris.tar
•![]() Linux:
Linux:
a. ![]() cd <CBT3.3_DOWNLOAD_DIR>
cd <CBT3.3_DOWNLOAD_DIR>
b. ![]() gunzip CBT33-Linux.tar.gz
gunzip CBT33-Linux.tar.gz
c. ![]() tar xvf CBT33-Linux.tar
tar xvf CBT33-Linux.tar
Uninstalling Prior CBT Releases
Step 3 ![]() If there is a previous CBT installation (CBT 2.x, CBT 3.0, or CBT 3.2), uninstall it using the following procedures; otherwise, skip to Step 4.
If there is a previous CBT installation (CBT 2.x, CBT 3.0, or CBT 3.2), uninstall it using the following procedures; otherwise, skip to Step 4.
•![]() Solaris: cd <CBT3.x_DOWNLOAD_DIR> ./uninstall
Solaris: cd <CBT3.x_DOWNLOAD_DIR> ./uninstall
•![]() Linux: cd <CBT3.x_DOWNLOAD_DIR> ./uninstall
Linux: cd <CBT3.x_DOWNLOAD_DIR> ./uninstall
•![]() Windows:
Windows:
–![]() In Windows Explorer, double-click CBT3x-Win.exe in <CBT3.x_DOWNLOAD_DIR>.
In Windows Explorer, double-click CBT3x-Win.exe in <CBT3.x_DOWNLOAD_DIR>.
–![]() Remove the existing CBT installation.
Remove the existing CBT installation.
Step 4 ![]() Install CBT 3.3.
Install CBT 3.3.
•![]() Solaris: cd <CBT3.3_DOWNLOAD_DIR> ./install
Solaris: cd <CBT3.3_DOWNLOAD_DIR> ./install
•![]() Linux: cd <CBT3.3_DOWNLOAD_DIR> ./install
Linux: cd <CBT3.3_DOWNLOAD_DIR> ./install
•![]() Windows:
Windows:
–![]() From Windows Explorer, double-click CBT33-Win.exe in <CBT3.3_DOWNLOAD_DIR>.
From Windows Explorer, double-click CBT33-Win.exe in <CBT3.3_DOWNLOAD_DIR>.
–![]() Select the default answers to the installation questions.
Select the default answers to the installation questions.
Note ![]() A demonstration version of CBT 3.3 is now running (a license is not included in the Cisco.com download). To make the software fully functional, obtain a license for CBT 3.3 from Cisco Systems. See Step 5.
A demonstration version of CBT 3.3 is now running (a license is not included in the Cisco.com download). To make the software fully functional, obtain a license for CBT 3.3 from Cisco Systems. See Step 5.
Step 5 ![]() Purchased copies of CBT no longer include a software CD, but include a license certificate with a PAK key. This PAK key generates the necessary license file from the following websites, and the software is downloaded from Cisco Connection Online.
Purchased copies of CBT no longer include a software CD, but include a license certificate with a PAK key. This PAK key generates the necessary license file from the following websites, and the software is downloaded from Cisco Connection Online.
•![]() Use this site if you are a registered user of Cisco Connection Online:
Use this site if you are a registered user of Cisco Connection Online:
•![]() Use this site if you are not a registered user of Cisco Connection Online:
Use this site if you are not a registered user of Cisco Connection Online:
www.cisco.com/go/license/public
Note ![]() Save the license file with the name "License" from the Cisco Server location and follow the instructions in Step 6 to copy it to the appropriate directory for use by CBT 3.3.
Save the license file with the name "License" from the Cisco Server location and follow the instructions in Step 6 to copy it to the appropriate directory for use by CBT 3.3.
Demonstration copies are available either by way of the Internet, or as an ordered accessory for a universal broadband router product.
The copies supplied with a universal broadband router product include a demo license certificate with a PAK key.
The copy available from the Internet uses a registration page where the PAK key is e-mailed to you.
Step 6 ![]() Use the following commands or click sequences to copy the license to the license directory and restart CBT 3.3.
Use the following commands or click sequences to copy the license to the license directory and restart CBT 3.3.
•![]() Solaris:
Solaris:
1. ![]() cp License /opt/CSCOcbt/httpServer/webapps/ROOT/WEB-INF/classes/lic
cp License /opt/CSCOcbt/httpServer/webapps/ROOT/WEB-INF/classes/lic
2. ![]() /opt/CSCOcbt/bin/stop_app
/opt/CSCOcbt/bin/stop_app
3. ![]() /opt/CSCOcbt/bin/start_app
/opt/CSCOcbt/bin/start_app
•![]() Linux:
Linux:
1. ![]() cp License /opt/CSCOcbt/httpServer/webapps/ROOT/WEB-INF/classes/lic
cp License /opt/CSCOcbt/httpServer/webapps/ROOT/WEB-INF/classes/lic
2. ![]() /opt/CSCOcbt/bin/stop_app
/opt/CSCOcbt/bin/stop_app
3. ![]() /opt/CSCOcbt/bin/start_app
/opt/CSCOcbt/bin/start_app
•![]() Windows:
Windows:
1. ![]() copy License <CBT3.3_INSTALLATION_DIR>\httpServer\webapps\ROOT\WEB-INF\classes\lic>
copy License <CBT3.3_INSTALLATION_DIR>\httpServer\webapps\ROOT\WEB-INF\classes\lic>
2. ![]() Click Start > Programs > Cisco Broadband Troubleshooter > Stop Troubleshooter
Click Start > Programs > Cisco Broadband Troubleshooter > Stop Troubleshooter
3. ![]() Click Start > Programs > Cisco Broadband Troubleshooter > Start Troubleshooter
Click Start > Programs > Cisco Broadband Troubleshooter > Start Troubleshooter
Note ![]() Once the CBT 3.3 license is installed and active, additional changes to the license are not supported. License changes disable an otherwise valid license.
Once the CBT 3.3 license is installed and active, additional changes to the license are not supported. License changes disable an otherwise valid license.
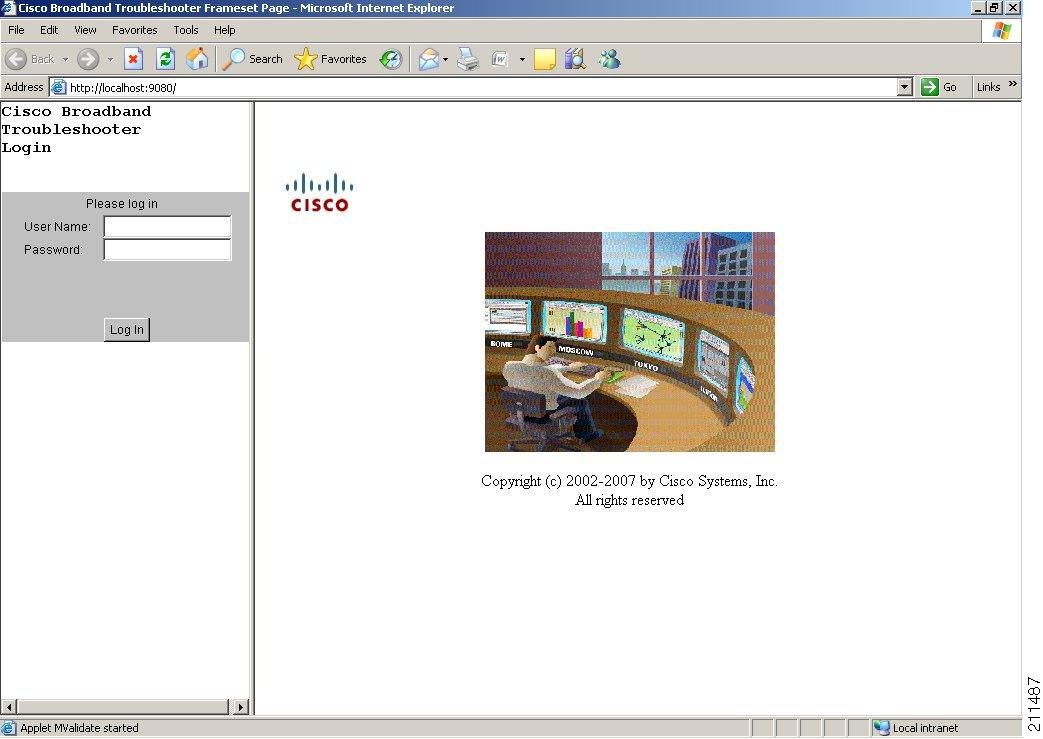
Figure 1 CBT Log In Window
Installing and Starting CiscoView on Solaris
Note ![]() The Solaris installation package for CBT 3.3 includes the CiscoView installation package.
The Solaris installation package for CBT 3.3 includes the CiscoView installation package.
Step 1 ![]() Obtain the software as per the instructions in the "CBT 3.3 Download and Upgrade" section.
Obtain the software as per the instructions in the "CBT 3.3 Download and Upgrade" section.
Step 2 ![]() Log in as root.
Log in as root.
Step 3 ![]() (Optional) If you are not running Solaris Volume Manager as root, you must mount manually the CD:
(Optional) If you are not running Solaris Volume Manager as root, you must mount manually the CD:
•![]() If a mount point does not exist, create one by making a new /cdrom directory.
If a mount point does not exist, create one by making a new /cdrom directory.
•![]() Enter the following command, where CD-ROM device is the name of your CD-ROM:
Enter the following command, where CD-ROM device is the name of your CD-ROM:
mount CD-ROM device /cdrom
Note ![]() If you are running Solaris Volume Manager, the CD-ROM automatically mounts on the /cdrom/cdrom0 directory.
If you are running Solaris Volume Manager, the CD-ROM automatically mounts on the /cdrom/cdrom0 directory.
Step 4 ![]() To change to the CiscoView Solaris directory and install CiscoView, enter:
To change to the CiscoView Solaris directory and install CiscoView, enter:
cd /cdrom/cdrom0/solaris/cv
./setup.sh
The CBT server is now running.
Step 5 ![]() (Optional) If you are not running Solaris Volume Manager, make sure that no other application is using /cdrom as the current directory so that you can unmount the CD by entering:
(Optional) If you are not running Solaris Volume Manager, make sure that no other application is using /cdrom as the current directory so that you can unmount the CD by entering:
umount /cdrom
Note ![]() If you are running Solaris Volume Manager, the CD-ROM automatically unmounts.
If you are running Solaris Volume Manager, the CD-ROM automatically unmounts.
Step 6 ![]() To eject the CD, enter:
To eject the CD, enter:
eject
Installing and Starting CBT on Windows
DETAILED STEPS
Step 1 ![]() Obtain the software as per the instructions in the "CBT 3.3 Download and Upgrade" section.
Obtain the software as per the instructions in the "CBT 3.3 Download and Upgrade" section.
Step 2 ![]() From Windows Explorer, double-click CBT33-Win.exe.
From Windows Explorer, double-click CBT33-Win.exe.
Step 3 ![]() Select the default answers to the installation questions.
Select the default answers to the installation questions.
The CBT server is now running.
Step 4 ![]() To start CBT by using the menus, choose:
To start CBT by using the menus, choose:
Start > Programs > Cisco Broadband Troubleshooter > Start Troubleshooter
or
To access CBT by using a browser, open the browser and enter:
http://CBT server IP address:9080/
Note ![]() In the URL, CBT server IP address is the server on which you installed CBT.
In the URL, CBT server IP address is the server on which you installed CBT.
Step 5 ![]() In the Log In window (see Figure 1), enter your username and password.
In the Log In window (see Figure 1), enter your username and password.
Step 6 ![]() (Optional) To stop CBT manually, choose:
(Optional) To stop CBT manually, choose:
Start > Programs > Cisco Broadband Troubleshooter > Stop Troubleshooter
Installing and Starting CBT on Linux
Step 1 ![]() Obtain the software as per the instructions in the "CBT 3.3 Download and Upgrade" section.
Obtain the software as per the instructions in the "CBT 3.3 Download and Upgrade" section.
Step 2 ![]() Log in as root.
Log in as root.
Step 3 ![]() Change to the download CBT Linux directory, as established in Step 1.
Change to the download CBT Linux directory, as established in Step 1.
Step 4 ![]() To start the installation program, enter:
To start the installation program, enter:
./install
The CBT server is now running.
Step 5 ![]() To start CBT by using a command line, enter:
To start CBT by using a command line, enter:
~ /opt/CSCOcbt/bin
./start_app
or
To access CBT by using a browser, open the browser and enter:
http://CBT server IP address:9080/
Note ![]() In the URL, CBT server IP address is the server on which you installed CBT.
In the URL, CBT server IP address is the server on which you installed CBT.
Step 6 ![]() In the Log In window (see Figure 1), enter your username and password.
In the Log In window (see Figure 1), enter your username and password.
Step 7 ![]() (Optional) To stop CBT manually, enter:
(Optional) To stop CBT manually, enter:
~/opt/CSCOcbt/bin
./stop_app
Requirements for Installing Daylight Savings Time (DST) Operating System Patches
CBT 3.3 requires that the latest operating system patches be installed for all platforms supported by CBT 3.3. Refer to the "Enhanced Support for Operating Systems and Web Server Applications" section on page 4 for additional information about supported platforms.
JRE OS-Level Requirements
CBT 3.3 supports the latest Java Runtime Environment (JRE 5.0) platform. However, the network administrator must ensure that all OS-level patches are installed to avoid system problems with CBT 3.3. This section describes patch requirements according to platform.
•![]() Microsoft Windows operating systems:
Microsoft Windows operating systems:
–![]() See DST information at <Preparing for Daylight Saving Time changes in 2007> available at http://www.microsoft.com/windows/timezone/dst2007.mspx
See DST information at <Preparing for Daylight Saving Time changes in 2007> available at http://www.microsoft.com/windows/timezone/dst2007.mspx
•![]() Linux operating systems:
Linux operating systems:
–![]() For Red Hat Enterprise Linux 3 (RHEL3), see information at http://rhn.redhat.com/errata/RHEA-2005-655.html
For Red Hat Enterprise Linux 3 (RHEL3), see information at http://rhn.redhat.com/errata/RHEA-2005-655.html
–![]() For Red Hat Enterprise Linux 4 (RHEL4), see information at http://rhn.redhat.com/errata/RHEA-2005-656.html
For Red Hat Enterprise Linux 4 (RHEL4), see information at http://rhn.redhat.com/errata/RHEA-2005-656.html
•![]() Sun Solaris operating systems:
Sun Solaris operating systems:
–![]() See DST patch information for Sun Solaris 8, 9, and 10 at the following location:
See DST patch information for Sun Solaris 8, 9, and 10 at the following location:
http://sunsolve.sun.com/search/document.do?assetkey=1-26-102178-1
Uninstalling Cisco Broadband Troubleshooter
This section provides instructions to uninstall Cisco Broadband Troubleshooter on each supported platform.
Uninstalling CBT on Solaris
Step 1 ![]() Log in as root.
Log in as root.
Step 2 ![]() Insert the CBT 3.3 CD-ROM for Solaris into the CD-ROM drive.
Insert the CBT 3.3 CD-ROM for Solaris into the CD-ROM drive.
Step 3 ![]() To change to the CBT Solaris directory, enter:
To change to the CBT Solaris directory, enter:
cd/cdrom/cdrom0/solaris/cbt
Step 4 ![]() To uninstall CBT, enter:
To uninstall CBT, enter:
./uninstall
Otherwise, refer to the following general uninstall procedure, as cited in the "Uninstalling Prior CBT Releases" section.
If there is a previous CBT installation (CBT 2.x, CBT 3.0 or CBT 3.2), uninstall it using the following steps.
•![]() Solaris: cd <CBT3.x_DOWNLOAD_DIR> ./uninstall
Solaris: cd <CBT3.x_DOWNLOAD_DIR> ./uninstall
Uninstalling CBT on Windows
Step 1 ![]() Choose:
Choose:
Start > Settings > Control Panel > Add/Remove Programs
Step 2 ![]() Select Cisco Broadband Troubleshooter.
Select Cisco Broadband Troubleshooter.
Step 3 ![]() Click Remove.
Click Remove.
Otherwise, refer to the following general uninstall procedure, as cited in the "Uninstalling Prior CBT Releases" section.
If there is a previous CBT installation (CBT 2.x, CBT 3.0 or CBT 3.2), uninstall it using the following steps.
•![]() Windows:
Windows:
–![]() From Windows Explorer, double-click CBT32-Win.exe in <CBT3.2_DOWNLOAD_DIR>.
From Windows Explorer, double-click CBT32-Win.exe in <CBT3.2_DOWNLOAD_DIR>.
–![]() Remove the existing CBT installation.
Remove the existing CBT installation.
Uninstalling CBT on Linux
Step 1 ![]() Log in as root.
Log in as root.
Step 2 ![]() Insert the CBT 3.3 CD-ROM into the CD-ROM drive.
Insert the CBT 3.3 CD-ROM into the CD-ROM drive.
Step 3 ![]() To mount the CD, enter:
To mount the CD, enter:
/bin/mount /mnt/cdrom
Step 4 ![]() To change to the CBT Linux directory, enter:
To change to the CBT Linux directory, enter:
cd /mnt/cdrom/linux
Step 5 ![]() To uninstall CBT, enter:
To uninstall CBT, enter:
./uninstall
Otherwise, refer to the following general uninstall procedure, as cited in the "Uninstalling Prior CBT Releases" section.
If there is a previous CBT installation (CBT 2.x, CBT 3.0 or CBT 3.2), uninstall it using the following steps.
•![]() Linux: cd <CBT3.x_DOWNLOAD_DIR> ./uninstall
Linux: cd <CBT3.x_DOWNLOAD_DIR> ./uninstall
 Feedback