Replacement of SODIMM on the Cisco uBR10-MC5X20H Line Card
Available Languages
Table Of Contents
Replacement of SODIMM on the Cisco uBR10-MC5X20H Line Card
Replacing the Small Outline Dual In-line Memory Module
Obtaining Documentation and Submitting a Service Request
Replacement of SODIMM on the Cisco uBR10-MC5X20H Line Card
1 Replacing the Small Outline Dual In-line Memory Module

CautionSmall outline dual in-line memory modules (SODIMMs) are ESD-sensitive components and can be damaged due to mishandling. Ensure that it is handled with care during installation and removal.
WarningRequired Tools and Equipment
•
•
•
•
•
Step 1
Step 2
Step 3
Step 4
Step 5
Figure 1 SDRAM SODIMM Socket on the Cisco uBR10-MC5x20H Line Card

Step 6
Caution
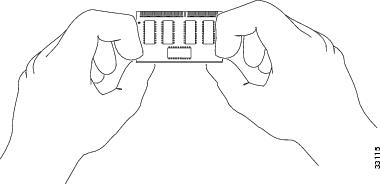
Figure 2 Releasing the Metal Clips
Step 7
Step 8
Step 9
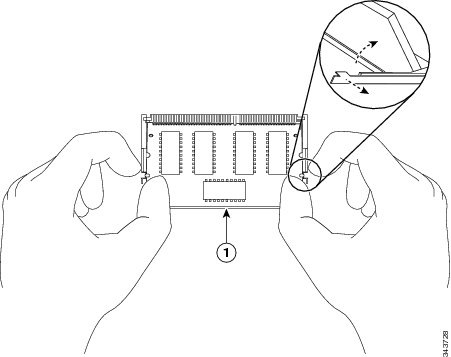
Figure 3
Handling the SODIMM
Step 10
Caution
Step 11
Step 12
Step 13
2 Related Documentation
For more information about the Cisco uBR10-MC5X20H cable interface line cards, Cisco uBR10012 router chassis, and software configuration, see the following documents:
•
•
•
3 Obtaining Documentation and Submitting a Service Request
For information on obtaining documentation, submitting a service request, and gathering additional information, see the monthly What's New in Cisco Product Documentation, which also lists all new and revised Cisco technical documentation, at:
http://www.cisco.com/en/US/docs/general/whatsnew/whatsnew.html
Subscribe to the What's New in Cisco Product Documentation as a Really Simple Syndication (RSS) feed and set content to be delivered directly to your desktop using a reader application. The RSS feeds are a free service and Cisco currently supports RSS version 2.0

 Feedback
Contact Cisco
- Open a Support Case

- (Requires a Cisco Service Contract)