Install Cisco Crosswork Optimization Engine
Before you begin, ensure that:
-
You are creating the Cisco Crosswork Network Automation VM on VMware ESXi 6.5 (Update 2d or later), and using the VMware vCenter Server 6.5 (Update 2d or later). .
-
The Cisco Crosswork Network Automation VM has allocated to it a minimum of 96 GB of RAM, 16 vCPUs, and 1 TB of hard drive space.
-
You have a public IPv4 address to assign to the Cisco Crosswork Network Automation VM's management network virtual interface. The DNS and NTP servers, and the default gateway, must be reachable via this IP address.
-
You have a public or private IPv4 address to assign to the Cisco Crosswork Network Automation VM's data network virtual interface. This IP address must be able to reach your managed devices, and be reachable by Cisco Network Services Orchestrator.
During installation, Cisco Crosswork Optimization Engine creates two special administrative IDs:
-
The virtual machine (VM) administrator, with the username cw-admin, and the default password cw-admin. Data center administrators use this ID to log in to and troubleshoot the Cisco Crosswork Network Automation VM hosting the Cisco Crosswork Optimization Engine server. You will use it to verify that the VM has been properly set up (see Verify the VM Configuration).
-
The Crosswork administrator, with the username admin and the default password admin. Product administrators use this ID to log in to and configure the Cisco Crosswork Optimization Engine user interface, and to perform special operations, such as stopping and restarting services.
These two administrative usernames are reserved and cannot be changed. The first time you log in using either of these administrative IDs, you will be prompted to change that ID's password.
While this section describes installation, you must also set up Cisco SR-PCE in order to use Cisco Crosswork Optimization Engine. Refer to the appropriate device configuration guide (for example, Segment Routing Configuration Guide for Cisco ASR 9000 Series Routers).
Procedure
| Step 1 |
Download the latest available Cisco Crosswork Optimization Engine image file (*.ova) to your system.
|
||
| Step 2 |
With VMware ESXi running, log in to the VMware vSphere Client or vSphere Web Client. Then select , as shown in the following figure.  |
||
| Step 3 |
The VMware Deploy OVF Template wizard appears and highlights the first step, 1 - Select an OVF Template, as shown in the following figure. Click Browse to navigate to the location where you downloaded the OVA image file and select it. Once selected, the file name is displayed in the window. 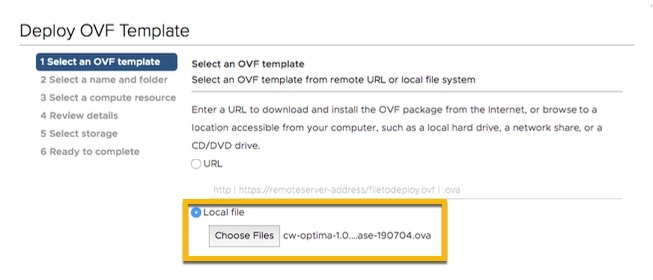 |
||
| Step 4 |
Click Next to go to 2 - Select a name and folder, as shown in the following figure. Enter a name for the Cisco Crosswork Network Automation VM you are creating. In the Select a location for the virtual machine list, choose the location under which the Cisco Crosswork Network Automation VM will reside. Cisco recommends that you include the Cisco Crosswork Optimization Engine version and build number in the name (for example: CW_VM-1.0.0_400). 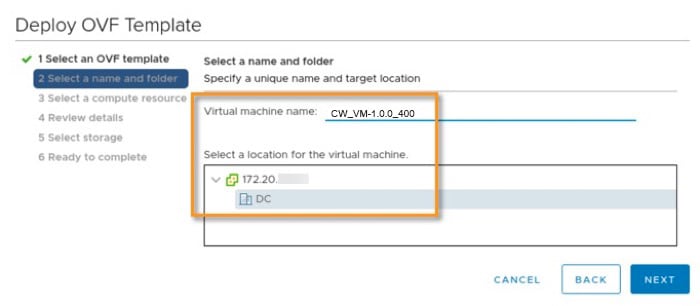 |
||
| Step 5 |
Click Next to go to 3 - Select a compute resource, as shown in the following figure. Choose the Cisco Crosswork Network Automation VM’s host. 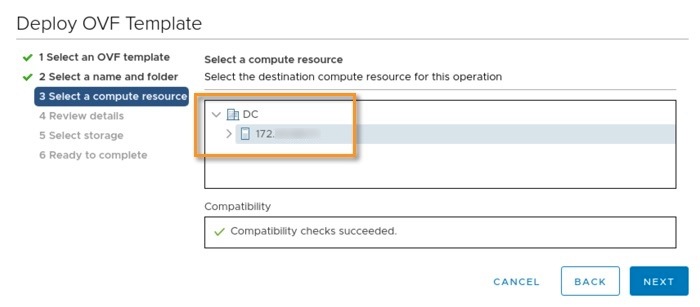 |
||
| Step 6 |
Click Next. The VMware vCenter Server validates the OVA. Network speed will determine how long validation takes. When validation is complete, the wizard moves to 4 - Review details, as shown in the following figure. Take a moment to review the OVF template you are deploying. Note that this information is gathered from the OVF and cannot be modified. 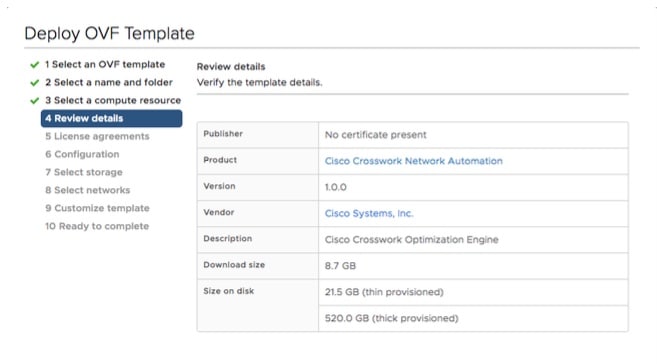 |
||
| Step 7 |
Click Next to go to 5 - License Agreements. Review the End User License Agreement and ensure that the I accept all license agreements checkbox is checked before you continue. |
||
| Step 8 |
Click Next to go to 6 - Configuration, as shown in the following figure. Select the number of interfaces (VMNICs) to use. Cisco recommends that you choose the default Dual Interface configuration. 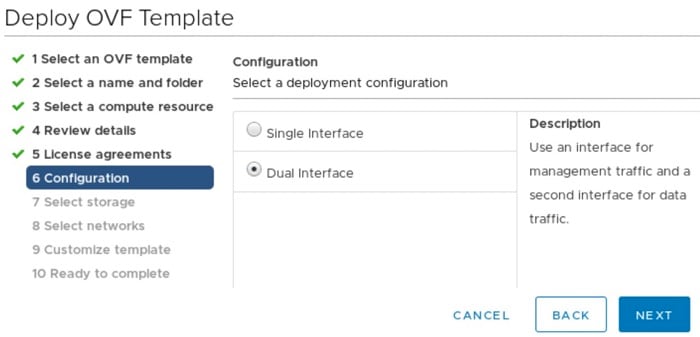 |
||
| Step 9 |
Click Next to go to 7 - Select Storage, as shown in the following figure. Cisco recommends that you select Thin Provision from the Select virtual disk format drop-down list. From the table, choose the datastore you want to use and review its properties to ensure there is enough available storage. 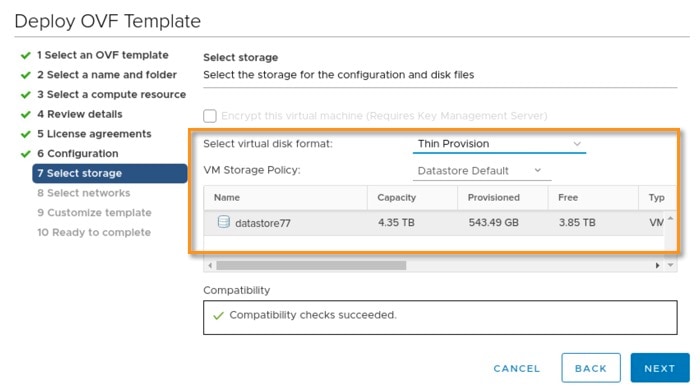 |
||
| Step 10 |
Click Next to go to 8 - Select networks, as shown in the following figure. In the dropdown table at the top of the page, choose the appropriate destination network for the source Data Network and Management Network, respectively. 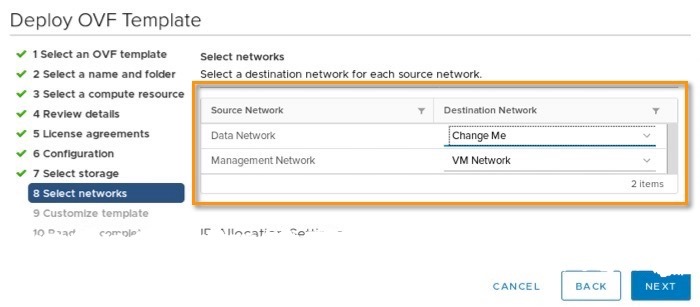 |
||
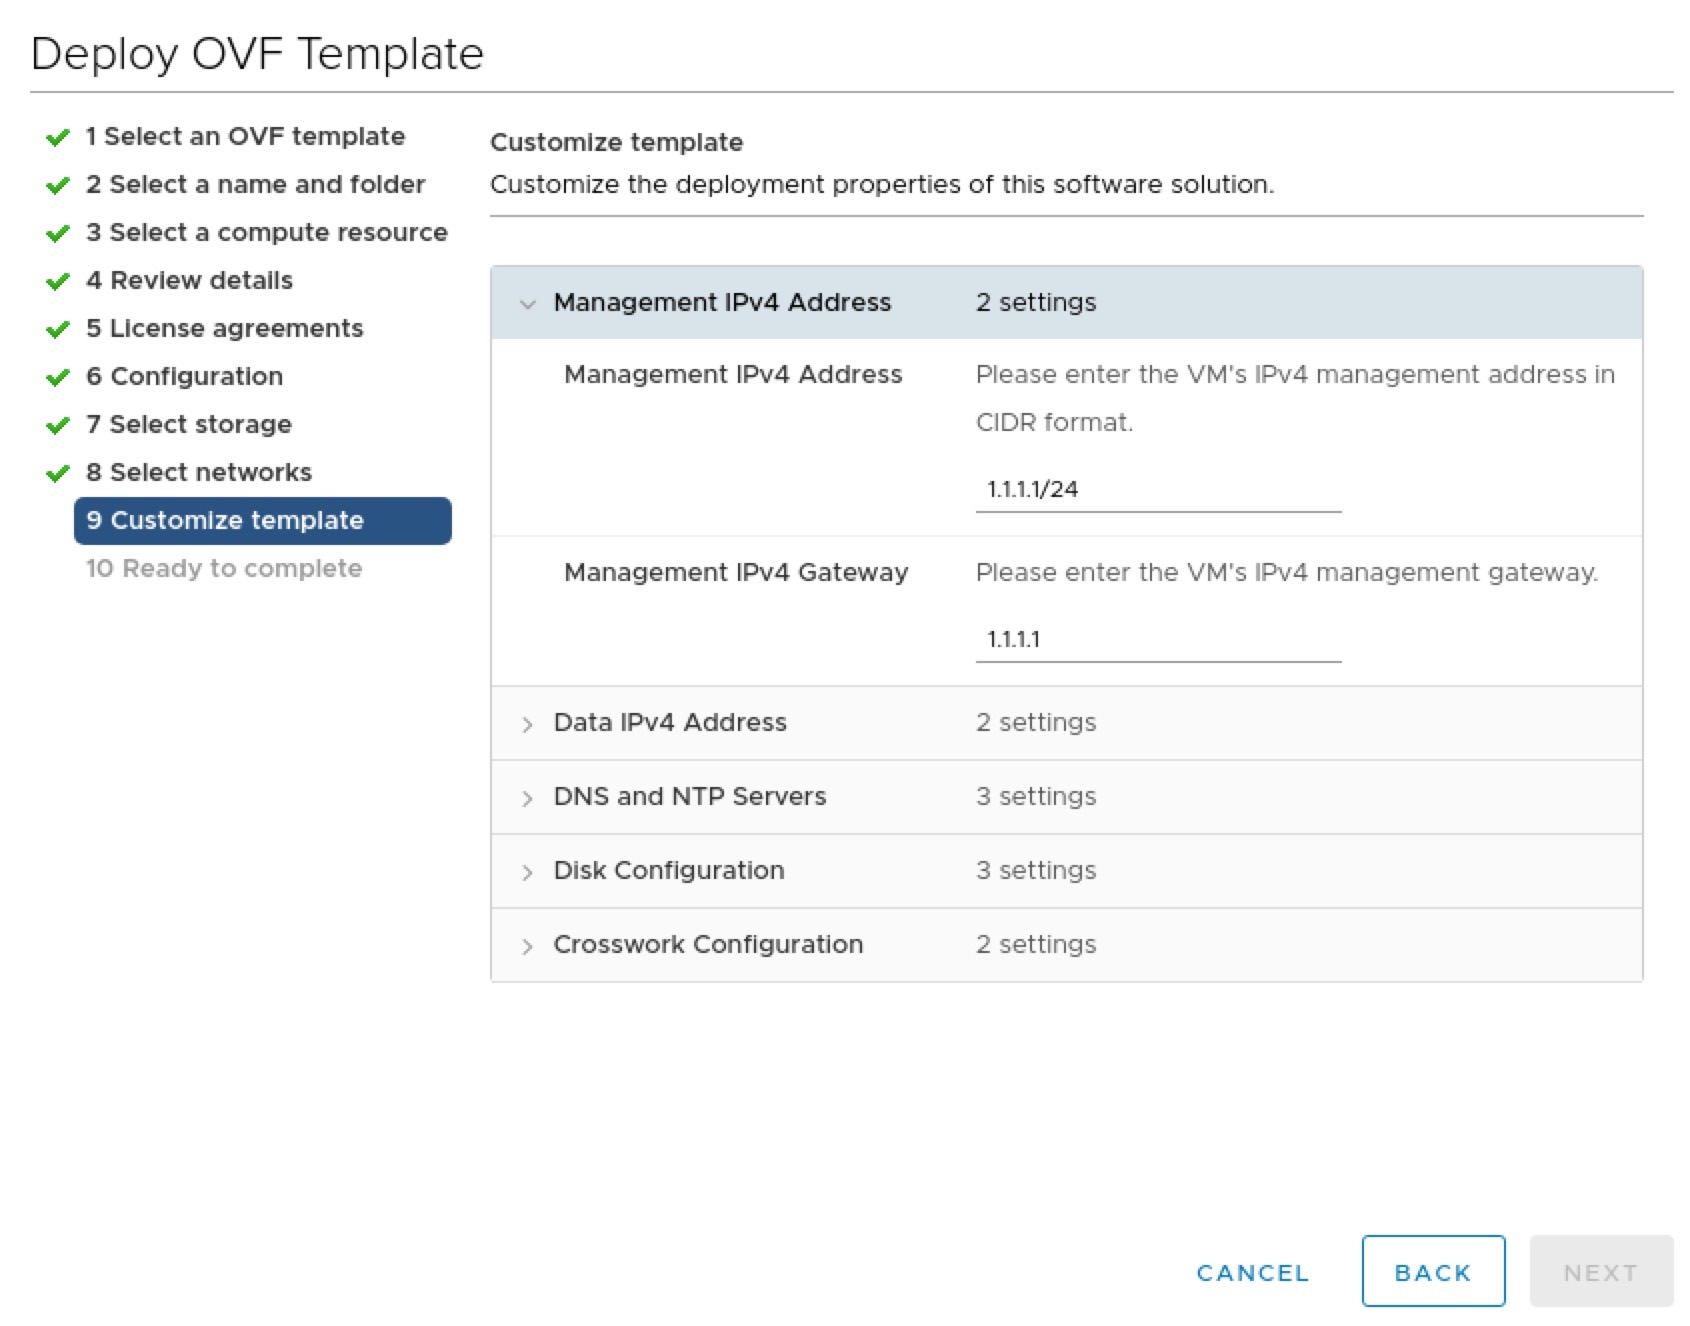
| Step 11 |
Click Next to go to 9 - Customize template, with the Management IPv4 Address settings already expanded, as shown in the following figure. Make entries in both fields:
 |
||
| Step 12 |
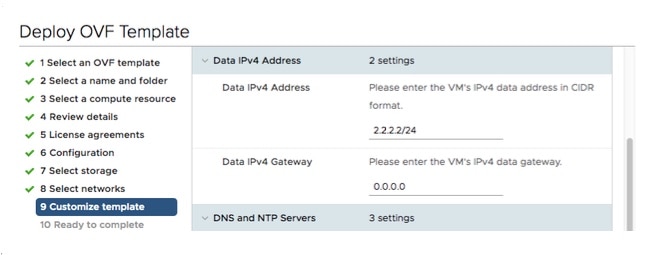
Expand the Data Network IPv4 Address settings, as shown in the following figure. Make entries in both fields:
 |
||
| Step 13 |
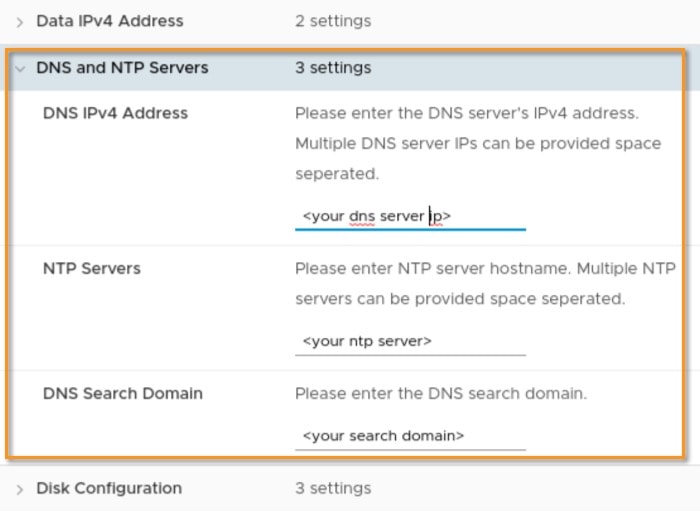
Expand the DNS and NTP Servers settings, as shown in the following figure. Make entries in three fields:
 |
||
| Step 14 |
Expand the Disk Configuration settings, as shown in the following figure. Make entries in all three fields. . The settings shown in the figure should work for most environments.  |
||
| Step 15 |
Expand the Crosswork Configuration settings, as shown in the following figure. Make entries in both fields. The Private Key encrypts the inventory database. 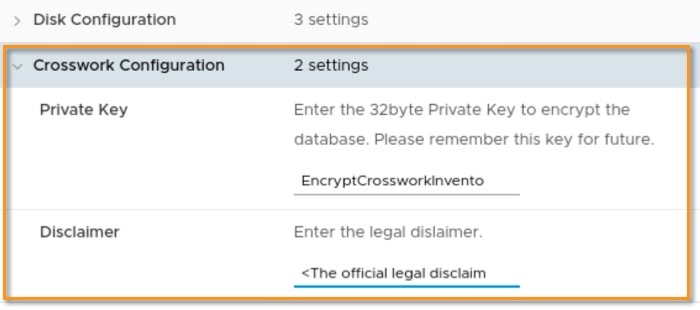 |
||
| Step 16 |
Expand the Crosswork Collection Configuration settings, as shown in the following figure. 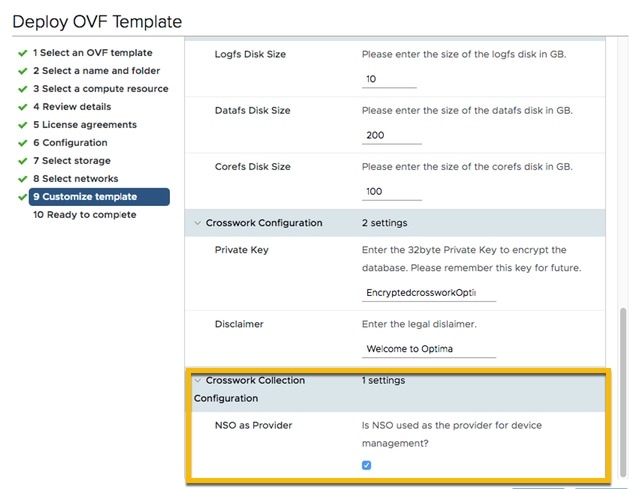 |
||
| Step 17 |
Click Next to go to 10 - Ready to Complete, as shown in the following figure. Review your settings and then click Finish if you are ready to begin deployment. 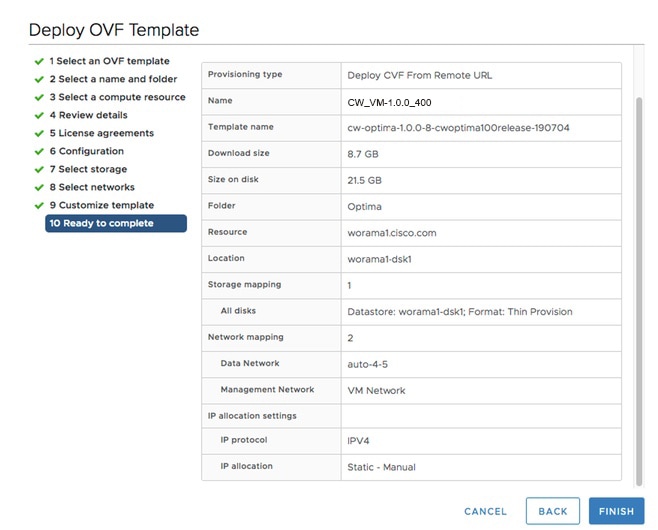 |
||
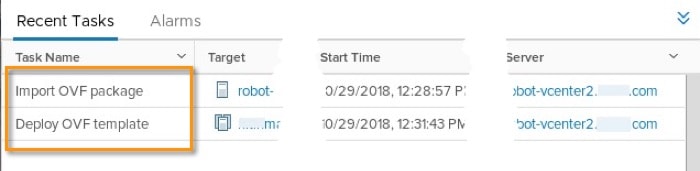
| Step 18 |
Wait for the deployment to finish before continuing. To check on the deployment status:
|
||
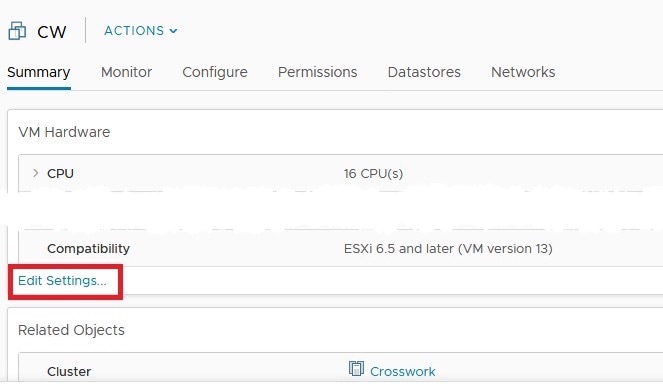
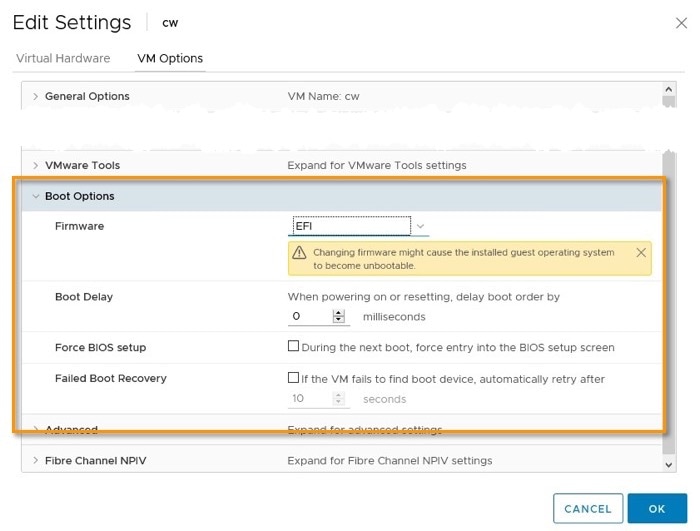
| Step 19 |
After the deployment tasks are complete, edit the host's VM settings to permit boot from EFI Firmware:
|
||
| Step 20 |
You can now power on the Cisco Crosswork Network Automation VM to complete the deployment process. Expand the host’s entry so you can click the Cisco Crosswork Network Automation VM and then choose , as shown in the following figure. 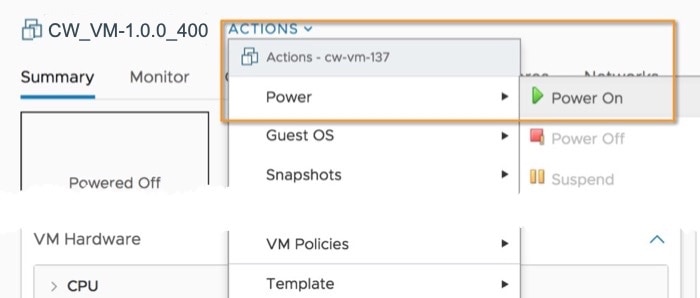 From this point, it will take 20 minutes for the Cisco Crosswork Network Automation VM to become operational. Please wait for the process to finish before continuing. |
 Feedback