Configure a Client Filter List on the WAP125 or WAP581
Available Languages
Objective
A Client Filter lets you list down the Media Access Control (MAC) addresses of the wireless clients connected to your network, effectively creating a known-only devices list, which can be stored at the local Wireless Access Point (WAP) or on an external Remote Authentication Dial-In Service (RADIUS) server. The list can be used to permit or deny listed client stations to authenticate with the WAP, making the network more secure.
This article aims to guide you in configuring a local client filter list on the WAP125 or WAP581 access points. It would be best to have a list of MAC addresses that you need to permit or deny.
Applicable Devices
- WAP125
- WAP581
Software Version
- 1.0.0.5 — WAP125
- 1.0.0.4 — WAP581
Configure a Client Filter List
Step 1. Log in to the web-based utility by entering your Username and Password in the fields provided and then click Login.
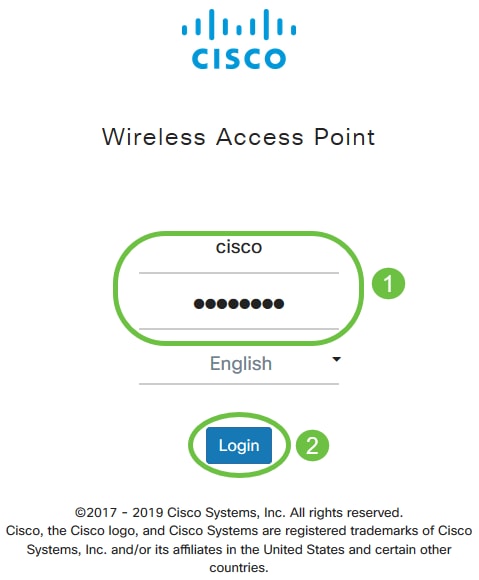
Note: The default username and password is cisco/cisco.
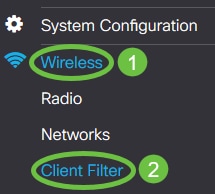
Step 2. Choose Wireless > Client Filter.
Step 3. Choose a Filter Action. The options are:
- Permit (Permit Only Clients in the List) — This option lets only the client devices, whose MAC Addresses are included in the client filter list connect to the network. Client devices that are not on the list are denied from connecting to the network.
- Deny (Deny all Clients on the List) — This option prevents only the client devices, whose MAC Addresses are included in the client filter list, from connecting to the network. Client devices that are not on the list are permitted to connect to the network.
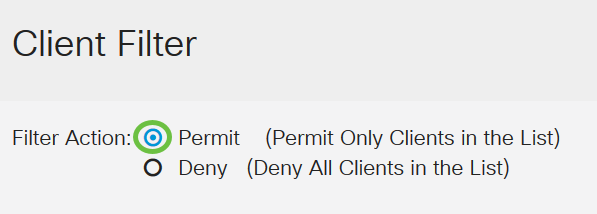
Note: In this example, Permit is chosen.
Step 4. Enter the MAC address of the client device in the MAC Address field.

Note: In this example, 1A:2B:3C:4D:5E:6F is entered.
Step 5. Enter a notation for the MAC address. This is used to identify the MAC address easily. It can be 1 to 31 characters.

Note: In this example, Manager 1’s Laptop is entered.
Step 6. Click Add.

Step 7. (Optional) Continue performing Steps 4 to 6 until the list is complete.
Step 8. Click Apply.

Step 9. Navigate to Wireless > Networks.
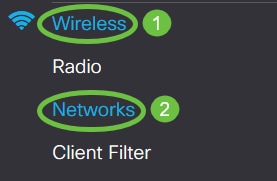
Step 10. Select the SSID under Virtual Access Points and click the edit icon. Enable client filter by choosing Local from the drop-down menu.
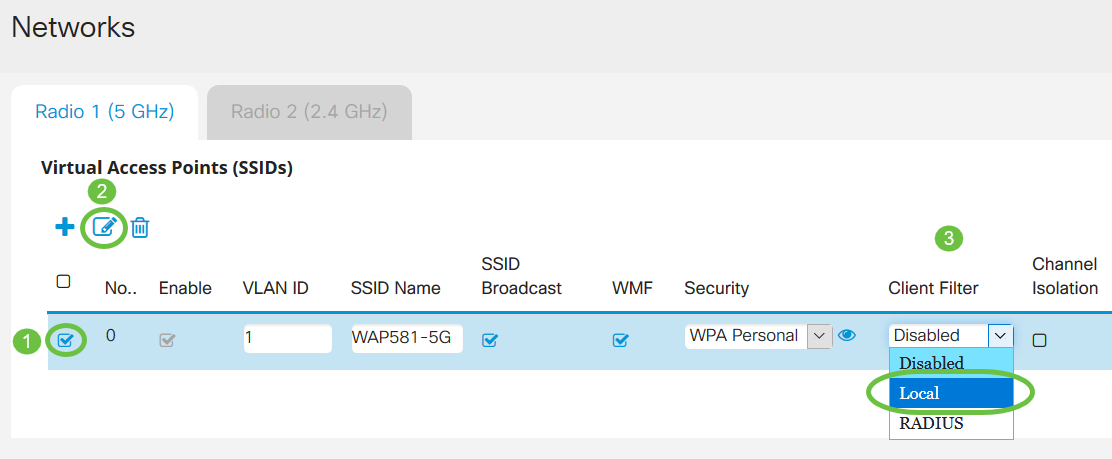
Step 11. Click Apply.

You have now successfully configured a client filter list on the WAP125 or WAP581 access point.
 Feedback