Configure the Remote Authentication Dial-In User Service (RADIUS) Server on the WAP125
Available Languages
Introduction
Remote Authentication Dial-In User Service (RADIUS) is a networking protocol that provides centralized Authentication, Authorization, and Accounting (AAA or Triple A) management for users who connect and use a network service. A RADIUS server regulates access to the network by verifying the identity of the users through the login credentials entered. For example, a public Wi-Fi network is installed in a university campus. Only those students who have the password can access these networks. The RADIUS server checks the passwords entered by the users and permits or denies access as appropriate.
How does RADIUS work?
The RADIUS server can support a variety of methods to authenticate a user. When it is provided with the username and original password given by the user, it can support Point-to-Point Protocol (PPP), Password Authentication Protocol (PAP) or Challenge Handshake Authentication Protocol (CHAP), UNIX login, and other authentication mechanisms.
The accounting features of the RADIUS protocol can be used independently of RADIUS authentication or authorization. The RADIUS accounting functions allow data to be sent at the start and end of sessions, indicating the amount of resources (such as time, packets, bytes, and so on) used during the session. An Internet Service Provider (ISP) might use RADIUS access control and accounting software to meet special security and billing needs.
Setting up a RADIUS Server is useful in enhancing security since it authenticates before authorizing a client or a user to gain access to the network. The RADIUS Server responds to client issues related to server availability, re-transmission, and timeouts. The RADIUS Server also handles users connection requests, authenticates the user, and sends the necessary configuration information to client to deliver services to the user.
The RADIUS Server centralizes control of a network that is made of RADIUS-enabled devices. RADIUS servers based its forwarding decisions on either 802.1X or Media Access Control (MAC) addresses.
Objective
The objective of this document is to show you how to configure the RADIUS server settings on your WAP125 or WAP581 access point.
Applicable Devices
- WAP125
- WAP581
Software Version
- 1.0.0.4 — WAP581
- 1.0.0.5 — WAP125
Gather the Support Information
Step 1. Log in to the web-based utility of your WAP. The default username and password is cisco/cisco.

Note: If you already have changed the password or created a new account, enter your new credentials instead.
Step 2. Choose System Configuration > Security.
Note: The available options may vary depending on the exact model of your device. In this example, WAP125 is used.

Step 3. In the Server IP Address Type area, choose a radio button for the IP version that the RADIUS server uses. The options are:
- IPv4 — Internet Protocol version 4 (IPv4) is the commonly used form of IP addressing used to identify hosts on a network and uses a 32-bit format.
- IPv6 — Internet Protocol version 6 (IPv6) is the next-generation IP address standard intended to replace the IPv4 format. IPv6 solves the address scarcity problem with the use of 128-bit addressing instead of 32-bit addressing which was used in IPv4.
Note: In this example, IPv4 is chosen.
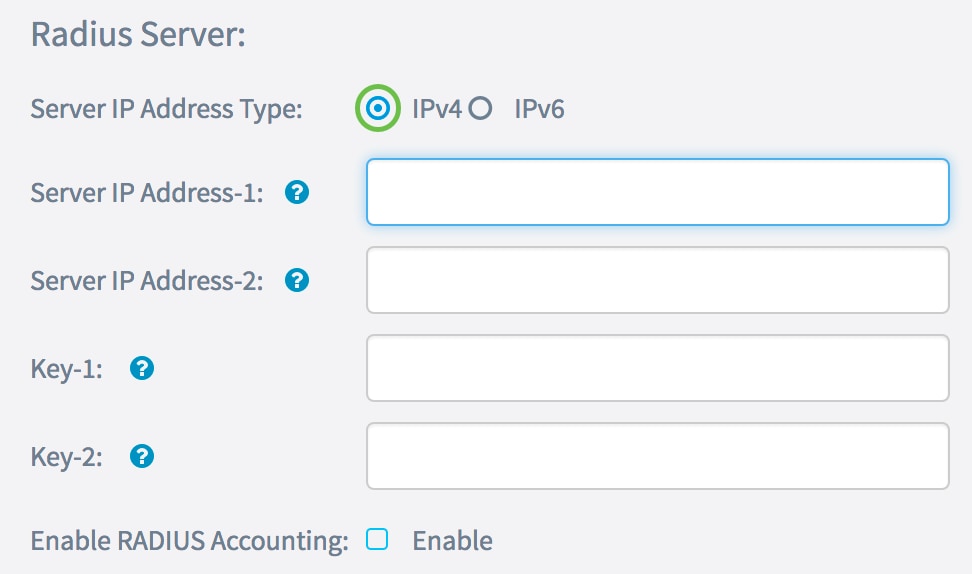
Step 4. In the Server IP Address-1 field, or Server IPv6 Address-1 field, enter either an IPv4 or IPv6 address for the global RADIUS server depending on the address type you chose in Step 3.
Note: In this example, 192.168.2.123 is the IP address of the RADIUS server. You can attribute up to two IP addresses per IP address version.

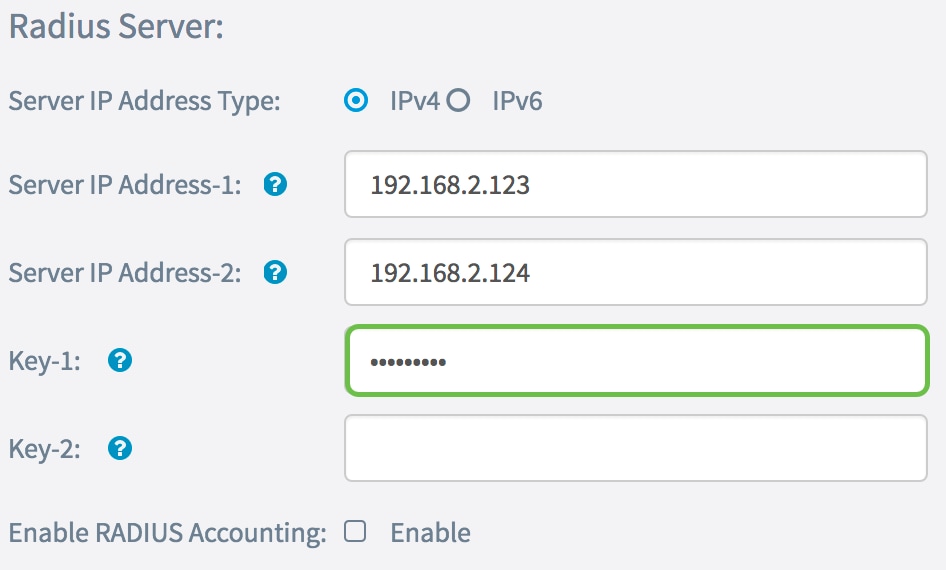
Step 5. (Optional) Enter the backup or failover IP address in the Server IP Address-2 field.
Note: In this example, 192.168.2.124 is used.

Step 6. In the Key-1 field, enter the shared secret key corresponding to the primary RADIUS server that the WAP uses to authenticate to the RADIUS server. The range is from 1 to 64 standard alphanumeric and special characters.
Note: The keys are case-sensitive and must match the key configured on the RADIUS server.
Step 7. (Optional) In the Key-2 field, enter the RADIUS key associated with the configured backup RADIUS servers. The server at Server IP (IPv6) Address 2 uses Key-2.
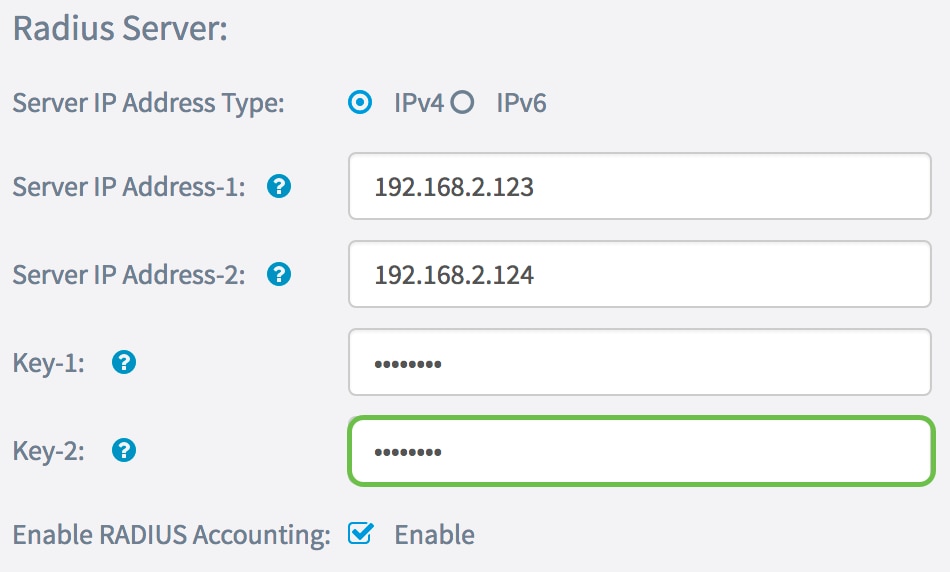
Step 8. In the Enable RADIUS Accounting area, check the Enable check box to enable tracking and measuring of the resources a user has consumed (such as system time and the amount of data transmitted). This enables RADIUS accounting for the primary and backup servers.
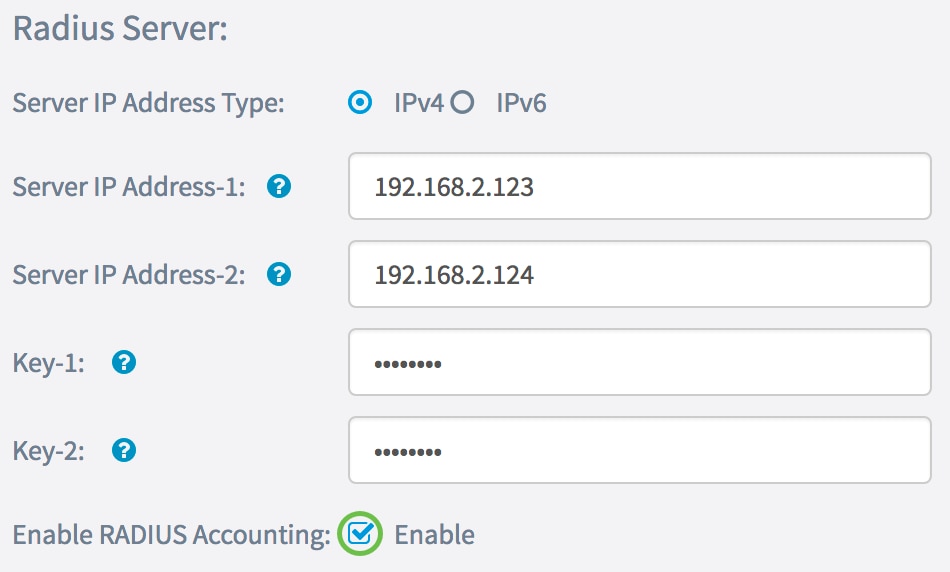
Step 9. Click the Save button to save the configured RADIUS server settings.
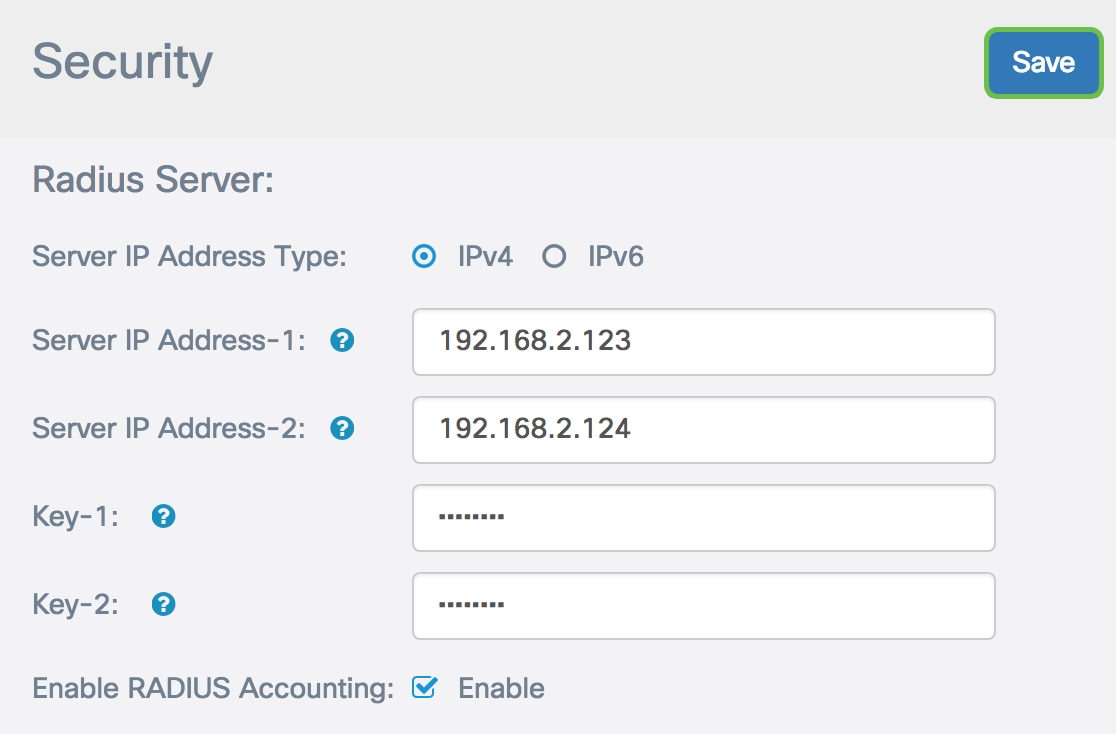
You should now have successfully configured the RADIUS server on your WAP125 or WAP581 access point.
 Feedback