Introduction
This document describes how to configure a UCS-C Series server integrated into UCS Manager to standalone mode and reimage its firmware version.
Prerequisites
Requirements
Cisco recommends that you have knowledge of these topics:
- Basic understanding of Unified Computing Systems servers (UCS)
- Basic understanding of UCS Manager (UCSM)
- Basic understanding of Cisco Integrated Management Controller (CIMC)
- Basic understanding of Networking
Components Used
This document is not restricted to specific software versions.
The information in this document was created from the devices in a specific lab environment. All of the devices used in this document started with a cleared (default) configuration. If your network is live, ensure that you understand the potential impact of any command.
Background Information
Ensure that you have these requirements before you attempt this configuration.
- Computer to connect to C-Series Server
- KVM cable
- Monitor
- Keyboard
- 1G cable to connect to the management port
Configure

Note: Do not perform this process without TAC recommendation.
Put Server in Standalone Mode

Warning: Ensure your server is powered off before you start this procedure.
Step 1. Decommission the Server
Navigate to your UCS Manager web Interface.
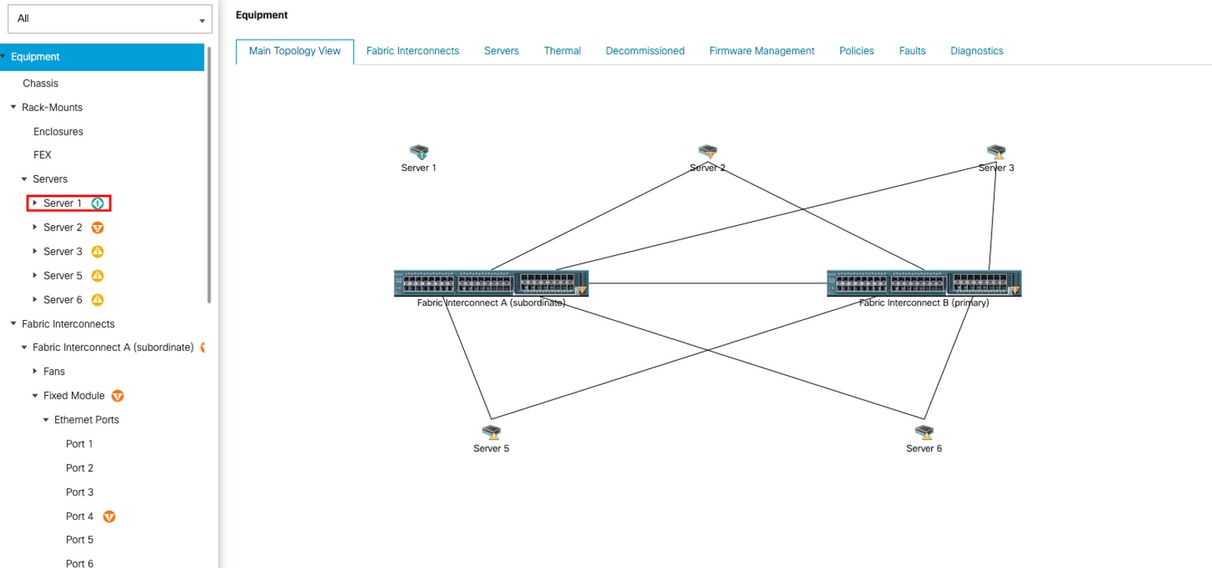
Navigate to Equipment > Rack-Mounts > Server x.
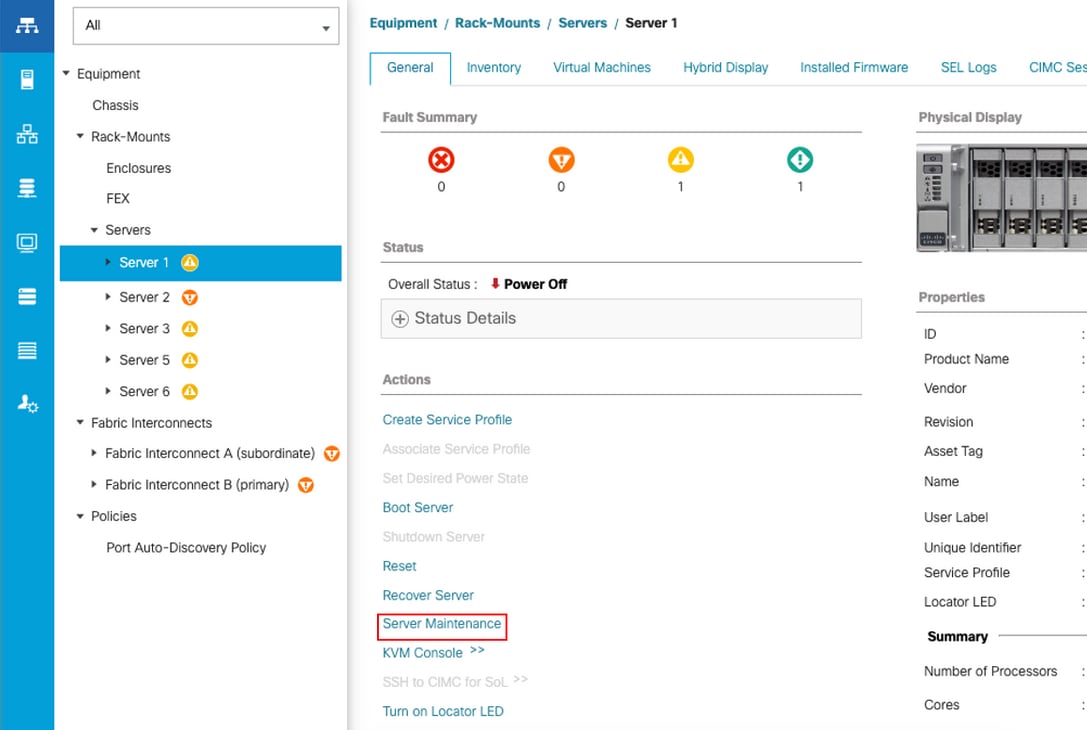
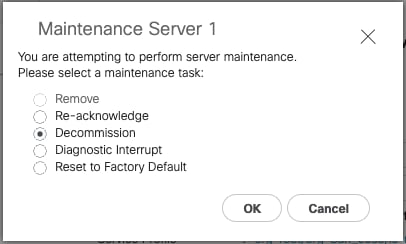
Click Server Maintenance and select Decommission.
Note: When a server is decommissioned, it is not shown over Rack-Mounts, it is shown under Equipment > Decommisioned > Rack-Mounts.
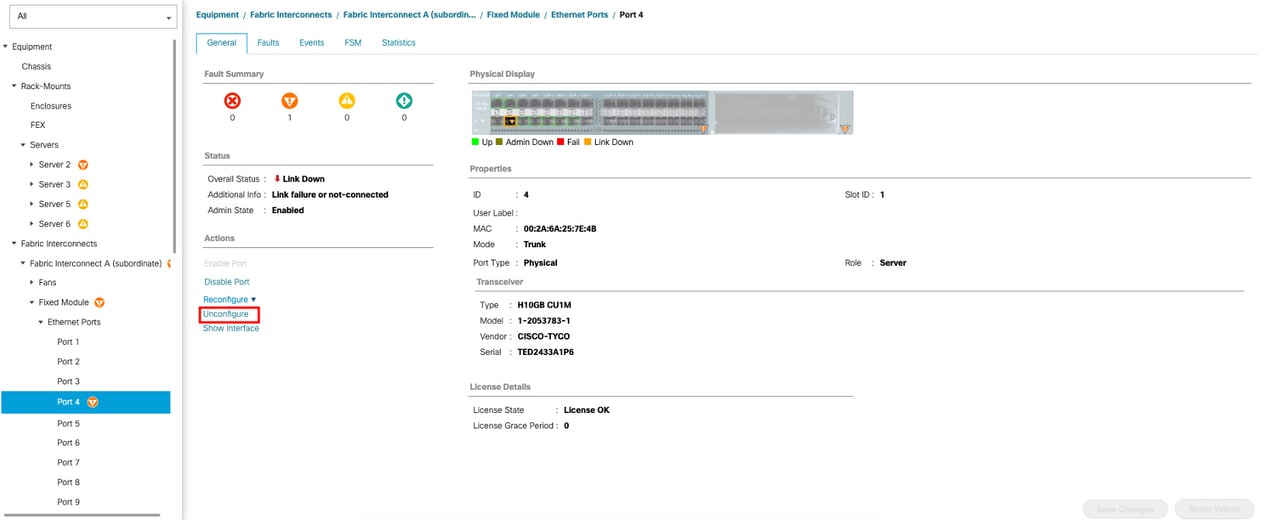
Step 2. Unconfigure Server Ports
Navigate to Equipment > Fabric Interconnects > Fabric Interconnect A > Fixed Module > Ethernet Ports > Port x.
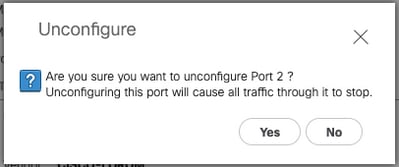
Click Unconfigure.
Repeat the same steps for Fabric Interconnect B.
Navigate to Equipment > Fabric Interconnects > Fabric Interconnect B > Fixed Module > Ethernet Ports > Port x.
Click Unconfigure.
Step 3. Change CIMC to Default Settings
Power off the server and remove the power cords.
Wait for 2 minutes and connect the power cords again.
Connect a KVM cable to the server with a monitor and keyboard.
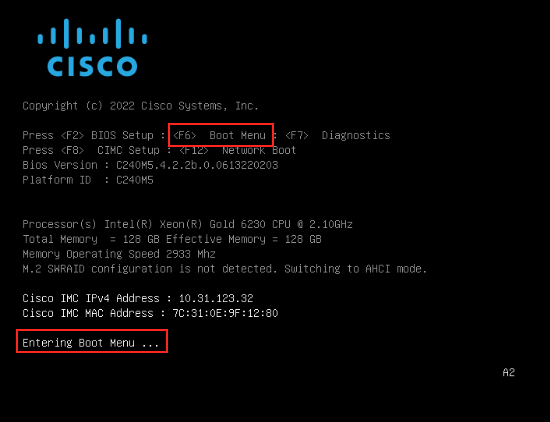
Monitor the server boot process until you reach the Cisco menu and press F8 to enter to Cisco IMC Configuration Utility.
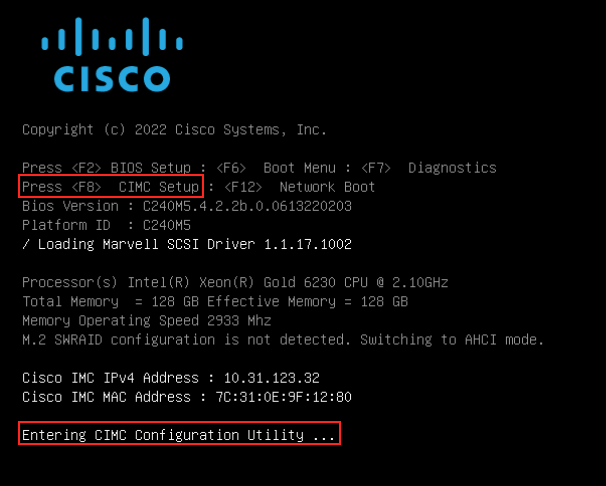
Press F1 and enable Factory Default.
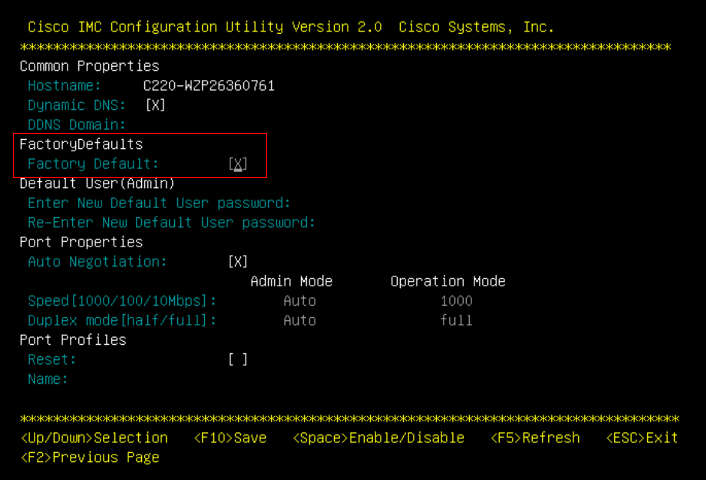
Press F10 to save changes and reboot the server.
Step 4. Configure CIMC to Standalone Mode
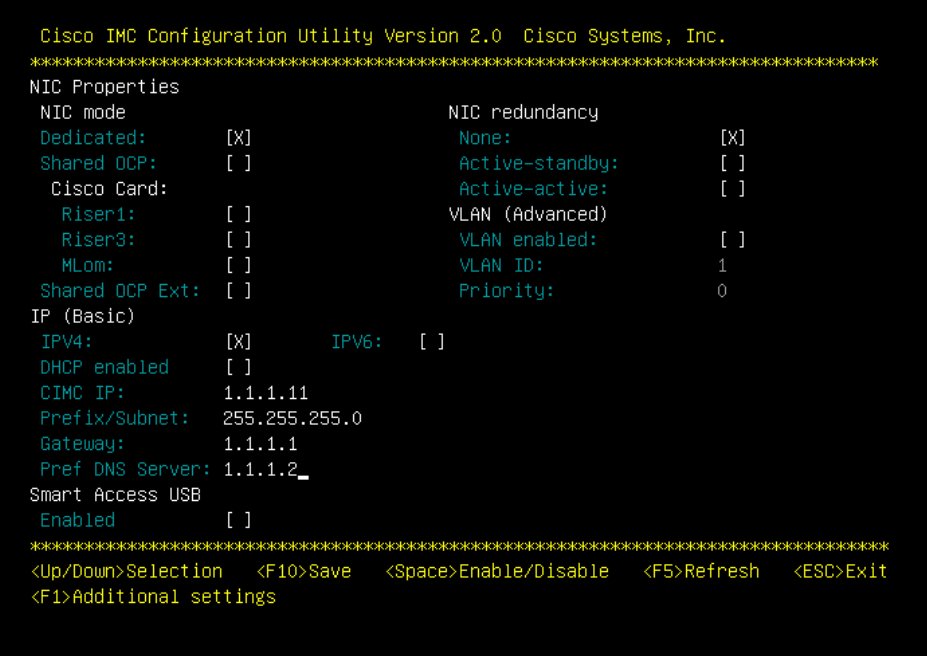
Monitor the server boot process until you reach the Cisco menu and press F8 to enter to Cisco IMC Configuration Utility again.
Apply the next configuration:
- NIC mode selected to Dedicated
- IP to IPV4
- CIMC IP with an IP in the same subnet as your computer.
- NIC redundancy to none
- No VLAN
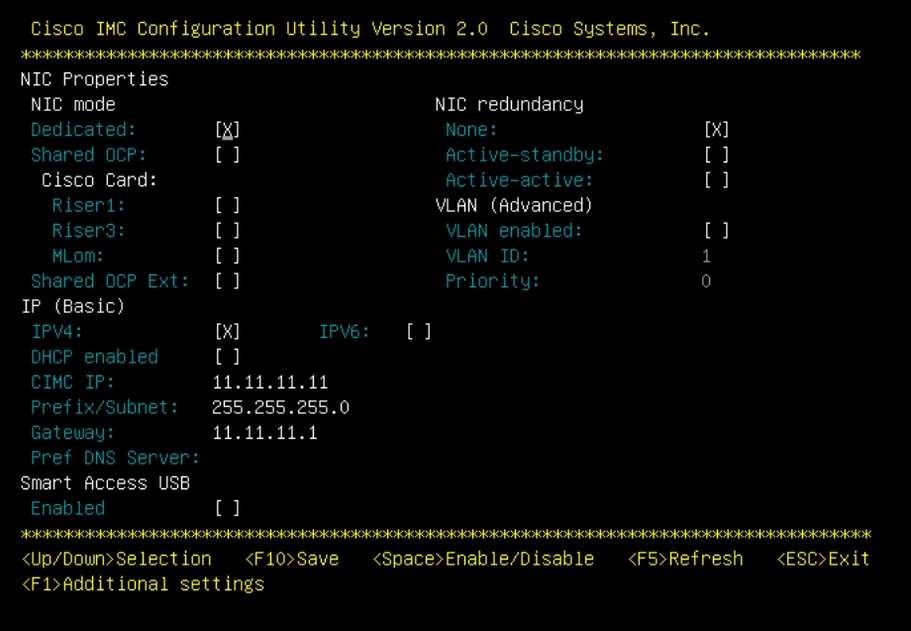
Press F10 to save changes and reboot the server.
Connect your computer to the physical Management Port on the server and open a web browser.
Use the IP you configured https://x.x.x.x
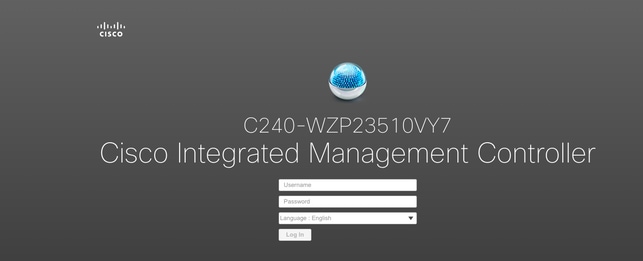
Note: Default password for admin user is password.
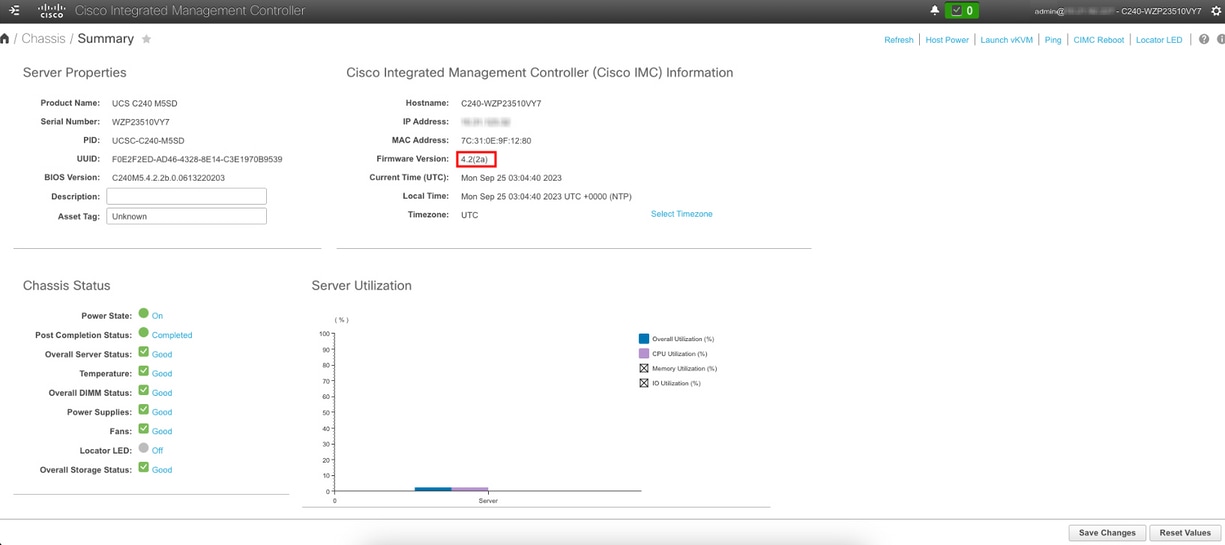
CIMC Prompt view and current CIMC version.
Reimage Firmware Version
Note: In case your Server is integrated back into UCSM, it is highly recommended to reimage the firmware version
Step 1. Download Host Upgrade Utility(HUU) ISO
Reimage is done through HUU. You can download HUU ISO at Download Page for Cisco.
Step 2. Launch KVM and Map HUU ISO
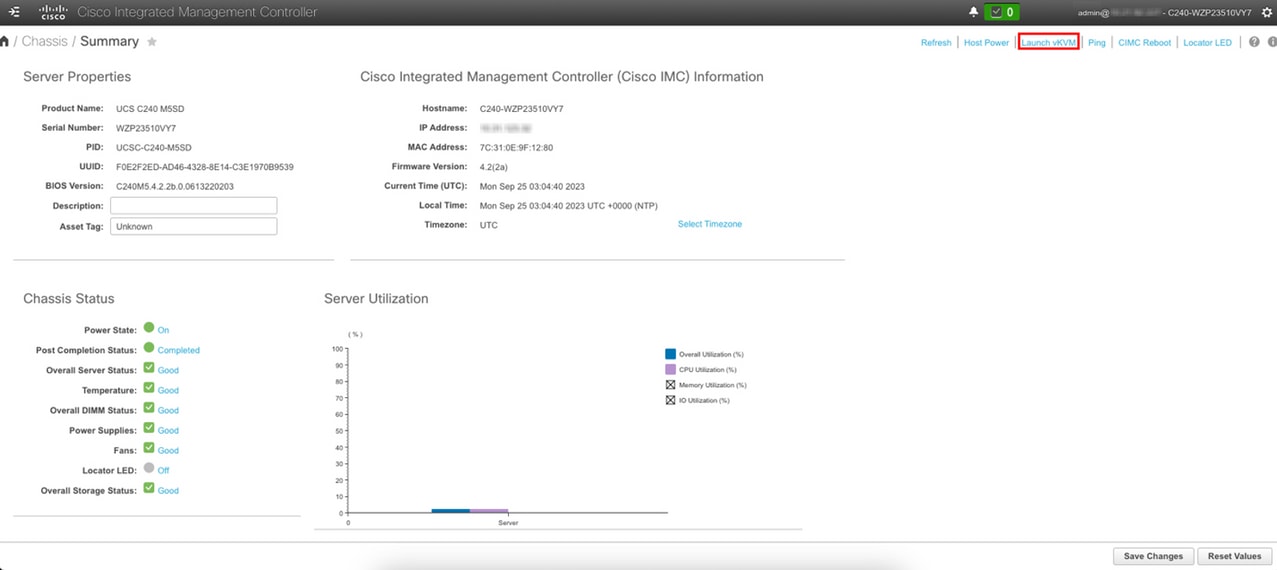
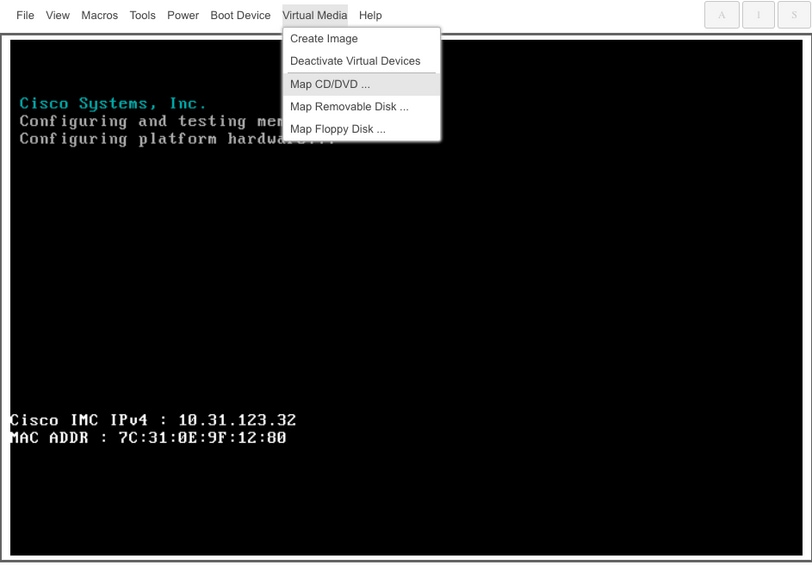
Once you download HUU for the current version, navigate to CIMC and click Launch KVM.
Once vKVM is launched, click Virtual Media and Activate Virtual Devices.
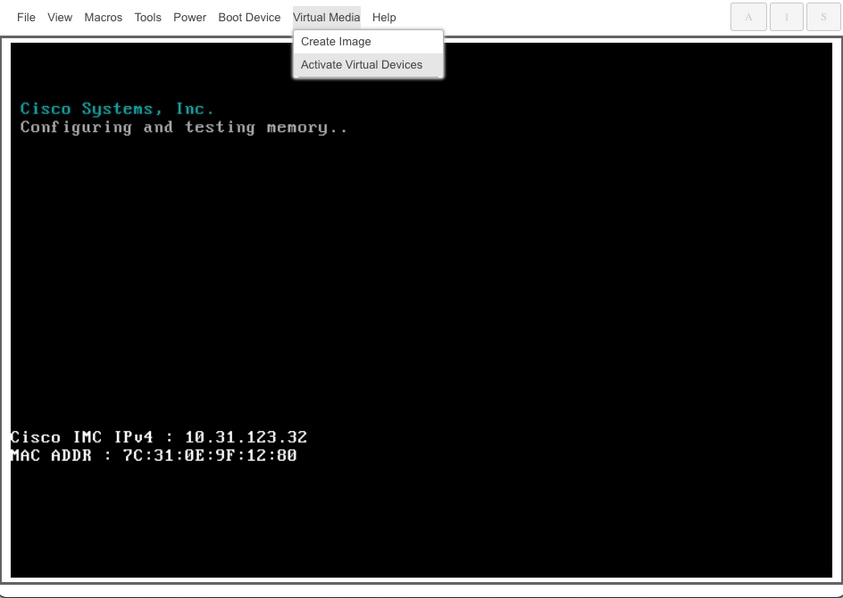
Map HUU on Map CD/DVD.
Step 3. Boot Using HUU ISO
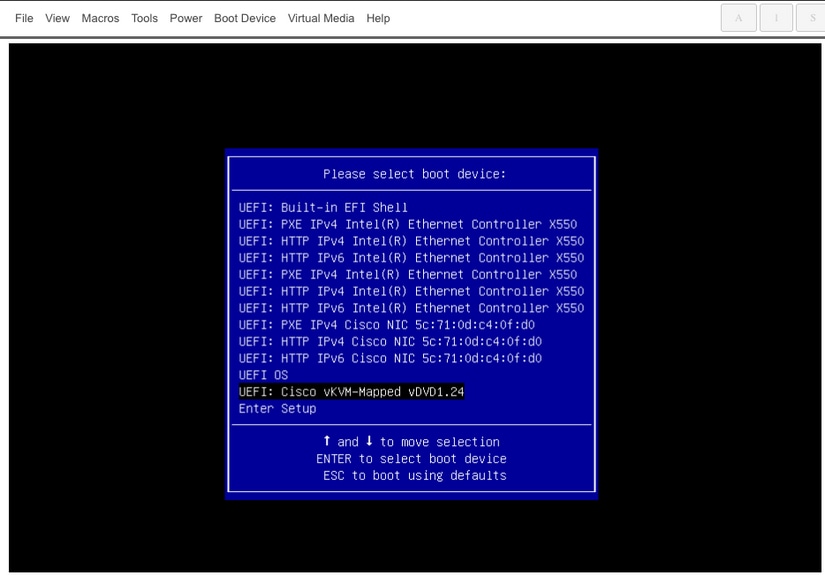
Monitor the server boot process until you reach the Cisco menu and press F6 to enter to Boot Menu.
Select vKVM-Mapped vDVD option to boot HUU ISO mapped.
Note: To load HUU ISO can take several minutes.
Step 4. Reimage Current Version
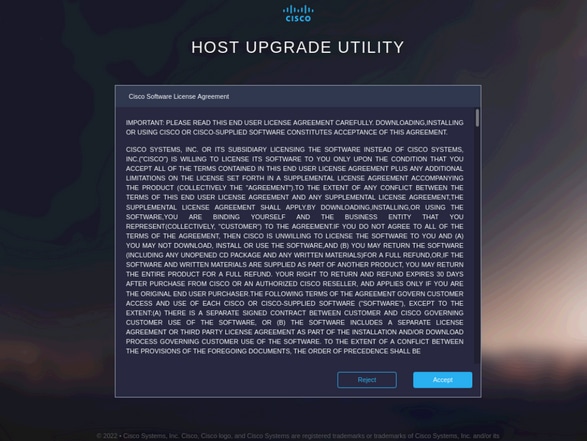
Wait until HUU ISO loads and accepts the Cisco Software License Agreement.
Switch to Advanced Mode and select all the components, then click Update & Activate.
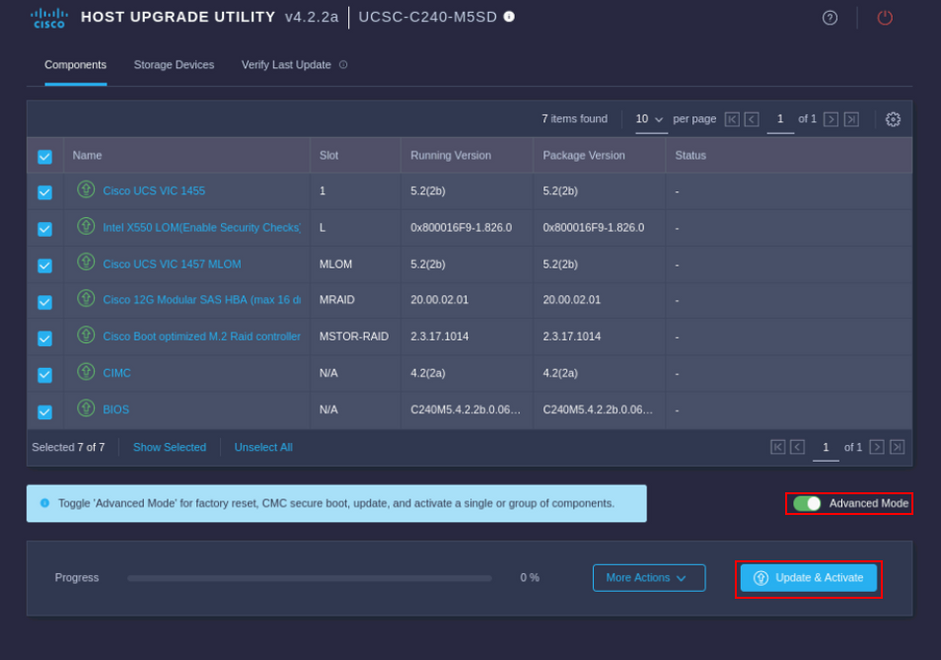
Wait until it finishes the reimage and the server reboots.
Integrate Server to UCS Manager
Step 1. Set CIMC to Factory Default
Repeat the same steps as in Step 3 on Put Server in Standalone Mode.
Step 2. Reconfigured Ports as Server Ports
Navigate to Equipment > Fabric Interconnects > Fabric Interconnect A > Fixed Module > Ethernet Ports > Port x.
Click Reconfigure and select Configured as Server Port.
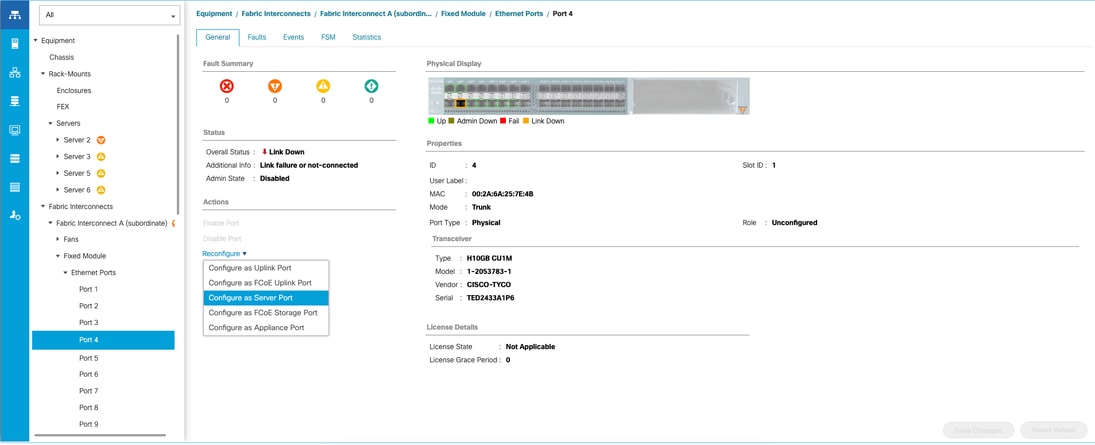
Repeat the same steps for Fabric Interconnect B.
Navigate to Equipment > Fabric Interconnects > Fabric Interconnect B > Fixed Module > Ethernet Ports > Port x.
Click Reconfigure and select Configured as Server Port.
Step 3. Connect Adapter Cables
Connect port 1 to FI-A and port 3 to FI-B of the VIC Card.
Step 4. Recommission Server
Navigate to Equipment > Decommsioned > Rack-Mounts, select the checkbox for Recommission, and Save Changes.
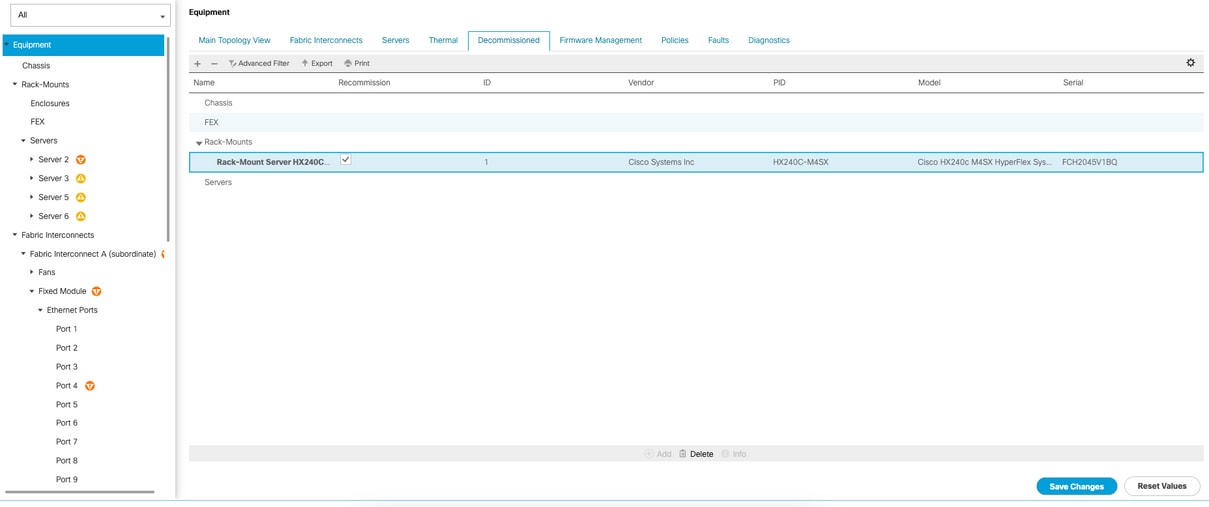
Wait until you see your server again.
You can monitor server discovery over Server FSM.
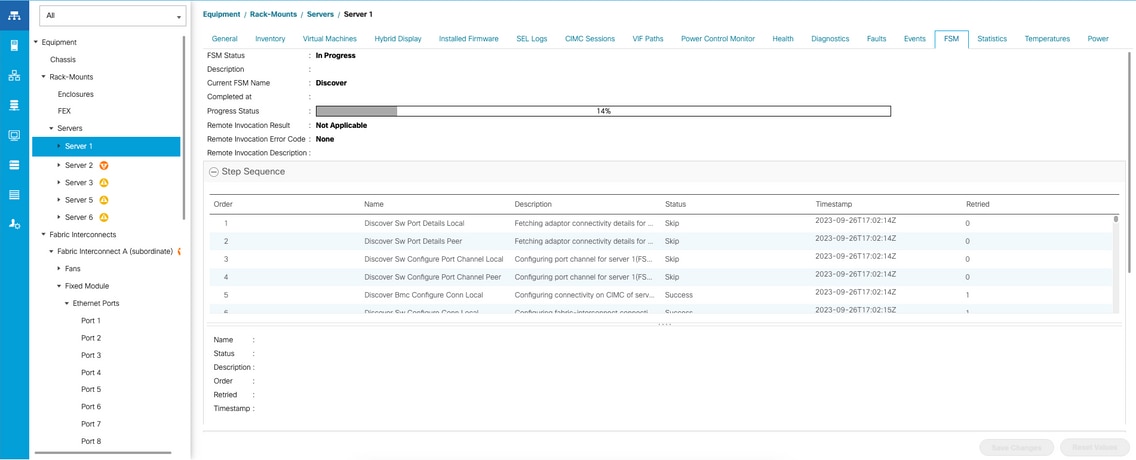
Note: Discovery can take several minutes to start.
Once the server finishes the discovery process, the association of the Service Profile (SP) starts.
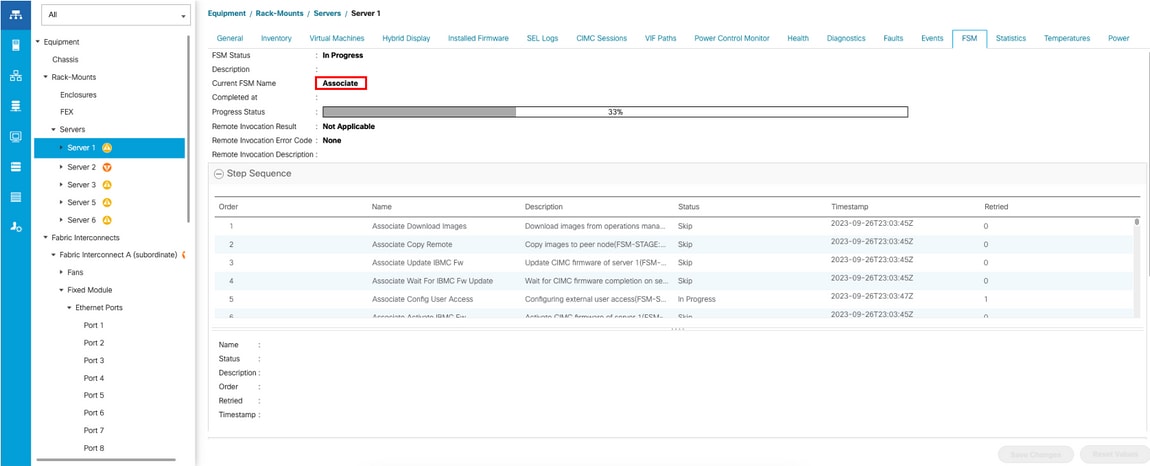
After discovery and association finish, you can boot your server and get it back to production.
Related Information
 Feedback