Introduction
This document describes the steps to reconfigure Cloud Delivered Firewall Tunnel's authentication mechanism from RSA to PSK on Cisco ASA.
Prerequisites
Requirements
There are no specific requirements for this document.
Components Used
The information in this document is based on Cisco Umbrella.
The information in this document was created from the devices in a specific lab environment. All of the devices used in this document started with a cleared (default) configuration. If your network is live, ensure that you understand the potential impact of any command.
Step 1: Verify An Existing Tunnel Using RSA authentication
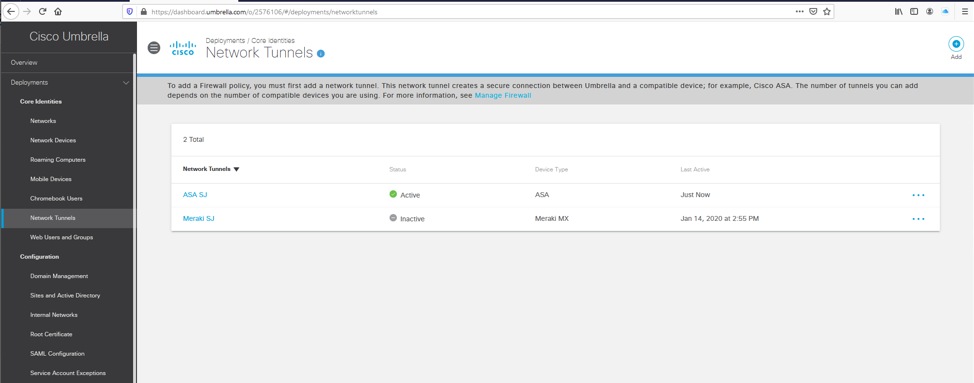
Verify that you have an existing tunnel using RSA authentication and that the status of the tunnel in the ASA is showing connected with this authentication type.
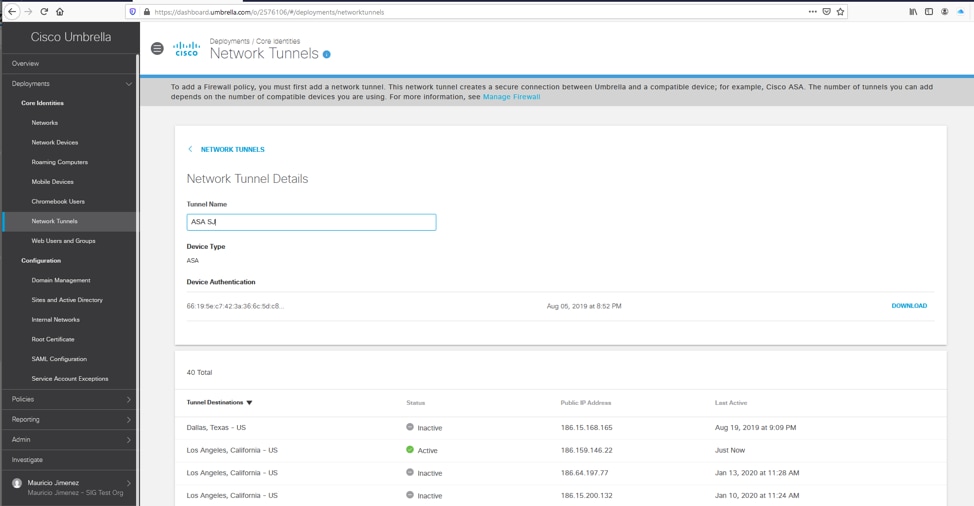
1. In the Umbrella dashboard, find the Network tunnel with the ASA showing a Device authentication finger print.
 Picture1.png
 Picture2.png
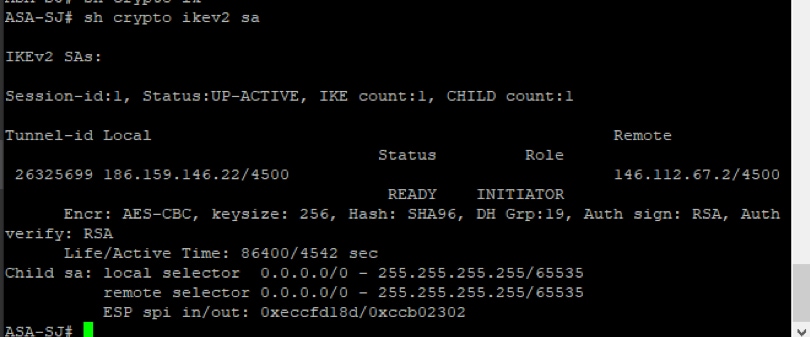
2. In the Cisco ASA, you can run these commands to verify the authentication type and headend IP being used for the tunnel.
show crypto ikev2 sa
and
show crypto ipsec sa
 Picture3.png
 Picture4.png
Step 2: Register ASA's Public IP
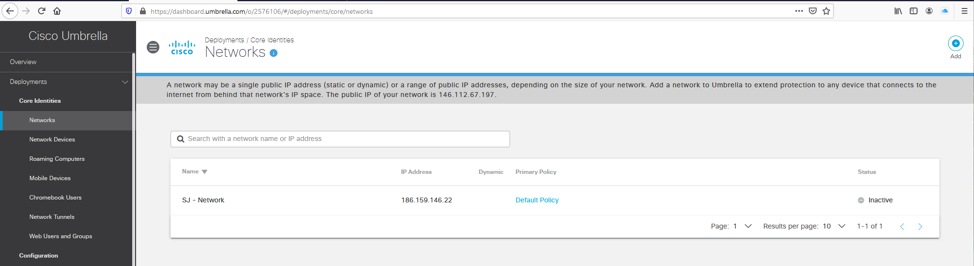
1. Make sure you have your public IP used by the ASA outside interface registered as a Network in the Umbrella dashboard.
2. If the Network does not exist, then proceed to add it and confirm the public IP used by the ASA interface. The Network object used for this tunnel must be defined with a /32 subnet mask.
 Picture5.png
Step 3: Create New ASA Tunnel
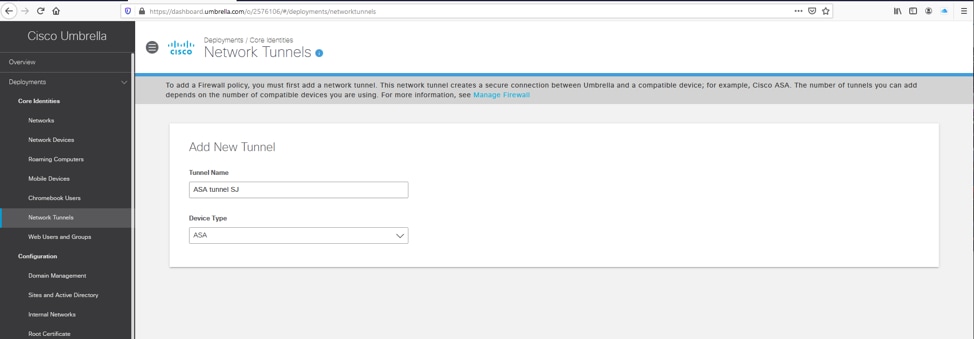
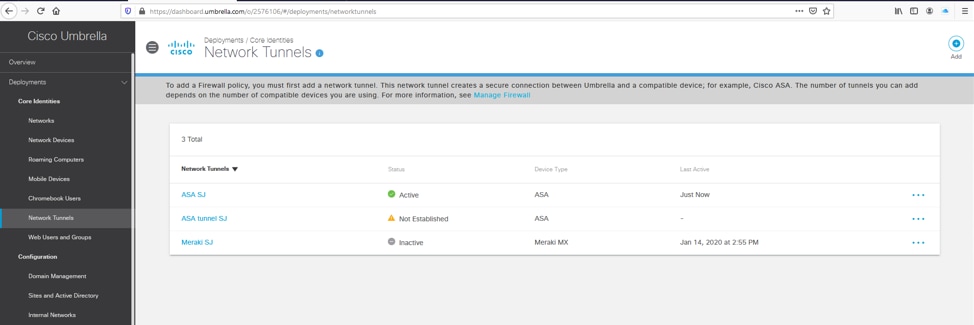
1. In the Umbrella dashboard under Deployments/Network Tunnels, create a new tunnel by selecting the Add option.
 Picture6.png
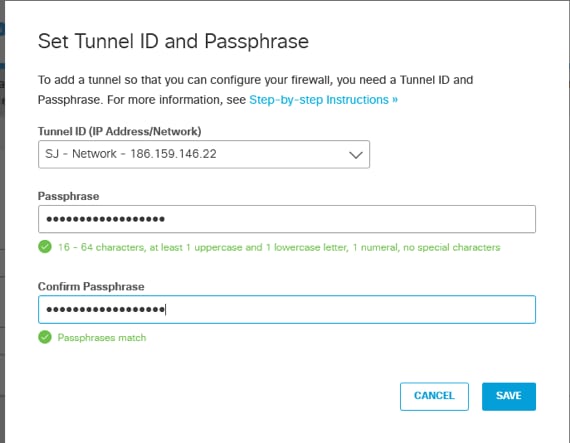
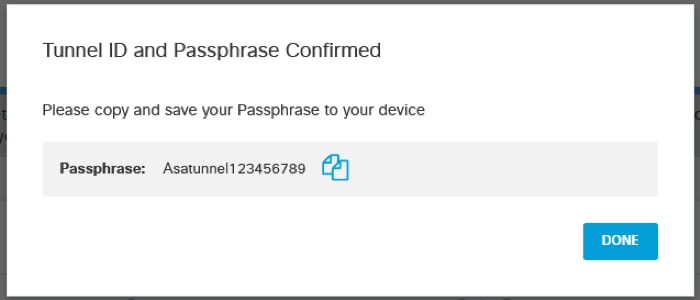
2. Select the Tunnel ID based on the Network that matches with the public IP of your ASA outside interface and setup a passphrase for the PSK authentication.
 Picture7.png
 Picture8.png
 Picture9.png
Step 4: Create New Tunnel-Group
1. On the ASA, create a new tunnel-group using the new headend IP for Umbrella and specify the passphrase define in the Umbrella dashboard for the PSK authentication.
2. The updated list of Umbrella data centers and IPs for the headends can be found in the Umbrella documentation.
tunnel-group <UMB DC IP address .8> type ipsec-l2l
tunnel-group <UMB DC IP address .8> general-attributes
 default-group-policy umbrella-policy
tunnel-group <UMB DC IP address .8> ipsec-attributes
 peer-id-validate nocheck
ikev2 local-authentication pre-shared-key 0 <passphrase>
ikev2 remote-authentication pre-shared-key 0 <passphrase>
 Picture10.png
Step 5: Locate the IPSec Profile Used for the Tunnel Interface
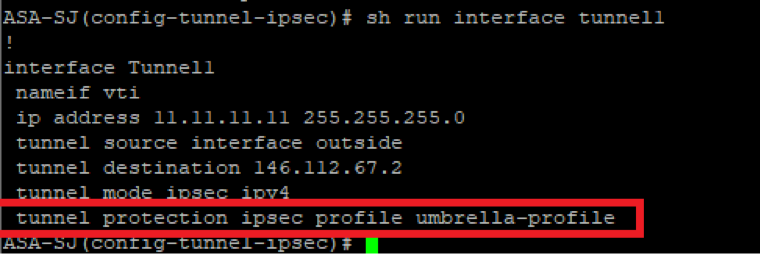
1. Search for the “crypto ipsec profile” that is being used in the tunnel interface for the route-based configuration to Umbrella headend (# is replace with the ID used for the tunnel interface to Umbrella):
show run interface tunnel#
 Picture11.png
2. If you are not sure about the tunnel ID, then you can use this command to verify existing tunnel interfaces and determine which is the one used for the Umbrella tunnel-based configuration:
show run interface tunnel
Step 6: Remove Old Trustpoint from IPSec Profile
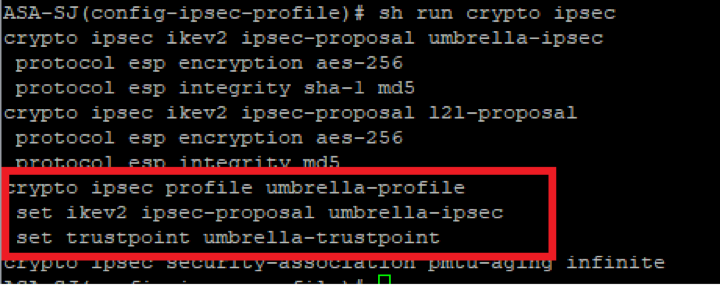
1. Remove the trustpoint from your IPSec profile which reference the RSA authentication for the tunnel. You can verify the configuration by using this command:
show crypto ipsec
 Picture12.png
2. Proceed to remove the trustpoint with these commands:
crypto ipsec profile <profile name>
no set trustpoint umbrella-trustpoint
 Picture13.png
3. Confirm that the trustpoint was removed from the crypto ipsec profile:
 Picture14.png
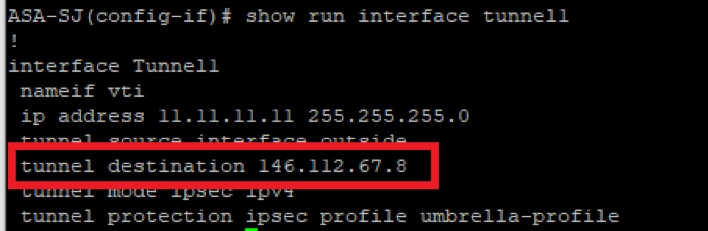
Step 7: Update Tunnel Interface with New Umbrella Headend IP
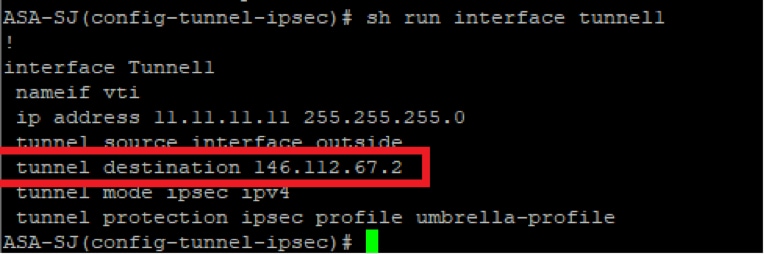
1. Replace the destination of the tunnel interface to the new Umbrella headend IP address terminating in .8.
- You can use this command to verify the current destination so it is replaced with the IP from the new Data Center IP address ranges, which can be found in the Umbrella documentation:
show run interface tunnel
 Picture15.png
Interface tunnel#
No tunnel destination <UMBRELLA DC IP address.2>
Tunnel destination <UMBRELLA DC IP address .8>
 Picture16.png
2. Confirm the change with the command:
show run interface tunnel#
 Picture17.png
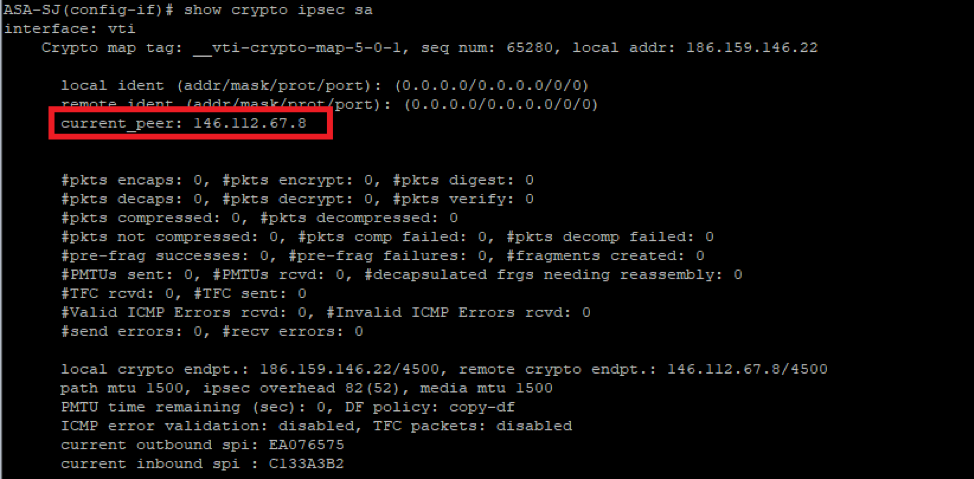
Step 8: Confirm New Tunnel Configuration Successfully Establishes
1. Confirm that the tunnel connection to Umbrella was reestablished correctly with the updated headend IP and using the PSK authentication with this command:
show crypto ikev2 sa
 Picture18.png
show crypto ipsec sa
 Picture19.png
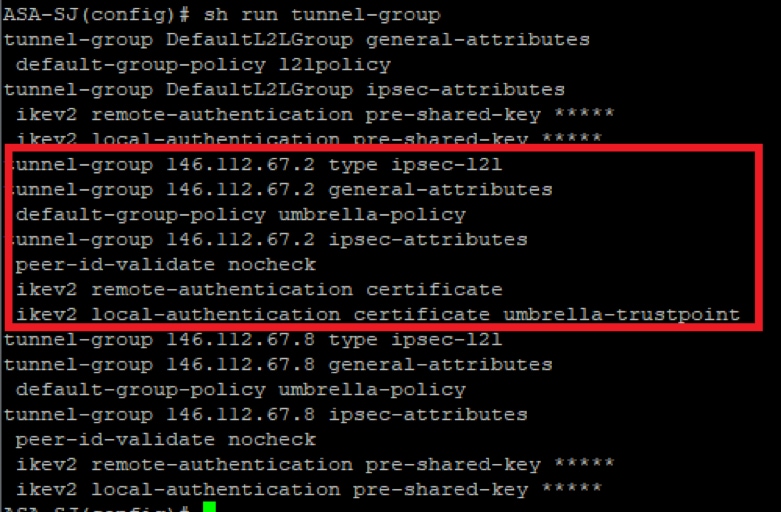
Step 9 (Optional): Remove the Old Tunnel-Group
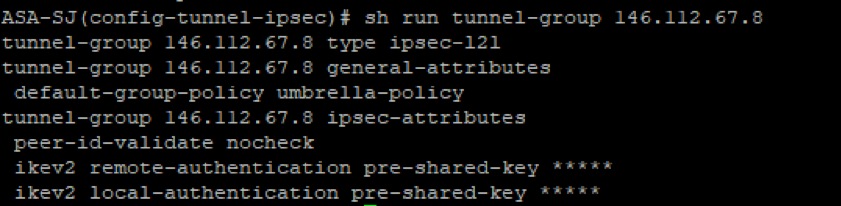
1. Remove the old tunnel-group that was pointing to the previous Umbrella headend IP range .2.
You can use this command to identify the correct tunnel before removing the configuration:
show run tunnel-group
 Picture20.png
2. Remove any reference of the old tunnel group using this command:
clear config tunnel-group <UMB DC IP address .2>
 Picture21.png
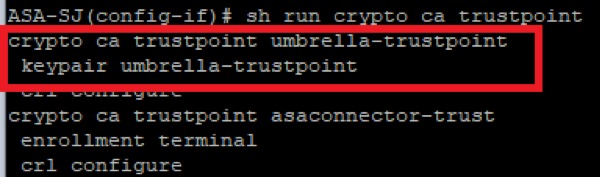
Step 10 (Optional): Remove Old Trustpoint
1. Remove any reference of the trustpoint used previously with the Umbrella tunnel-based configuration with this command:
sh run crypto ipsec
The friendly name used for the trustpoint can be found when you review the “crypto ipsec profile”:
 Picture22.png
2. You can run this command to confirm the trustpoint configuration. Make sure the friendly name matches with the configuration used in the crypto ipsec profile command:
sh run crypto ca trustpoint
 Picture23.png
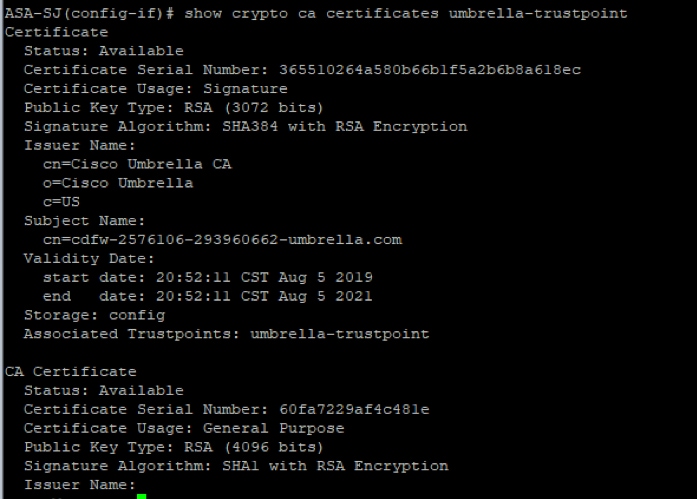
3. To get more details about the certificate, use the command:
show crypto ca certificate <trustpoint-name>
 Picture24.png
4. Remove the trustpoint with the command:
no crypto ca trustpoint <trustpoint-name>
 Picture25.png
Step 11 (Optional): Delete Old Network Tunnel
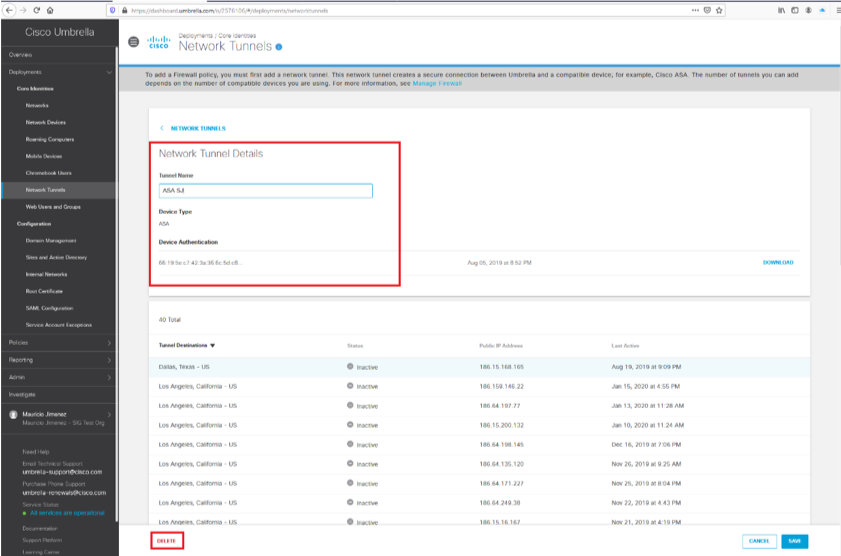
1. Delete the old network tunnel from the Umbrella dashboard by navigating to Network Tunnel Details and selecting Delete.
 Picture26.png
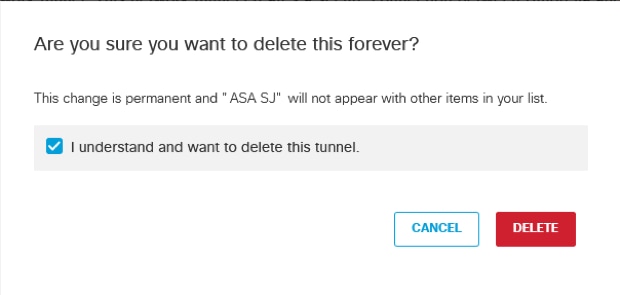
2. Confirm you deletion by selecting the I understand and want to delete this tunnel option in the pop-up, then select Delete.
 Picture27.png
Step 12: Update Web Policies with New Tunnel Identity
Confirm your web policies have the updated identity with the new network tunnel:
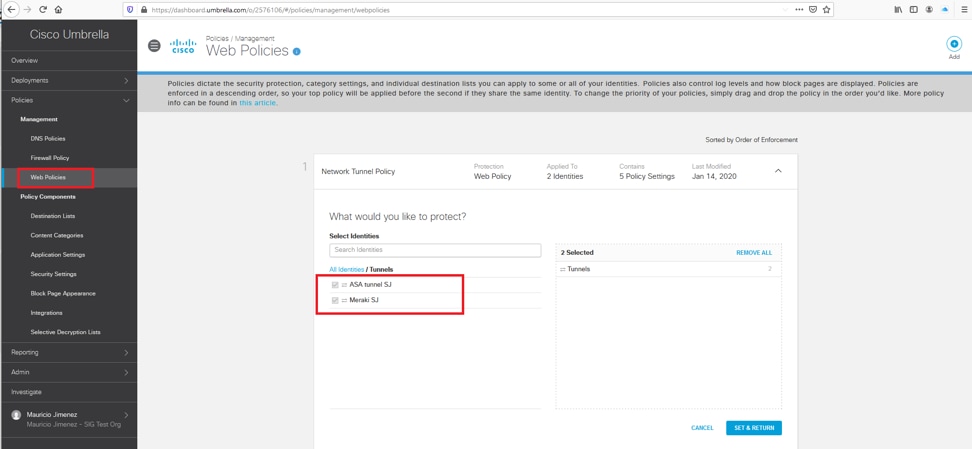
1. In the Umbrella dashboard, navigate to Policies > Management > Web Policies.
2. Review the Tunnels section and confirm that your web policies have the updated identity with the new network tunnel.
 Picture28.png
 Feedback