Introduction
This document describes the process of how to deploy static routes in Secure Firewall Threat Defense through Firewall Management Center.
Prerequisites
Requirements
Cisco recommends having knowledge of these topics:
- Firewall Management Center (FMC)
- Secure Firewall Threat Defense (FTD)
- Network routes foundamentals.
Components Used
The information of this document is based on these software and hardware versions:
- Firewall Management Center for VMWare v7.3
- Cisco Secure Firewall Threat Defense for VMWare v7.3
The information in this document was created from the devices in a specific lab environment. All of the devices used in this document started with a cleared (default) configuration. If your network is live, ensure that you understand the potential impact of any command.
Background Information
This procedure is supported on appliances:
- Firewall Management Center On-Prem
- Firewall Management Center for VMWare
- cdFMC
- Cisco Secure Firewall 1000 series appliances
- Cisco Secure Firewall 2100 Series appliances
- Cisco Secure Firewall 3100 series appliances
- Cisco Secure Firewall 4100 series appliances
- Cisco Secure Firewall 4200 series appliances
- Cisco Secure Firewall 9300 appliance
- Cisco Secure Firewall Threat Defense for VMWare
Configure
Configurations
Step 1. In the FMC GUI , Navigate to Devices > Device Managment.
Step 2. Identify the FTD that is going to be configured and click the pencil icon in order to edit the current configuration of the FTD.

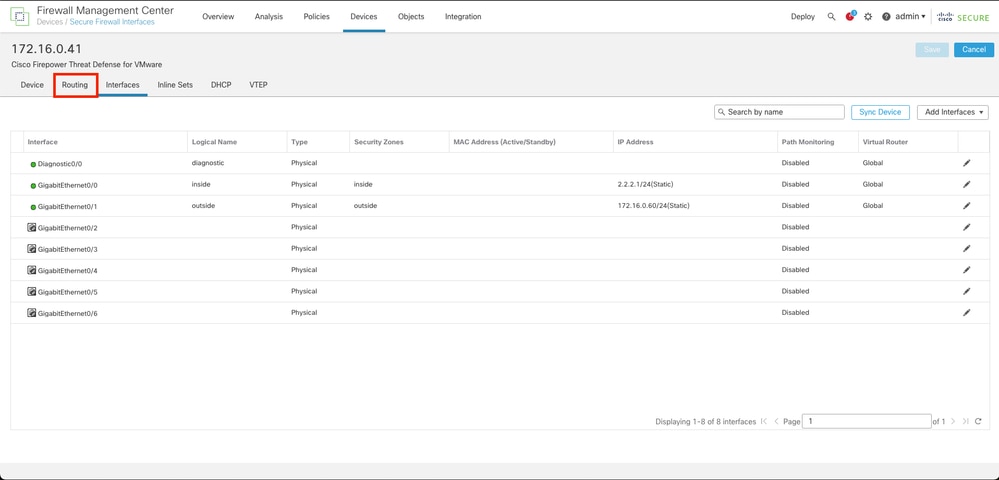
Step 2. Click over the Routing tab.
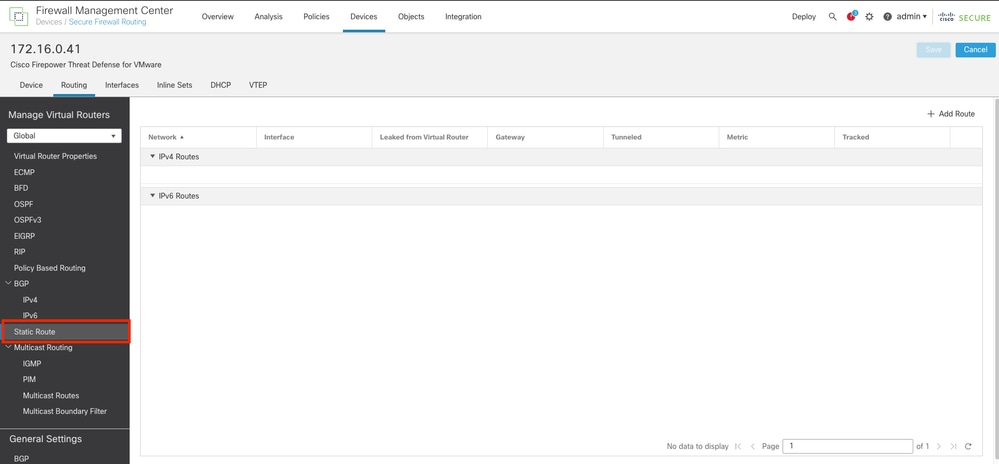
Step 3. At the left menu select Static Route
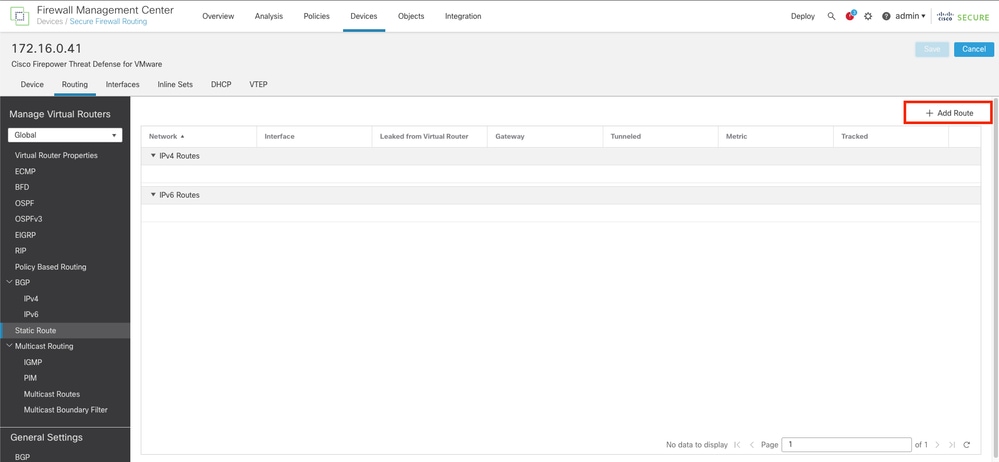
Step 4. click the (+) Add route option.
Step 5. Under the Static Route Configuration section, enter the required information in the Type, Interface, Available Network, Gateway, and Metric fields (as well as Tunneled and Route tracking if needed).
Type: Click IPv4or IPv6 depending on the type of static route that you are adding.
Interface: Choose theInterfaceto which this static route applies.
Available Network: In the Available Network list, choose the destination network. To define a default route, create an object with the address 0.0.0.0/0 and select it here.
Gateway: In theGateway or IPv6 Gateway field, enter or choose the gateway router which is the next hop for this route. You can provide an IP address or a Networks/Hosts object.
Metric: In the Metricfield, enter the number of hops to the destination network. Valid values range from 1 to 255; the default value is 1.
Tunneled: (Optional) For a default route, click the Tunneled checkbox to define a separate default route for VPN traffic
Route tracking: (IPv4 static route only) To monitor route availability, enter or choose the name of an SLA (service level agreement) Monitor object that defines the monitoring policy, in the Route Tracking field.
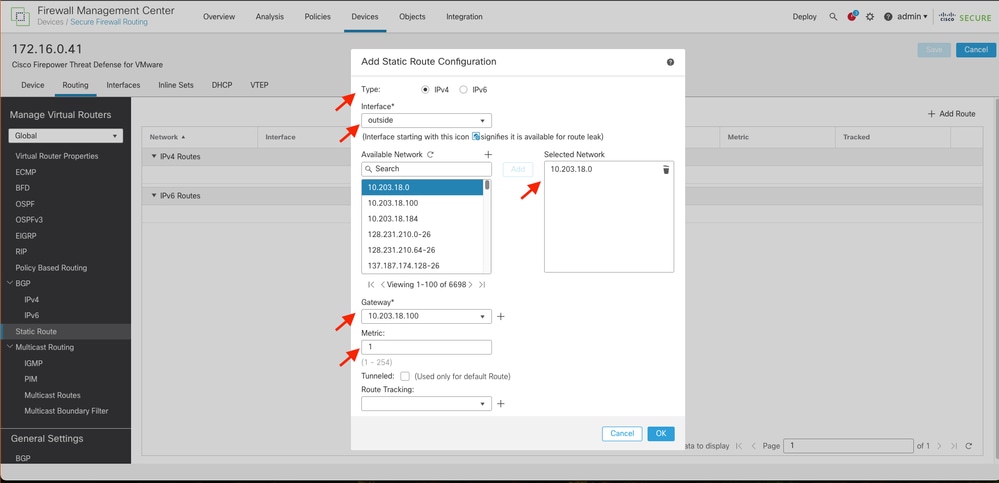

Tip: Available Network , Gateway and Route traffic fields requires the use of network objects, if the objects are not created yet , please click over the (+) sign at the right of each filed in order to create a new network object.
Step 6. Click on OK
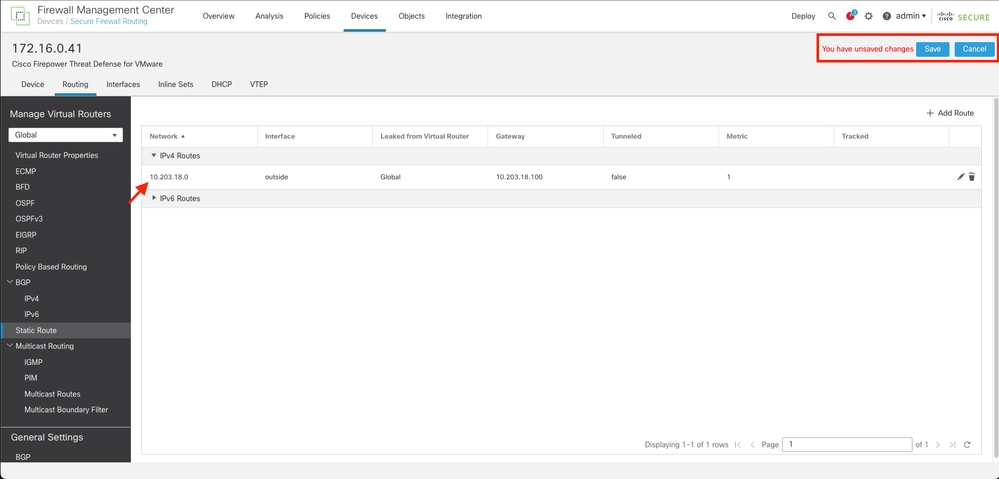
Step 7. Save the configuration and validate the new static route it is showing as expected.
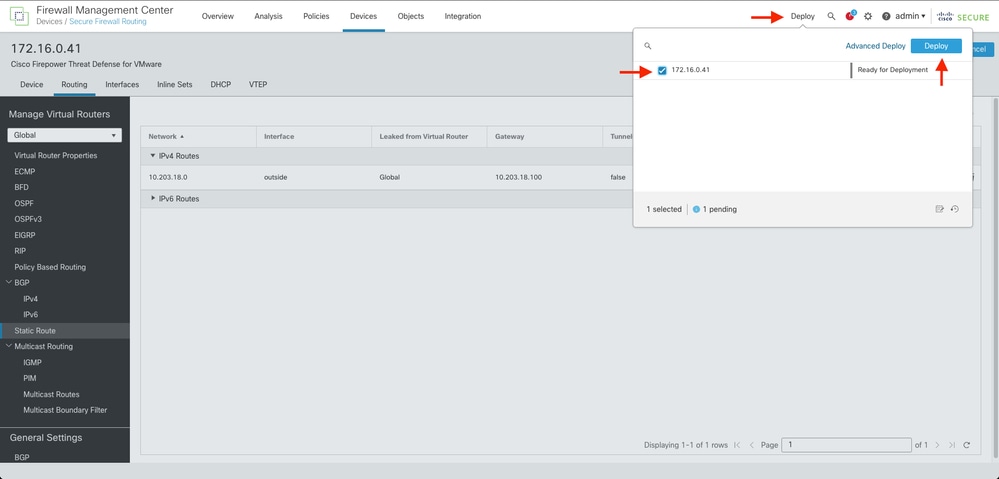
Step 7. Navigate to Deploy and checkbox the selected FTD in Step 2, then click over the blue deploy icon to deploy the new configuration.
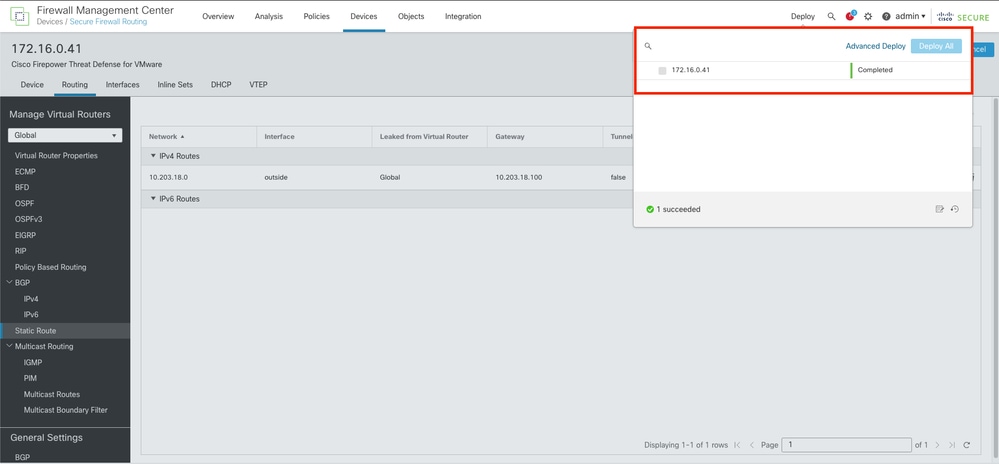
Step 8. Validate the deployment is showing as completed.
Verify
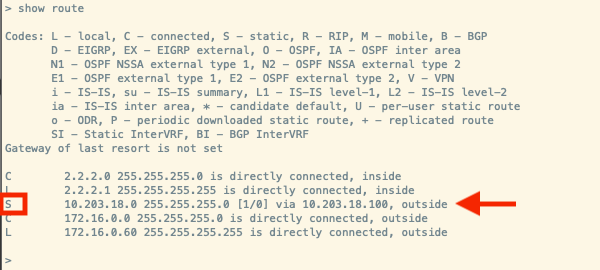
1. Log using SSH, Telnet or console to the previusly deployed FTD.
2. Run command show route and show running-config route
3. Validate the FTD routing table has now the deployed static route with the S flag and that it is also showing in the running configuration.


 Feedback