Understand New Split Upgrade on ISE
Available Languages
Contents
Introduction
This document describes the enhanced split upgrade feature introduced in 3.2 P3 compared with the traditional split upgrade method.
Prerequisites
Requirements
Cisco recommends that you have knowledge of these topics:
- Basic knowledge of Cisco Identity Service Engine
Components Used
This document is not restricted to specific software and hardware versions.
The information in this document was created from the devices in a specific lab environment. All of the devices used in this document started with a cleared (default) configuration. If your network is live, ensure that you understand the potential impact of any command.
Background Information
GUI Upgrade Methods
- Split
- Multi-step sequential process to upgrade your deployment while the services are available.
 Old Split Upgrade
- Full
- Two-step process to upgrade all nodes in parallel with service outage.
- Takes lesser time than split upgrade.
 Full Upgrade
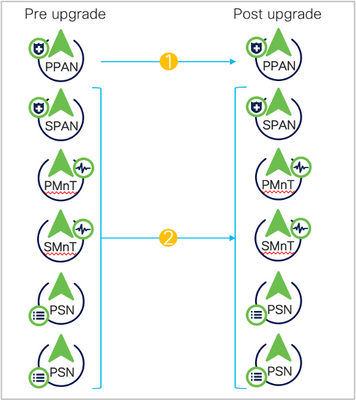
- New split
- Upgrade in batches.
- Increase stability and reduce downtime.
- Lesser time than old split upgrade.
- Pre-checks.
- No URT.
 New Split Upgrade
Upgrade Paths
- 2.6, 2.7, 3.0 > SPLIT/FULL > 3.1
- 2,7, 3.0, 3.1 > SPLIT/FULL > 3.2
- 3.0, 3.1, 3.2 > SPLIT/FULL > 3.3
- Starting with 3.2 P3, the new split upgrade replaced the old split upgrade leaving two options only: Full upgrade and New Split.
New vs Old Split Upgrade
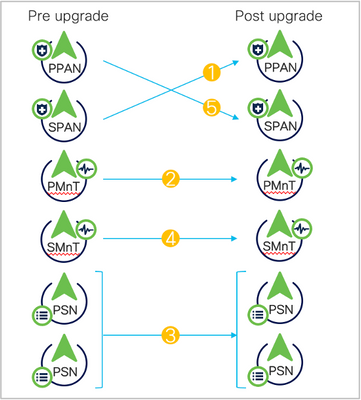
Old Split Upgrade Process
 Old Split Upgrade Steps
1. SPAN: Deregister, config data upgrade, promote to PAN.
2. pMnT: Deregister, register in new deployment, download and import operational data upgrade.
3. PSN1: Deregister, register in new deployment, download and import data.
4. PSN2: Deregister, register in new deployment, download and import data.
5. sMnT: Deregister, register in new deployment, download and import operational data upgrade.
6. PPAN: Register, download, and import data, promote SPAN so as to make same deployment as before the upgrade.
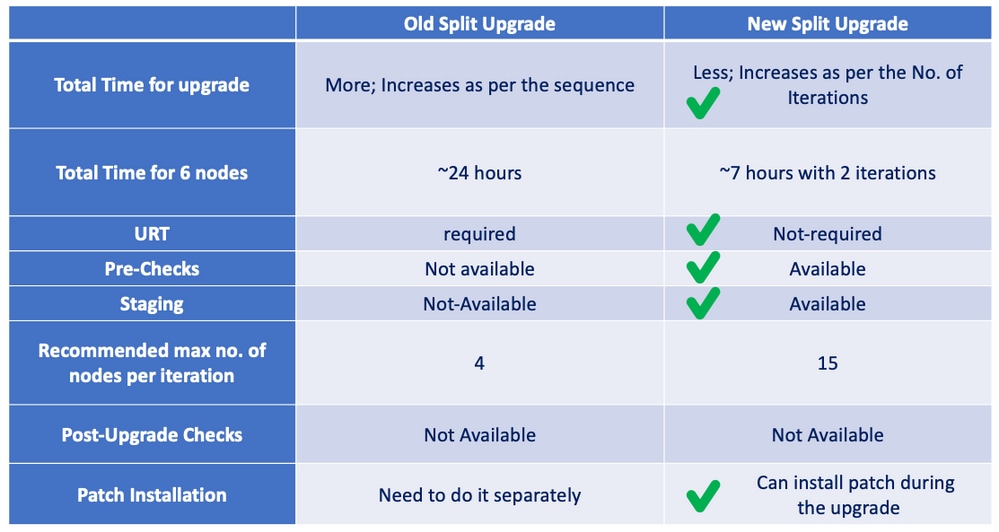 Old Split vs New Split
New Split Upgrade - Wizard
 Step 1.
 Step 2. Checklist
 Step 3. Select Nodes
 Step 4. Prepare to Upgrade
 Step 6. Upgrade Nodes
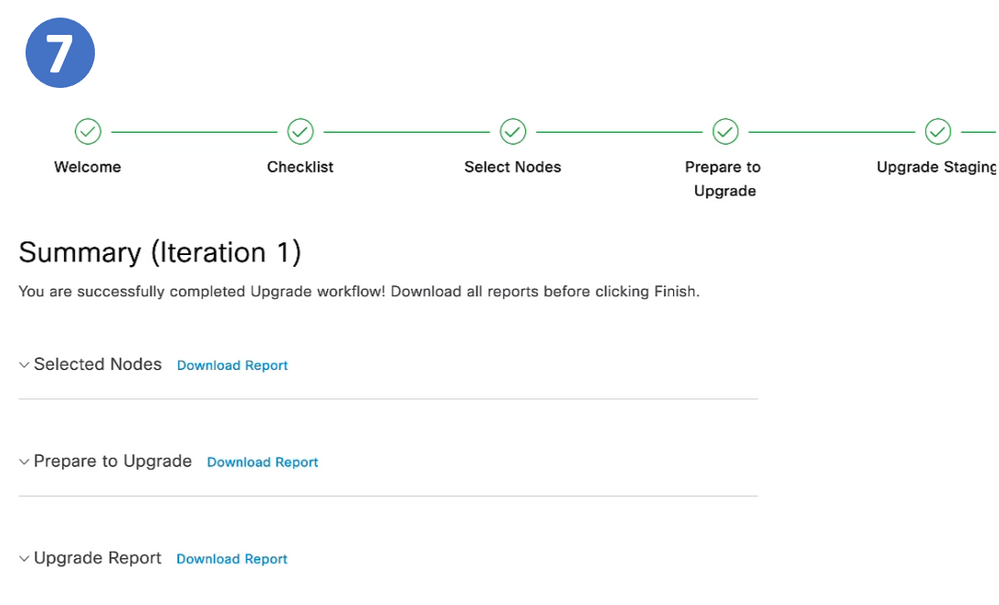
 Summary Page

Note: The same steps are repeated per iteration.
Detailed Steps
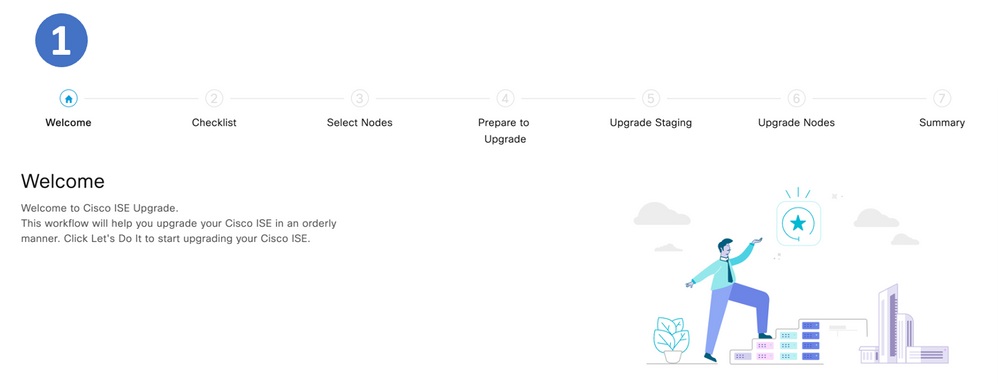
Step 1. Welcome to Cisco ISE Upgrade
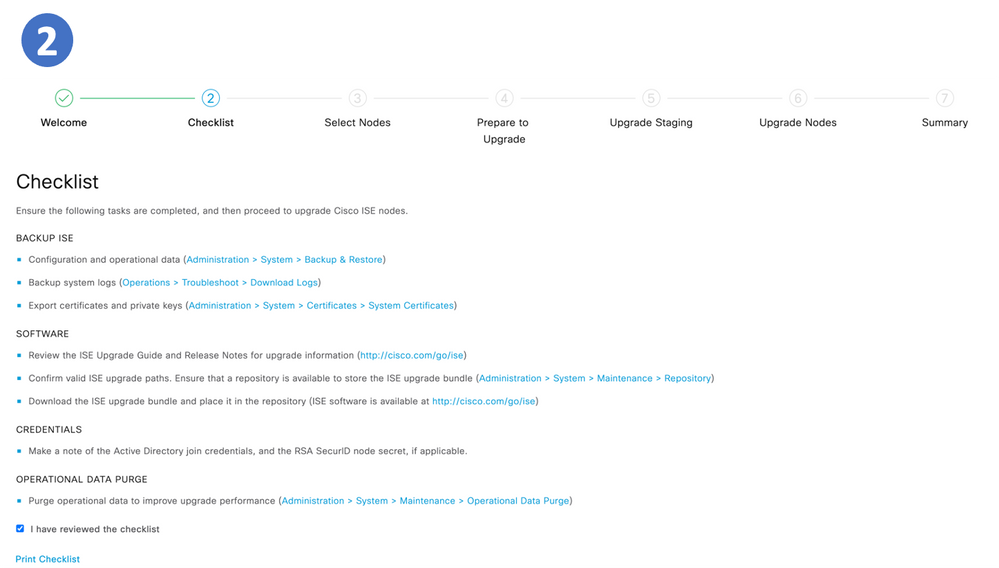
Step 2. Checklist
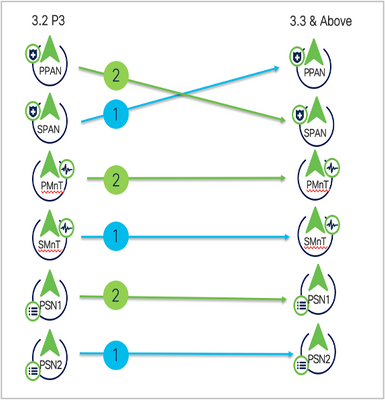
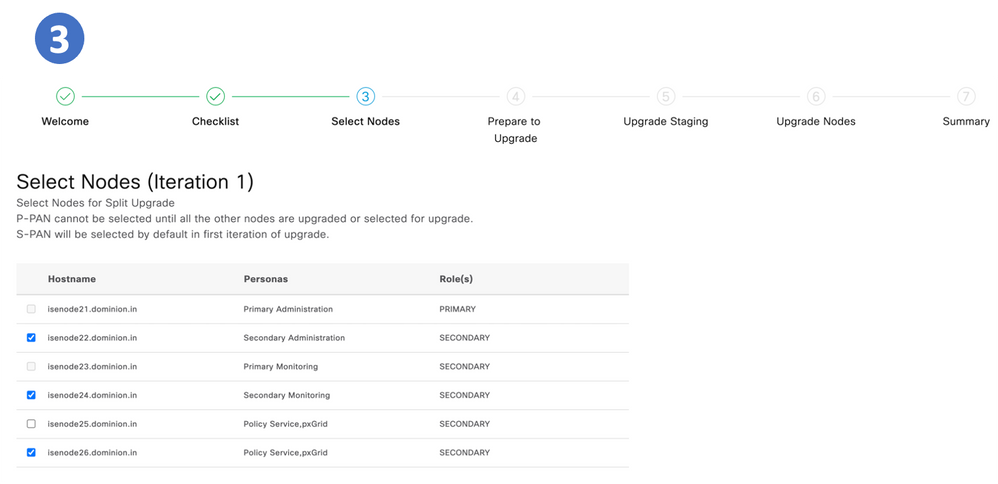
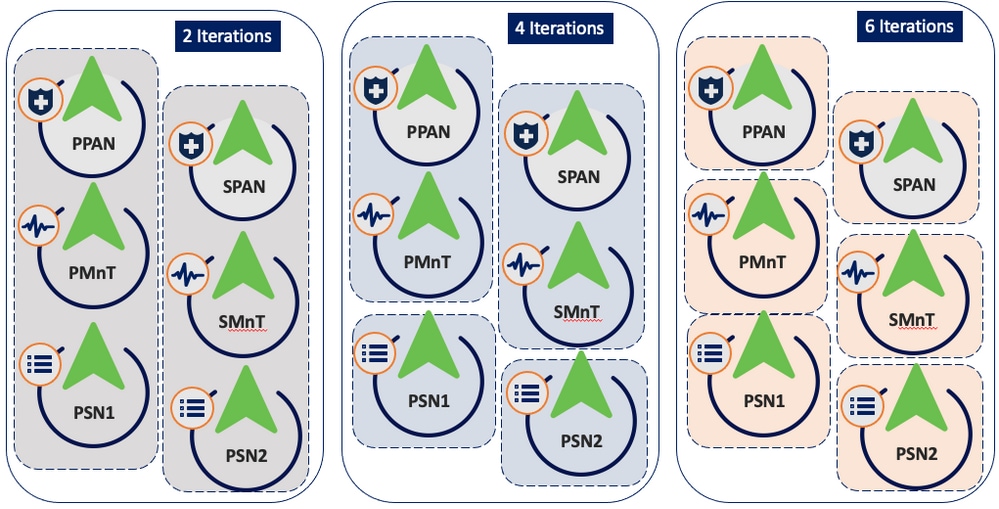
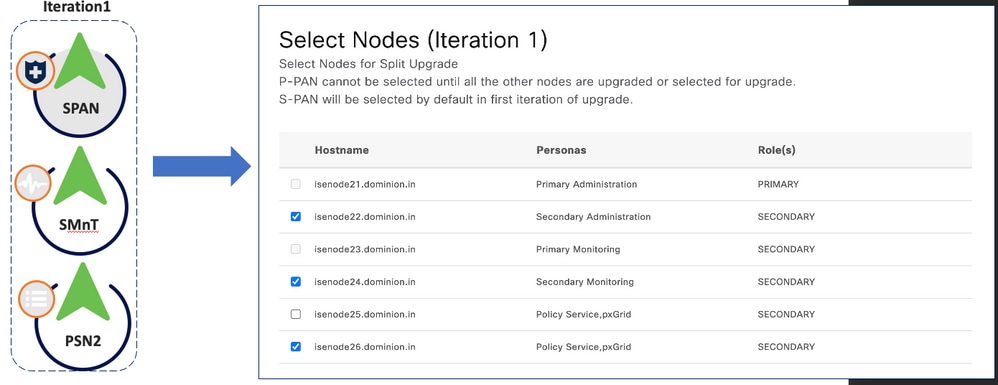
Step 3. Select Nodes for Iterations
Different iterations can be selected for the same deployment.
 Iteration Options
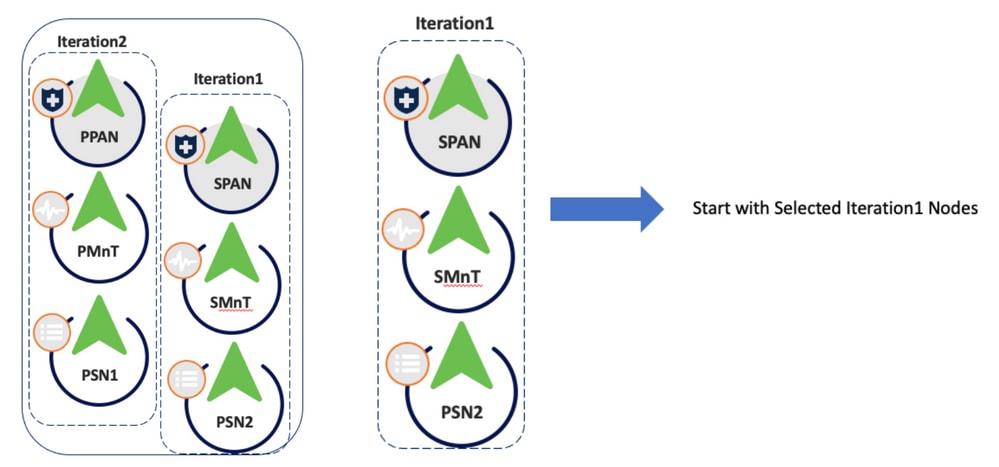
In the case of 2 iterations, Step 3 begins selecting the nodes.
 Iteration1 Node Selection
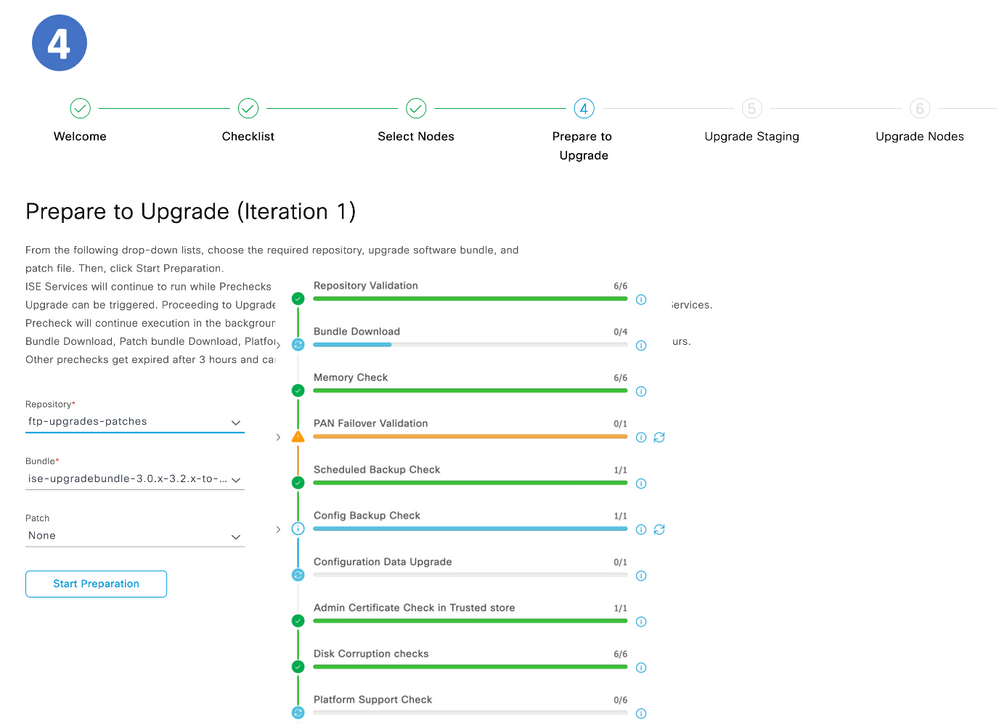
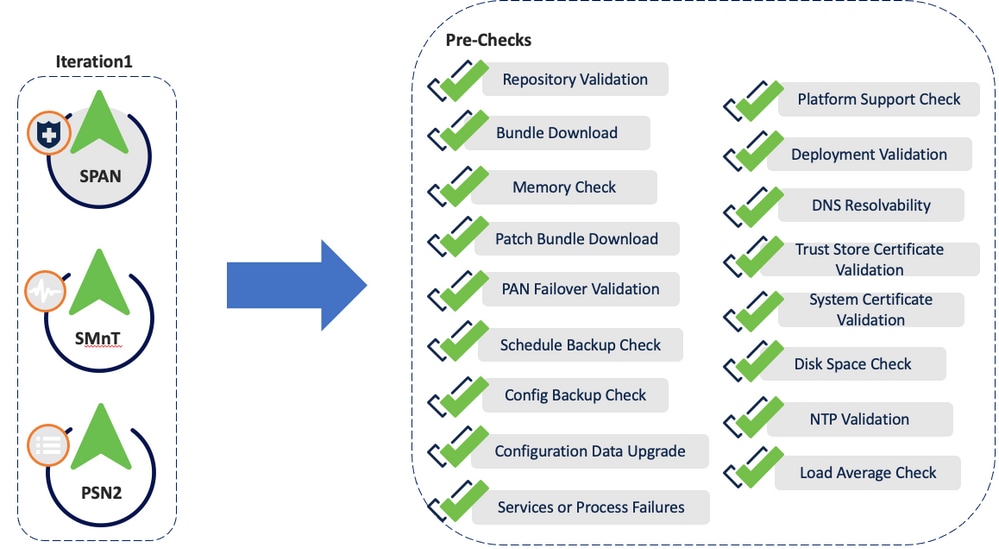
Step 4. Prepare for Upgrade
 Node Selection
 Pre PreChecks
Pre PreChecks
- Repository validation checks if repository is configured for all the nodes.
- Bundle Download helps to download.
- Memory Check checks whether 25% memory space is available on the PAN node, and 1GB space memory space is available in other nodes.
- Patch bundle download helps to download the patch bundle for the selected nodes.
- PAN Failover validation check checks if PAN high-availability is enabled. Be notified that PAN failover is going to be disabled if it is enabled.
- Scheduled Backup Check checks whether the scheduled backup is enabled. - not mandatory.
- Config Backup Check checks whether configuration backup was done recently. Upgrade process runs only after the backup is completed.
- Configuration Data Upgrade runs the configuration data upgrade on the configuration database clone and creates the upgrade data dump. This check starts after the bundle download.
- Services or Process Failures indicates the state of the service or application (whether it is running or in a failed state).
- Platform support check checks the supported platforms in the deployment. It checks whether the system has a minimum of 12 core CPUs, 300-GB hard disk, and 16-GB memory. It also checks whether the ESXi version is 6.5 or later.
- Deployment validation checks the state of the deployment node (whether it is in sync or in progress).
- DNS Resolvability checks for the forward and reverse lookup of host name and IP address.
- Trust Store Cert Validation checks whether the trust store certificate is valid or has expired.
- System Cert Validation checks the system certificate validation for each node.
- Disk Space Check checks whether the hard disk has enough free space to continue with the upgrade process.
- NTP Validation Checks for the NTP configured in the system and whether the time source is from the NTP server.
- Load Average Check checks the system load on a specific interval. The frequency can be 1,5 or 15 minutes.
Note: Not all prechecks are applicable in all nodes, some of them are only run in the PAN.
- All nodes
- Repository validation
- Bundle download
- Memory check
- Patch bundle download
- Service or process failures
- Platform support check
- DNS resolvability
- Disk Space check
- NTP validation
- Load average check.
- Only on PAN
- PAN failover validation check
- Scheduled backup check
- Config backup check
- Configuration data upgrade
- Deployment validation
- Trust store cert validation
- System cert validation
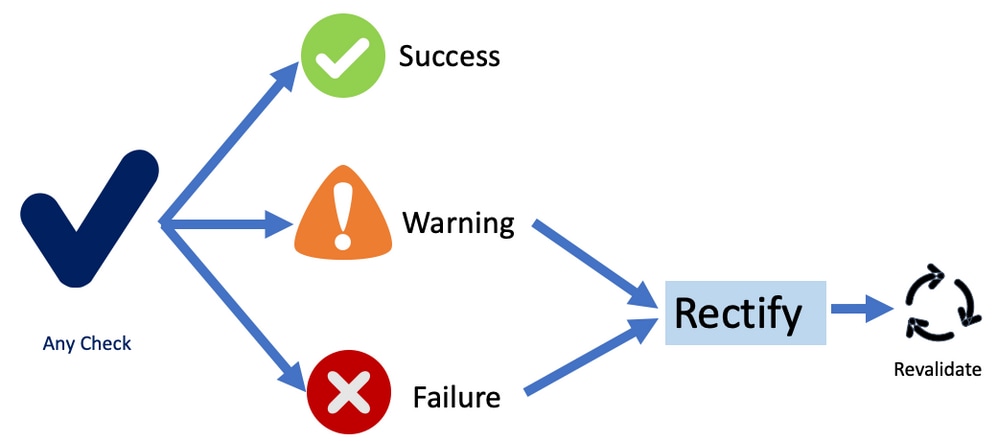
The status for all pre-checks can be:
- Success
- Warning
- Failure
Once fixed, the prechecks with Warnings and Failures can be reevaluated.
 Precheck Status
Note: ISE services can continue to run while prechecks are executed. Report can be valid for 12 hours during which upgrade can be triggered.
Note: Bundle download, patch bundle download, platform check, configuration data upgrade and disk space check are valid for 12 hours. Other prechecks get expired after 3 hours and can be revalidated using refresh failed checks button or individual refresh button.
Note: Upgrade bundle is downloaded and stored in ./storeddata/Installing/.upgrade/.
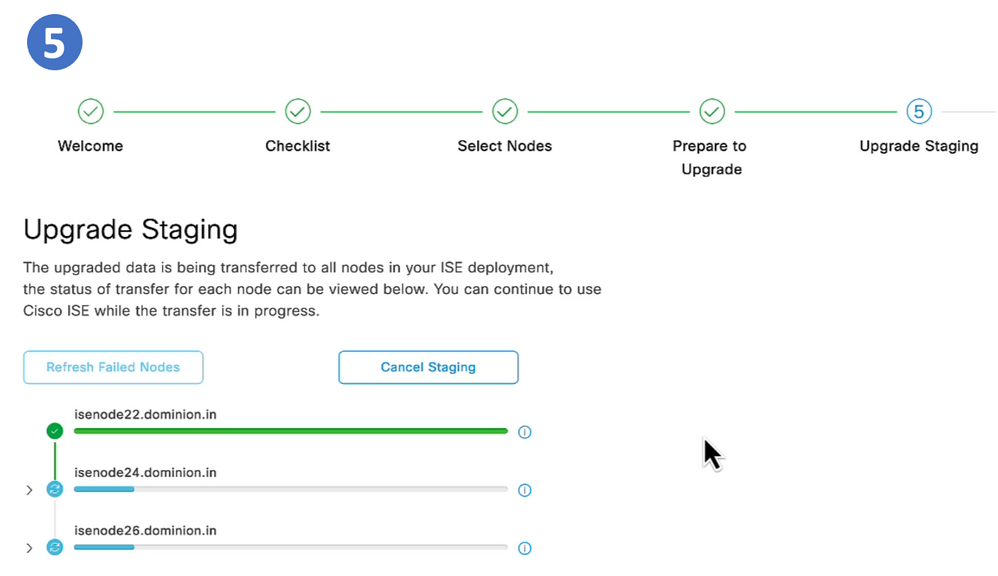
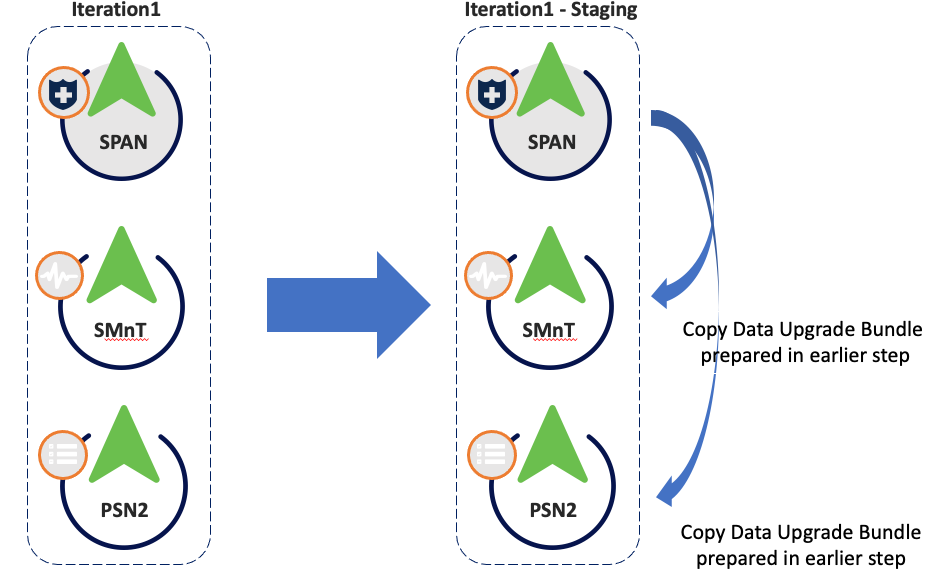
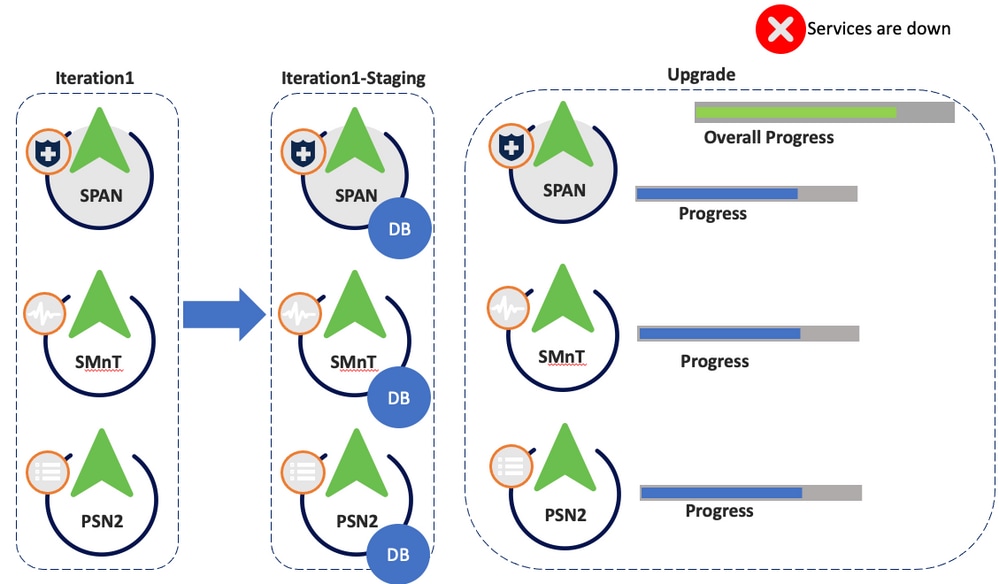
Step 5. Staging
Once all prechecks passed successfully, the next step is staging. The PAN copies the config database dump prepared in an earlier step to the rest of the nodes in the iteration.
IterStaging
 Iter Staging
Note: Proceeding to upgrade staging (by clicking start staging) step cannot cause suspension of any ISE services. Precheck can continue execution in the background even if ISE UI is closed.
Step 6. Upgrade
- All the nodes in the iteration are upgraded in parallel, hence services are disrupted.
- Each node has a its own progress bar and there is another one for the overall progress of the iteration.
- The upgrade progress is monitored via PPAN.
 Upgrade
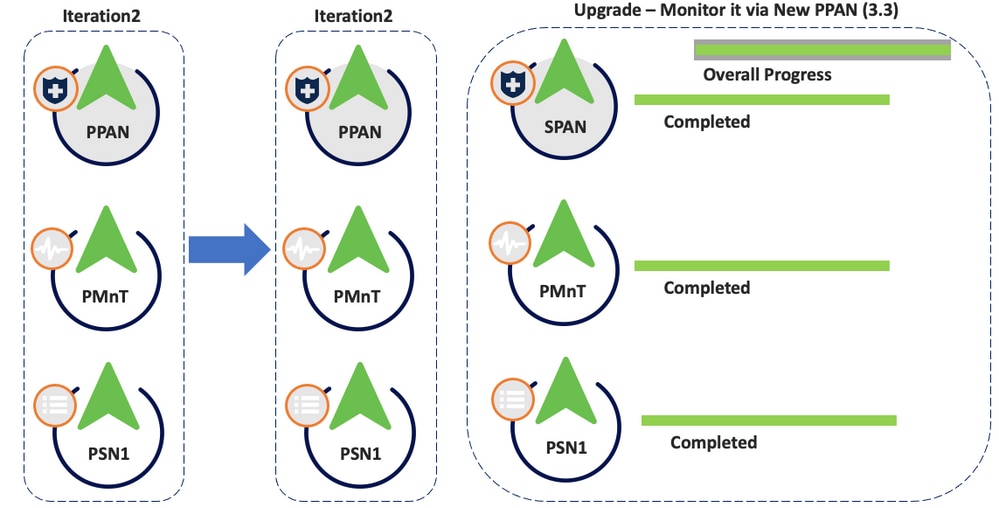
Iteration 2
- Same prechecks apply.
- During staging, the config database dump (not the upgrade bundle) is copied from the new PPAN in 3.3 from iteration 1.
 Iteration 2 Staging
- Nodes are upgraded and status is monitored via new PPAN (3.3).
 Iteration 2 Upgrade
Troubleshooting
Pre-Checks Failed
Refer to the ADE.log and ise-psc.log files.
show logging system ade/ADE.log
show logging application ise-psc.log
Configuration Data Upgrade Check
Refer to ADE.log, configdb-upgrade-[timestamp].log and dbupgrade-data-global-[timestamp].log on secondary admin node.
show logging system ade/ADE.log
show logging application configdb-upgrade-[timestamp].log
show logging application dbupgrade-data-global-[timestamp].log
Note: When you collect the Support Bundle, make sure to enable full configuration database check to include configdb-upgrade logs.
Upgrade Issues, Log Collection
Upgrade failed in one of the nodes and cannot continue with rest of the deployment.
Logs to monitor:
- On Secondary node
(Accessible via admin CLI "show logging application" or "show logging system")
/configdb-upgrade-<timestamp>.log
/dbupgrade-schema-<timestamp>.log
/dbupgrade-data-global-<timestamp>.log
ade/ADE.log
- On PAN
show logging application ise-psc.log
Upgrade Issues, Fix It
 Troubleshooting Actions
Related Information
Revision History
| Revision | Publish Date | Comments |
|---|---|---|
2.0 |
03-Apr-2025
|
Updated Title, Introduction, Style Requirements, Machine Translation, Image Captions, and Formatting. |
1.0 |
29-Aug-2023
|
Initial Release |
 Feedback
Contact Cisco
- Open a Support Case

- (Requires a Cisco Service Contract)