Introduction
This document describes how to create a private secure shell (SSH) key for authentication to the CLI on Identity Secure Engine (ISE).
Prerequisites
Requirements
Cisco recommends that you have knowledge of these topics:
- Repository in ISE.
- Certificate authentication.
Components Used
The information in this document is based on these software and hardware versions:
- ISE 3.3 patch 3
- Windows 10
- MacOS X
- SSH client Putty
The information in this document was created from the devices in a specific lab environment. All of the devices used in this document started with a cleared (default) configuration. If your network is live, ensure that you understand the potential impact of any command.
Configure
Create the private and public keys in Windows
Click on the Search icon located on the taskbar:
• Type cmd into the search bar
• In the search results, right-click on Command Prompt and select Run as administrator. This ensures you have the necessary permissions to execute commands
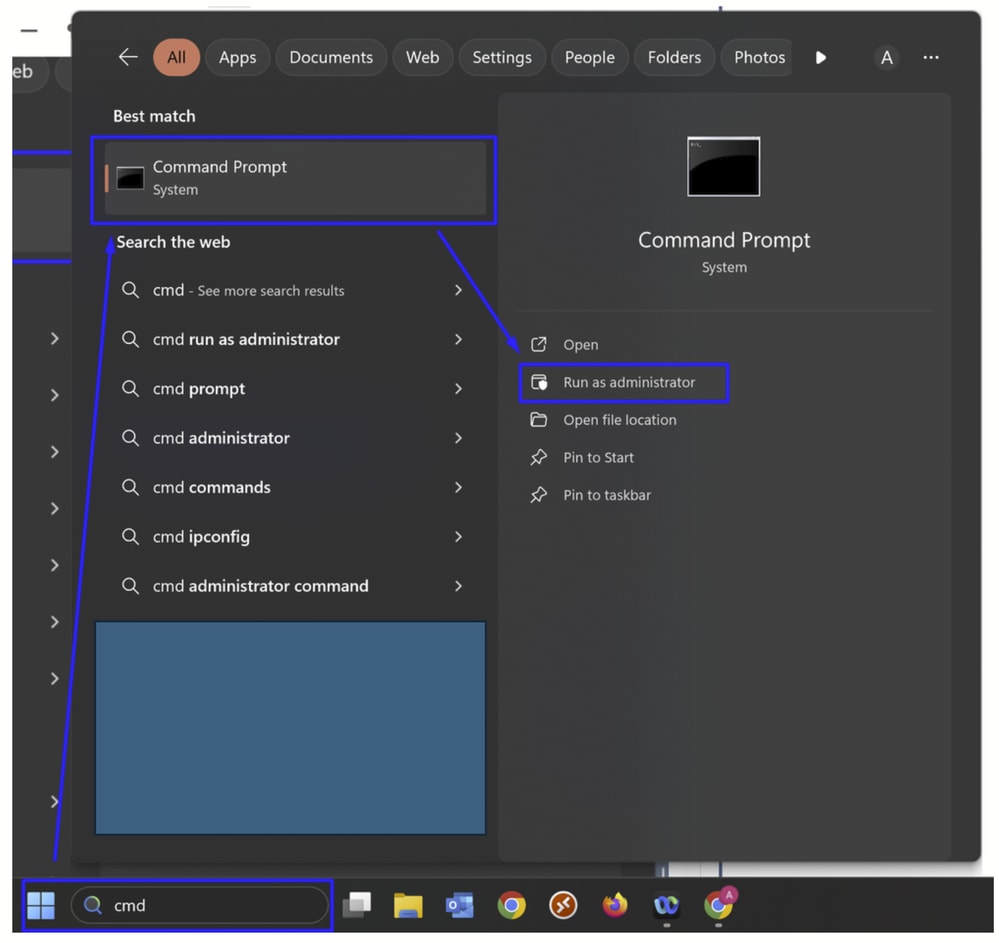
• Execute the next command:
ssh-keygen
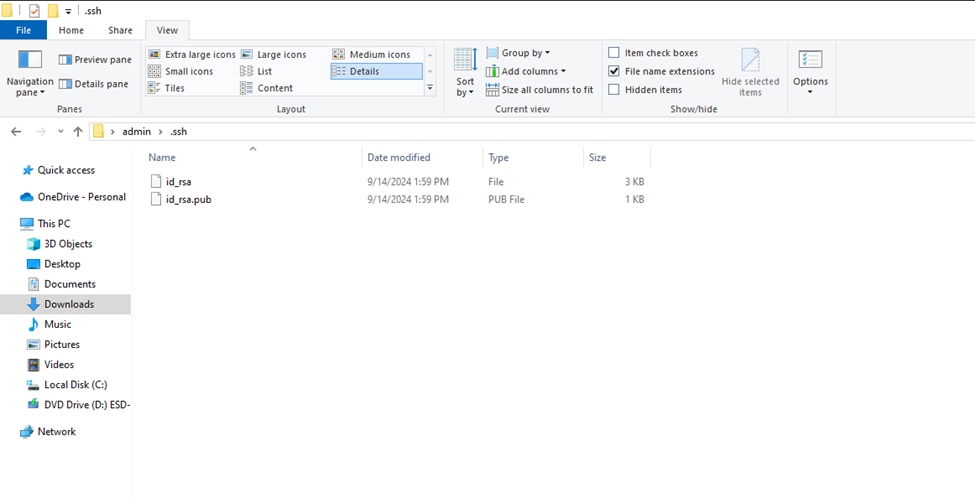
- This prompts you to enter the encryption key twice. Please save it, because this is for being authenticated against the ISE as the new password. After that, this results in the creation of two files, the private (id_rsa) and the public (id_rsa.pub) keys, then. Save the files in one directory. For example, the default one was used

- Verify where the files are stored
Transfer the public key (id_rsa.pub) in the file repository folder that is configured on ISE.
Create the private and public keys via in MacOS
Click on the Finder icon located in the Dock
• Navigate to the Applications folder
• Within the Applications folder, locate and open the Utilities folder
• In the Utilities list, find Terminal
• Double-click on Terminal to open it
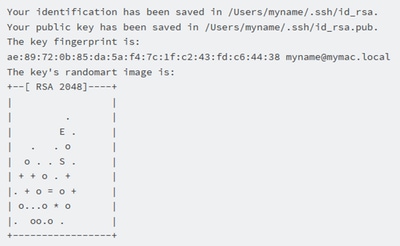
• In the Terminal window, type “ssh-keygen -t rsa“ and press the enter key to execute it
• Write the encryption key twice and save it
• Go to files location
Transfer the public key (id_rsa.pub) in the file repository folder that is configured on ISE.
Configure the certificate to login in ISE
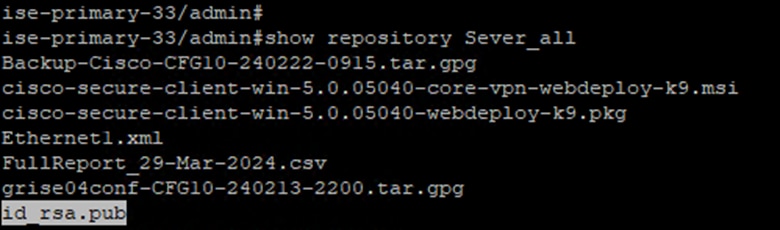
Corroborate if the public file is under the repository by using the next command:
show repository <name of the repository>
- Import the public key file
(id_rsa.pub) by using the command in the privilege mode:
crypto key import <public key filename> repository <repository name>

- Enter to the global configuration mode and use the command:
service sshd PubkeyAuthentication
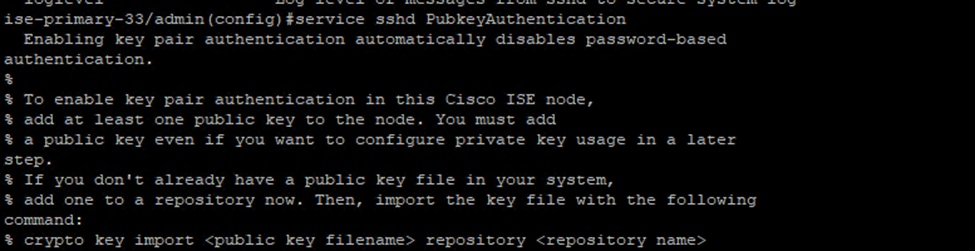
Please use the comand in order to verifying that you do not get any errors meanwhile importing the public key. It is suggested to proceed with this via the console port to avoid losing the access to the ISE.
Verify
Login in Windows
Try to access to the ISE via cmd by using the command:
ssh -i <private_key_file> <ISE_CLI_USER>@<IP_OR_FQDN_OF_ISE>
EXAMPLE:
ssh -i id_rsa admin@192.168.57.13

Use the encryption key configured in the step Create the private and public keys in Windows in order to authenticate.
Login in MacOS
Enter this command in the terminal:
ssh -i <private_key_file> <ISE_CLI_USER>@<IP_OR_FQDN_OF_ISE>
EXAMPLE:
ssh -i id_rsa admin@192.168.57.13
or
ssh -i ~/.ssh/ <private_key_file> <ISE_CLI_USER>@<IP_OR_FQDN_OF_ISE>
EXAMPLE:
ssh -i ~/.ssh/id_rsa admin@192.168.57.13
Use the encryption key configured in the step Create the private and public keys via in MacOS in order to authenticate.
Login in Putty
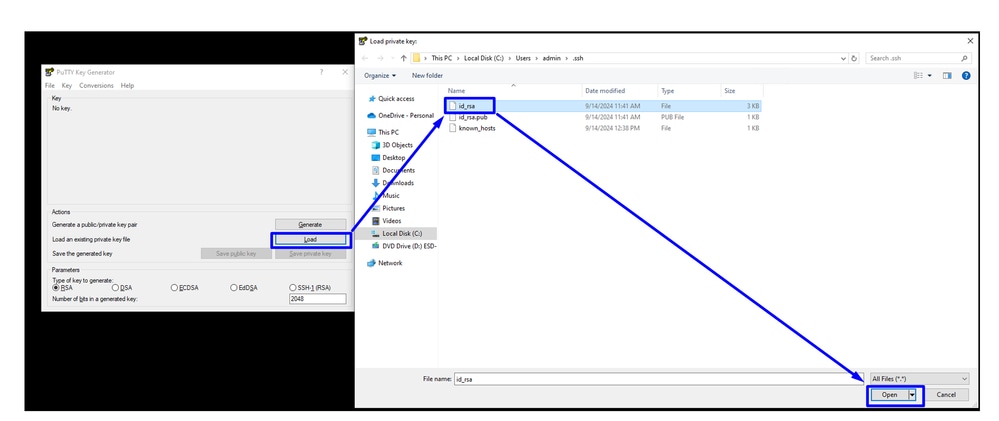
Open PuTTy key generator (search by PuttyGen in the start search bar), click on Load, select all files, and open the private key generated from cmd (Windows) or terminal (MacOS):
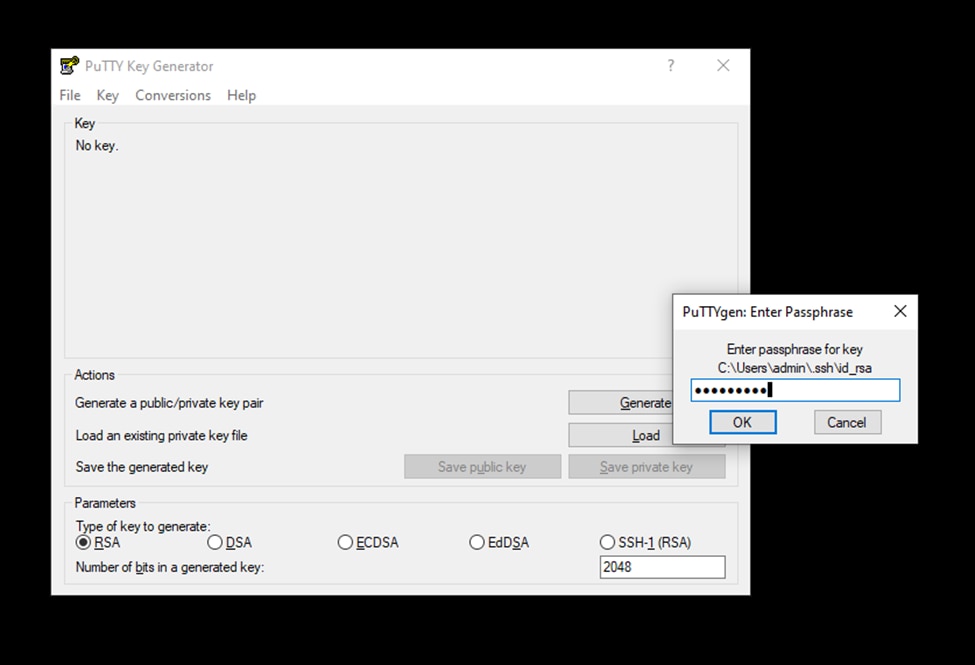
- Write the encryption key previously used in the cmd or terminal
Convert this file to a Putty version compatible by executing the next steps:
- Click on Key > Parameters for saving key files

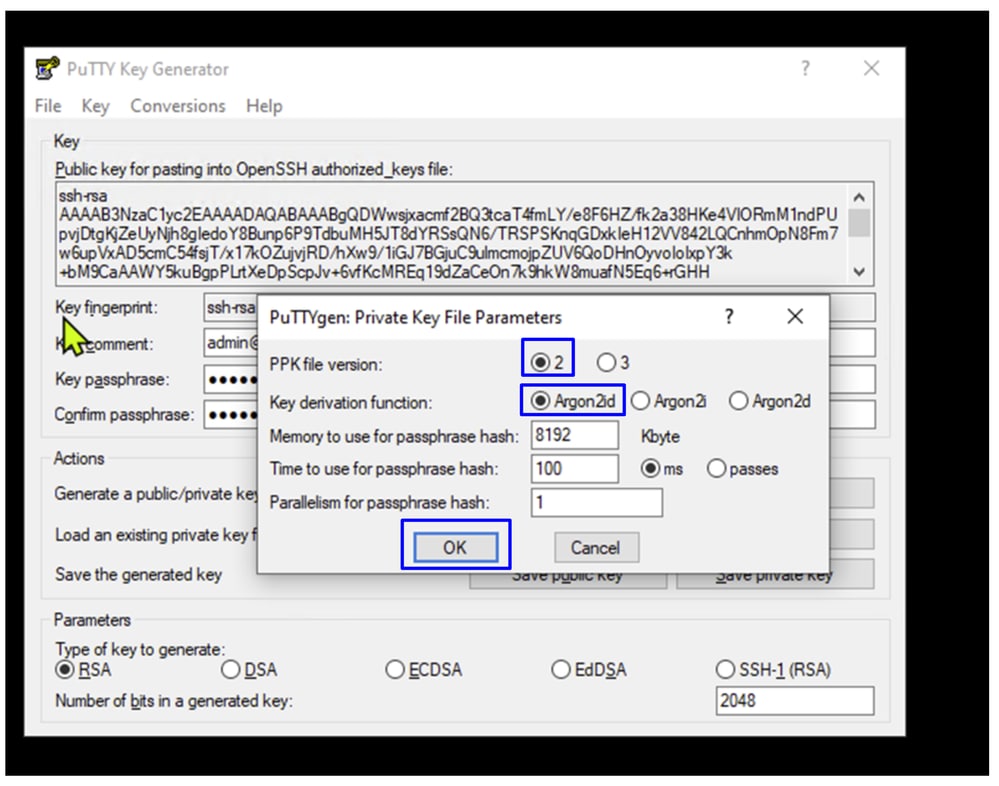
PPK file version : Chose 2Key derivation function: Choose Argon2id

Note: For the rest of parameters use the default values.
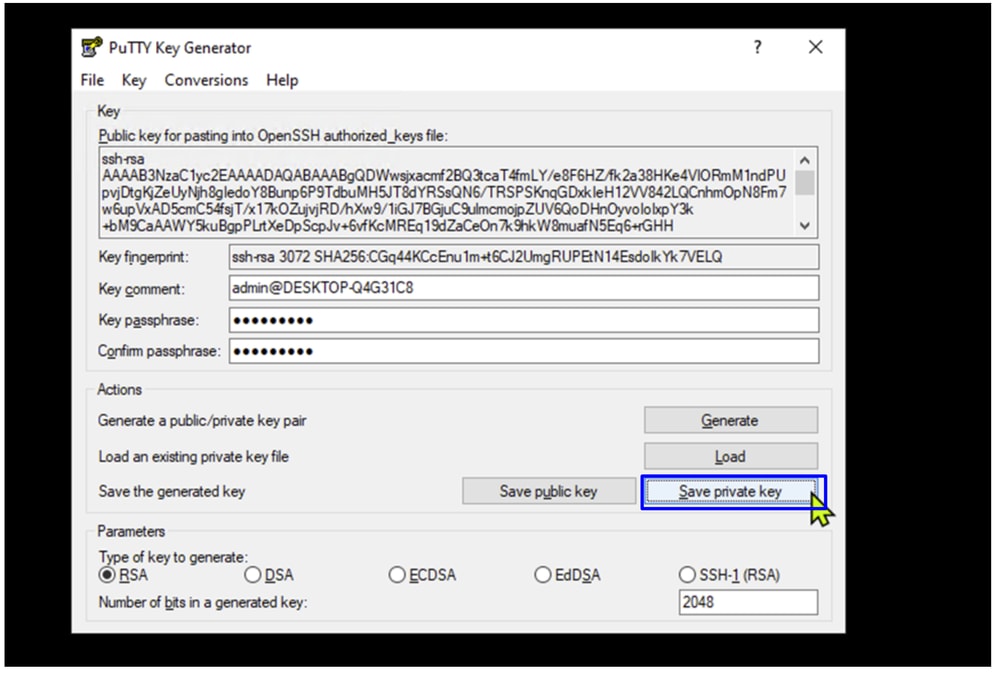
- Click on
Save private Key
After you save the key on your computer, you are ready to use it by referring to the next examples:
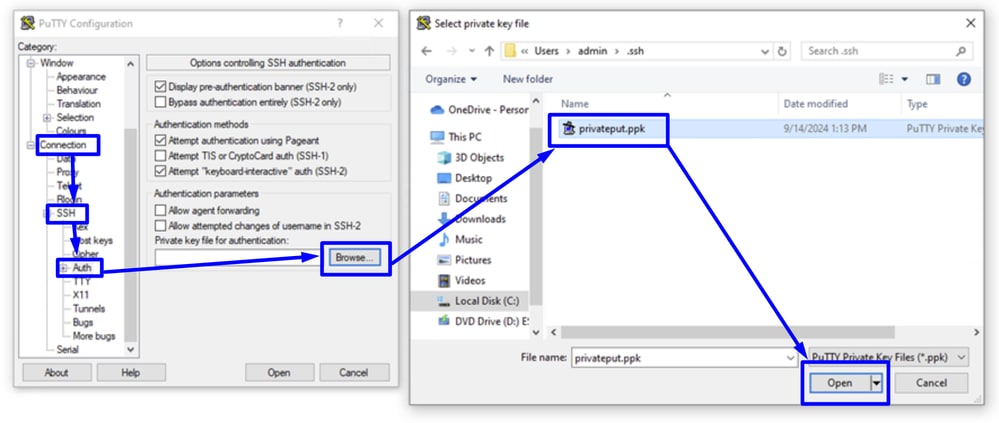
- Open Putty
- Click on
Connection > SSH > Auth > Browse
- Select your private key and click
Open
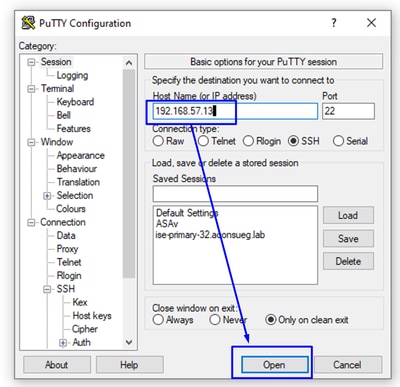
- Go back to Session, set the IP address or hostname (FQDN) of the ISE
- Click Open

Use the encryption key configured in the step Create the private and public keys via in MacOS or Create the private and public keys in Windows in order to authenticate.
Troubleshoot
Check out error messages from the endpoint site adding in the ssh connection the flag -v
Example for Windows:
ssh -v -i id_rsa admin@192.168.57.13
Example for MacOS:
ssh -v -i id_rsa admin@192.168.57.13
or
ssh -v -i ~/.ssh/id_rsa admin@192.168.57.13
Error importing the public key
% Error: Unable to parse public key file.

If you face any inconvenience importing more than one public key, please contact Cisco support.
 Feedback