Introduction
This document describes the steps needed to look for the proper Simple Network Management Protocol (SNMP) Object Identifiers (OIDs) for a Firepower eXtensibe Operative System (FXOS) platform such as 2100, 4100 and 9300 models.
Prerequisites
Requirements
Cisco recommends that you have knowledge of these topics:
- Cisco Firepower FXOS
- SNMP protocol
Components Used
The information in this document is based on these hardware/software versions:
- Firepower 2100, 4100 and 9300
- FXOS Version 2.1, 2.2 and 2.3
Procedure
Step 1. Go to the following link to identify the device component you want to monitor.
https://www.cisco.com/c/en/us/td/docs/security/firepower/fxos/mib/b_FXOS_4100_9300_MIBRef/about_cisco_fxos_mib_files.html#reference_mlw_x31_g1b
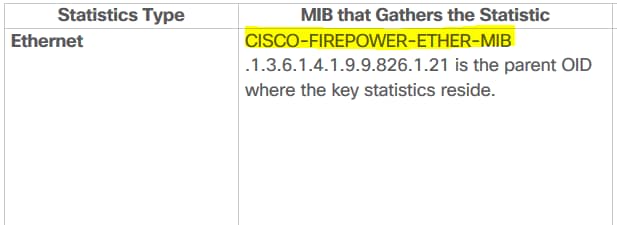
Step 2. Identify the Management Information Base (MIB) name from the desired part.

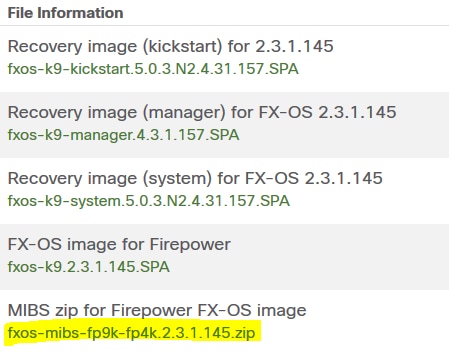
Step 3. Download the MIB file from software.cisco.com for the FXOS installed version.

Step 4. Uncompress the MIBs zip file and open the folder with the MIBS uncompressed.
Step 5. Look for the MIBs file. In this example, "CISCO-FIREPOWER-ETHER-MIB" is the searched MIB.
Step 6. Open that file with a text editor.
Once the file is open, search for the specific table.

Step 7. Look for the desired table on the MIB file to get the final OID.
Generating the OID
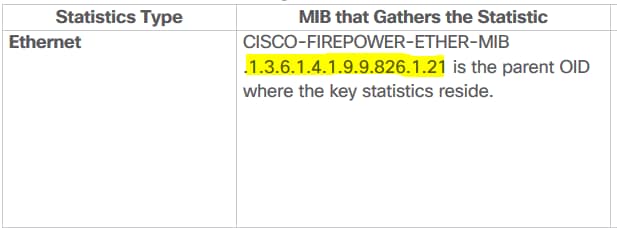
Step 1. The MIB number is the parent identifier for the statistic type to be polled.

Step 2. On the MIB file opened, search for the same table on Procedure Step 6 Section and write down the first 2 numbers:
cfprEtherPauseStatsTable OBJECT-TYPE <-------------------------------------------------------- Table we are looking
    SYNTAX           SEQUENCE OF CfprEtherPauseStatsEntry
    MAX-ACCESS       not-accessible
    STATUS           current
    DESCRIPTION
        "Cisco Firepower ether:PauseStats managed object table"
    ::= { cfprEtherObjects 14 } <------------------------------------------------------------- First number to be added

cfprEtherPauseStatsEntry OBJECT-TYPE
    SYNTAX           CfprEtherPauseStatsEntry
    MAX-ACCESS       not-accessible
    STATUS           current
    DESCRIPTION
        "Entry for the cfprEtherPauseStatsTable table."
    INDEX { cfprEtherPauseStatsInstanceId }
    ::= { cfprEtherPauseStatsTable 1 } <------------------------------------------------------ Second number to be added
Those 2 numbers follow the parent OID extracted in Step 1.
Step 3. The following list shows the last number to complete the OID.
CfprEtherPauseStatsEntry ::= SEQUENCE {
    cfprEtherPauseStatsInstanceId                                    CfprManagedObjectId,
    cfprEtherPauseStatsDn                                            CfprManagedObjectDn,
    cfprEtherPauseStatsRn                                            SnmpAdminString,
    cfprEtherPauseStatsIntervals                                     Gauge32,
    cfprEtherPauseStatsRecvPause                                     Unsigned64,
    cfprEtherPauseStatsRecvPauseDelta                                Counter64,
    cfprEtherPauseStatsRecvPauseDeltaAvg                             Unsigned64,
    cfprEtherPauseStatsRecvPauseDeltaMax                             Unsigned64,
    cfprEtherPauseStatsRecvPauseDeltaMin                             Unsigned64,
    cfprEtherPauseStatsResets                                        Unsigned64,
    cfprEtherPauseStatsResetsDelta                                   Counter64,
    cfprEtherPauseStatsResetsDeltaAvg                                Unsigned64,
    cfprEtherPauseStatsResetsDeltaMax                                Unsigned64,
    cfprEtherPauseStatsResetsDeltaMin                                Unsigned64,
    cfprEtherPauseStatsSuspect                                       TruthValue,
    cfprEtherPauseStatsThresholded                                   CfprEtherPauseStatsThresholded,
    cfprEtherPauseStatsTimeCollected                                 DateAndTime,
    cfprEtherPauseStatsUpdate                                        Gauge32,
    cfprEtherPauseStatsXmitPause                                     Unsigned64,
    cfprEtherPauseStatsXmitPauseDelta                                Counter64,
    cfprEtherPauseStatsXmitPauseDeltaAvg                             Unsigned64,
    cfprEtherPauseStatsXmitPauseDeltaMax                             Unsigned64,
    cfprEtherPauseStatsXmitPauseDeltaMin                             Unsigned64
}
Step 4. Look for the value want to monitor. e.g. "cfprEtherPauseStatsResetsDeltaAvg"
cfprEtherPauseStatsResetsDeltaAvg OBJECT-TYPE
    SYNTAX       Unsigned64
    MAX-ACCESS   read-only
    STATUS       current
    DESCRIPTION
        "Cisco Firepower ether:PauseStats:resetsDeltaAvg
        managed object property"
    ::= { cfprEtherPauseStatsEntry 12 } <------------------------------------------------------ Last number to be added
Step 5. Put together all the numbers starting with the parent MIB.
1.3.6.1.4.1.9.9.826.1.21.14.1.12
[6] Verify with an SNMP walk to gather the final OID
root@NCRUZZAV-V18T1:~# snmpwalk -v 2c 10.88.243.250 -c cisco 1.3.6.1.4.1.9.9.826.1.21.14.1.12
iso.3.6.1.4.1.9.9.826.1.21.14.1.12.1091814 = Counter64: 0
iso.3.6.1.4.1.9.9.826.1.21.14.1.12.1091819 = Counter64: 0
iso.3.6.1.4.1.9.9.826.1.21.14.1.12.1091824 = Counter64: 0
iso.3.6.1.4.1.9.9.826.1.21.14.1.12.1091829 = Counter64: 0
iso.3.6.1.4.1.9.9.826.1.21.14.1.12.1091834 = Counter64: 0
iso.3.6.1.4.1.9.9.826.1.21.14.1.12.1091839 = Counter64: 0
iso.3.6.1.4.1.9.9.826.1.21.14.1.12.1091844 = Counter64: 0
iso.3.6.1.4.1.9.9.826.1.21.14.1.12.1091849 = Counter64: 0
iso.3.6.1.4.1.9.9.826.1.21.14.1.12.1091854 = Counter64: 0
iso.3.6.1.4.1.9.9.826.1.21.14.1.12.1091859 = Counter64: 0
iso.3.6.1.4.1.9.9.826.1.21.14.1.12.1091864 = Counter64: 0
iso.3.6.1.4.1.9.9.826.1.21.14.1.12.1091869 = Counter64: 0
iso.3.6.1.4.1.9.9.826.1.21.14.1.12.1091874 = Counter64: 0
iso.3.6.1.4.1.9.9.826.1.21.14.1.12.1091879 = Counter64: 0
iso.3.6.1.4.1.9.9.826.1.21.14.1.12.1091884 = Counter64: 0
iso.3.6.1.4.1.9.9.826.1.21.14.1.12.1091889 = Counter64: 0
iso.3.6.1.4.1.9.9.826.1.21.14.1.12.1091894 = Counter64: 0
root@NCRUZZAV-V18T1:~#
Notice that the output displays 1 OID for each part selected in the table. In this example, there is 1 OID for each interface as the table selected, displays all the device interfaces statistics.
