Introduction
This document describes how to configure OSPF routing on the Firepower Threat Defense (FTD) managed by the Firepower Device Manager (FDM).
Prerequisites
Requirements
Cisco recommends that you have knowledge of these topics:
Components Used
The information in this document is based on these software and hardware versions:
The information in this document was created from the devices in a specific lab environment. All of the devices used in this document started with a cleared (default) configuration. If your network is live, ensure that you understand the potential impact of any command.
Configure
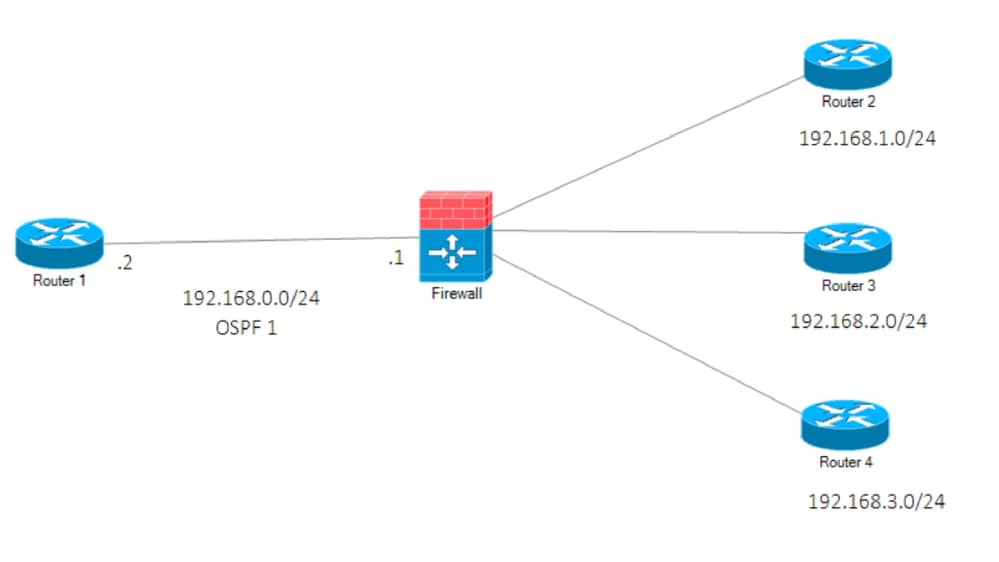
Network Diagram
Network Diagram
Configurations
In this scenario you are configuring OSPF on the FTD and R1 router of Network Diagram.
You are configuring OSPF on FTD and Router for 3 subnets.
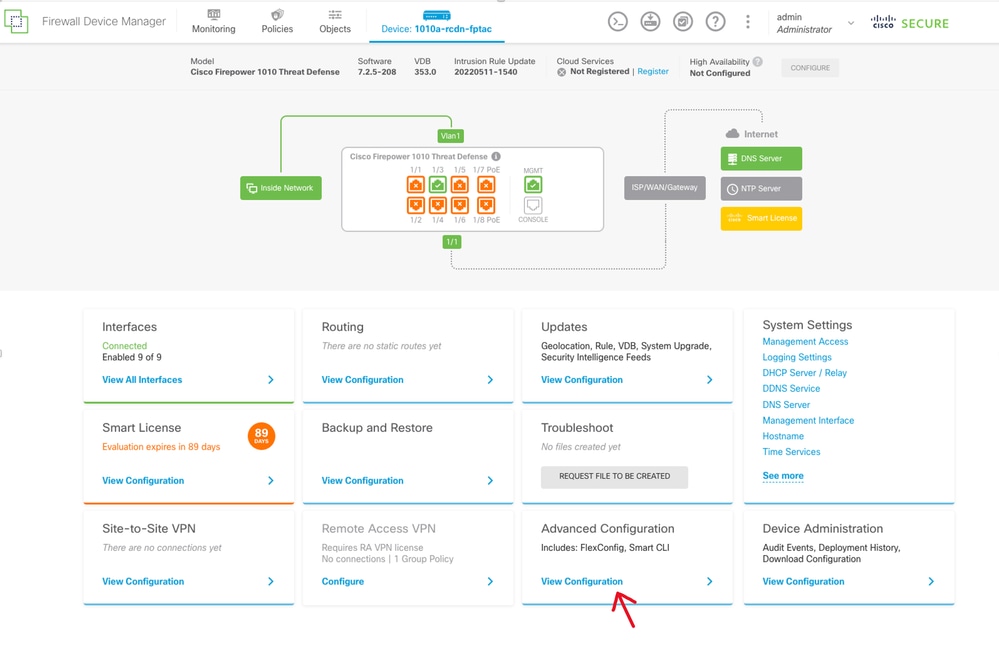
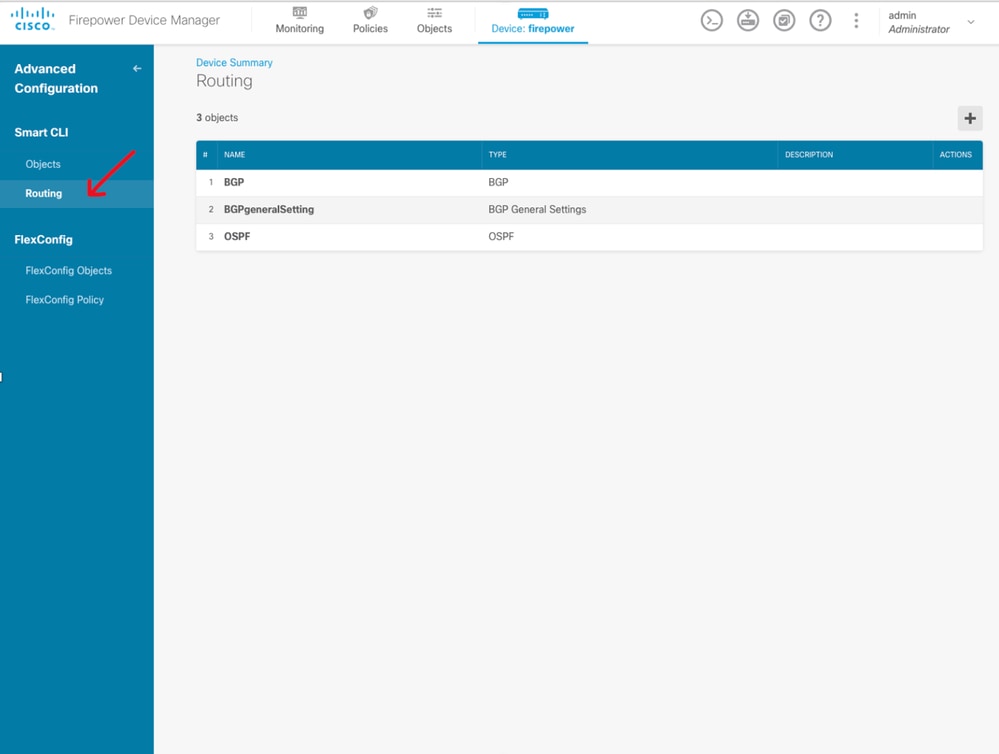
Step 1. To Configure Access the Smart CLI on FTD.
Advanced Configuration on FDM GUI
Routing Selection for OSPF
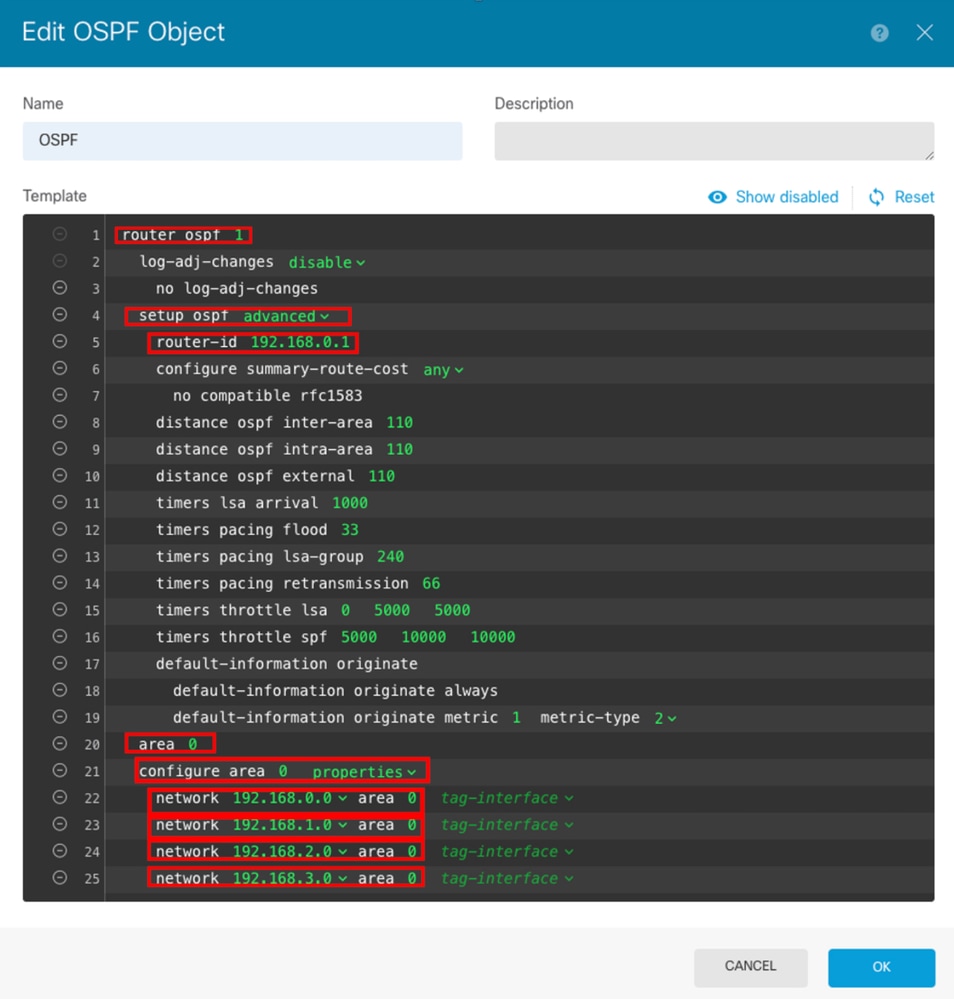
Step 2: Configure the Parameters on Smart CLI Object
Smart CLI configuration for OSPF
- Highlighted are the configuration changes which are to be done as per the network diagram.
- The parameters: OSPF process ID, router-id, area and the networks are being changed.
Step 3: Deploy the Config Change
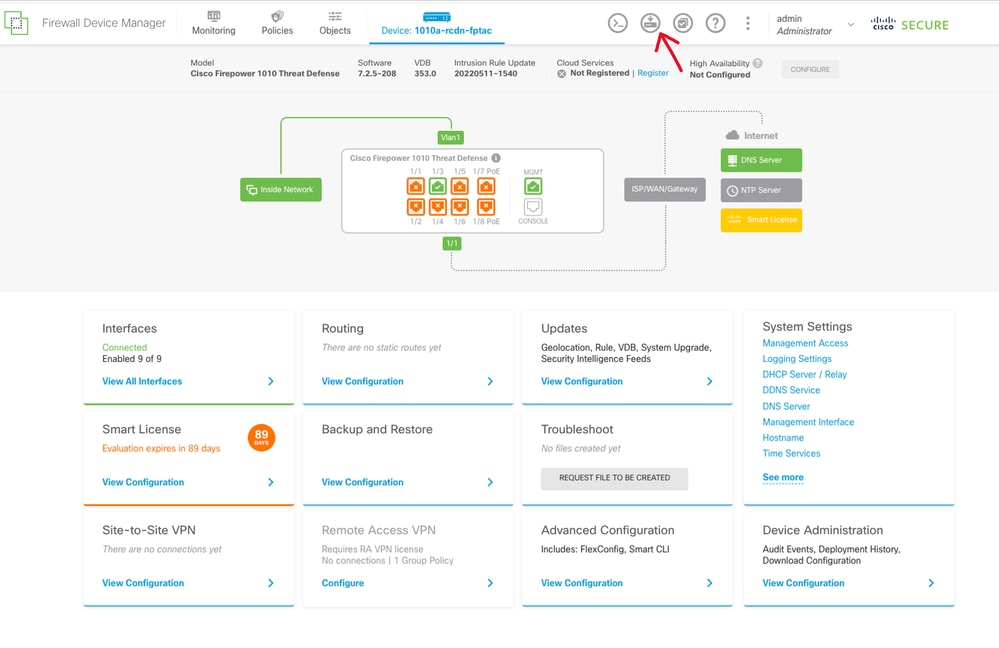
Deploy icon on FDM GUI
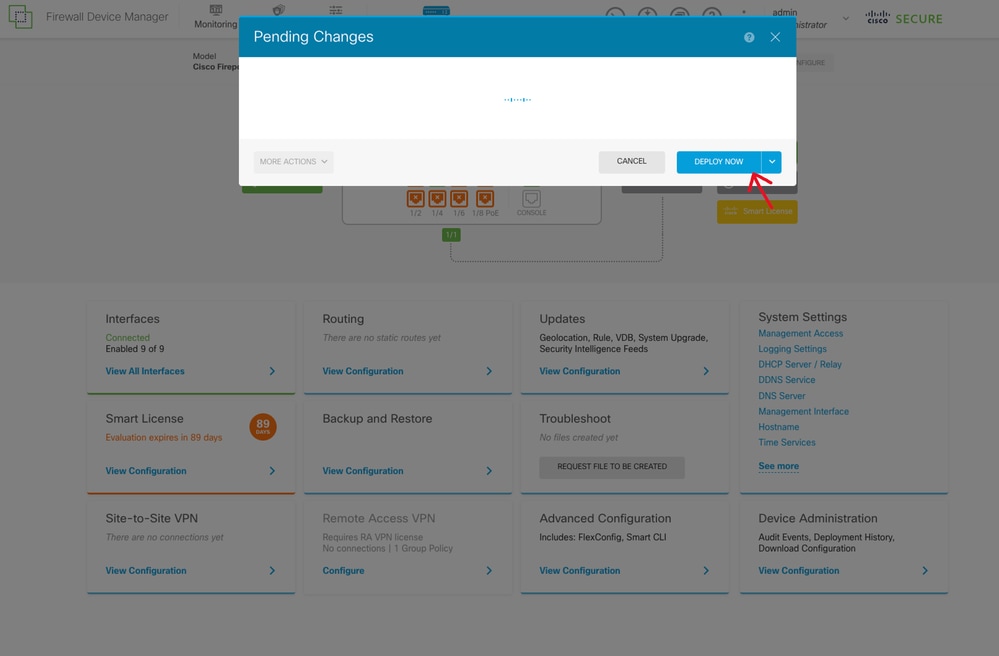
Deploy Now Button on FDM GUI
Step 4: Configuration on Router
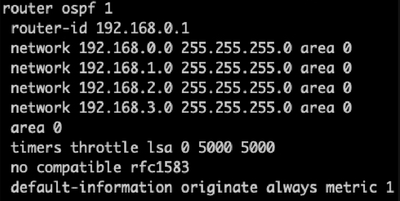
- Add the configuration to the router. In this scenario you are configuring on router R1 from Network Diagram. Refer the next image.
Router configuration for OSPF
Step 5: Verify the Configuration on FTD CLI
- Verify with show run router ospf command on CLI.
Verification of Config on FTD CLI
Verify
To verify on the config on FTD CLI:
- show route — check for OSPF O routes being advertised.
- show ospf neighbour
To verify the config on Router:
- show ip route — check for OSPF O routes being advertised.
-
show ip ospf neighbor