Introduction
This document describes how to install and configure the AppDynamics Node.js Agent to monitor a Node.js application for performance metrics.
Prerequisites
Requirements
To proceed with the setup, ensure you meet the following:
-
Familiarity with Node.js and Express framework
-
A working application or use the application present in GitHub link from Related Information section
-
Basic understanding of environment variables and application structure
-
Access to AppDynamics SaaS or On-Prem Controller
-
API access credentials (Account Name, Access Key, Controller Host/Port)
Components Used
The information in this document is based on these software versions:
The information in this document was created from the devices in a specific lab environment. All of the devices used in this document started with a cleared (default) configuration. If your network is live, ensure that you understand the potential impact of any command.
Background Information
The AppDynamics Node.js Agent allows you to instrument and monitor your Node.js applications. It captures business transaction data, backend response times, memory usage, and CPU metrics, and sends them to the AppDynamics Controller.
To collect metrics properly, the agent must be initialized before any other user application modules are loaded. The agent communicates over HTTP(S) with the Controller and requires controller host, port, and access key details to function correctly.
Configure

Tip: Please ensure to replace all variable with your actual AppDynamics Controller details in the configuration snippet.
Step 1: Install the Agent
Install the AppDynamics Node.js Agent using NPM:
npm install appdynamics --save
Step 2: Embed Configuration in Code
Add the code at the very top of your main file (app.js or index.js), before any other modules:
require("appdynamics").profile({
    controllerHostName: 'ControllerURL',
    controllerPort: ControllerPort,
    controllerSslEnabled: true,  // Set to true if controllerPort is SSL
    accountName: 'accountName',
    accountAccessKey: 'accountAccessKey', // required
    applicationName: 'Hello_World_NodeJS', // Change the name of application
    tierName: 'Hello_World_NodeJS_Tier', // Change the name of tier
    nodeName: 'Hello_World_NodeJS_Node', //// Change the name of node

});
Step 3: Add Your Application Logic
const express = require('express');
const app = express();
const port = 3000;

app.get('/', (req, res) => {
  res.send('Hello World!');
});

app.listen(port, () => {
  console.log(`Example app listening on port ${port}`);
});
Verify
Step 1: Start Your App
node app.js
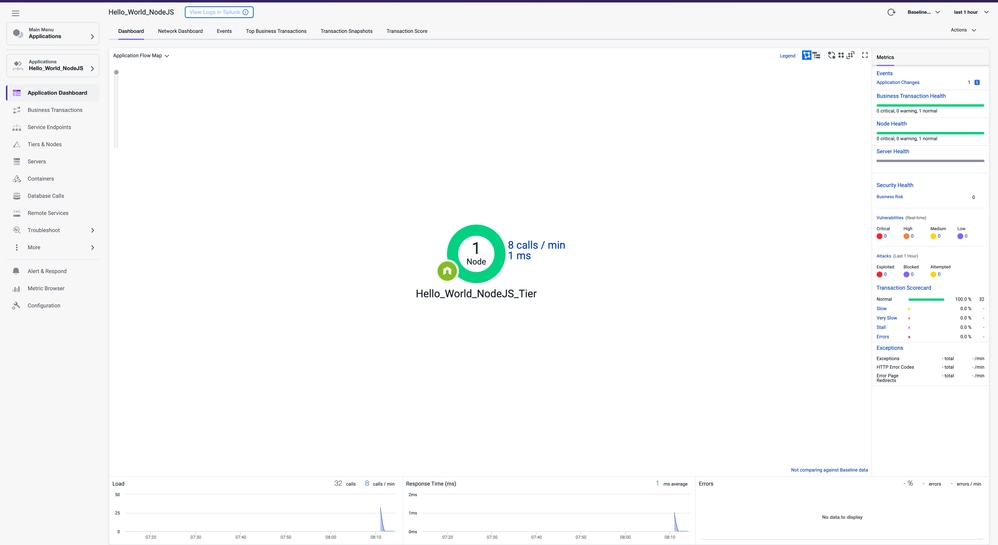
Step 2: Go to AppDynamics Dashboard
-
Log in to your AppDynamics Controller
-
Navigate to Applications > Hello_World_NodeJS
-
Look for metrics and flow maps within 5 minutes
Troubleshoot
|
Issue
|
Possible Cause
|
Resolution
|
|
App does not appear in dashboard
|
Agent not initialized before app code
|
Ensure require('appdynamics') is first line
|
|
Agent installation fails
|
Missing permissions or no internet or incompatible OS
|
Run with elevated permissions or ensure that using supported platforms
|
|
401 access error
|
Incorrect accountAccessKey or accountName
|
Double-check credentials from AppDynamics Controller
|
Related Information
AppDynamics Documentation
Install the Node.js Agent
GitHub Node.js AppDynamics Demo
Need Further Assistance?
If you have a question or experiencing issues, please create asupport ticketwith these details:
- Error Details or Screenshot:Provide specific error message or a screenshot of the problem.
- Command Used:Specify the exact command you were running when the issue occurred.
- Node agent logs :Provide the agent logs from /tmp/appd/*/logs/ if generated.
 Feedback