Introduction
This document describes how to create, manage, and utilize Asset Groups in Cisco CX Cloud for device access and reporting.
Prerequisites
Requirements
Cisco recommends that you have knowledge of these topics:
- Navigation and usage of Cisco CX Cloud and SNTC Portal
- Familiarity with access control and compliance policy concepts
Components Used
The information in this document is based on these software and hardware versions:
- Cisco CX Cloud platform (latest version at time of writing)
- Supported Cisco hardware assets managed within CX Cloud
The information in this document was created from the devices in a specific lab environment. All of the devices used in this document started with a cleared (default) configuration. If your network is live, ensure that you understand the potential impact of any command.
Background Information
Asset Groups in Cisco CX Cloud (previously known as Segment Exclusions in SNTC Portal) provide a way to organize, manage, and control user access to device assets. Asset Groups serve several purposes:
- Enable granular access control for users based on assigned device groupings.
- Support compliance policies by enabling grouping of devices for audit and reporting purposes.
- Allow devices to be assigned to multiple asset groups for flexible management.
- Default Asset Group All Assets automatically includes all devices in the portal.
Asset Groups are visible in the Assets & Coverage tile, under Assets > All Assets. The Asset Group column can be displayed using the More Options icon and selecting Hide / Show Columns > Asset Group.

Note: Devices not assigned to any Asset Group have no value in the Asset Group column.
Configure
Display Asset Groups
These are the detailed steps to create a new Asset Group in CX Cloud:
- Log in to CX Cloud Portal.
- Click the Assets & Coverage tile.
- Select Assets > All Assets.
- Click the More Options icon (three vertical dots).
- Click Hide / Show Columns to display the column.
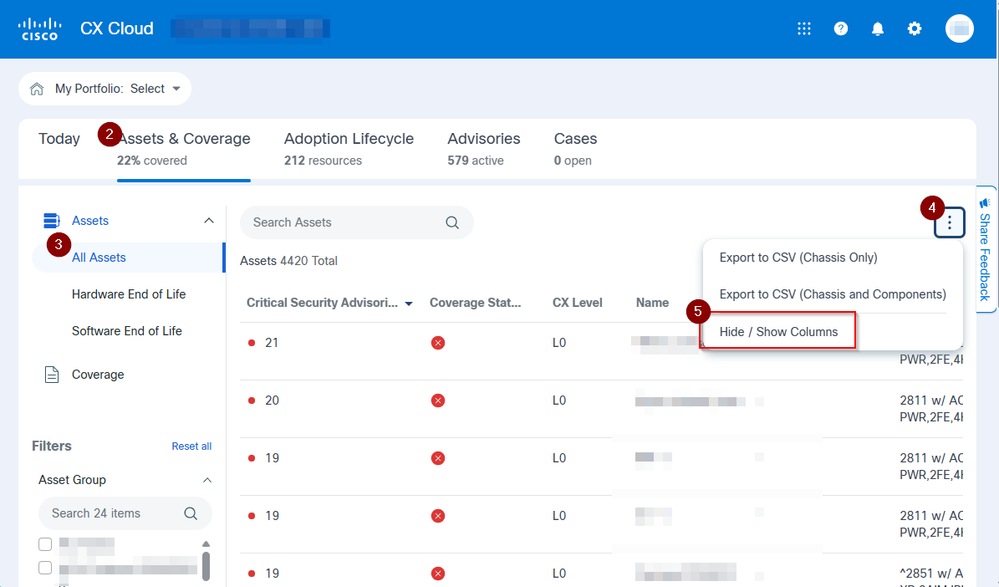 More Options Menu
- Check the Asset Groups checkbox.
- Click the Apply button.
 Asset Groups Checkbox
Create an Asset Group
- Log in toCX Cloud Portal with a SUA.
- Open theAdmin Center.

Tip: It is the Gear/Cog icon on top, right corner.
- Click Asset Groups.
- ClickCreatebutton.
- Select whether you want aStatic or aDynamic group.
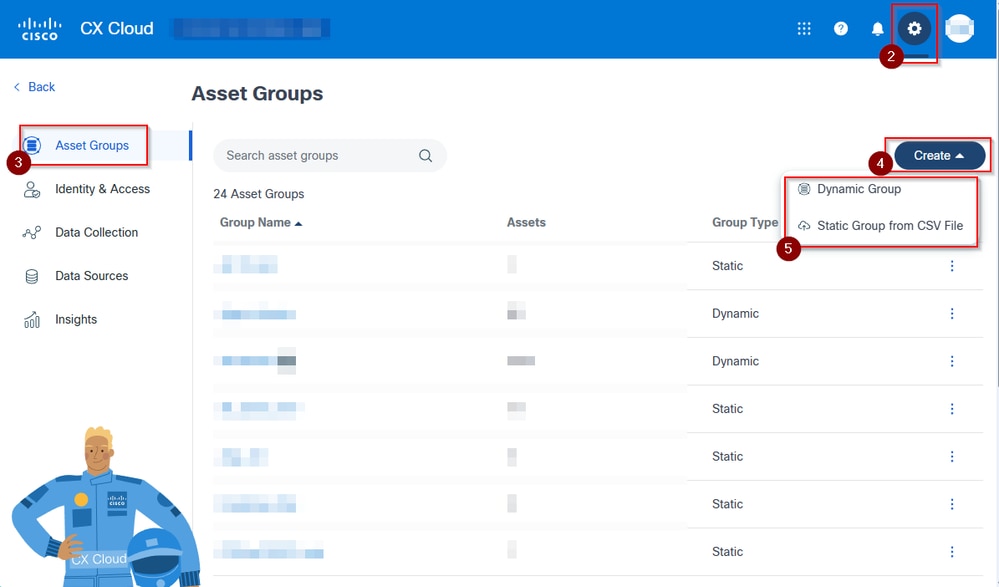 Steps to Create an Asset Group in CXCloud
Create Static Groups
5.1.1 Static groups require the use of a template, available to download when creating the group by clicking thetemplate text in blue.
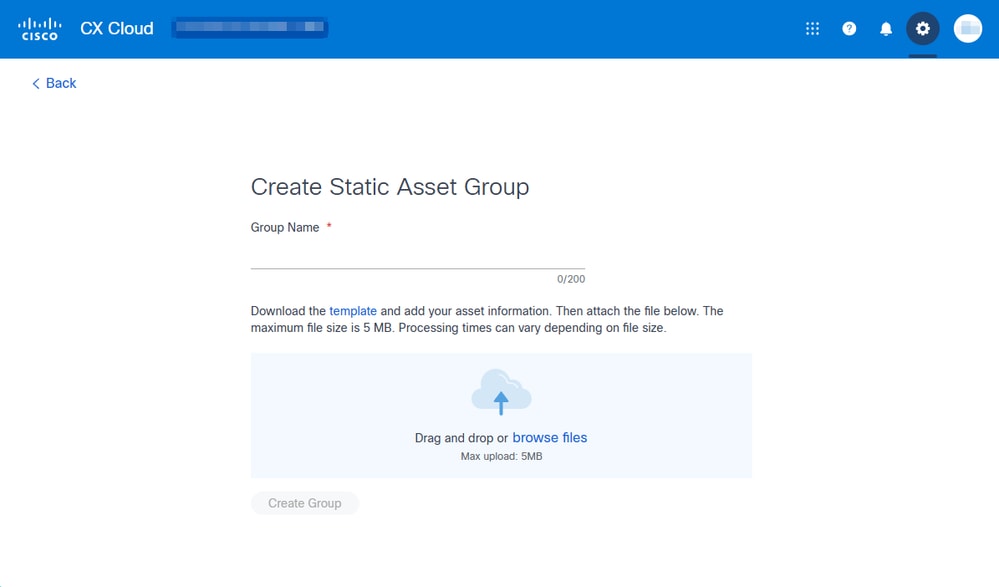 Create Static Asset Group
5.1.2 The template needs to be populated with Serial Numbers.
Tip: You can edit it on multiple programs. For this example, Notepad was used.
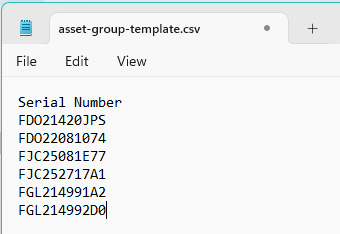 Example of the Template for a Static Asset Group
5.1.3 Upload the file by dragging and dropping it over the cloud icon or select it from your files by clicking thebrowse files text in blue.
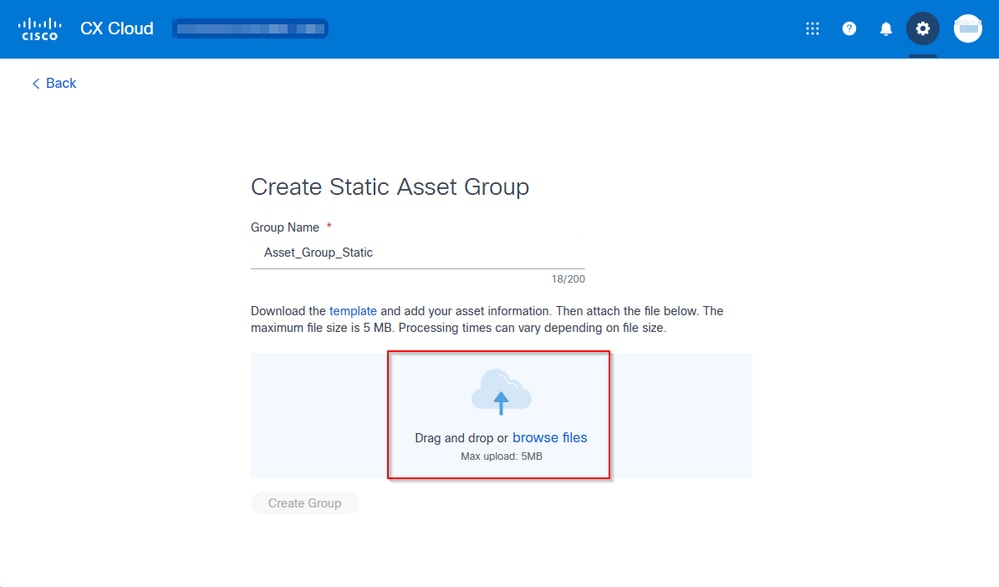 View with Where to Add the Template for a Static Asset Group
5.1.4 The portal validates the file format and shows a green arrow and line indicating the completion of the upload.
Click theCreate Group button to proceed.
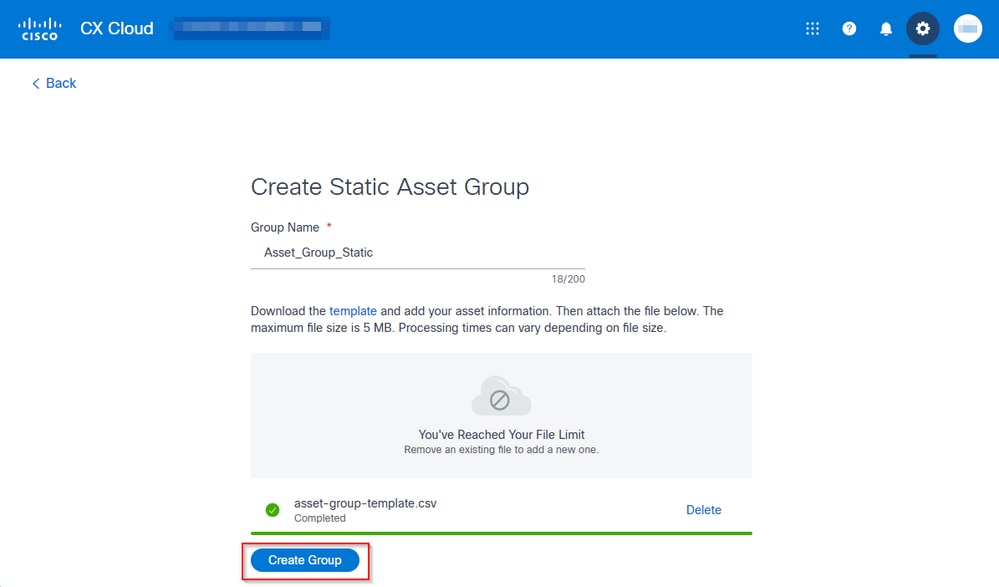 Create Group Button Used for Creating a Static Asset Group
5.1.5 The portal redirects to theAsset Groups menu and shows messages informing of the progress of the creation.
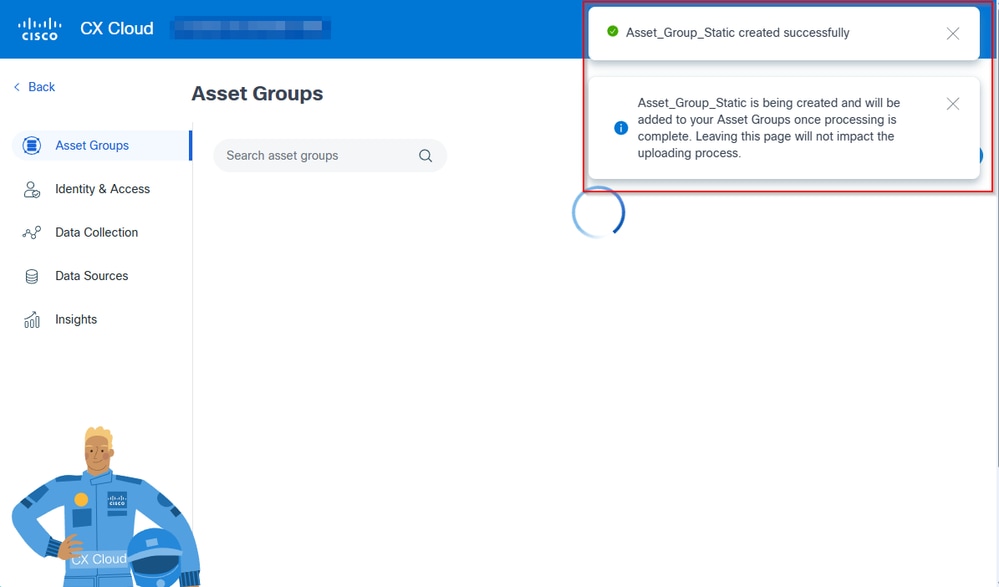 Messages Informing About the Progress of the Group Creation
5.1.6 The group shows up afterwards on top of the others with the text "Processing..."under the amount of assets. It is updated once the processing finishes.
5.1.7 Once processing is finished, the group displays the assets added to it. If there are multiple groups on the portal, consider searching the asset groups to find yours.
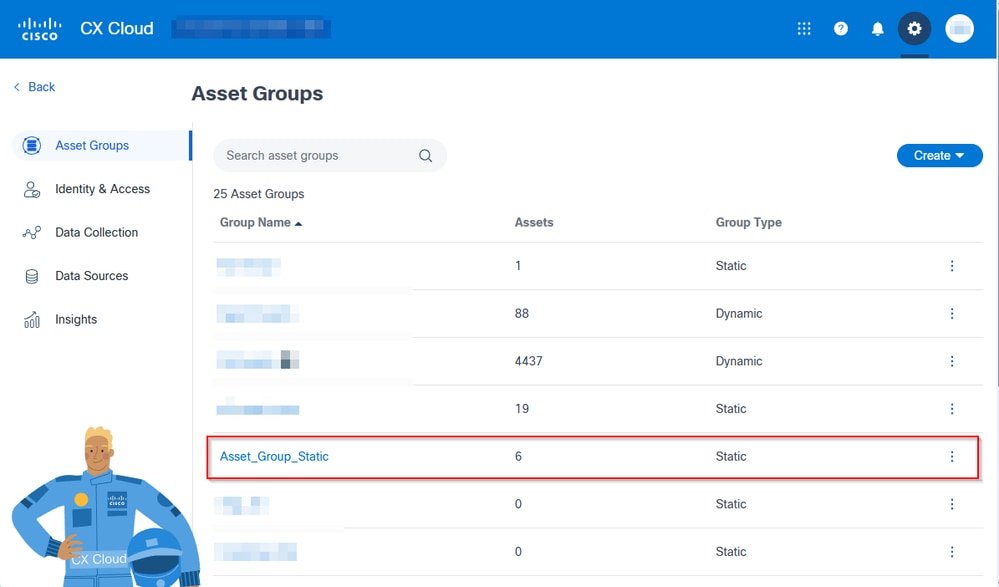 Dynamic Group Visible under Asset Groups View
Create Dynamic Groups
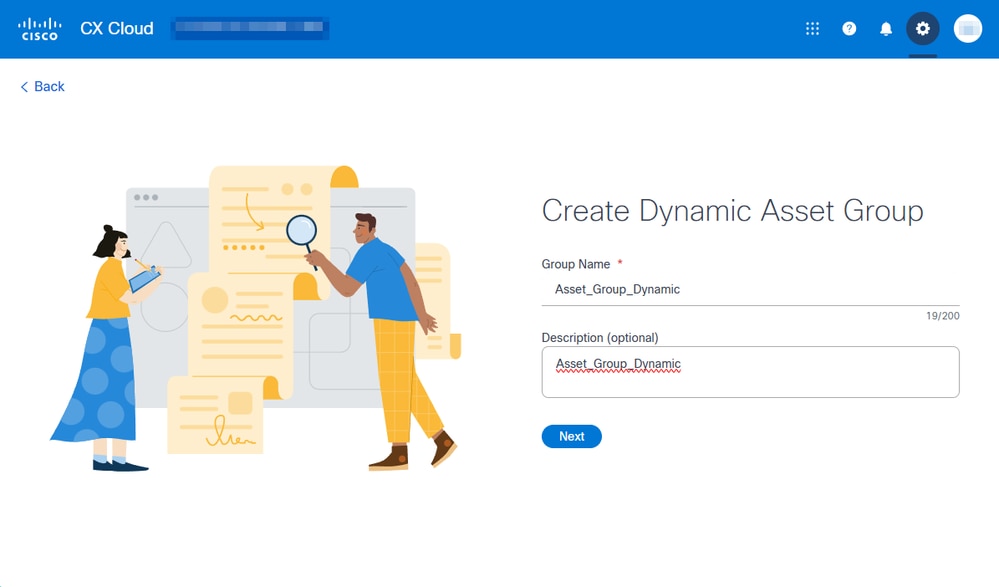
5.2.1. Dynamic groups require aGroup Name limited to 200 characters. Add aGroup Nameand clickNext.
Tip: A description can be added. It is optional and recommended for easier management of the groups later on.
 Create Dynamic Asset Group View
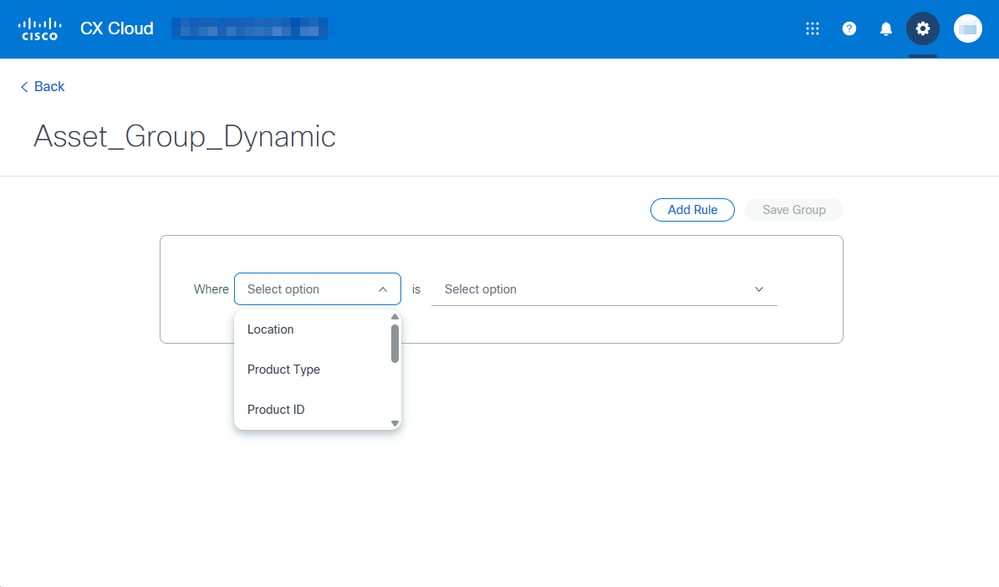
5.2.2. Next step involves creating rules with the Where____ is _____ . Fields that can be used to filter are:
- Location
- Product Type
- Product ID
- Product Family
- Contract Number
- Managed By
- Software Type
Each modifies the options available on the is _____ part of the rule.
 Dynamic Group Rules View
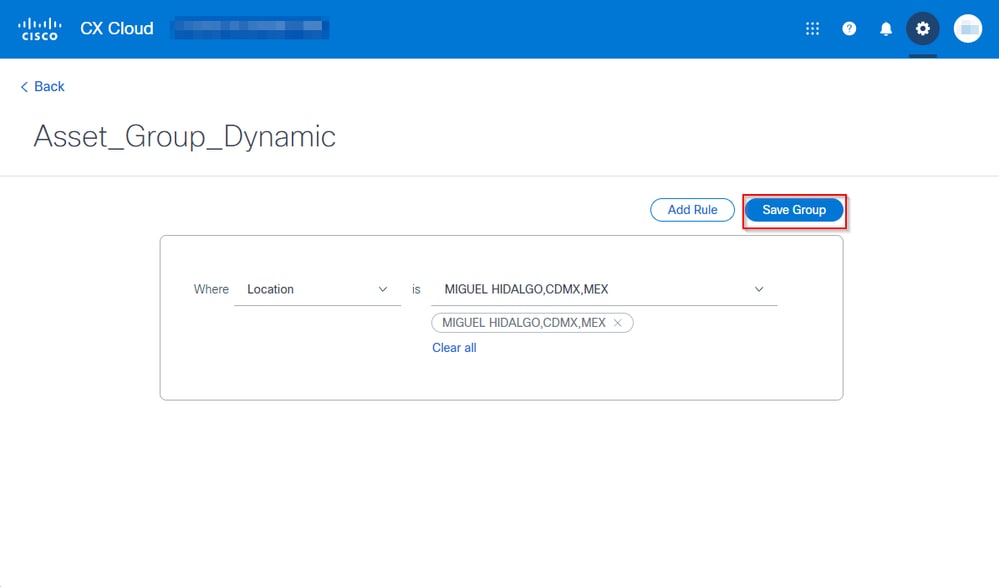
5.2.3 A SUA can add more rules if needed. For further filtering, click theAdd Rule button. Once a rule is created, the group can be saved by clicking theSave Group button.
Note: The rule in this example includes all devices where Location is MIGUEL HIDALGO,CDMX,MEX.
 Rule with All Product Types Selected
5.2.4 The portal redirects to the Asset Groups menu and shows messages informing of the progress of the creation.
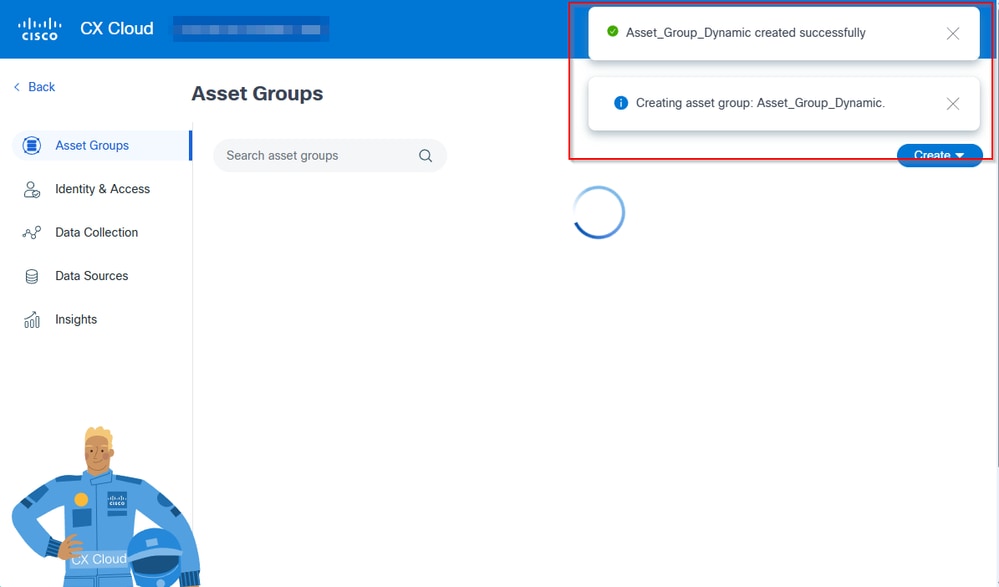 Messages Informing About the Progress of the Group Creation
5.2.5 The group shows up afterwards on top of the others with the text "Processing..."under the amount of assets. It is updated once the processing finishes.
5.2.6 Once processing is finished, the group displays the assets added to it. If there are multiple groups on the portal, consider searching the asset groups to find yours.
 Dynamic Group Visible under Asset Groups View
Edit an Asset Group
To edit an existing Asset Group, these are the steps:
Edit Static Groups
- Log in toCX Cloud Portal with a SUA.
- Open theAdmin Center.
Tip: It is the Gear/Cog icon on top, right corner.
- Click Asset Groups.
- Click the More Options menu (three vertical dots).

Caution: Static Group names cannot be edited
- Click Replace CSV File.
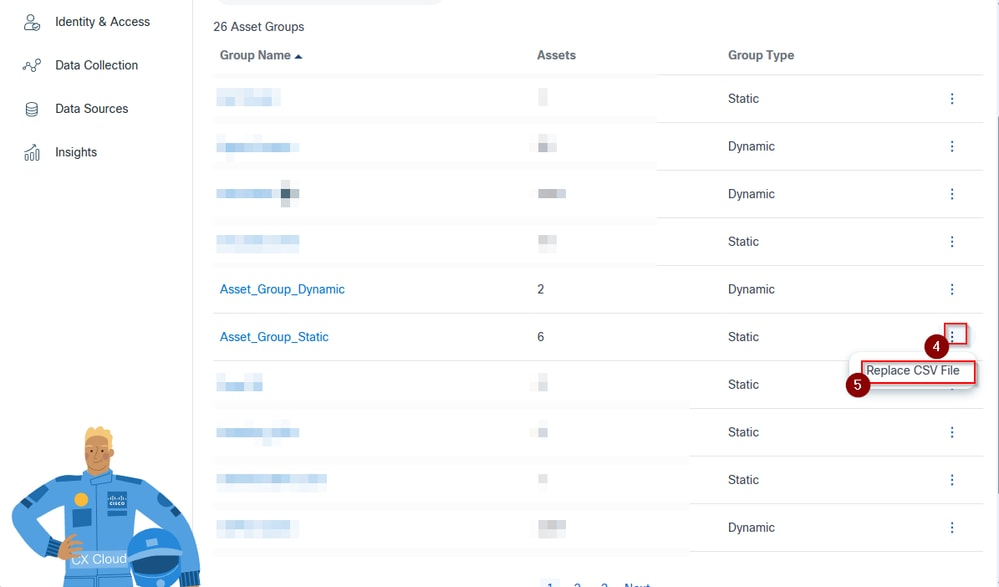 Three Vertical Dots Menu
- Click the Replace button.
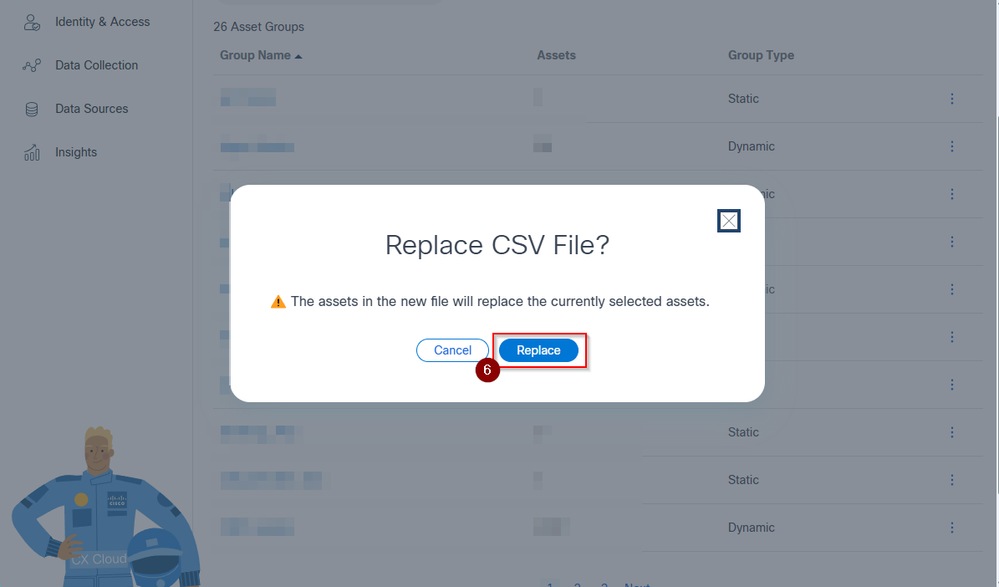 Replace Button
- A similar screen to the one from step 5.1.3 Create Static Group shows up.
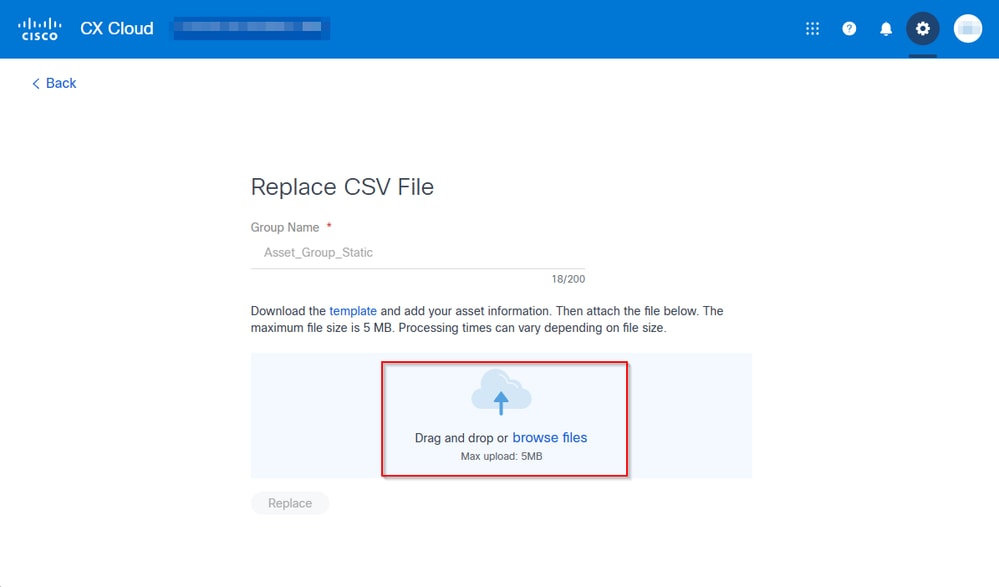 Replace CSV File
- Provide the new CSV file. The portal validates the file format and shows a green arrow and line indicating the completion of the upload. Click the Replace button.
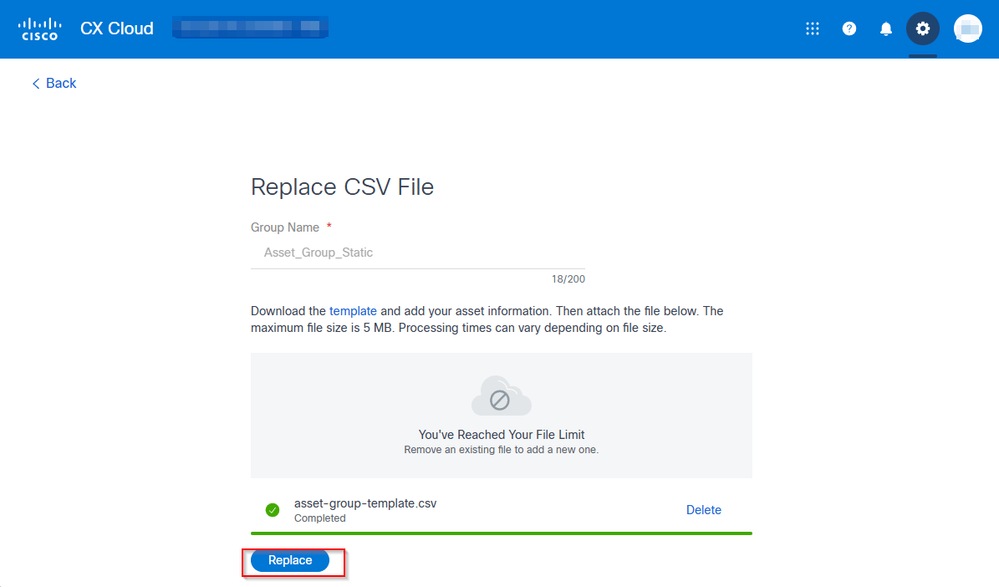 Replace Button
- The portal redirects to the Asset Groups menu and shows messages informing of the progress of the replacement.
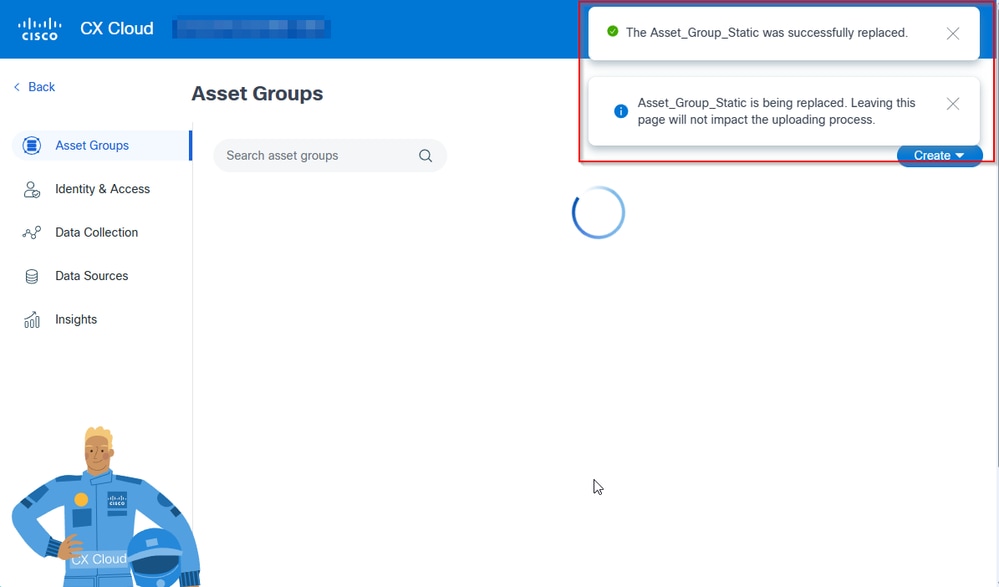 Messages Informing the Progress of the Replacement
- The group shows up afterwardswith the text "Processing..." under the amount of assets. It is updated once the processing finishes.
 Static Asset Group Updated
Edit Dynamic Groups
- Log in toCX Cloud Portal with a SUA.
- Open theAdmin Center.
Tip: It is the Gear/Cog icon on top, right corner.
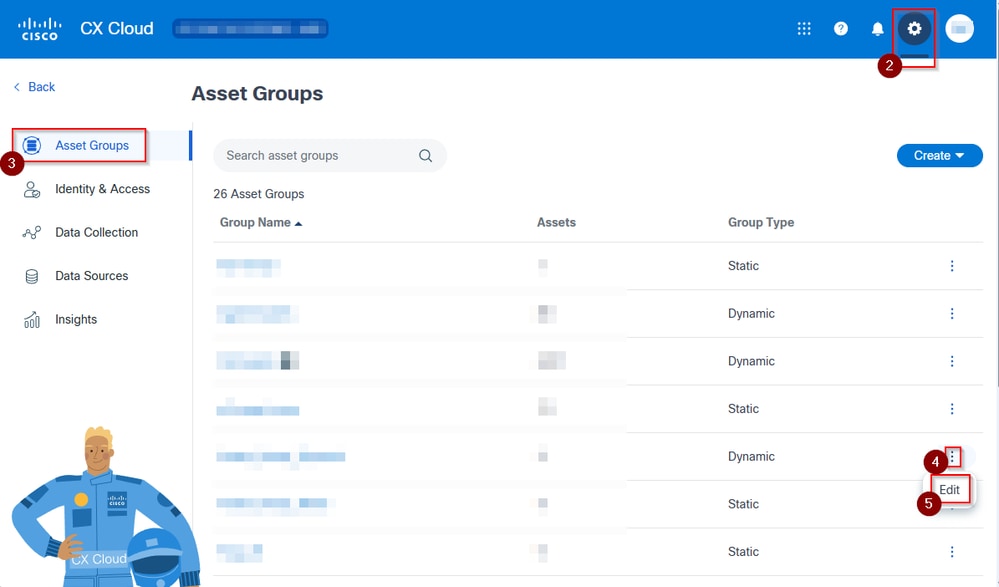
- Click Asset Groups.
- Click the More Options menu (three vertical dots).
- Click the Edit button.
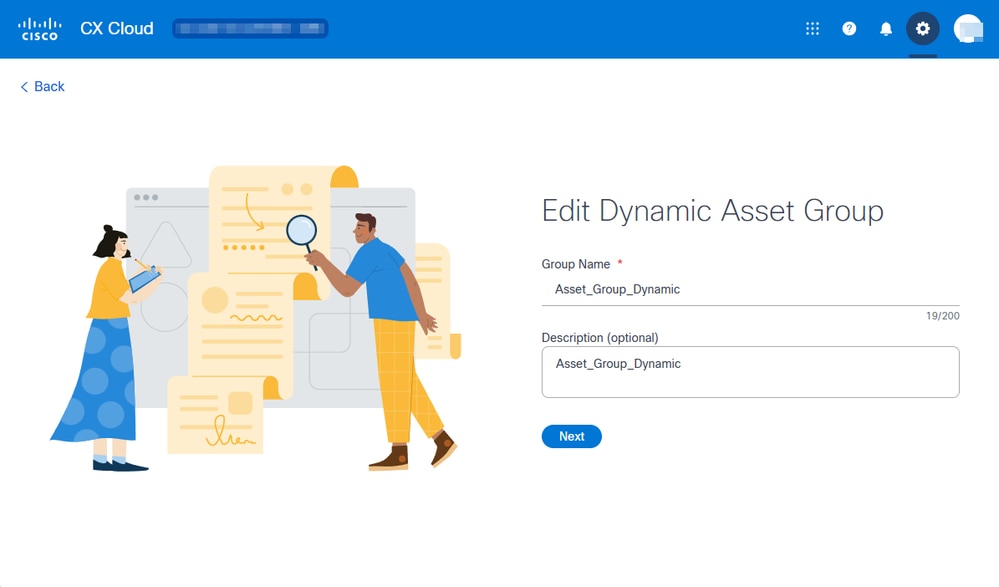
 Edit Dynamic Asset Group
- You are able to edit the Group Name, Description, and all other settings on the group.
 Editing a Dynamic Group
- Read and comply with the instructions on screen. Steps 5.2.2 to 5.2.6 from the Create Dynamic Groups apply afterwards.
Delete an Asset Group
To delete an existing Asset Group, these are the steps:
- Log in toCX Cloud Portal with a SUA.
- Open theAdmin Center.
Tip: It is the Gear/Cog icon on top, right corner.
- Click Asset Groups.
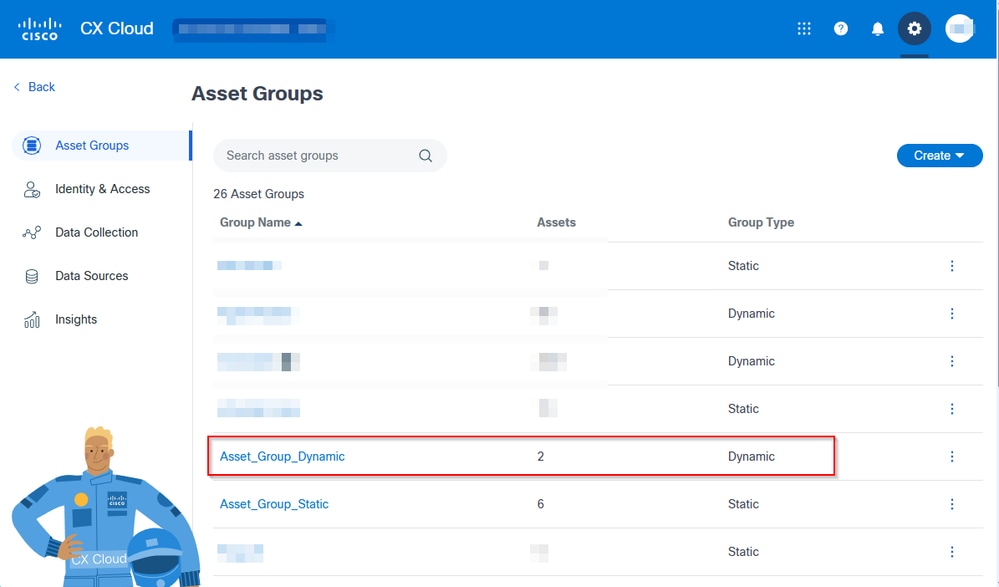
- Click the Group Name you want to delete.
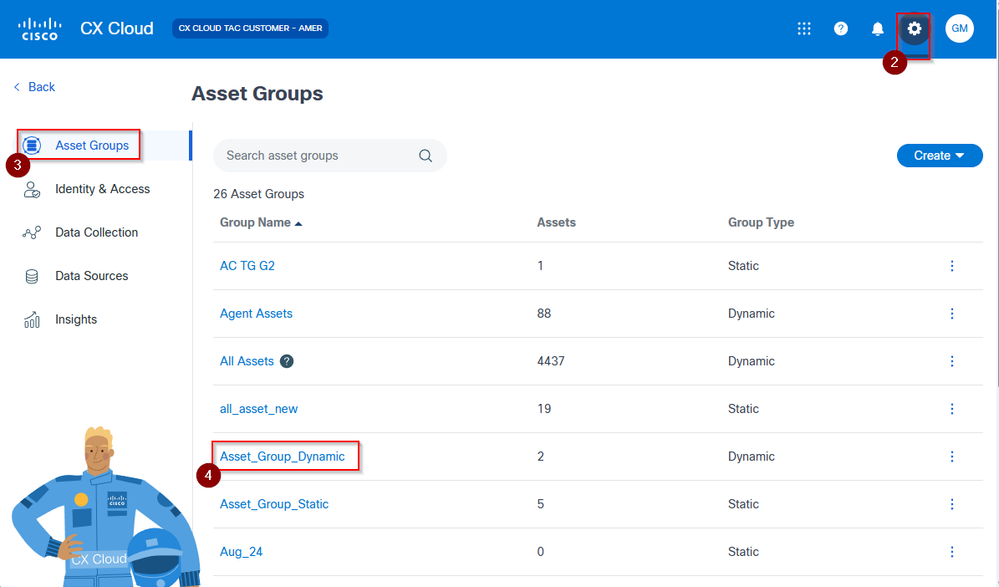 Asset Groups View to Delete a Group
- Click the Delete button.
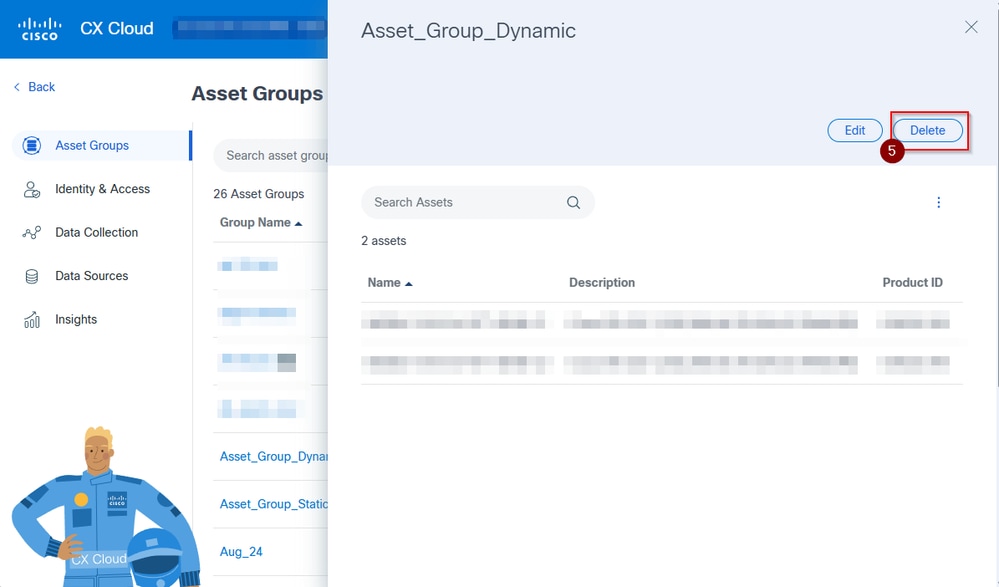 Delete Button
- A notice pops up, summarizing the amount of devices the group has, and access policies the group deletion impacts. Click the Delete button to confirm.
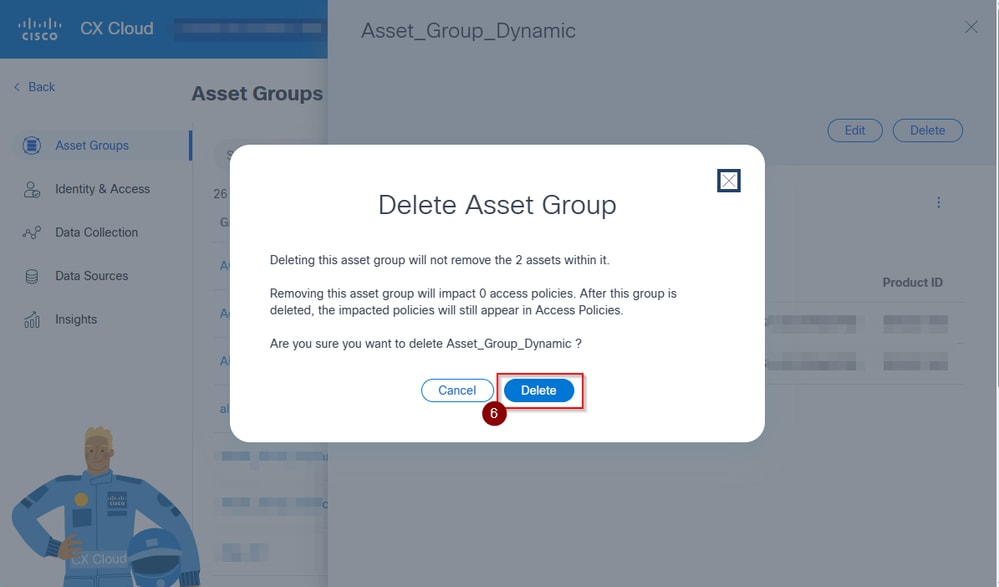 Delete Confirmation
- A message pops up showing the name of the group being deleted.
 Message Showing the Deletion Progress
- The portal redirects to the Asset Groups page, the group is not be visible.
Verify
To verify the configuration and assignment of an Asset Group:
- Log in toCX Cloud Portal with a SUA. Navigate to Admin Center > Asset Groups > Click the Group Name to verify.
Troubleshoot
These are the steps to troubleshoot common issues with Asset Groups:
Asset Group Not Displayed
- Ensure that the Asset Group column is enabled via More Options > Hide / Show Columns > Asset Group.
Devices Not Appearing in Asset Group
- Verify that devices were selected and assigned correctly during Asset Group creation or editing.
Asset Group Changes Not Saving
- Confirm network connectivity and try saving changes again. If issue persists, contact Cisco support.
Related Information
 Feedback