Introduction
This document describes all the required steps to configure the Partner Admin and Partner User roles as needed.
Prerequisites
Requirements
Cisco recommends you have knowledge of these topics:
Components Used
The information in this document is based on these software and hardware requirements:
The information in this document was created from the devices in a specific lab environment. All of the devices used in this document started with a cleared (default) configuration. If your network is live, ensure that you understand the potential impact of any command.
Configure
Configurations
As a broad summary of what you need to do:
- Create an asset group.
- Create a user group for the Partners.
- Create a rule within Identity & Access.
Note: The least privilege principle is not applied in CX Cloud. Access is cumulative, meaning the highest role granted is the one in effect at any given time.
Create an Asset Group
Note: This section is optional. Please skip if you plan to use the All Assets group.
- Log in to CX Cloud Portal with a SUA.
- Open the Admin Center.

Tip: It is the Gear/Cog icon on top, right corner.
- Click on Asset Groups.
- Click on Create button.
- Select whether you want a Static or a Dynamic group.
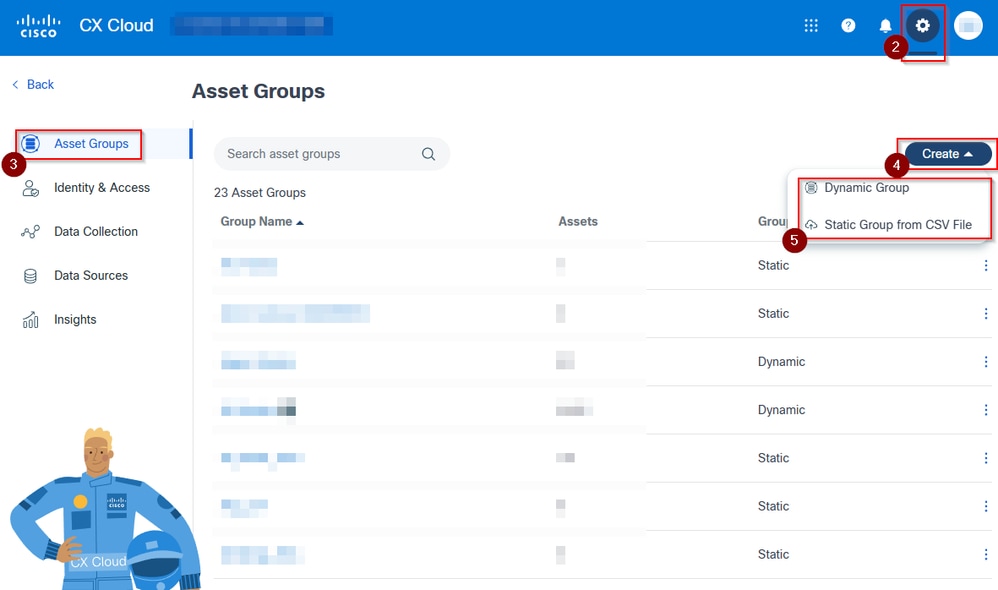 Steps to Create an Asset Group in CXCloud
Static Groups
5.1.1 Static groups require the use of a template, available to download when creating the group by clicking the template text in blue.
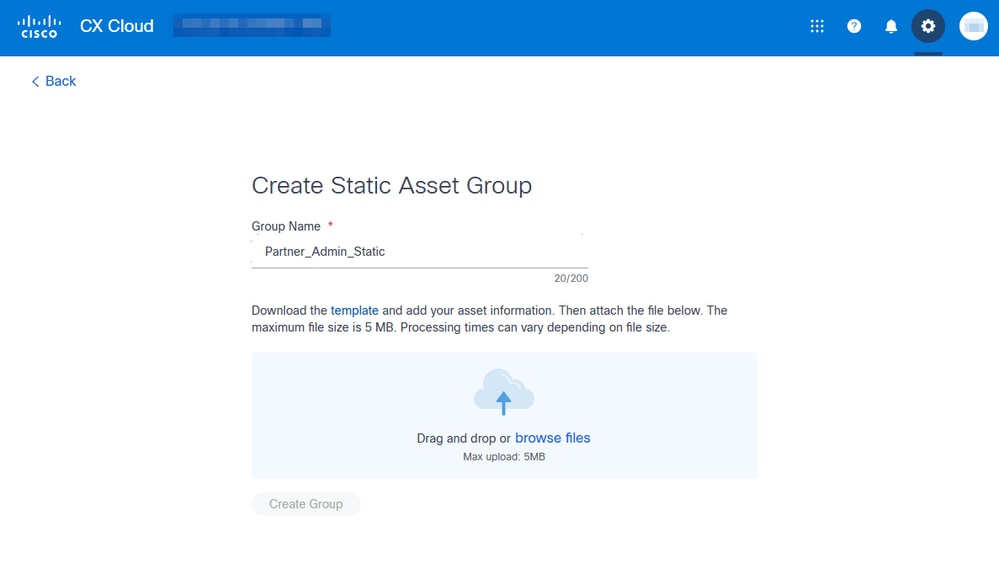 Create Static Asset Group View
5.1.2 The template needs to be populated with Serial Numbers.
Tip: You can edit it on multiple programs. For this example, Notepad was used.
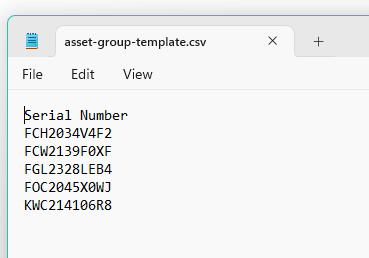 Example of the Template for a Static Asset Group
5.1.3 Upload the file by dragging and dropping it over the cloud icon or select it from your files by clicking the browse files text in blue.
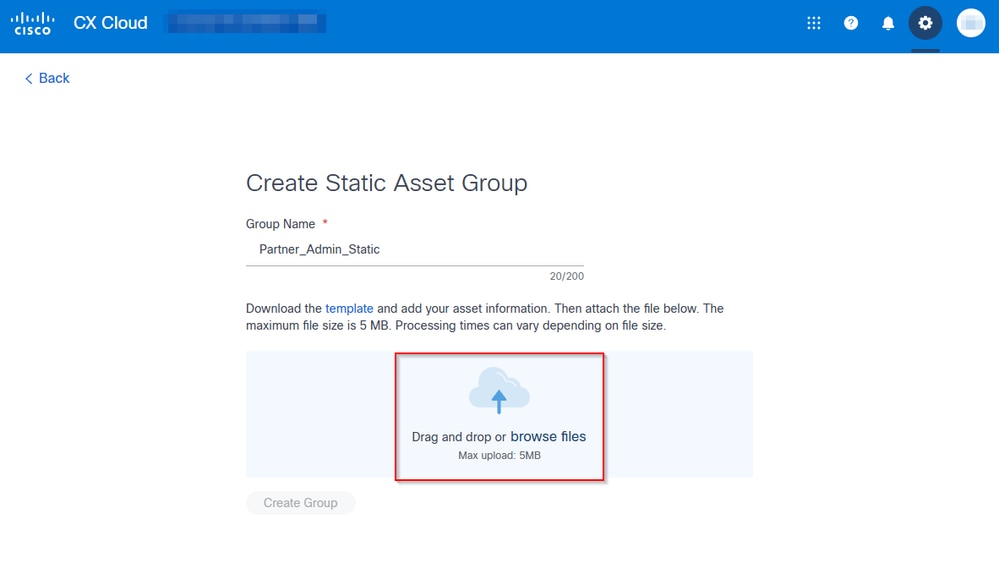 View with Where to Add the Template for a Static Asset Group
5.1.4 The portal validates the file format and shows a green arrow and line indicating the completion of the upload.
Click the Create Group button to proceed.
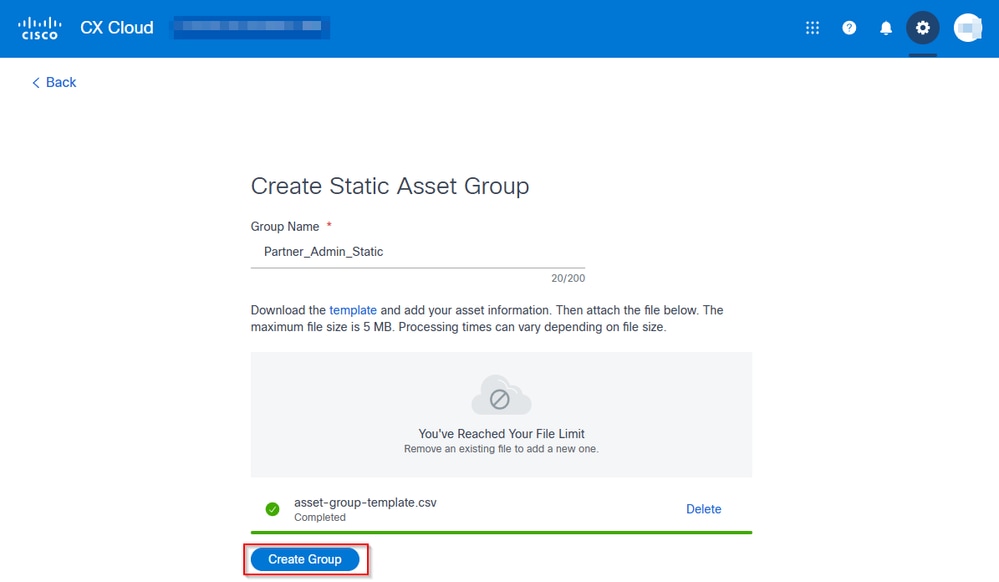 Create Group Button Used for Creating a Static Asset Group
5.1.5 The portal redirects to the Asset Groups menu and shows messages informing of the progress of the creation.
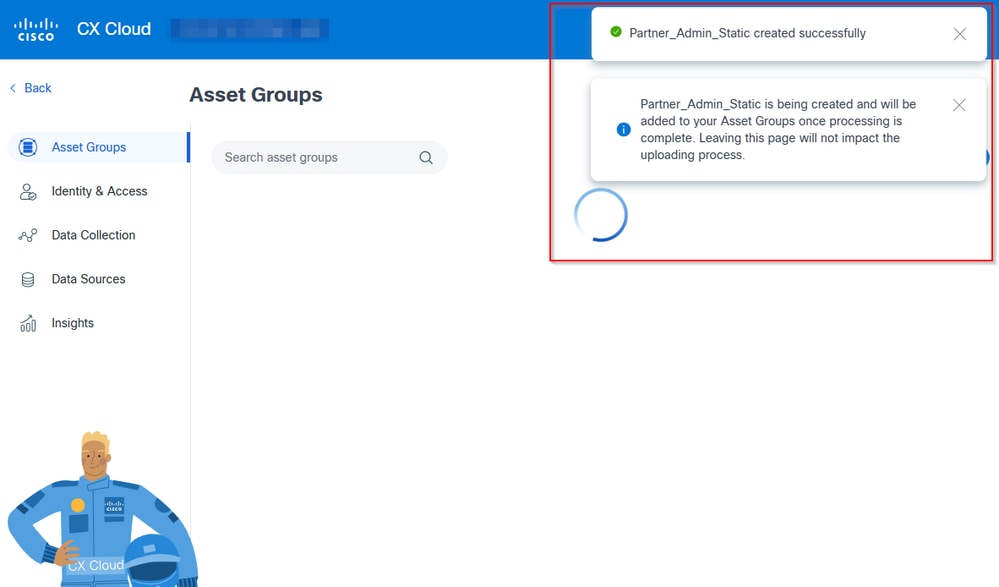 Messages Informing About the Progress of the Group Creation
5.1.6 The group shows up afterwards on top of the others with the text "Processing..."under the amount of assets. It is updated once the processing finishes.
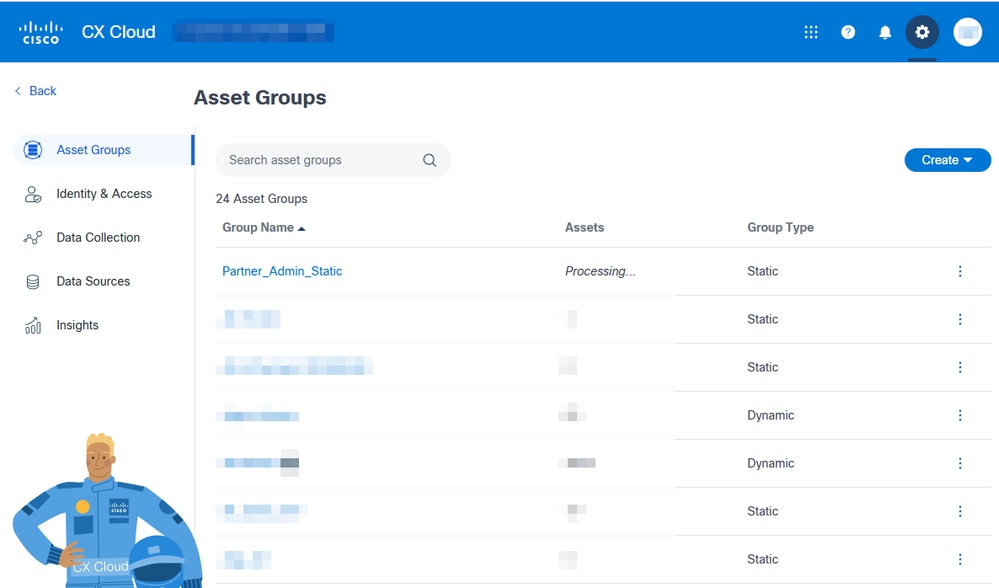 Group Processing
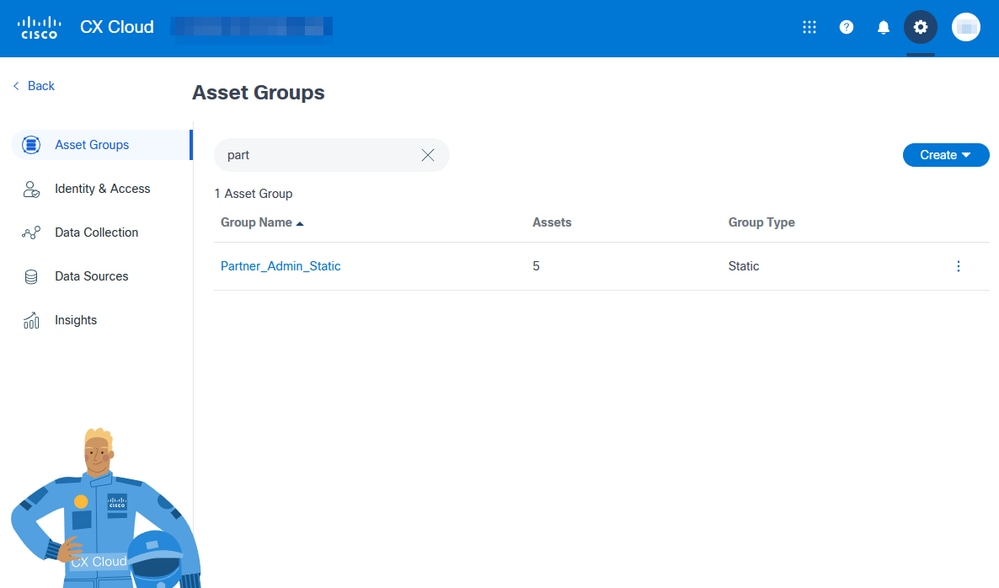
5.1.7 Once processing is finished, the group displays the assets added to it. If there are multiple groups on the portal, consider searching the asset groups to find yours.
Dynamic Groups
5.2.1. Dynamic groups require a Group Name limited to 200 characters. Add a Group Name and click Next.

Note: A description can be added. It is optional and recommended for easier management of the groups later on.
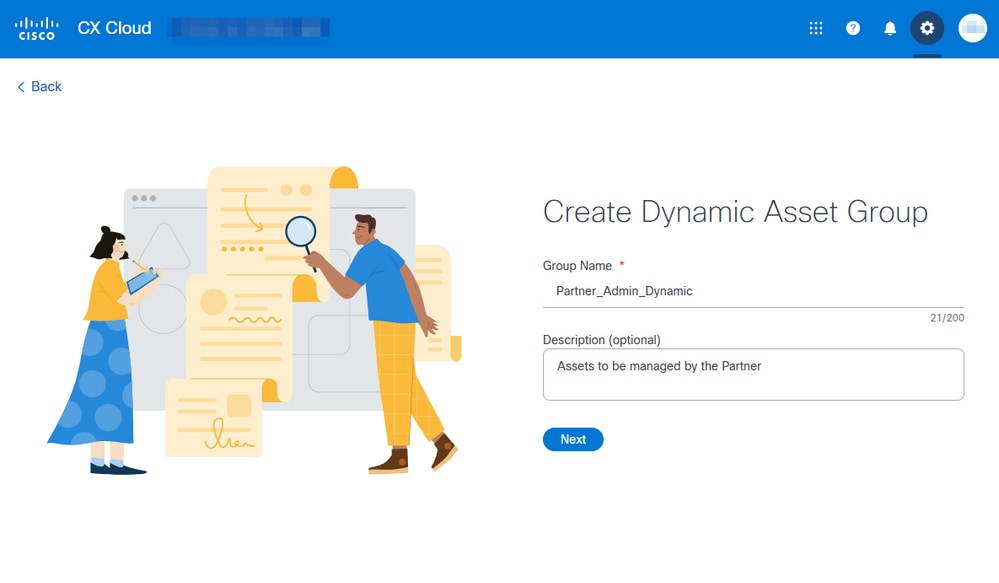 Create Dynamic Asset Group View
5.2.2. Next step involves creating rules with the Where____ is _____ . Fields that can be used to filter are:
- Location
- Product Type
- Product ID
- Product Family
- Contract Number
- Managed By
- Software Type
Each modifies the options available on the is _____ part of the rule.
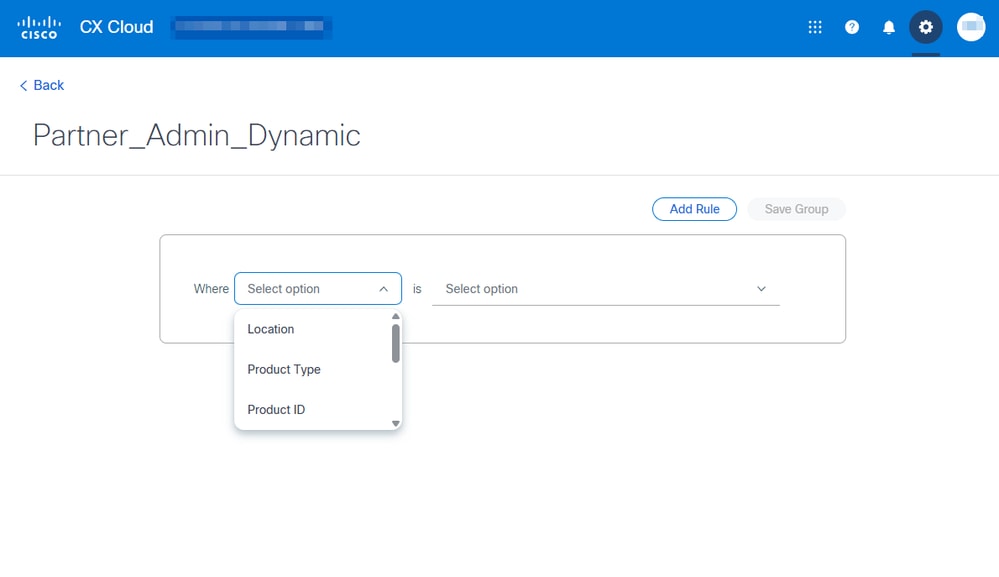 Dynamic Group Rules View
5.2.3 A SUA can add more rules if needed. For further filtering, click the Add Rule button. Once a rule is created the group can be saved by clicking the Save Group button.
Note: The rule in this example includes all product types available. It has all devices selected.
 Rule with All Product Types Selected
5.2.4 The portal redirects to the Asset Groups menu and shows messages informing of the progress of the creation.
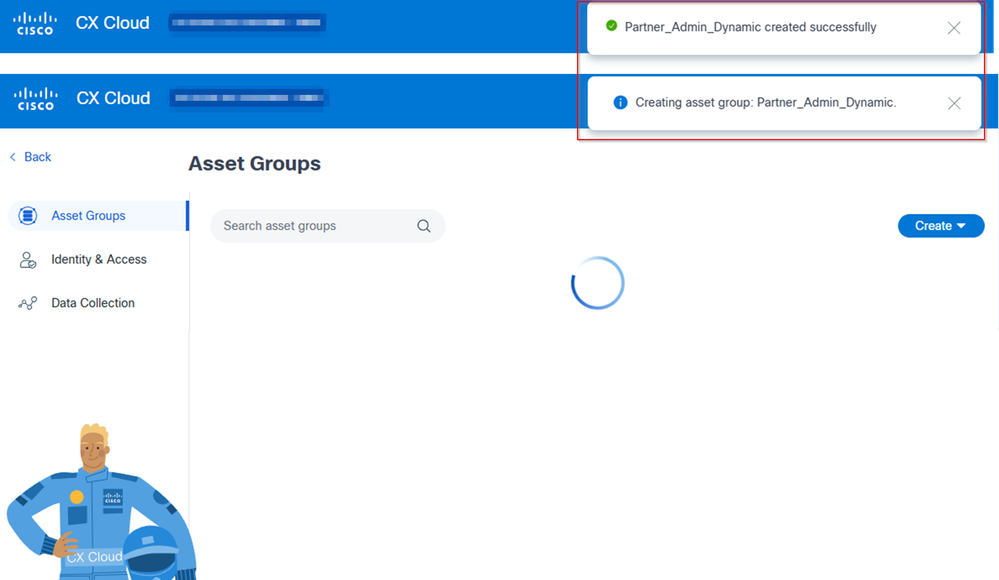 Messages Informing About the Progress of the Group Creation
5.2.5 The group shows up afterwards on top of the others with the text "Processing..." under the amount of assets. It is updated once the processing finishes.
5.2.6 Once processing is finished, the group displays the assets added to it. If there are multiple groups on the portal, consider searching the asset groups to find yours.
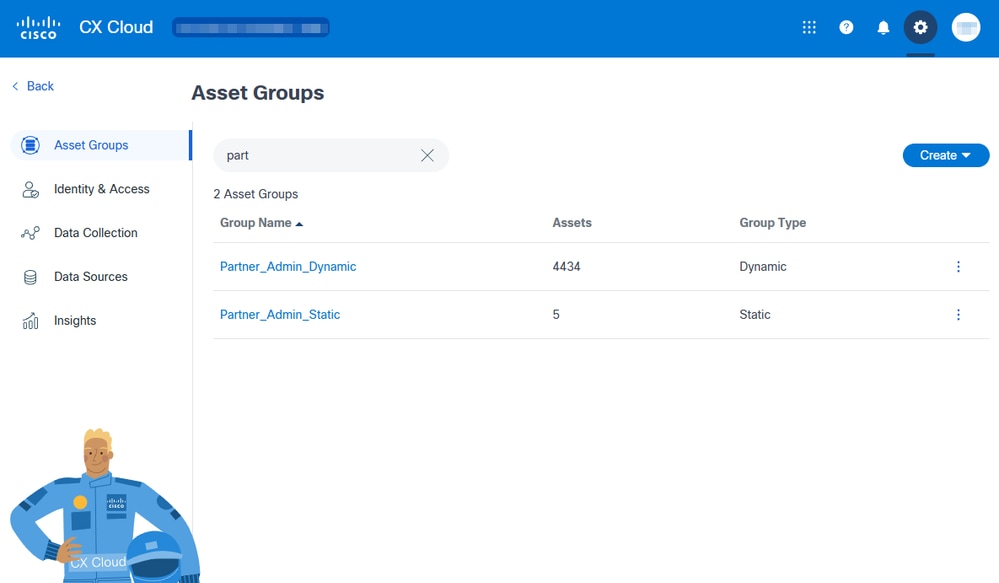 Dynamic Group Visible under Asset Groups View
Create a User Group
- Log in to CX Cloud Portal with a SUA.
- Open the Admin Center.
Tip: It is the Gear/Cog icon on top, right corner.
- Click Identity & Access.
- Click Users tab.
- Click User Groups.
- Click Create User Group button.
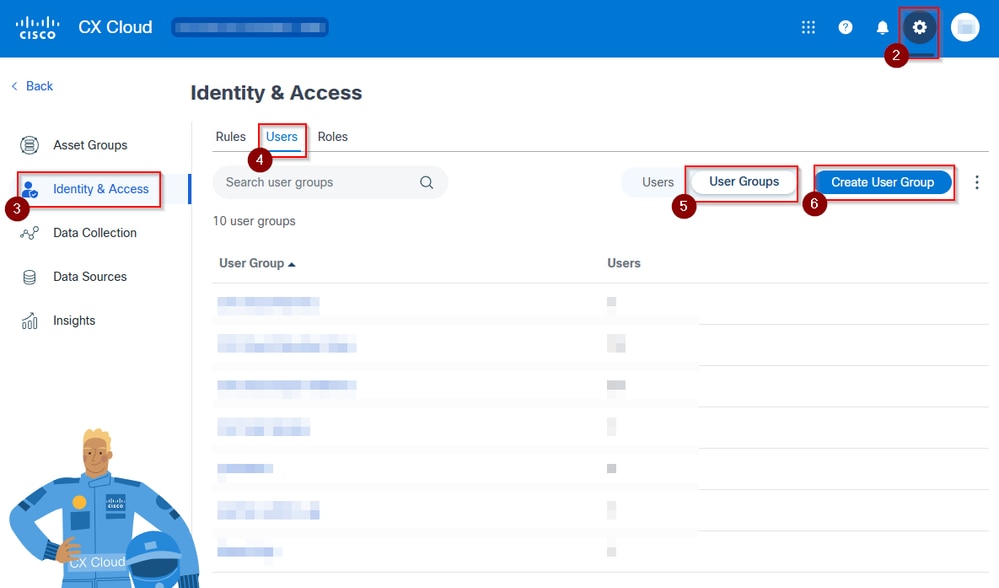 Identity & Access View
- Name your group.
- Select the users by clicking the check-box to the left.
Note: If the Partner is not a user yet, click Add New User button and complete the steps on screen.
- Click the Save button.
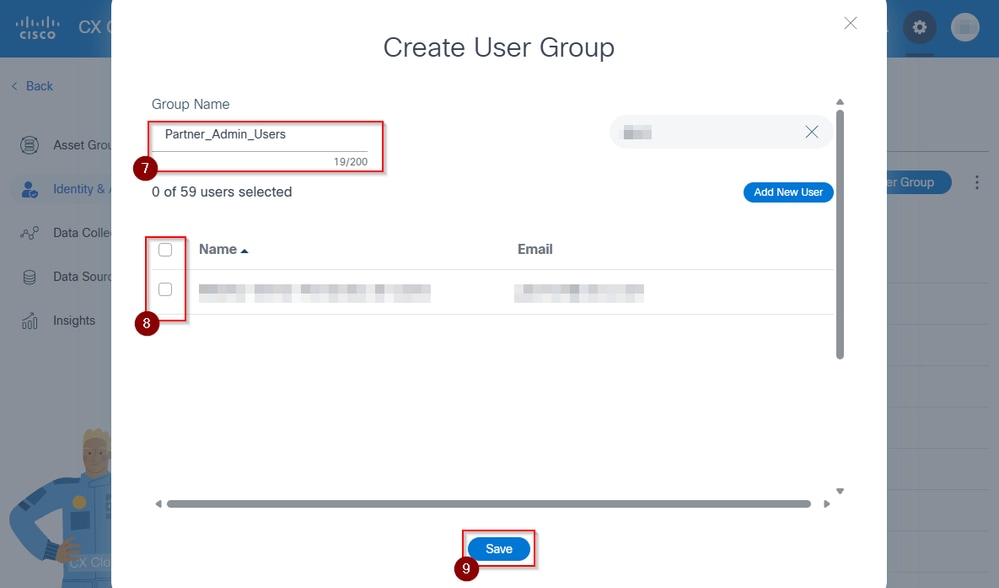 Create User Group View
- A message confirming the group creation is shown, the portal redirects to the Identity & Access view and the User Group is visible.
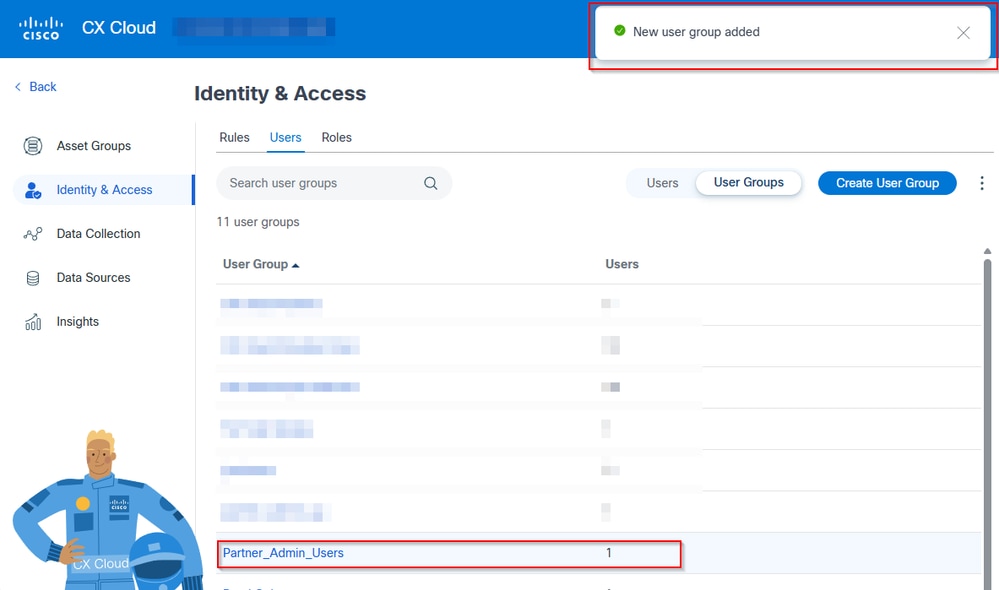 Messages and User Group visible under Identity & Access view
Create a Rule
- Log in to CX Cloud Portal with a SUA.
- Open the Admin Center.
Tip: It is the Gear/Cog icon on top, right corner.
- Click Identity & Access.
- Click Create Rule button.
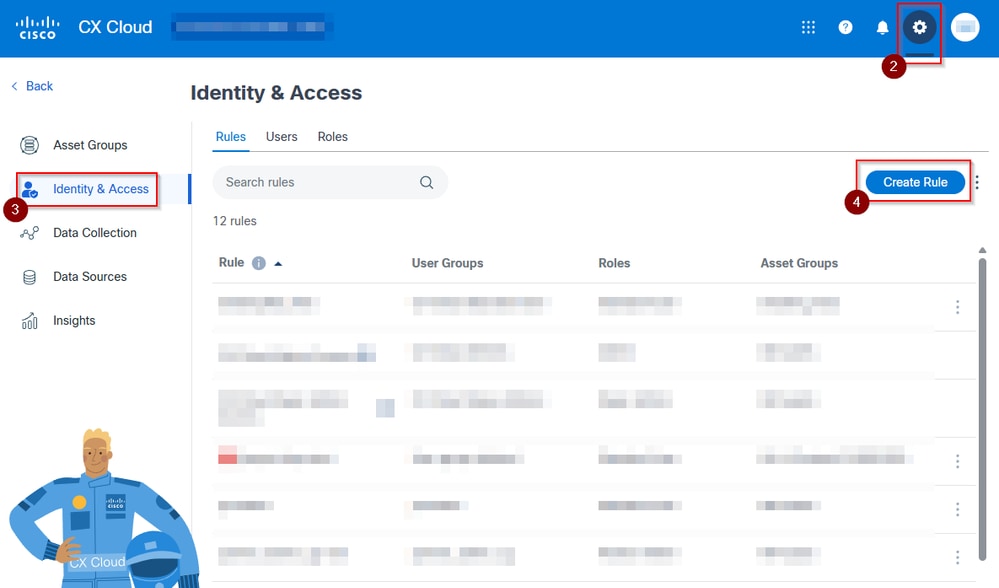 Identity & Access View Showing Rules
- Name your rule.
Tip: It is recommended to be descriptive, as rules can accumulate.
- Select the User Group created previously.
- Select the Role. Partner Admin or Partner User.
- Select the Asset Group created previously.
- Click Create Rulebutton.
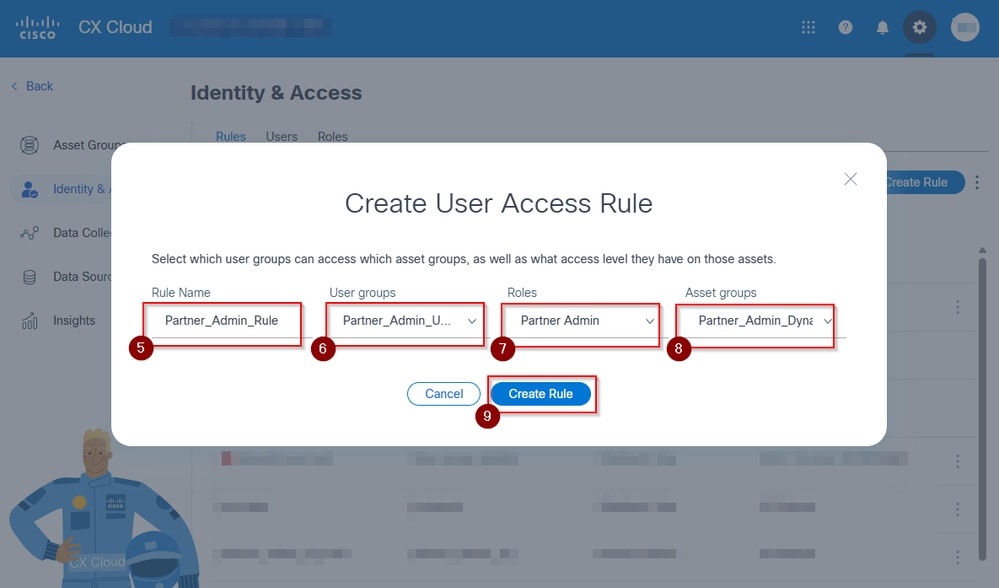 Create User Access Rule View
- The portal redirects to Identity & Access, and shows a message confirming the rule creation and is visible.
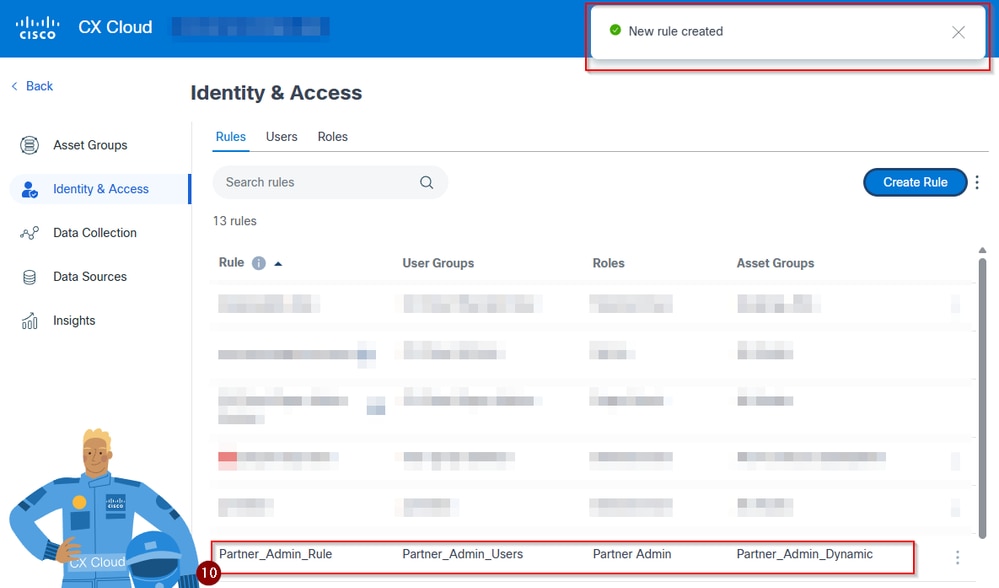 Rule Showing under Identity & Access
Verify
- Log in to CX Cloud Portal with a SUA.
- Open the Admin Center.
Tip: It is the Gear/Cog icon on top, right corner.
- Click Identity & Access.
- Click Users tab.
- Visually confirm the groups assigned to the intended user include the one just created.
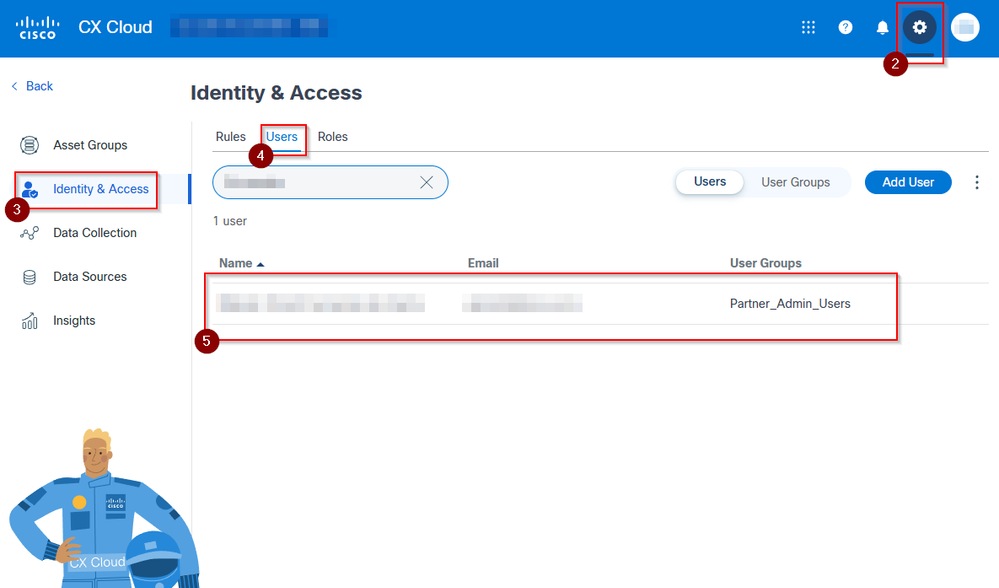 User with Access as Partner Admin
Troubleshoot
If the Partner:
- Is unable to access the portal through CX Cloud Portal due to MFA or other log in error:
Please direct the user to open an inquiry on the Web Help Portal.
- Gets a blank page, or gets the Platform Suite page
Verify the set up and ensure their user is assigned to a User Group with an applying Rule that allows them to get visibility over at least one asset. This can be done at a glance under Admin Center > Identity & Access > Users and clicking the user being troubleshooted.
If assistance is needed, feel free to open a case with TAC for configuration assistance. For reference on how to open the case from CX Cloud here is a video tutorial.
You can click the ? sign and select the CX Cloud Support
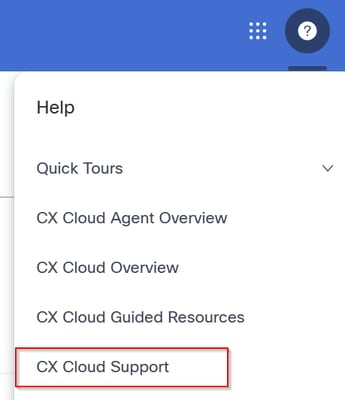 Opening a Support Case for CXCloud
 Feedback