Introduction
This document describes how to add standby node using Application Programming Interface (API) call (Postman) in Application Centric Infrastructure (ACI) 6.x version. Documented as a workaround in below bug.
https://bst.cloudapps.cisco.com/bugsearch/bug/CSCwo01130
Components Used
The information in this document is based on ACI Fabric running software version 6.0(7e).
- ACI APIC cluster running with 3 APIC-M3 nodes and 1 APIC-M3 for standby.
- ACI version: 6.0(7e).
- POSTMAN tool with version 11.32.0.
Legal Disclaimer: The information in this document was created from the devices in a specific lab environment. All of the devices used in this document started with a cleared (default) configuration. If your network is live, ensure that you understand the potential impact of any command.
Background Information for hardware used
- It is supported by a single and Multipod setup.
- Standby APIC can be connected to any leaf in any POD in the Fabric.
- No information is replicated to standby controllers, including admin credentials.
- Admin login is not enabled on standby APIC.
- In order to troubleshoot cold Standby, you must log in into the standby using SSH as rescue-user.
- Standby APIC password must be same as used by fabric.
Prerequisites
The existing ACI Application Policy Infrastructure Controller(APIC) cluster must be fully-fit.
Cisco Integrated Management Controller(CIMC) IP of standby APIC must be reachable.
Any API tool must be installed.
APIC GUI & CLI
Validate that the existing cluster is in fully fit state.
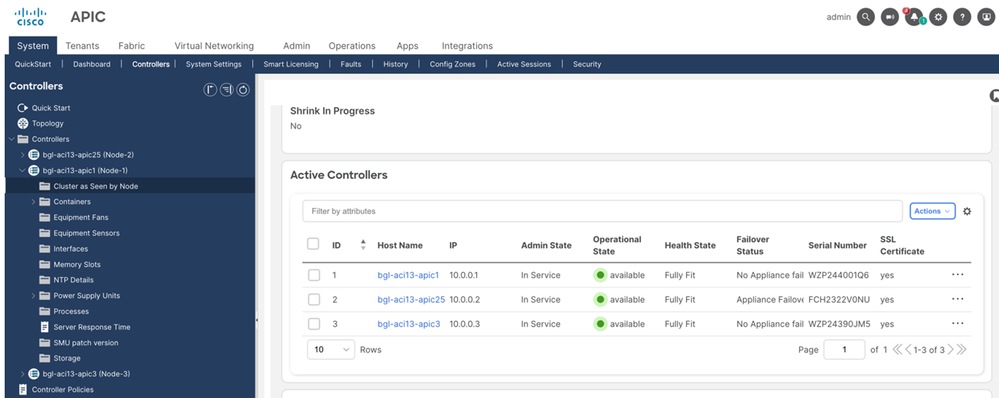
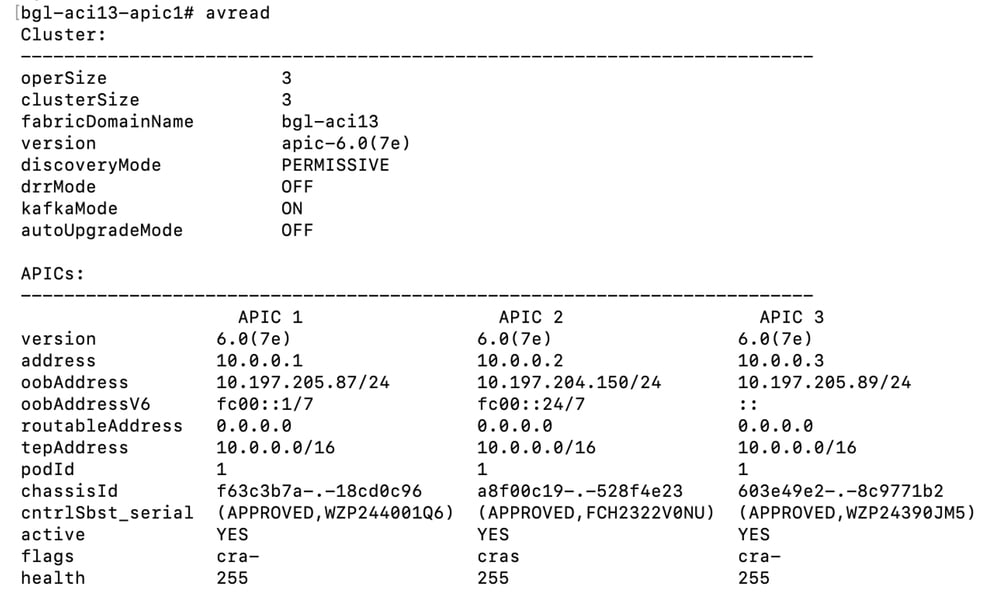
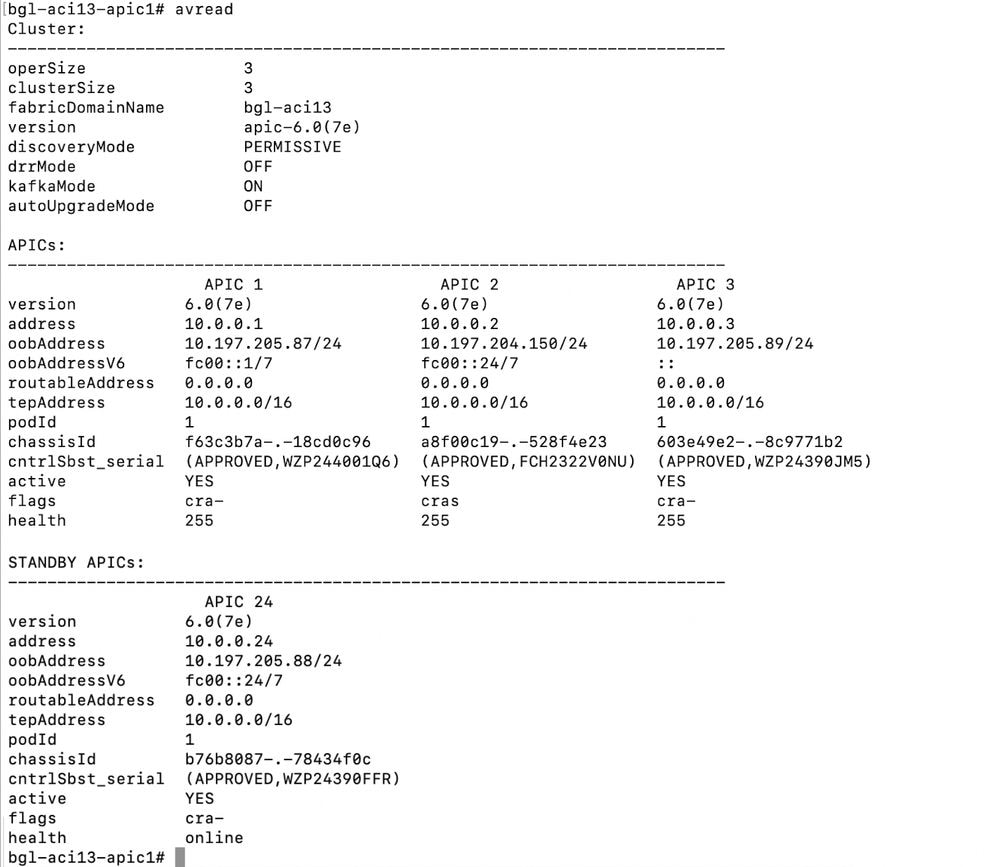
Validate the avread output, health value must be 255 for all APIC.
Procedure to add a standby APIC by API call using POSTMAN
Step 1. Open the Postman tool and make a post request to log in into the APIC-1. After successful execution of POST API call gives 200 OK in response.
URL-   https://<10.197.205.87>/api/aaaLogin.json

Body- { "aaaUser" : { "attributes": {"name":"admin","pwd":"<password>" } } }
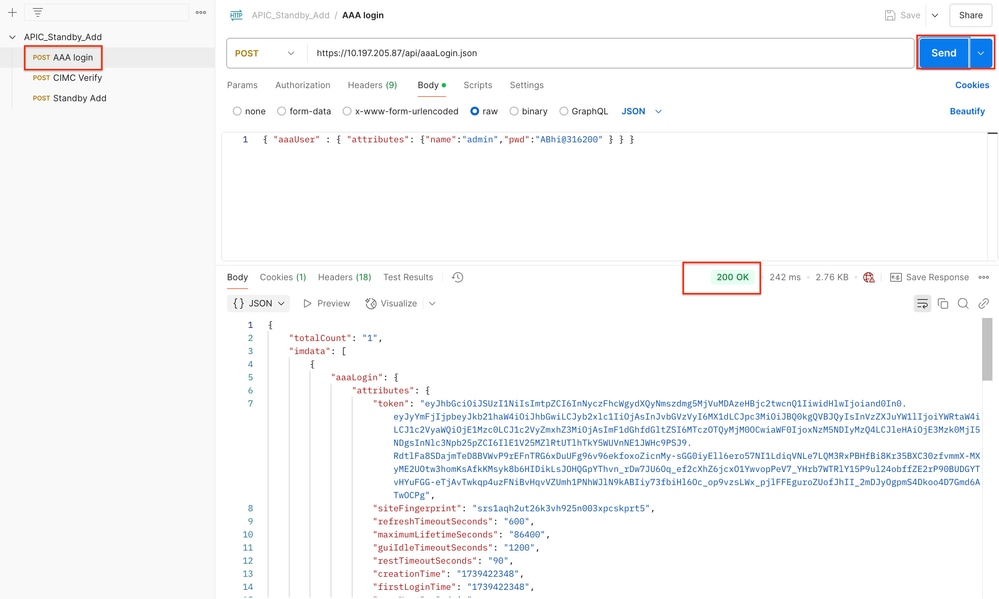
Post successful log in via the API, an AAA token is issued, which is essential for subsequent API requests to exercise user rights.
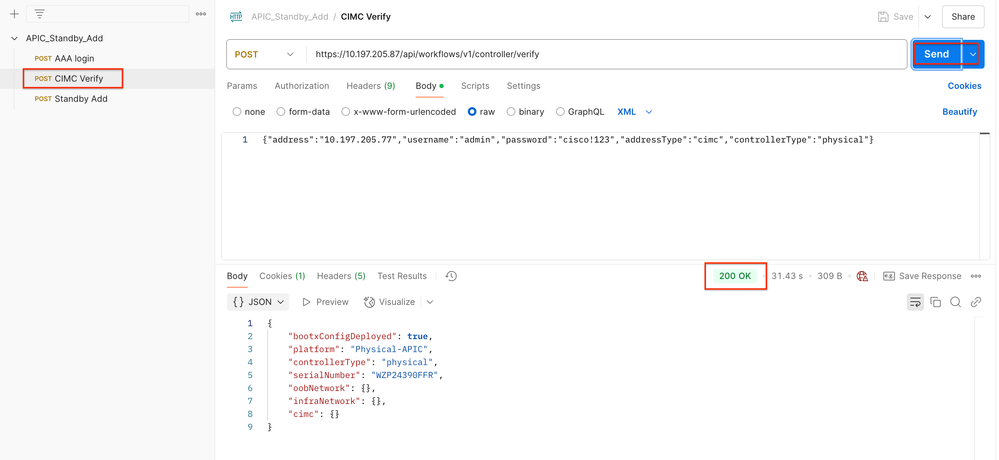
Step 2. Make a post request for CIMC validation. After successful execution of POST API call gives 200 OK in response.
URL- https://<10.197.205.87>/api/workflows/v1/controller/verify

Body- {"address":"<CIMC_IP>","username":"admin","password":"<cimc_password>","addressType":"cimc","controllerType":"physical"}
Step 3. Make a post request to add a Standby Node. After successful execution of POST API call gives 200 OK in response.
URL- https://<10.197.205.87>/api/workflows/v1/controller/add

Body- {"adminPassword":"<standby_APIC_Pass>","force":false,"nodes":[{"nodeName":"<apic_node_name>","controllerType":"physical","nodeId":<24>,"serialNumber":"<standby_serialnumber>","podId":<Pod_id>,"standby":true,"cimc":{"address4":"<CIMC_IP>","username":"admin","password":"<cimc_pass>"},"oobNetwork":{"address4":"<apic_oob_ip/24>","gateway4":"<oob_Gw>","enableIPv4":true}}]}

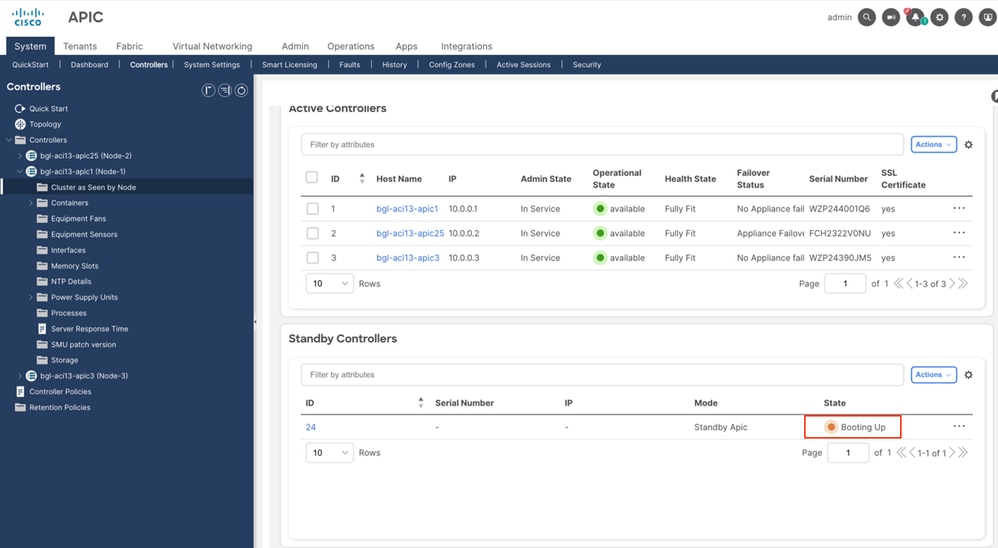
Step 4. Open the APIC-1 GUI and verify the Standby controller status. Standby APIC status shows as Booting Up.
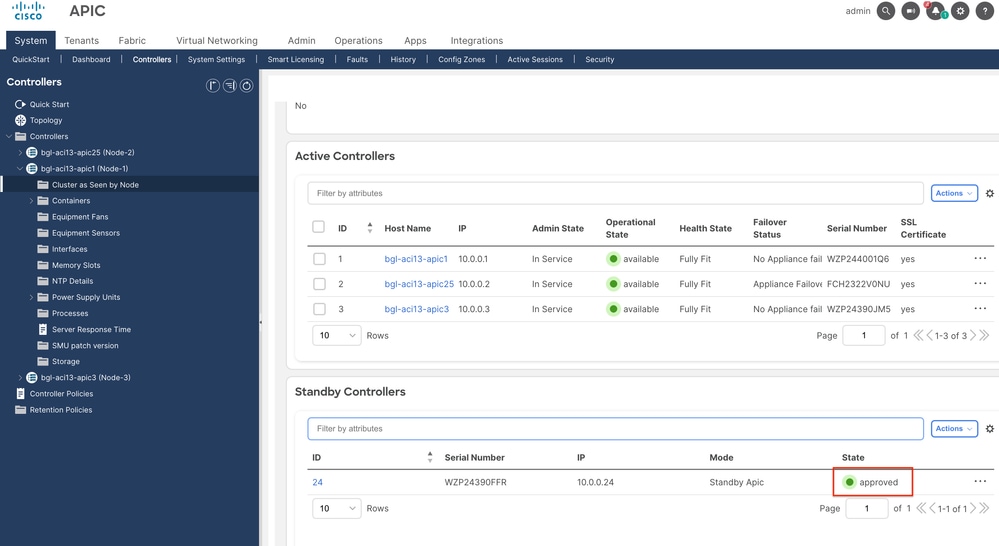
Step 5. Standby APIC added successfully with Approved state.
Verify avread output in APIC cli.
Abbreviation
ACI: Application Centric Infrastructure
APIC: Application Centric Infrastructure Controller
CIMC: Cisco Integrated Management Controller
GUI: Graphical User Interface
 Feedback