-
Cisco MeetingPlace for Outlook Release 4.3.0 System Manager's Guide
-
Preface
-
Concepts and Functions
-
Installing Cisco MeetingPlace for Outlook
-
Configuring and Managing Cisco MeetingPlace for Outlook
-
Customizing Meeting Notifications
-
Using Cisco MeetingPlace for Outlook
-
Troubleshooting
-
Notification Items
-
Customizing the Cisco MeetingPlace for Outlook Scheduling Form
-
Upgrading Cisco MeetingPlace for Outlook
-
 Feedback
Table Of Contents
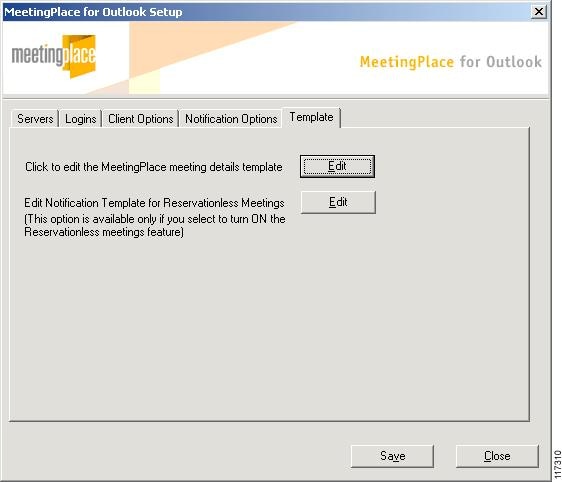
Customizing Meeting Notifications
About Meeting Notification Templates
For Meetings Scheduled Using Microsoft Outlook
For Meetings Scheduled Using MeetingPlace Web or MeetingTime
About Customizing Meeting Notifications
Customizing the MeetingPlace for Outlook Template Files
Customizing the MPmessage.rtf File
Customizing the mpMsgRsvl.rtf File
Configuring the MeetingPlace Web Host Name Web Link
Customizing Template Files from Other Scheduling Clients
Configuring the MeetingPlace Web Host Name Web Link
Adding Instructions and Alternate MeetingPlace Phone Numbers to Notifications
Displaying Alternate Phone Numbers
Adding and Deleting the Click-to-Attend Link
Customizing Meeting Notifications
This chapter discusses required and optional customizations for meeting notifications. Topics include:
•
About Meeting Notification Templates
•
About Meeting Notification Templates
Cisco MeetingPlace for Outlook comes with five templates that are used to generate the meeting notifications sent to users. Each template contains tags and text that represent the information that appears in a notification. When a notification is generated, MeetingPlace for Outlook or the MeetingPlace Audio Server replaces tags with appropriate information from their databases.
For Meetings Scheduled Using Microsoft Outlook
Meetings scheduled from Microsoft Outlook use two notification templates:
For Meetings Scheduled Using MeetingPlace Web or MeetingTime
Meetings scheduled using MeetingPlace Web or MeetingTime use three notification templates:
About Customizing Meeting Notifications
You must customize the MPmessage.rtf, mpMsgRsvl.rtf, notifyschedule.tpl, and notifyreschedule.tpl notification template files with the link to your MeetingPlace Web host name, and, if you have a DMZ configuration, to the external MeetingPlace Web host name. See the relevant sections in this chapter for instructions.
You can also customize the meeting notifications that are sent out when users schedule a meeting. Possible customizations include:
•
•
•
•
The meeting notification templates are editable Rich Text Formatting (RTF) files that you manually customize by changing tags and text. RTF support allows you to use text formatting like bold, italics, and color in your meeting notifications.
Customizing the MeetingPlace for Outlook Template Files
Customizing the MPmessage.rtf and mpMsgRsvl.rtf files adds or removes information from meeting invitations originating from Microsoft Outlook.
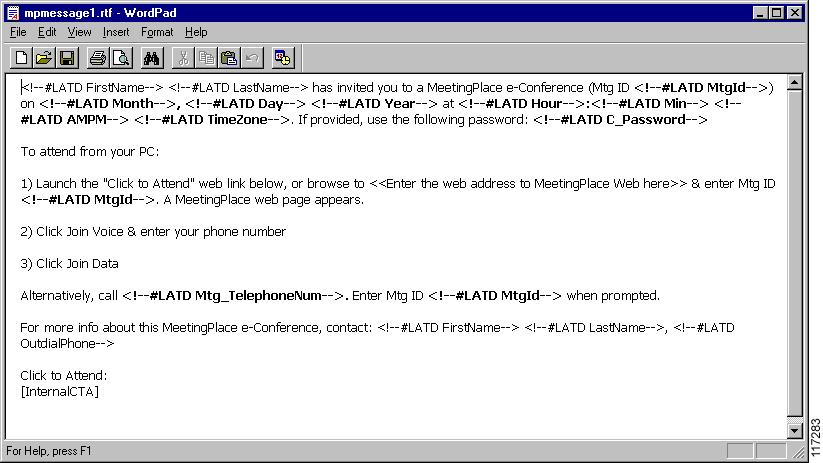
Customizing the MPmessage.rtf File
To customize the MPmessage.rtf file:
Step 1
Step 2
Step 3
Step 4
Step 5
See Appendix A, "Notification Items" for a list of available tags.
Step 6
Step 7
Step 8
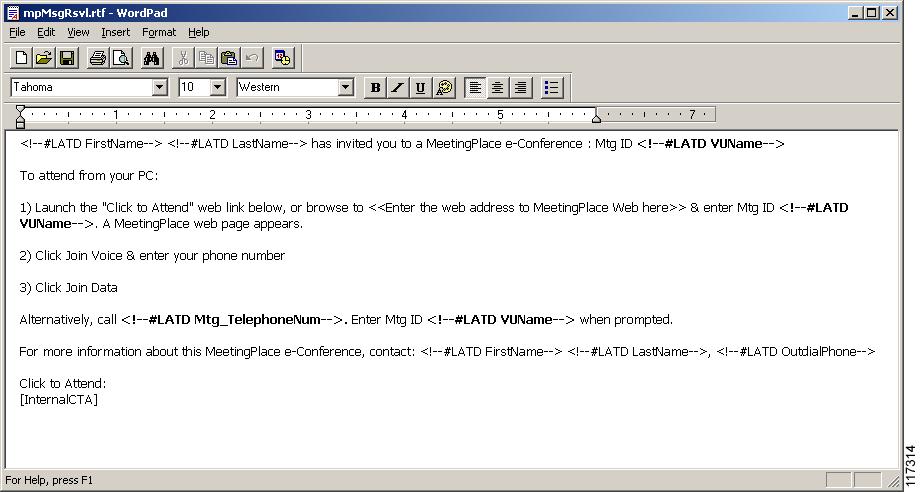
Customizing the mpMsgRsvl.rtf File
It is unlikely that you will need to modify the reservationless meeting notification template. This section is provided for informational purposes only. Your configuration may not include support for reservationless meetings.
To customize the mpMsgRsvl.rtf file:
Step 1
Step 2
Step 3
Step 4
Step 5
•
•
Step 6
Step 7
Configuring the MeetingPlace Web Host Name Web Link
You must configure the MeetingPlace Web host name web link.
To configure the MeetingPlace Web host name web link:
Step 1
Step 2
Step 3
Replace <<Enter the web address to MeetingPlace Web here>> with the host name of your MeetingPlace Web Server. For example,
http://companyxhostname, wherecompanyxhostnameis the host name of your MeetingPlace Web Server.Step 4
Step 5
Step 6
Customizing Template Files from Other Scheduling Clients
Notifications generated as a result of meetings scheduled using MeetingPlace Web or MeetingTime use the following three template files. To access these files, go to <drive>: \Latitude\mpweb\shared components\MeetingPlace Notification Gateway:
•
•
•
MeetingPlace for Outlook allows your users to receive these notifications in RTF format. To ensure the receipt of RTF notifications:
•
•
Before customizing any of these template files, we recommend that you save a copy of them to the <drive>: \Latitude\mpweb\shared components\MeetingPlace Notification Gateway directory.
When organizing your notification information, place more important information at the top of the template. Any item you add will appear in the same location in the meeting notification.
Customizing Template Files
To customize the template files:
Step 1
Step 2
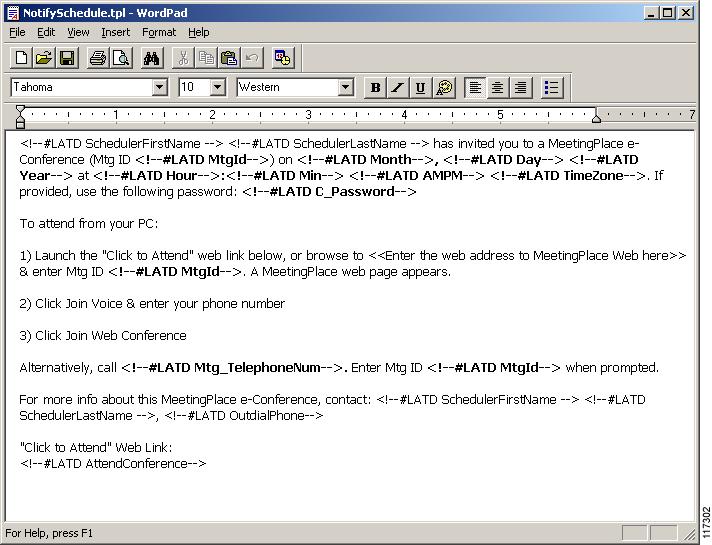
Step 3
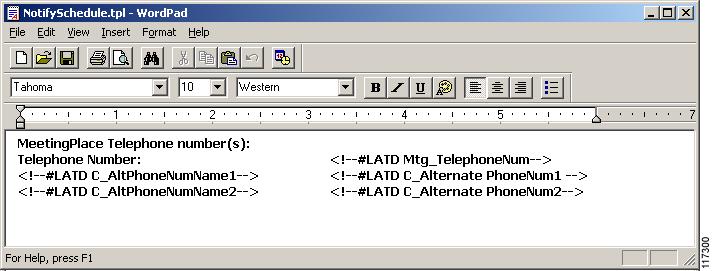
Figure 4-1 NotifySchedule.tpl in WordPad
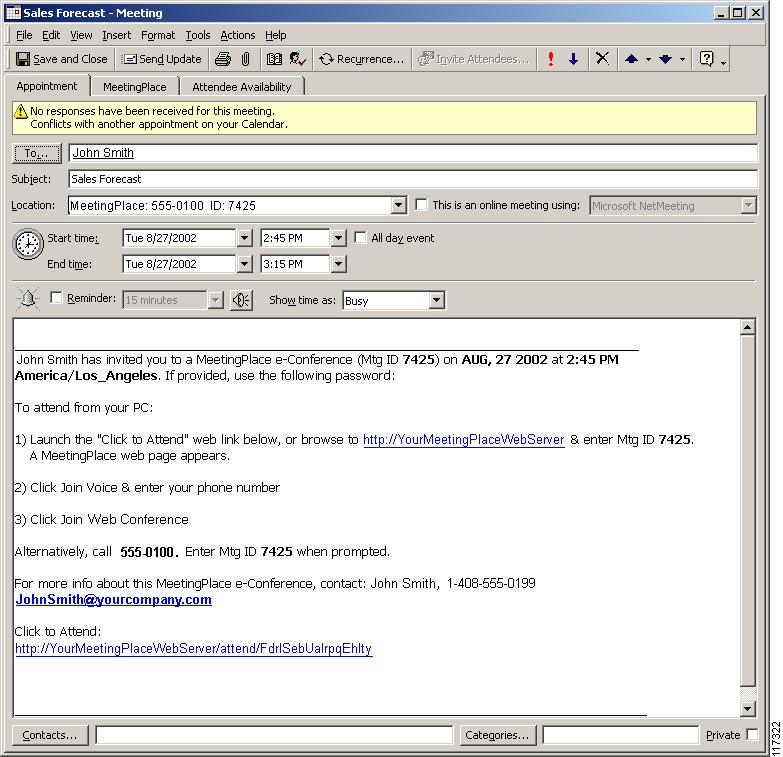
Figure 4-2 Generated NotifySchedule.tpl Notification
Configuring the MeetingPlace Web Host Name Web Link
To configure the MeetingPlace Web host name web link:
Step 1
Step 2
Replace <<Enter the web address to MeetingPlace Web here>> with the hostname of your MeetingPlace Web Server. For example,
http://companyxhostname, wherecompanyxhostnameis the host name of your MeetingPlace Web Server.Step 3
Adding Instructions and Alternate MeetingPlace Phone Numbers to Notifications
To help your users attend meetings, consider adding the following instructions and information in your notifications:
•
•
•
•
•
To include any of this information, see the following table for a list of tags and add the appropriate tags to the NotifySchedule.tpl and NotifyReschedule.tpl template files. When a notification is generated, the tags are replaced with appropriate information from the MeetingPlace database.
In addition, use MeetingTime to enter alternate MeetingPlace phone numbers and your customized instructions and into the MeetingPlace database.
Displaying Alternate Phone Numbers
To display alternate phone numbers for your MeetingPlace Audio Server:
Step 1
–
–
Step 2
Step 3
Step 4
Step 5
Step 6
Toll Free Number or Internal Extension Number.If your MeetingPlace Audio Server has a second or third alternate number, repeat the steps above using the 2nd and 3rd Alternate Ph Number parameters. When finished, click Save Changes.
Including Instructions
To include instructions in your notifications:
Step 1
Step 2
Step 3
Step 4
Step 5
To attend this meeting, call[insert MeetingPlace phone number]at the time of the meeting and follow the prompts. Refer to the information contained in this notification for meeting details.Step 6
Step 7
MeetingNotes is a collection of meeting materials, such as recordings that you can listen to over the phone and presentations that you can request to have sent to you via e-mail.
To access MeetingNotes, call MeetingPlace at [insert MeetingPlace phone number], listen to the prompts, press 3, and then enter the month, date, and meeting ID for the meeting you want to access.Step 8
Adding and Deleting the Click-to-Attend Link
The MPmessage.rtf, mpMsgRsvl.rtf, notifyschedule.tpl and notifyreschedule.tpl template files must contain the attend tag. By default, these template files already contain this tag.
To add the click-to-attend link to your meeting notifications:
Step 1
Step 2
Step 3
Step 4
To delete the click-to-attend link from your meeting notifications:
Step 1
•
•
Step 2
Step 3
Step 4