Contents
- Upgrading the Firmware on Cisco UCS E-Series Servers
- Basic Workflow for Using the HUU
- Upgrading the Firmware Using the HUU
Upgrading the Firmware on Cisco UCS E-Series Servers
This chapter includes the following topics:
Basic Workflow for Using the HUU
Download the HUU ISO image from Cisco.com.
Use the KVM console or the CIMC CLI to map the HUU ISO image.
Set the boot order to make the virtual CD/DVD drive as the boot device.
From the HUU GUI, select all or specific firmware components to update.
After the firmware updates, click Exit to reboot the HUU.
Unmap the HUU ISO image.
Reboot the server.
Upgrading the Firmware Using the HUU
| Step 1 | Navigate to http://www.cisco.com/. | ||
| Step 2 | If you are not already logged in, click Log In at the top-right edge of the page and log in using your Cisco.com credentials. | ||
| Step 3 | In the menu bar at the top, click Support. A roll-down menu appears. | ||
| Step 4 | From the Downloads (center) pane, click All Downloads (located at the bottom right corner). The Download Software page appears. | ||
| Step 5 | From the left pane, click Products. | ||
| Step 6 | From the center pane, click Servers—Unified Computing. | ||
| Step 7 | From the right pane, click Cisco UCS E-Series Software. | ||
| Step 8 | From the right pane, click the name of the server model for which you want to download the software. The Download Software page appears. | ||
| Step 9 | Click Unified Computing System (UCSE) Server Firmware. | ||
| Step 10 | Click the Download button associated with the Cisco UCS Host Upgrade Utility ISO image to download the image onto your PC. The End User License Agreement dialog box appears. | ||
| Step 11 | Click Accept License Agreement. | ||
| Step 12 | The Opening ucse-server-platform-huu.iso dialog box appears. Either open the file or browse to the location where you want to save the HUU ISO image, and then click OK. | ||
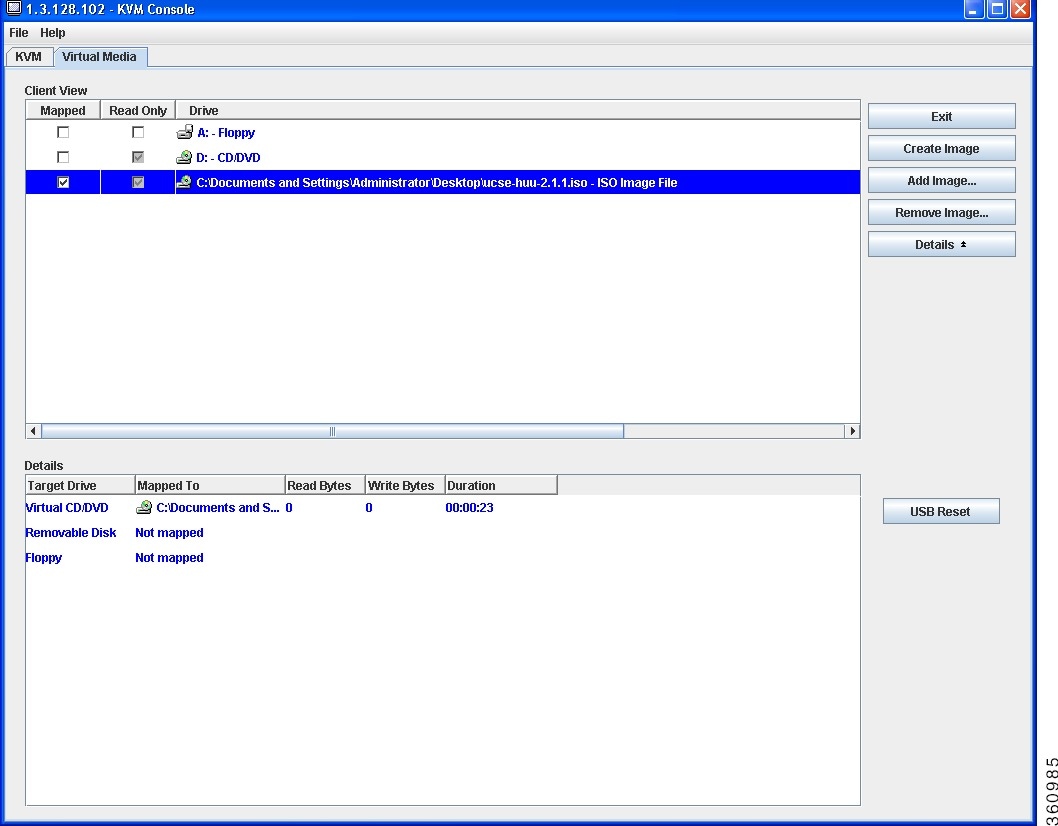
| Step 13 | You can use either the KVM Console or the CIMC CLI to map the HUU ISO image:
| ||
| Step 14 | After the image is mapped, set the boot order to make the virtual CD/DVD drive as the boot device. | ||
| Step 15 | Reboot the server. | ||
| Step 16 | From the CIMC GUI, click the Launch KVM Console icon on the toolbar. The HUU and the Cisco Software License Agreement page appears. | ||
| Step 17 | Click I Agree to accept the licensing terms and conditions. The Cisco Host Upgrade Utility GUI appears with a list of components that are available for update. 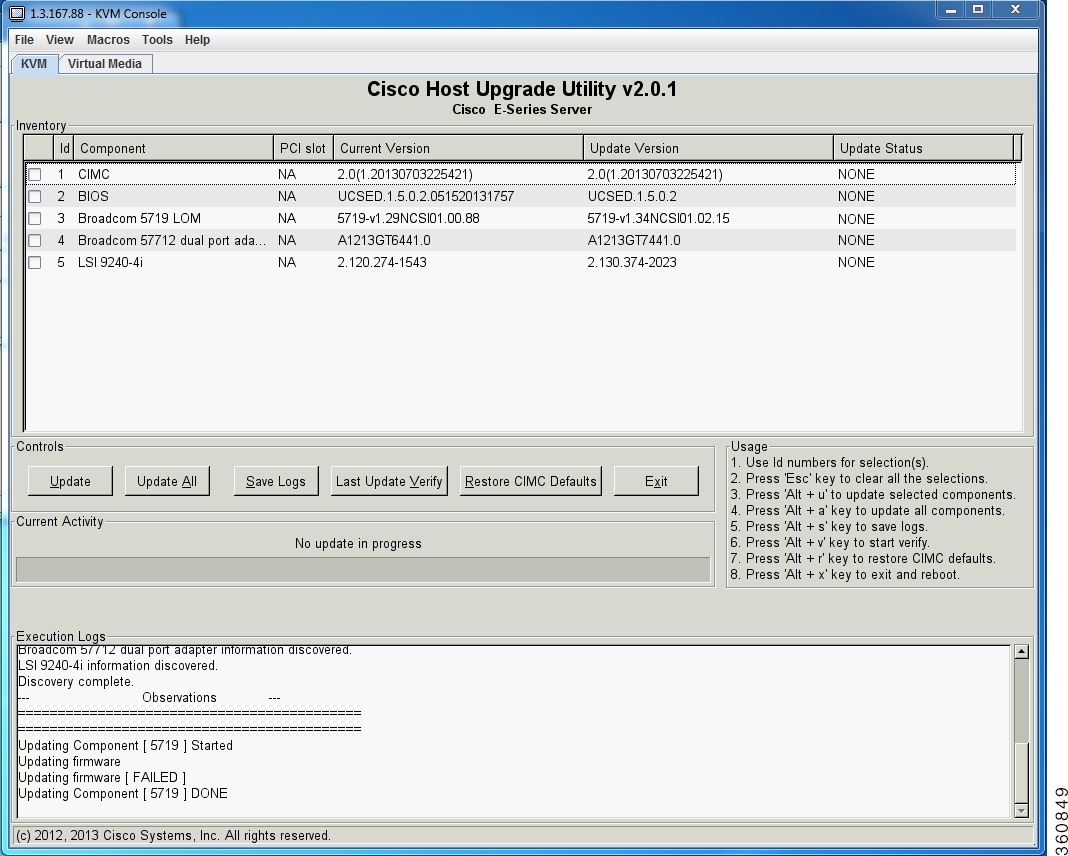 | ||
| Step 18 | Do one of the following:
The status of the update is displayed in the Update Status column. To view details about the update status, see the Execution Logs area.
| ||
| Step 19 | After the firmware is updated, click Exit, and then click Ok at the confirmation prompt. The HUU reboots.
| ||
| Step 20 | Unmap the HUU ISO image. Do one of the following: | ||
| Step 21 | Reboot the server. |