Downloads |
 Feedback Feedback
|

Table Of Contents
Audit Log Viewer—Setting Action
Audit Log Viewer—Approving Actions
Event Log Viewer—Refreshing the List
Event Log Viewer—Most Recent Events
Event Log Viewer—Purging the Event Log
Template Viewer—Connection Templates and Parameters
Viewers and Options
This chapter describes the viewer applets and options dialog that the WSA Explorer Client provides:
Audit Log Viewer
The following sections give detailed information about the Audit Log Viewer:
•
Audit Log Viewer—Setting Action
•
Audit Log Viewer—Description
All actions performed by the WSA Audit Processor are logged for each run that it performs.
The Audit Log Viewer allows users to browse this log and manually intervene to correct discrepancies between the physical and database view of the networks being audited.
Audit Log Viewer—Invoking
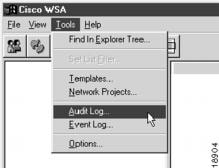
To invoke the WSA Audit Log Viewer, select Tools->Audit Log... from the WSA Explorer Client menu bar, as shown in , "".
Figure 6-1 Audit Log Viewer Invocation
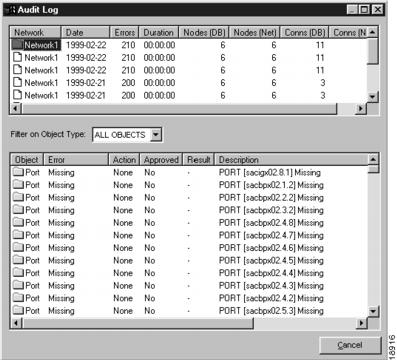
A new Audit Log Viewer appears. Choose an audit run from the top list and the lower list fills with the results of that audit run, as shown in , "".
Figure 6-2 Audit Log Viewer
Only the most recent audit run and results, which are denoted by the folder symbol, can be used to modify the database, as described in the section Audit Log Viewer—Setting Action and the section Audit Log Viewer—Approving Actions.
Note
Caution
Audit Log Viewer—Filters
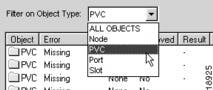
The Audit Log can be filtered by the object type by selecting an item from the drop down list boxes, as shown in , "".
Figure 6-3 Selecting an Object Type Filter
Audit Log Viewer—Setting Action
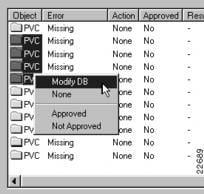
Audit result entries can be tagged so that the WSA Control system modifies the WSA database to match what exists in the physical network.
To tag one or more entries for modification, select the entries to be modified and activate Modify DB from the item menu, as shown in , "".
Figure 6-4 Setting the Modify Tag
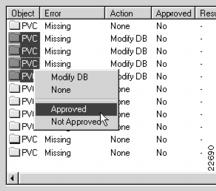
Audit Log Viewer—Approving Actions
When audit result entries have been tagged to be modified, the modification must be authorized before the WSA Control System performs the modification.
To authorize one or more entries tagged for modification, select the entries to be authorized and activate Approved on the item menu, as shown in , "".
Figure 6-5 Approving Modifications
Event Log Viewer
The following sections give detailed information about the Event Log Viewer:
•
•
•
Event Log Viewer—Description
All actions performed by users of the WSA Client Applications and by the WSA Control System and Audit Processor are logged.
The Event Log Viewer allows users to browse this log and filter by date, time, event class, and event type and automatically refresh the list and/or view the most recent events.
Event Log Viewer—Invoking
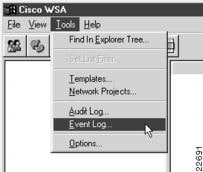
To invoke the WSA Event Log Viewer, select Tools->Event Log... from the WSA Explorer Client menu bar, as shown in , "".
Figure 6-6 Event Log Viewer Invocation
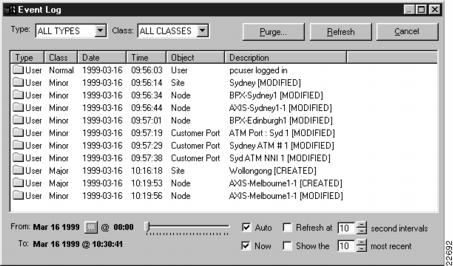
A new Event Log Viewer appears, as shown in , "".
Figure 6-7 Event Log Viewer
Note
Caution
Event Log Viewer—Filters
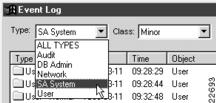
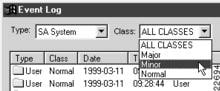
The event log can be filtered by the type and/or the class of the event by selecting an item from the drop-down list boxes, as shown in , "", and , "".
Figure 6-8 Selecting an Event Type Filter
Figure 6-9 Selecting an Event Class Filter
Note
The supported event types are generated by the following sources:
•
•
•
Event Log Viewer—Date Ranges
In addition to filtering by event type and class, the date range that is used to search for events can be adjusted to suit your requirements.
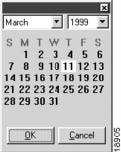
The end dates for the list can be selected by pressing the ... button next to the current date and selecting a new date from the popup date selector, as shown in , "".
Figure 6-10 Choosing a New Date
If Now is checked, the list refresh always goes up to the current date and time at the instant the refresh takes place. To set an explicit end date for the list, uncheck Now and select an appropriate value.
The slider bars next to the date and time fields can be used to adjust the time when the listed events start and/or finish, as shown in , "".
Figure 6-11 Adjusting the List Start Time
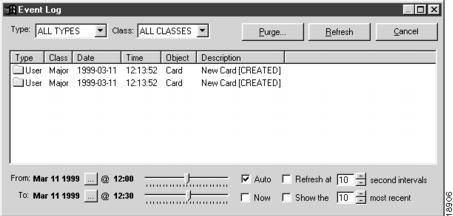
The default date and time range is from 00:00 on the day the Event Viewer was invoked to the time of the last refresh, as shown in , "".
Figure 6-12 Default Date Range
Event Log Viewer—Refreshing the List
The event log list can be refreshed by clicking on Refresh, or by setting a timer by checking Refresh at and setting the interval to a suitable number of seconds, as shown in , "".
Figure 6-13 Setting the Refresh Interval
If Now is checked, whenever the list is refreshed, either on a timer or by pressing Refresh, the To date of the date range is updated to match the time of the refresh.
If Auto is checked, as shown in , "", and any change is made to the filter, date range of most recent event count, the list automatically refreshes. If Auto is unchecked, refreshes occur manually by pressing Refresh.
Figure 6-14 Allowing Auto Refresh
Event Log Viewer—Most Recent Events
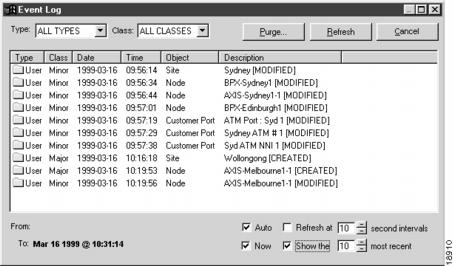
By checking Show the and setting the most recent event count to a suitable level, the list always displays a short list of the most recent events that can easily be monitored in a small window, as shown in , "".
Figure 6-15 Viewing the Most Recent Events
Event Log Viewer—Purging the Event Log
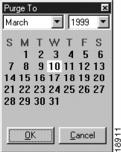
To purge all entries from the event log prior to a supplied date, press Purge... and a date selection dialog appears, as shown in , "".
Figure 6-16 Choosing the Purge Start Date
Select the date up to which you want to purge. (The default date is one day prior to the current date.) Then press OK to select that date, or press Cancel to close the dialog and cancel the purge operation.
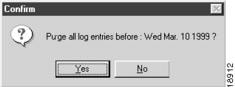
If you selected a date to purge to, a confirmation dialog appears, as shown in , "".
Figure 6-17 Purge Confirmation
Press Yes to purge the event log to this date, or press No to cancel the purge operation.
Options
The following sections give detailed information about Options:
•
Options—Description
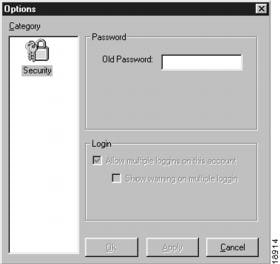
The only option available in the current version of WSA is to set your login password.
Options—Invoking
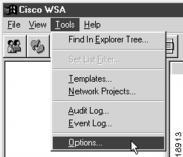
To invoke the WSA Options Dialog, select Tools->Options... from the WSA Explorer Client menu bar, as shown in , "".
Figure 6-18 Options Invocation
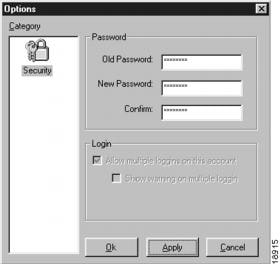
An Options dialog appears, as shown in , "".
Figure 6-19 Options Dialog
Options—Setting Your Password
To set your password, enter your existing password and your new password, with confirmation, in the appropriate entry fields, as shown in , "".
Figure 6-20 Setting Your Password
Note
Press Apply to set the new password. Press OK to set the new password and close the dialog. Press Cancel to close the dialog and leave your password as it is.
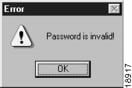
If the existing password that you supply is incorrect, a warning dialog appears, as shown in , "".
Figure 6-21 Password Error
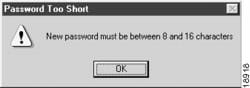
Your new password must be between 8 and 16 characters inclusive. If it is too short, a warning dialog appears, as shown in , "".
Figure 6-22 Password Too Short
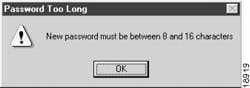
If the password that you enter is too long, a warning dialog appears, as shown in , "".
Figure 6-23 Password Too Long
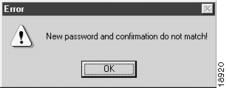
If the new password and its confirmation do not match, a warning dialog appears, as shown in , "".
Figure 6-24 Password Confirmation Error
Template Viewer
The following sections give detailed information about Template Viewer:
•
Template Viewer—Description
WSA uses templates to define configuration parameters for nodes, cards, ports, net links, and connections. Creation, modification, and deletion of templates is done with the WSA System Administration Client (refer to Cisco WAN Service Administrator System Administrator Reference).
The Template Viewer allows users to examine the templates that are currently available, but does not facilitate modification of these templates.
Template Viewer—Invoking
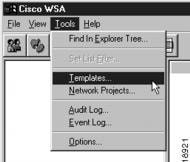
To invoke the WSA Template Viewer, select Tools->Templates... from the WSA Explorer Client menu bar, as shown in , "".
Figure 6-25 Template Viewer Invocation
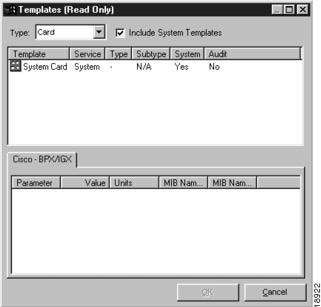
A Template Viewer dialog appears, as shown in , "".
Figure 6-26 Template Viewer
Template Viewer—Types
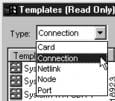
WSA supports templates for nodes, cards, ports, net links, and connections. To select a template type, select an item from the drop-down list box, as shown in , "".
Figure 6-27 Selecting a Template Type
Template Viewer—Connection Templates and Parameters
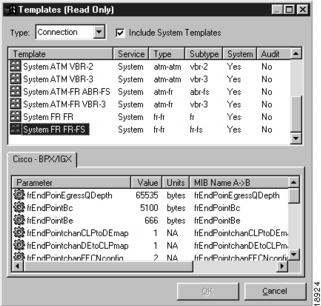
Connection templates are used by the WSA Control System to determine the Quality of Service (QOS) parameters to pass in the connection creation commands it generates for provisioning connections in the network.
To view the parameters set for a specific connection template, select the template name from the template list, and the parameter list is populated with the defined QOS parameters for this template, as shown in , "".
Figure 6-28 Connection Parameters
Note