简介
本文档介绍从思科安全终端私有云设备收集支持快照并启用实时支持会话的步骤。
背景信息
与TAC协作时,有时需要收集支持快照或允许TAC建立到您的安全终端(之前称为高级恶意软件防护)私有云设备的支持隧道。这有助于彻底调查或远程应用修复。
此方法可节省时间,并为TAC工程师提供有效解决问题所需的全面信息。
支持快照
从管理门户生成支持快照
要从管理门户收集支持快照,请执行以下步骤:
步骤 1:登录到管理门户。
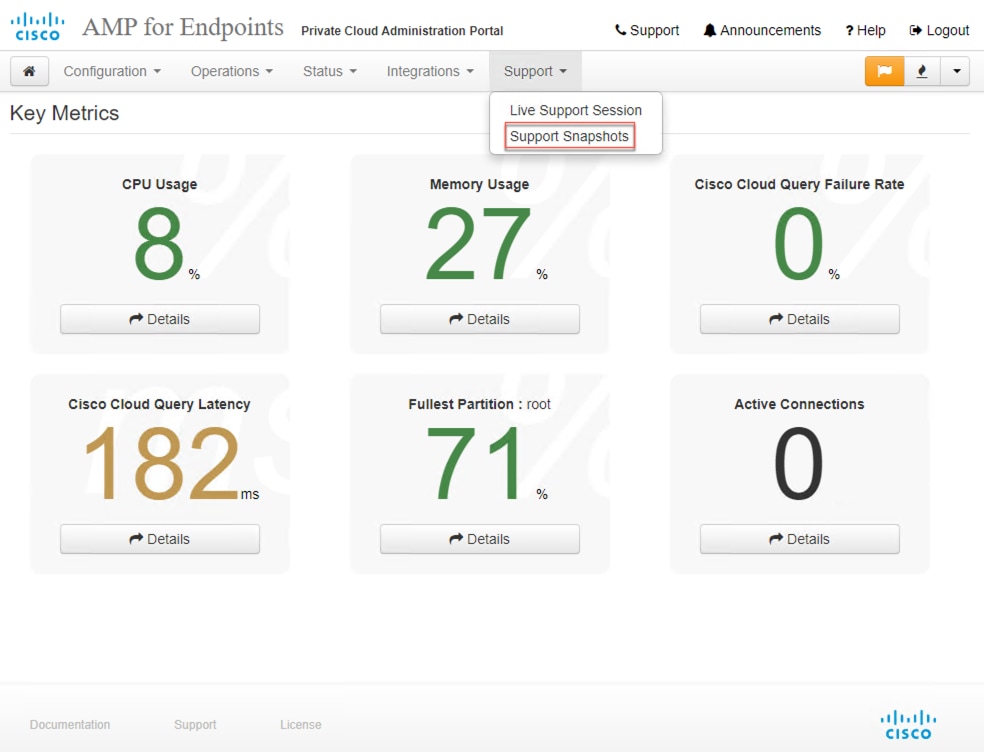
步骤 2:选择Support,然后选择Support Snapshots,如图所示。
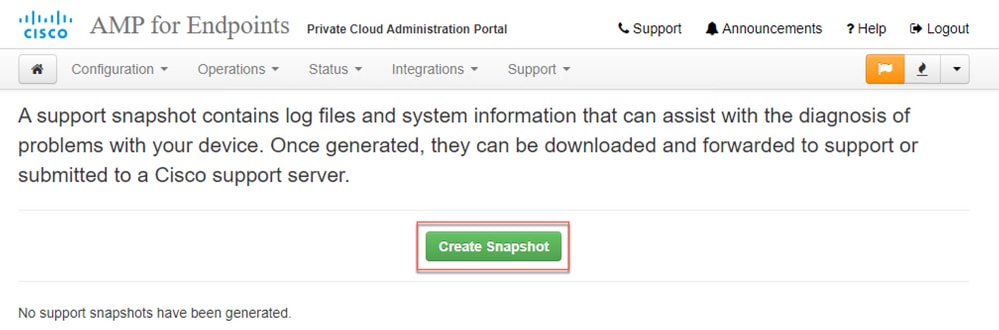
步骤 3:单击Create Snapshot。
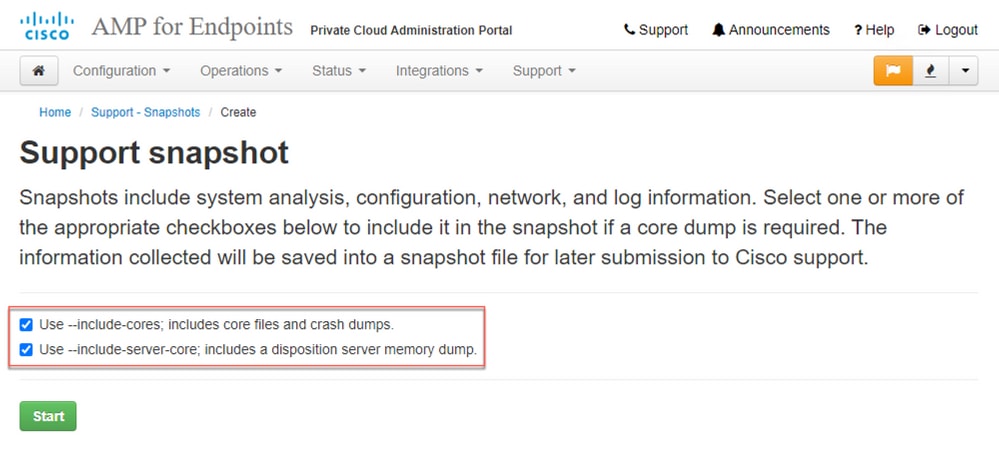
步骤 4:您可以选择“包括Core Files和其他内存转储以及快照”,默认情况下未选择这些快照,如图所示。
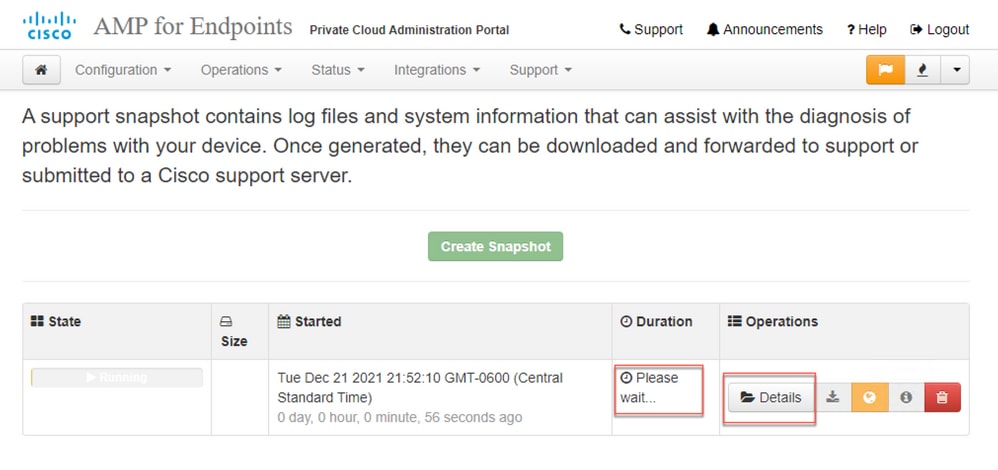
步骤 5:您会发现快照已启动,这可能需要一段时间。要监控进度,请单击Details,如图所示。
步骤 6:快照生成完成后,您必须能够选择  图标,用于在您访问门户的本地计算机上下载快照。
从管理门户SSH生成支持快照
要从管理门户SSH创建支持快照,请执行以下步骤:
步骤 1:通过SSH连接到管理门户。
步骤 2:这是可用于生成快照的CLI。
[root@fireamp ~]# amp-support snapshot -A

usage: /opt/opadmin/embedded/bin/amp-support snapshot [options]

Create a snapshot of the current system; this includes log files, system
status, run processes, crash dumps, and other information that can be
used by a support engineer to diagnose problems with your system.
If no explicit options are provided the default ones are assumed.  The
default options are: include-configs, include-logs, include-network,
include-cores, and include-status

    -A, --all                        Include everything.
    -a, --include-analysis           Include system analysis. (SLOW!)
    -C, --include-configs            Include configuration files.
    -c, --include-cores              Include core files.
    -F, --include-firehose-cassandra Include firehose-cassandra status.
    -i, --include-inodes             Include filesystem inode usage.
    -I, --include-integrations       Include appliance integration information.
    -k, --include_kafka              Include Kafka status.
    -L, --include-flink              Include Flink status.
    -l, --include-logs               Include log files.
    -m, --include-mongo              Include MongoDB status.
    -N, --include-cassandra          Include Cassandra status.
    -n, --include-network            Include network analysis.
    -r, --include-redis              Include Redis status.
    -S, --include-server-core        Include a disposition server memory dump.
    -s, --include-status             Include system status.
    -d, --include-docker             Include docker status.
    -z, --include_zookeeper          Include Zookeeper status.
    -f, --fs-check FILE              Include filesystem check results from file.
    -v, --verbose                    Increase output verbosity.
从装置控制台生成支持快照
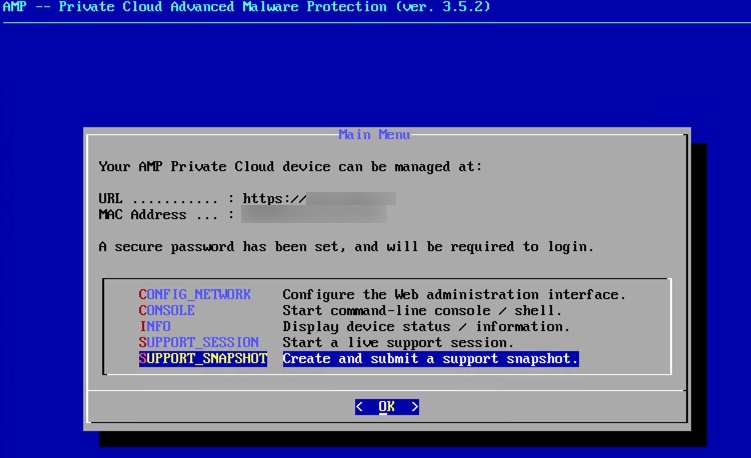
要从私有云设备控制台创建支持快照,请执行以下步骤:
步骤 1:登录到私有云设备控制台。
步骤 2:选择SUPPORT_SNAPSHOT。
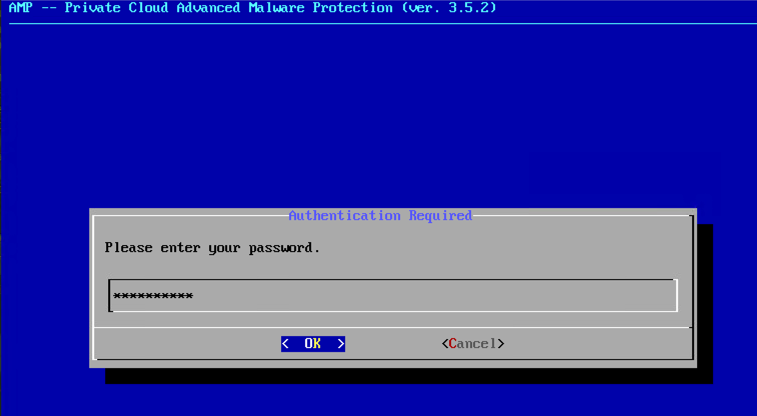
步骤 3:输入管理门户密码,如图所示。
第4步:您可以选择包括核心文件和其他内存转储以及默认情况下未选择的快照,如图所示。
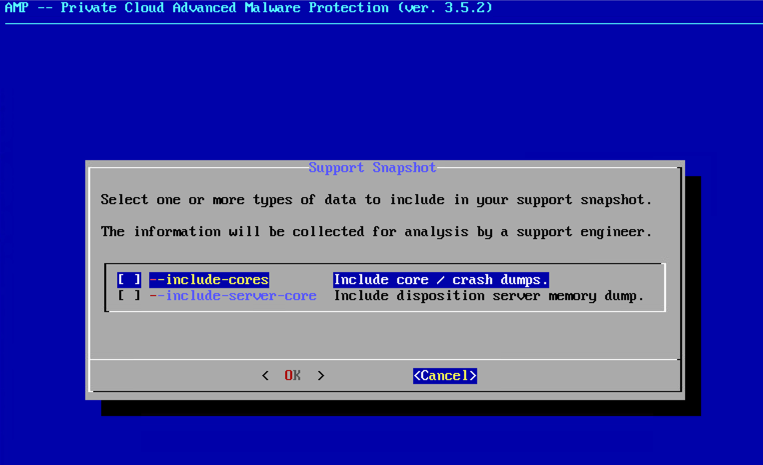
步骤 5:然后,选择OK,开始创建快照。
实时支持会话
从管理门户启用实时支持会话
要从管理门户创建启用实时支持会话,请执行以下步骤:
步骤 1:登录到管理门户。
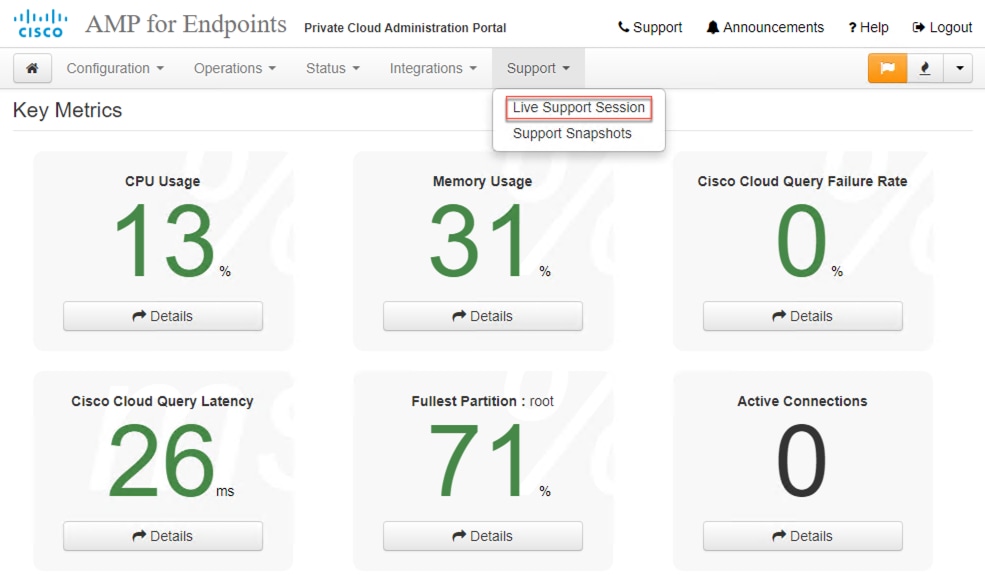
步骤 2:单击或选择Support,然后选择Live Support Session。
步骤 3:单击或选择启动支持会话(如图所示),然后选择下载以获取TAC远程连接到设备所需的SSH身份。然后单击或选择开始启动实时支持会话,如图所示。

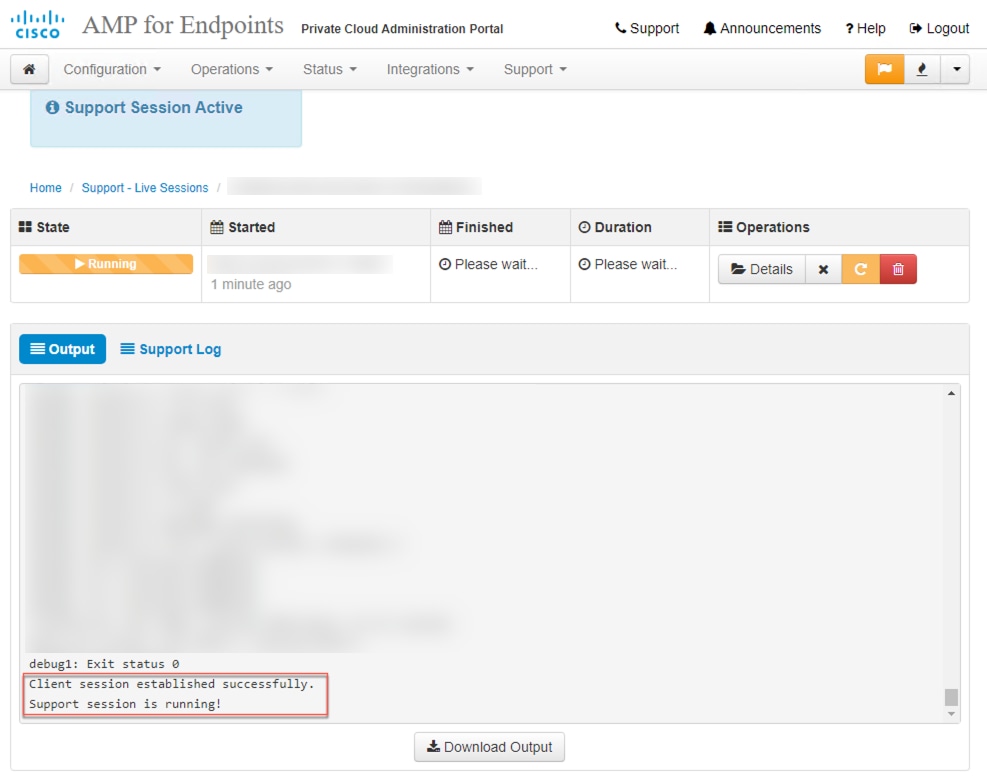
步骤 4:在设备成功连接实时支持会话后,您将看到如图所示的日志,如图所示。
从管理门户SSH启用实时支持会话
要从管理门户SSH创建启用实时支持会话,请执行以下步骤:
步骤 1:登录到管理门户SSH。
步骤 2:这是可用于从SSH启用实时支持会话的CLI。
[root@fireamp ~]# amp-support session -l support.log -s support-sessions.amp.cisco.com -p 22
usage: /opt/opadmin/embedded/bin/amp-support session [options]

Manage a support session with a remote server; this facilitates a secure method of
provide unrestricted shell access to your machine to an engineer on a remote
system. Note that when restart a session, the same parameters as the previous
session are used unless new parameters are supplied. The UUID is expected to be
version 4.

Note that the `--log` option provides an optional log file for the support
engineer to log their shell activity to. A script is provided to the remote
user to collect this log data, but it is not and cannot be enforced by the
support script.

OPTIONS

    -b, --batch                      Use batch (non-interactive) mode.
    -d, --delete                     Delete a support session and all files.
    -l, --log FILE                   Log remote shell commands to file.
    -p, --port PORT                  Connect to an alternative port.
    -s, --support-server SERVER      Set the server of a session.
    -t, --terminate                  Terminate an active session.
    -v, --verbose                    Increase output verbosity.

NOTE: UUID can be any random string as long as it has the format: xxxxxxxx-xxxx-xxxx-xxxx-xxxxxxxxxxxx. Also, you can keep the Port as default to 22

EXAMPLES

    /opt/opadmin/embedded/bin/amp-support session -l support.log -s support.example.com -p 2222 xxxxxxxx-xxxx-xxxx-xxxx-xxxxxxxxxxxx
    /opt/opadmin/embedded/bin/amp-support session xxxxxxxx-xxxx-xxxx-xxxx-xxxxxxxxxxxx
    /opt/opadmin/embedded/bin/amp-support session -t -d xxxxxxxx-xxxx-xxxx-xxxx-xxxxxxxxxxxx
从设备控制台启用实时支持会话
要从私有云设备控制台创建启用实时支持会话,请执行以下步骤:
步骤 1:登录到私有云设备控制台。
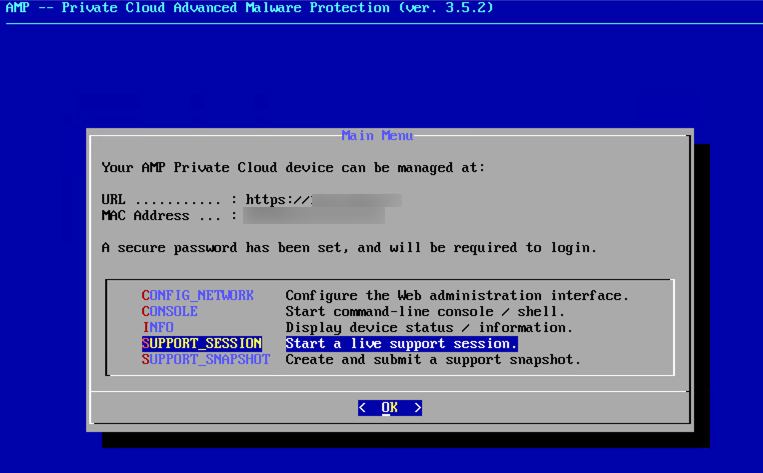
步骤 2:选择SUPPORT_SESSION以启用实时支持会话,如图所示。
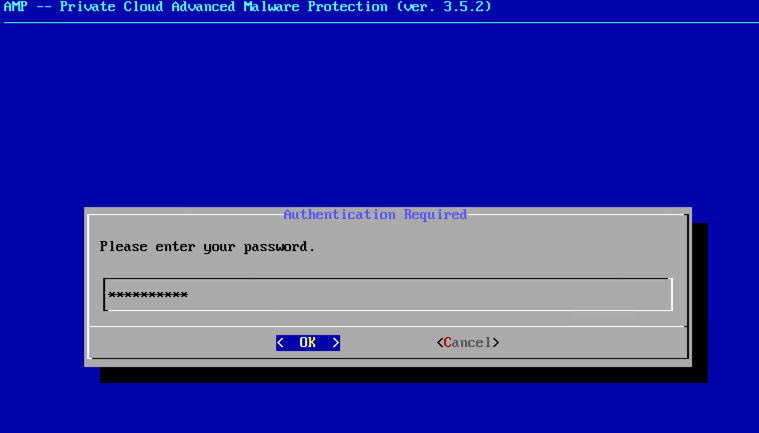
第3步:输入管理门户密码,如图所示。
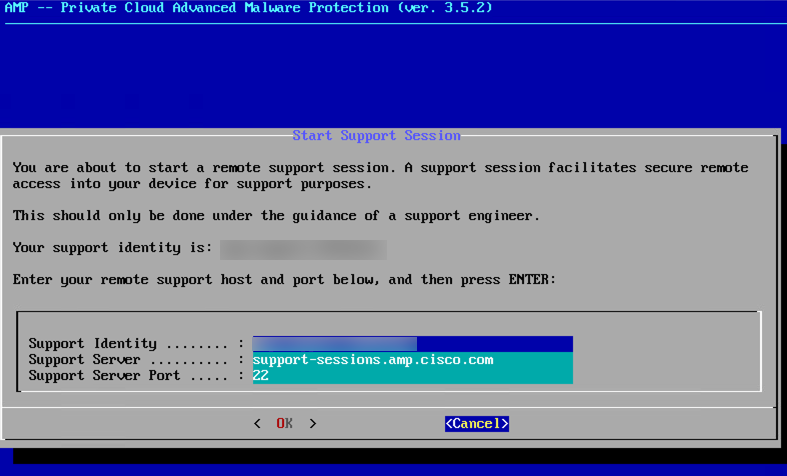
步骤 4:您可以保持所有默认设置不变。选择OK以启用实时支持会话,如图所示。
 反馈
反馈