Instalação do PON 24.1.2 roteado - Laboratório de VM única
Opções de download
Linguagem imparcial
O conjunto de documentação deste produto faz o possível para usar uma linguagem imparcial. Para os fins deste conjunto de documentação, a imparcialidade é definida como uma linguagem que não implica em discriminação baseada em idade, deficiência, gênero, identidade racial, identidade étnica, orientação sexual, status socioeconômico e interseccionalidade. Pode haver exceções na documentação devido à linguagem codificada nas interfaces de usuário do software do produto, linguagem usada com base na documentação de RFP ou linguagem usada por um produto de terceiros referenciado. Saiba mais sobre como a Cisco está usando a linguagem inclusiva.
Sobre esta tradução
A Cisco traduziu este documento com a ajuda de tecnologias de tradução automática e humana para oferecer conteúdo de suporte aos seus usuários no seu próprio idioma, independentemente da localização. Observe que mesmo a melhor tradução automática não será tão precisa quanto as realizadas por um tradutor profissional. A Cisco Systems, Inc. não se responsabiliza pela precisão destas traduções e recomenda que o documento original em inglês (link fornecido) seja sempre consultado.
Introdução
Este documento descreve um passo a passo da instalação do software Cisco Routed PON Manager no laboratório local.
Pré-requisitos
Requisitos
- Conhecimento do ambiente de servidor Linux
- Conhecimento dos editores de texto do Linux
- Ferramentas do Linux - openssh- server, net- tools, ntpd
Componentes Utilizados
- Máquina virtual Linux (VM)
- 2 vCPUs
- 8 GB de RAM
- Espaço de 20 GB (mínimo)
- Ubuntu 20.04.06 LTS
As informações neste documento foram criadas a partir de dispositivos em um ambiente de laboratório específico. Todos os dispositivos utilizados neste documento foram iniciados com uma configuração (padrão) inicial. Se a rede estiver ativa, certifique-se de que você entenda o impacto potencial de qualquer comando.
Configuração
Máquina virtual
Ferramentas
Este documento começa com a suposição de que a VM foi configurada para acesso, o sistema operacional Ubuntu foi instalado e configurado com conectividade de rede, as ferramentas listadas em Requisitos foram instaladas e o arquivo zip PON roteado foi baixado. Para facilitar, os comandos Ubuntu apt foram fornecidos para baixar e instalar as ferramentas recomendadas.

Note: Um link para o download do Routed PON 24.1.2 está disponível aqui.
sudo apt install net-tools
sudo apt install openssh-server
sudo apt install ntpd
Desempacotando
1) Crie um diretório de instalação para descompactar o arquivo Routed PON 24.1.2 zip.
rpon@rpon-mgr:~$ mkdir Routed_PON_24_1_2
2) Descompacte Cisco_Routed_PON_24_1_2_Release.zip no diretório atribuído.
rpon@rpon-mgr:~/PON_Mgr_24_1_2$ unzip Cisco_Routed_PON_24_1_2_Release.zip
Archive: Cisco_Routed_PON_24_1_2_Release.zip
inflating: PON_MANAGER_SIGNED_CCO/R4.0.0-Cisco-UB2004-sign.tar.gz
inflating: PON_MANAGER_SIGNED_CCO/README
inflating: PON_MANAGER_SIGNED_CCO/verify.tar.gz
3) Altere o diretório (cd) para a pasta PON_MANAGER_SIGNED_CCO recém-criada e liste (ls) os arquivos.
rpon@rpon-mgr:~/PON_Mgr_24_1_2/PON_MANAGER_SIGNED_CCO$ ls -la
total 29120
drwxrwxr-x 2 rpon rpon 4096     Jun 13 09:26 .
drwxrwxr-x 3 rpon rpon 4096     Jun 13 09:26 ..
-rw-rw-r-- 1 rpon rpon 29792662 Mar 15 05:21 R4.0.0-Cisco-UB2004-sign.tar.gz
-rw-rw-r-- 1 rpon rpon 1966     Mar 15 05:21 README
-rw-rw-r-- 1 rpon rpon 11502    Mar 15 05:21 verify.tar.gz
Note: O arquivo README listado explica o processo de verificação do arquivo. Esta etapa não é executada durante este passo de instalação.
4) Descompacte o arquivo R4.0.0-Cisco-UB2004-sign.tar.gz usando tar -xvf R4.0.0-Cisco-UB2004-sign.tar.gz.
rpon@rpon-mgr:~/PON_Mgr_24_1_2/PON_MANAGER_SIGNED_CCO$ tar -xvf R4.0.0-Cisco-UB2004-sign.tar.gz
R4.0.0-Cisco-UB2004-sign/
R4.0.0-Cisco-UB2004-sign/R4.0.0-Cisco-UB2004.tar.gz.signature
R4.0.0-Cisco-UB2004-sign/R4.0.0-Cisco-UB2004.tar.gz
5) Envie o CD para o diretório R4.0.0-Cisco-UB2004-sign e liste os arquivos.
rpon@rpon-mgr:~/PON_Mgr_24_1_2/PON_MANAGER_SIGNED_CCO$ cd R4.0.0-Cisco-UB2004-sign/
rpon@rpon-mgr:~/PON_Mgr_24_1_2/PON_MANAGER_SIGNED_CCO/R4.0.0-Cisco-UB2004-sign$ ls -la
total 29112
drwxr-xr-x 2 rpon rpon 4096     Mar 15 04:51 .
drwxrwxr-x 3 rpon rpon 4096     Jun 13 09:26 ..
-rw-r--r-- 1 rpon rpon 29796139 Mar 15 04:51 R4.0.0-Cisco-UB2004.tar.gz
-rw-r--r-- 1 rpon rpon 3546     Mar 15 04:51 R4.0.0-Cisco-UB2004.tar.gz.signature
6) Untar R4.0.0-Cisco-UB2004-tar.gz via tar -xvf R4.0.0-Cisco-UB2004.tar.gz.
rpon@rpon-mgr:~/PON_Mgr_24_1_2/PON_MANAGER_SIGNED_CCO/R4.0.0-Cisco-UB2004-sign$ tar -xvf R4.0.0-Cisco-UB2004.tar.gz
---- snipped for brevity -----
7) Um novo diretório agora é criado chamado CD R4.0.0-Cisco-UB2004 para esse diretório.
Note: É aqui que os scripts do shell para instalar, desinstalar, verificar o status e o arquivo JSON do controlador PON adicional estão localizados.
rpon@rpon-mgr:~/PON_Mgr_24_1_2/PON_MANAGER_SIGNED_CCO/R4.0.0-Cisco-UB2004-sign/R4.0.0-Cisco-UB2004$ ls -la
total 116
drwxr-xr-x 7 rpon rpon 4096  Mar 14 11:11 .
drwxr-xr-x 3 rpon rpon 4096  Jun 13 09:26 ..
-rw-r--r-- 1 rpon rpon 8196  Mar 14 11:10 .DS_Store
-rwxr-xr-x 1 rpon rpon 13650 Mar 14 11:10 get-support-info.sh
drwxr-xr-x 3 rpon rpon 4096  Mar 14 11:10 grafana_dashboards
-rwxr-xr-x 1 rpon rpon 25392 Mar 14 11:10 install.sh
-rw-r--r-- 1 rpon rpon 1493  Mar 14 11:11 PonCntlInit.json
drwxr-xr-x 2 rpon rpon 4096  Mar 14 11:10 R4.0.0-Firmware
drwxr-xr-x 5 rpon rpon 4096  Mar 14 11:14 R4.0.0-Netconf-UB2004
drwxr-xr-x 6 rpon rpon 4096  Mar 14 11:14 R4.0.0-PonManager-UB2004
-rw-r--r-- 1 rpon rpon 7949  Mar 14 11:11 README.txt
-rwxr-xr-x 1 rpon rpon 2349  Mar 14 11:10 status.sh
drwxr-xr-x 2 rpon rpon 4096  Mar 14 11:10 tools
-rwxr-xr-x 1 rpon rpon 2245  Mar 14 11:10 uninstall.sh
-rwxr-xr-x 1 rpon rpon 8605  Mar 14 11:11 upgrade.sh
Instalação
Consulte o arquivo README.txt para ver as etapas de instalação. Esta instalação está usando a Opção 2 para nova instalação.
rpon@rpon-mgr:~/PON_Mgr_24_1_2/PON_MANAGER_SIGNED_CCO/R4.0.0-Cisco-UB2004-sign/R4.0.0-Cisco-UB2004$ cat README.txt

--- snipped for brevity ---

Option 2: New Installation
===========================

Step 1 : Verify System Requirements:
------------------------------------

a) Verify system is running ubuntu version 20.04

user@system:~$ lsb_release -a
No LSB modules are available.
Distributor ID: Ubuntu
Description: Ubuntu 20.04.3 LTS
Release: 20.04
Codename: bionic

b) Verify the ethernet interfaces are configured on the ubuntu system
1) Look for your Ethernet Interfaces: "ifconfig" or "ip a". <<< make note of interfaces listed >>>
2) There are multiple ways to configure interfaces on Ubuntu 18.04 and 20.04
3) The simplest way is via Netplan
4) Netplan is located in the /etc/netplan directory
5) There will be a file similar in name to "01-network-manager-all.yaml"
6) Edit this file with your favorite editor such as "nano" or "vi"

c) user@system:~$ sudo nano /etc/netplan/<net-plan-name>.yaml
Sample Netplan text <<< Make sure indentation is consistent >>>

network:
 version: 2
 renderer: NetworkManager
 ethernets:
  eno1: <<< MCMS IP Interface >>>
  dhcp4: no <<< No DHCP >>>
  dhcp6: no <<< No DHCP >>>
  addresses: [172.16.41.5/24] <<< Static IPv4 >>>
  gateway4: 172.16.41.1 <<< IPv4 default Gateway >>>
   nameservers: <<< DNS Addresses >>>
 vlans: <<< Configured VLANs >>>
  vlan4090: <<< "l2EthInterfaceName" VLAN named vlan4090 assigned to PON Controller Interface >>>
  id: 4090 <<< VLAN number >>>
  link: eno2 <<< PON Controller Interface >>>

d) After finished editing, Save and exit, then enter "netplan apply" to enable new configuration.

e) Verify ubuntu system has connectivity to Internet


Step 2 : Installation
---------------------

a) Run the installation script "install.sh":

user@system:<install_directory>/R4.0.0-UB2004$ sudo ./install.sh -e <l2EthInterfaceName>

This script will do the following:
• Install MongoDB
• Install MCMS PON Manager
• Install MCMS Netconf Server
• Install PON Controller and UMT Relay (using the Ethernet interface specificed)

Required:
-e <l2EthInterfaceName> interface name of L2 port

Optional:
-d <databaseIpAaddress> IP address of MongoDB database
-n <databaseName> MongoDB database name for PON Manager
-m Install only PonManager/MongoDB/NETCONF
-c Install only PonController

defaults:
-d <databaseIpAddress> = 127.0.0.1
-n <databaseName> = tibit_pon_controller


Informational: How to verify all processes are running
=======================================================

a) Verify MongoDB is running

user@system:~$ sudo systemctl status mongod.service
● mongod.service - MongoDB Database Server
Loaded: loaded (/lib/systemd/system/mongod.service; enabled; vendor preset: enabled)
Active: active (running) since Fri 2019-08-30 11:56:38 PDT; 3 days ago
Main PID: 15035 (mongod)
CGroup: /system.slice/mongod.service
└─15035 /usr/bin/mongod --config /etc/mongod.conf

b) Verify MCMS PON Manager Apache Web Server is running

user@system:~$ sudo systemctl status apache2.service
● apache2.service - The Apache HTTP Server
Loaded: loaded (/lib/systemd/system/apache2.service; enabled; vendor preset: enabled)
Drop-In: /lib/systemd/system/apache2.service.d
└─apache2-systemd.conf
Active: active (running) since Fri 2019-08-16 15:19:09 PDT; 1 weeks 2 days ago
Process: 2981 ExecReload=/usr/sbin/apachectl graceful (code=exited, status=0/SUCCESS)
Main PID: 8471 (apache2)

---- Removed addtional information regarding PON Controller as this is installed in the XR Router so these instructions do not apply to the VM. ---
😎 😎
Netplan
Usando um editor de arquivos de texto do linux (nano, vi), edite o arquivo YAML localizado no diretório /etc/netplan/ usando o modelo fornecido no README.txt na pasta de instalação. Preencha as informações de IP específicas da rede e da VM.
rpon@rpon-mgr:~/PON-mgr-24.1.2/PON_MANAGER_SIGNED_CCO/R4.0.0-Cisco-UB2004-sign/R4.0.0-Cisco-UB2004$ sudo nano /etc/netplan/01-network-manager-all.yaml
network:
 version: 2
 renderer: NetworkManager
 network:
  ethernets:
   ens192: <- This VM's network adapter is ens192. If the default is NOT ens192, change this value to the desired network adapter
    dhcp4: no
    dhcp6: no
    addresses: [IPv4 address and subnet]
    gateway4: [V4Gateway]
    nameservers:
      addresses: [DNS Server(s)]
vlans:
 vlan.4090:
  id: 4090
  link: [VM network adapter name]
Note: Usando nano para editar, uma vez concluído; pressione Control + O para salvar o arquivo e, em seguida, Control X para sair do nano. No VIM, use :wq! para salvar e sair.
Note: O uso de sudo netplan — debug apply é útil ao testar o netplan antes do aplicativo.
Verifique se a configuração do netplan está correta exibindo o arquivo via cat. Essa saída é apenas um exemplo de laboratório. Utilize os endereços IP específicos da rede. Quando terminar e sair do editor de texto, execute sudo netplan apply.
Exemplo de laboratório:
rpon@rpon-mgr:~/PON-mgr-24.1.2/PON_MANAGER_SIGNED_CCO/R4.0.0-Cisco-UB2004-sign/R4.0.0-Cisco-UB2004$ cat /etc/netplan/01-network-manager-all.yaml
# Let NetworkManager manage all devices on this system
network:
 version: 2
 renderer: NetworkManager
 ethernets:
  ens192:
    dhcp4: no
    dhcp6: no
    addresses: [10.122.140.232/28]
    gateway4: 10.122.140.225
    nameservers:
      addresses: [172.18.108.43,172.18.108.34]
 vlans:
   vlan4090:
     id: 4090
     link: ens192

rpon@rpon-mgr:~/PON-mgr-24.1.2/PON_MANAGER_SIGNED_CCO/R4.0.0-Cisco-UB2004-sign/R4.0.0-Cisco-UB2004$ sudo netplan apply
Instalação do pacote
Execute a instalação usando os argumentos escolhidos. Para esta instalação, usando -e, -d e -m. De acordo com o README.txt, -e informa ao instalador qual interface ethernet na VM usar, -d define o IP que é aplicado ao arquivo mongo.conf para o MongoDB usar, e -m instala PON Manager, MongoDB e NETCONF.
Exemplo:
sudo ./install.sh -e ens192 -d [endereçoIP] -m
Note: Se esta for uma VM nova, os tempos de instalação podem variar até 5 minutos enquanto as dependências são adicionadas e atualizadas. Quando a instalação for concluída, uma mensagem de log será gerada.
rpon@rpon-mgr:~/PON_MANAGER_SIGNED_CCO/R4.0.0-Cisco-UB2004-sign/R4.0.0-Cisco-UB2004$ sudo ./install.sh -e ens192 -d 10.122.140.232 -m

--- Installation snipped for brevity ---

Installation complete!

MCMS Component Versions:
PON Manager: R4.0.0
PON NETCONF: R4.0.0
PON Controller: Not Installed
Note: O controlador PON está hospedado no roteador XR, portanto, uma instalação na VM é desnecessária.
Verificação
Verificação de Status do Serviço
Execute uma verificação de status nos serviços instalados para verificar se eles estão ativos e em execução por meio do script status.sh, localizado no mesmo diretório de instalação.
Note: Se uma instalação completa foi executada conforme indicado por -m, verifique se os serviços listados estão ativos e em estado de execução.
- mongod.service
- apache2.service
- tibit-netopeer2-server.service
- tibit-netconf.service
Exemplo:
rpon@rpon-mgr:~/PON-mgr-24.1.2/PON_MANAGER_SIGNED_CCO/R4.0.0-Cisco-UB2004-sign/R4.0.0-Cisco-UB2004$ sudo ./status.sh
MCMS Component Versions:
PON Manager: R4.0.0
PON NETCONF: R4.0.0
PON Controller: Not Installed

● mongod.service - MongoDB Database Server
Loaded: loaded (/lib/systemd/system/mongod.service; enabled; vendor preset: enabled)
Active: active (running) since Wed 2024-06-12 19:45:37 EDT; 2min 49s ago
Main PID: 54731 (mongod)
Memory: 74.7M
CGroup: /system.slice/mongod.service
└─54731 /usr/bin/mongod --config /etc/mongod.conf

● apache2.service - The Apache HTTP Server
Loaded: loaded (/lib/systemd/system/apache2.service; enabled; vendor preset: enabled)
Active: active (running) since Wed 2024-06-12 19:46:44 EDT; 1min 42s ago
Main PID: 62165 (apache2)
Tasks: 123 (limit: 9419)
Memory: 18.6M
CGroup: /system.slice/apache2.service
├─62165 /usr/sbin/apache2 -k start
├─62167 /usr/sbin/apache2 -k start
├─62168 /usr/sbin/apache2 -k start
└─62169 /usr/sbin/apache2 -k start

● tibit-netopeer2-server.service - Tibit Communications, Inc. Netopeer2 Server
Loaded: loaded (/lib/systemd/system/tibit-netopeer2-server.service; enabled; vendor preset: enabled)
Active: active (running) since Wed 2024-06-12 19:47:04 EDT; 1min 21s ago
Process: 63029 ExecStart=/opt/tibit/netconf/bin/start_netopeer2_server.sh (code=exited, status=0/SUCCESS)
Main PID: 63035 (netopeer2-serve)
Tasks: 7 (limit: 9419)
Memory: 5.4M
CGroup: /system.slice/tibit-netopeer2-server.service
└─63035 /opt/tibit/netconf/bin/netopeer2-server -v 1 -t 55

● tibit-netconf.service - Tibit Communications, Inc. NetCONF Server
Loaded: loaded (/lib/systemd/system/tibit-netconf.service; enabled; vendor preset: enabled)
Active: active (running) since Wed 2024-06-12 19:47:04 EDT; 1min 21s ago
Process: 63023 ExecStartPre=/opt/tibit/netconf/bin/shm_clean.sh (code=exited, status=0/SUCCESS)
Process: 63027 ExecStartPre=/opt/tibit/netconf/bin/sysrepocfg --copy-from startup -d running (code=exited, status=0/SUCCESS)
Main PID: 63028 (tibit-netconf)
Tasks: 17 (limit: 9419)
Memory: 49.4M
CGroup: /system.slice/tibit-netconf.service
├─63028 /opt/tibit/netconf/bin/tibit-netconf
└─63037 /opt/tibit/netconf/bin/tibit-netconf
11. Abra um navegador da Internet e insira o IP da VM.
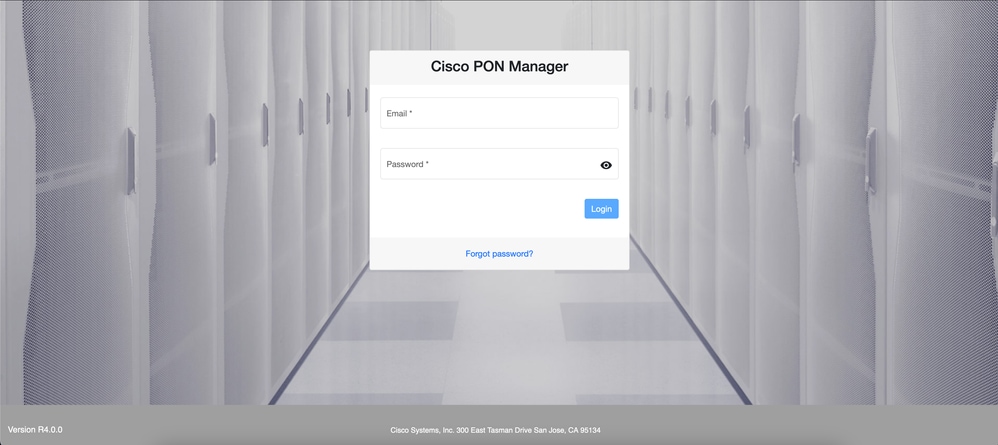 Tela de login do gerenciador PON
Documentação de referência
Histórico de revisões
| Revisão | Data de publicação | Comentários |
|---|---|---|
1.0 |
23-Jul-2024
|
Versão inicial |
Colaborado por engenheiros da Cisco
- Andy MoyerEngenheiro de escalonamento da Cisco
 Feedback
Contate a Cisco
- Abrir um caso de suporte

- (É necessário um Contrato de Serviço da Cisco)