Catalyst 9K 플랫폼의 GuestShell 문제 해결
다운로드 옵션
편견 없는 언어
본 제품에 대한 문서 세트는 편견 없는 언어를 사용하기 위해 노력합니다. 본 설명서 세트의 목적상, 편견 없는 언어는 나이, 장애, 성별, 인종 정체성, 민족 정체성, 성적 지향성, 사회 경제적 지위 및 교차성에 기초한 차별을 의미하지 않는 언어로 정의됩니다. 제품 소프트웨어의 사용자 인터페이스에서 하드코딩된 언어, RFP 설명서에 기초한 언어 또는 참조된 서드파티 제품에서 사용하는 언어로 인해 설명서에 예외가 있을 수 있습니다. 시스코에서 어떤 방식으로 포용적인 언어를 사용하고 있는지 자세히 알아보세요.
이 번역에 관하여
Cisco는 전 세계 사용자에게 다양한 언어로 지원 콘텐츠를 제공하기 위해 기계 번역 기술과 수작업 번역을 병행하여 이 문서를 번역했습니다. 아무리 품질이 높은 기계 번역이라도 전문 번역가의 번역 결과물만큼 정확하지는 않습니다. Cisco Systems, Inc.는 이 같은 번역에 대해 어떠한 책임도 지지 않으며 항상 원본 영문 문서(링크 제공됨)를 참조할 것을 권장합니다.
소개
이 문서에서는 Cat9K 스위치에서 게스트 셸의 문제를 해결하는 방법에 대해 설명합니다.
사전 요구 사항
요구 사항
- Cisco IOS® XE Software에 대한 기본 이해
- Linux 파일 시스템
- Linux 명령
사용되는 구성 요소
이 문서의 정보는 다음 소프트웨어 및 하드웨어 버전을 기반으로 합니다.
- Catalyst 9200
- Catalyst 9300
- Catalyst 9400
- Catalyst 9500
- Catalyst 9600
- Cisco IOS XE 17.9.1 이상 버전
이 문서의 정보는 특정 랩 환경의 디바이스를 토대로 작성되었습니다. 이 문서에 사용된 모든 디바이스는 초기화된(기본) 컨피그레이션으로 시작되었습니다. 현재 네트워크가 작동 중인 경우 모든 명령의 잠재적인 영향을 미리 숙지하시기 바랍니다.
배경 정보
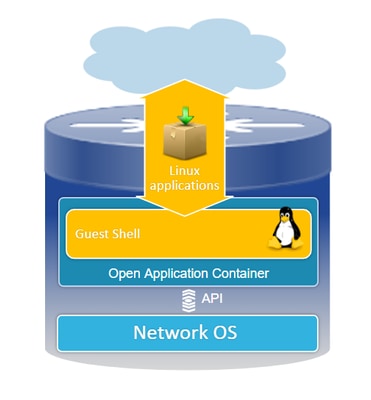
게스트 셸 개요
- 게스트 셸은 LXC(Linux Container) 내에서 작동하는 격리된 실행 환경을 제공합니다.
- 네트워크 액세스: 관리자는 Linux 네트워크 인터페이스를 통해 네트워크에 연결할 수 있으므로 강력한 연결 및 관리가 가능합니다.
- 부트플래시 액세스: 부트플래시 스토리지에 직접 액세스할 수 있어 효율적인 파일 관리 및 시스템 운영을 지원합니다.
- Cisco IOS CLI 액세스: 관리자는 Cisco IOS Command-Line Interface와 직접 상호 작용하여 원활한 통합과 제어가 가능합니다.
- 스크립트 실행: 이 환경에서는 Python 스크립트의 설치 및 실행을 지원하므로 자동화 및 사용자 지정이 가능합니다.
- 애플리케이션 지원: 32비트 및 64비트 Linux 응용 프로그램 모두 설치 및 실행할 수 있으므로 유연성과 다양한 기능 가능성을 제공합니다.
문제 해결
.
설정
1. IOX를 활성화합니다.
Switch#conf terminal
Switch(config)#iox
Switch(config)#
IOX가 초기화될 때까지 1~5분 정도 기다립니다. IOX가 작동하는지 확인합니다. CLI 세션 중에 표시되는 메시지를 확인하거나 show 명령의 출력을 검토할 수 있습니다.
*Mar 10 15:35:40.206: %UICFGEXP-6-SERVER_NOTIFIED_START: Switch 1 R0/0: psd: Server iox has been notified to start
*Mar 10 15:35:51.186: %IOX-3-PD_PARTITION_CREATE: Switch 1 R0/0: run_ioxn_caf: IOX may take upto 5 mins to be ready. Wait for iox to be ready before installing the apps
*Mar 10 15:37:56.643: %IOX-3-IOX_RESTARTABITLITY: Switch 1 R0/0: run_ioxn_caf: Stack is in N+1 mode, disabling sync for IOx restartability
*Mar 10 15:38:05.835: %IM-6-IOX_ENABLEMENT: Switch 1 R0/0: ioxman: IOX is ready.
Switch#show iox-service

IOx Infrastructure Summary:
---------------------------
IOx service (CAF)              : Running
IOx service (HA)               : Running
IOx service (IOxman)           : Running
IOx service (Sec storage)      : Running
Libvirtd 5.5.0                 : Running
Dockerd v19.03.13-ce           : Running
Sync Status                    : Disabled
2. 네트워크 구성
이 예에서는 AppGigabitEthernet 인터페이스를 사용하여 네트워크 액세스를 제공합니다.
!
interface AppGigabitEthernet1/0/1
 switchport trunk allowed vlan 50
 switchport mode trunk
!
app-hosting appid guestshell
 app-vnic AppGigabitEthernet trunk
  vlan 50 guest-interface 0
   guest-ipaddress 192.168.10.10 netmask 255.255.255.0
 name-server0 192.168.10.254
end
!

참고: GuestShell은 기본적으로 DHCP 클라이언트 서비스를 포함하지 않으므로 고정 IP 주소를 사용합니다. DHCP 클라이언트 서비스를 설치하여 동적으로 IP 주소를 가져올 수 있습니다.
이 예에서는 관리 인터페이스(Gi0/0)를 사용하여 네트워크 액세스를 제공합니다. 관리 모드에서 guestshell은 Cisco IOS 구성 관리 포트 IP 주소가 게이트웨이 역할을 하는 네트워킹을 위해 관리 포트를 사용합니다.
!
app-hosting appid guestshell
 app-vnic management guest-interface 0
 name-server0 8.8.8.8
!
참고: 관리 인터페이스를 사용할 때 Guestshell eth0 인터페이스의 기본 컨피그레이션은 IP 주소 192.168.30.2로 하드코딩됩니다.
가상 포트 그룹 인터페이스를 구성할 수 있습니다.
- 가상 포트 그룹 구성: 고정 IP 주소로 가상 포트 그룹을 설정합니다.
- 인터넷 연결: 외부 액세스를 허용하기 위해 전면 포트 인터페이스가 인터넷에 연결되어 있는지 확인합니다.
- NAT 구성: 네트워크 주소 변환을 용이하게 하기 위해 가상 포트 그룹과 전면 포트 간에 NAT를 설정합니다.
- GuestShell IP 할당: 가상 포트 그룹 인터페이스와 동일한 서브넷 내의 GuestShell에 IP 주소를 할당합니다.
!
interface VirtualPortGroup0
 ip address 192.168.35.1 255.255.255.0
 ip nat inside
!
interface GigabitEthernet1/0/3
 no switchport
 ip address 192.168.100.10 255.255.255.0
 ip nat outside
!
ip route 0.0.0.0 0.0.0.0 192.168.100.254
ip route vrf Mgmt-vrf 0.0.0.0 0.0.0.0 192.168.10.254
ip nat inside source static tcp 192.168.35.2 7023 192.168.100.10 7023 extendable
!
!
ip access-list standard NAT_ACL
 10 permit 192.168.0.0 0.0.255.255
!
app-hosting appid guestshell
 app-vnic gateway1 virtualportgroup 0 guest-interface 0
  guest-ipaddress 192.168.35.2 netmask 255.255.255.0
 app-default-gateway 192.168.35.1 guest-interface 0
 name-server0 8.8.8.8
end
3. guestshell을 활성화합니다.
Switch#guestshell enable
Interface will be selected if configured in app-hosting
Please wait for completion
guestshell installed successfully
Current state is: DEPLOYED
guestshell activated successfully
Current state is: ACTIVATED
guestshell started successfully
Current state is: RUNNING
Guestshell enabled successfully
참고: guestshell enable 명령은 guestshell을 설치하는 유일한 방법입니다. 앱 호스팅 CLI를 사용하여 활성화/연결/비활성화하면 guestshell을 제어하는 데 사용할 수 있습니다. 대신 guestshell exec CLI를 사용하는 것이 좋습니다.
Guestshell 라이프 사이클
Guestshell 비활성화: guesthell을 비활성화하면 guestshell에 대한 액세스가 제거되고 현재 세션이 종료됩니다. 파일/데이터가 보존되므로 guestshell enable을 사용하여 액세스를 복원할 수 있습니다.
Switch#guestshell disable
Guestshell disabled successfully
Guestshell 제거: 이렇게 하면 게스트 셸 파일 시스템이 비가역적으로 삭제됩니다. 모든 파일/데이터/스크립트/settinguestshell/설치된 패키지 및 모듈.
Switch#guestshell destroy
Guestshell destroyed successfully
참고: 이 명령을 실행하면 모든 데이터가 돌이킬 수 없게 손실됩니다.
Guestshell 실행: Guestshell은 guestshell run bash 명령을 실행하여 Guest 셸 내에 셸을 생성하므로 /bin 및 /sbin 아래에서 모든 Linux 이진을 사용할 수 있습니다.
Switch#guestshell run bash
[guestshell@guestshell ~]$ ping 192.168.10.1
PING 192.168.10.1 (192.168.10.1) 56(84) bytes of data.
64 bytes from 192.168.10.1: icmp_seq=2 ttl=254 time=0.517 ms
64 bytes from 192.168.10.1: icmp_seq=3 ttl=254 time=0.552 ms
64 bytes from 192.168.10.1: icmp_seq=4 ttl=254 time=0.447 ms
64 bytes from 192.168.10.1: icmp_seq=5 ttl=254 time=0.549 ms
Guestshell 실행 python: 인터랙티브 python 인터프리터를 시작하려면 이 명령을 사용합니다.
Switch#guestshell run python3
Python 3.6.8 (default, Dec 22 2020, 19:04:08)
[GCC 8.4.1 20200928 (Red Hat 8.4.1-1)] on linux
Type "help", "copyright", "credits" or "license" for more information.
>>>
검증
다음 명령을 사용하여 Guestshell을 검증할 수 있습니다.
Switch#show app-hosting detail appid guestshell
App id                 : guestshell
Owner                  : iox
State                  : RUNNING
Application
  Type                 : lxc
  Name                 : GuestShell
  Version              : 3.3.0
  Description          : Cisco Systems Guest Shell XE for x86_64
  Author               : Cisco Systems
  Path                 : /guestshell/:guestshell.tar
  URL Path             :
  Multicast            : yes
Activated profile name : custom

Resource reservation
  Memory               : 256 MB
  Disk                 : 1 MB
  CPU                  : 800 units
  CPU-percent          : 11 %
  VCPU                 : 1

Platform resource profiles
  Profile Name                  CPU(unit)  Memory(MB)  Disk(MB)
  --------------------------------------------------------------

Attached devices
  Type              Name               Alias
  ---------------------------------------------
  serial/shell     iox_console_shell   serial0
  serial/aux       iox_console_aux     serial1
  serial/syslog    iox_syslog          serial2
  serial/trace     iox_trace           serial3

Network interfaces
   ---------------------------------------
eth0:
   MAC address         : 52:54:dd:5b:c4:b8
   IPv4 address        : 192.168.30.2
   IPv6 address        : ::
   Network name        : mgmt-bridge200

Port forwarding
  Table-entry  Service  Source-port  Destination-port
  ---------------------------------------------------
  Switch#show app-hosting list
App id                                   State
---------------------------------------------------------
guestshell                               RUNNING
Switch#guestshell run sudo ifconfig
eth0: flaguestshell=4163<UP,BROADCAST,RUNNING,MULTICAST>  mtu 1500
        inet 192.168.10.10  netmask 255.255.255.0  broadcast 192.168.10.255
        inet6 fe80::5054:ddff:fece:a7c9  prefixlen 64  scopeid 0x20
        ether 52:54:dd:ce:a7:c9  txqueuelen 1000  (Ethernet)
        RX packets 3  bytes 266 (266.0 B)
        RX errors 0  dropped 0  overruns 0  frame 0
        TX packets 9  bytes 726 (726.0 B)
        TX errors 0  dropped 0 overruns 0  carrier 0  collisions 0

lo: flaguestshell=73<UP,LOOPBACK,RUNNING>  mtu 65536
        inet 127.0.0.1  netmask 255.0.0.0
        inet6 ::1  prefixlen 128  scopeid 0x10
        loop  txqueuelen 1000  (Local Loopback)
        RX packets 338  bytes 74910 (73.1 KiB)
        RX errors 0  dropped 0  overruns 0  frame 0
        TX packets 338  bytes 74910 (73.1 KiB)
        TX errors 0  dropped 0 overruns 0  carrier 0  collisions 0
리소스 크기 조정
!
app-hosting appid guestshell
 app-vnic management guest-interface 0
 app-resource profile custom
  cpu 1000
  memory 512
  persist-disk 200
!
변경 사항을 적용하려면 게스트 셸을 비활성화한 다음 활성화해야 합니다.
Switch#guestshell disable
Guestshell disabled successfully
Switch#guestshell enable
*Mar 11 01:17:46.841: %SYS-5-CONFIG_I: Configured from console by coguestshell enable
Interface will be selected if configured in app-hosting
Please wait for completion
guestshell activated successfully
Current state is: ACTIVATED
guestshell started successfully
Current state is: RUNNING
Guestshell enabled successfully
Switch#show app-hosting detail appid guestshell | sec Resource reservation
Resource reservation
  Memory               : 512 MB
  Disk                 : 200 MB
  CPU                  : 1110 units
  CPU-percent          : 15 %
  VCPU                 : 1
참고: 스위치에서는 플랫폼에 따라 리소스 크기를 최대 한도까지 조정할 수 있습니다. Cisco Catalyst 9000 Platform Hardware Resources for Applications를 참조하십시오.
일반적인 시나리오
DHCP 컨피그레이션
문제/장애: DHCP 클라이언트 이진(DHCLIENT)이 없습니다.
솔루션
sudo yum install dhcp-client 명령을 사용하여 Yum 유틸리티를 사용하여 DHCP 클라이언트를 설치할 수 있습니다. 그러나 CentOS Stream 8용 리포지토리는 더 이상 사용할 수 없습니다.
1. DHCP가 작동하도록 하려면 앱 호스팅에서 IP 주소를 설정하지 않아야 합니다.
!
interface AppGigabitEthernet1/0/1
 switchport trunk allowed vlan 50
 switchport mode trunk
!
app-hosting appid guestshell
 app-vnic AppGigabitEthernet trunk
  vlan 50 guest-interface 0
name-server0 8.8.8.8
!
2. 미러리스트를 yum repo에서 baseurl 자격 증명 모음으로 변경합니다.
Switch#guestshell run bash
[guestshell@guestshell ~]$ sudo find /etc/yum.repos.d/ -type f -exec sed -i 's/mirrorlist=/#mirrorlist=/g' {} +
[guestshell@guestshell ~]$ sudo find /etc/yum.repos.d/ -type f -exec sed -i 's/#baseurl=/baseurl=/g' {} +
[guestshell@guestshell ~]$ sudo find /etc/yum.repos.d/ -type f -exec sed -i 's/mirror.centos.org//g' {} +
[guestshell@guestshell ~]$ cat /etc/yum.repos.d/CentOS-Stream-RealTime.reporepo
# CentOS-Stream-RealTime.repo
# The mirrorlist system uses the connecting IP address of the client and the
# update status of each mirror to pick current mirrors that are geographically
# close to the client.  You should use this for CentOS updates unless you are
# manually picking other mirrors.
#
# If the mirrorlist does not work for you, you can try the commented out
# baseurl line instead.

[rt]
name=CentOS Stream $releasever - RealTime
#mirrorlist=http://mirrorlist.centos.org/?release=$stream&arch=$basearch&repo=RT&infra=$infra
baseurl=http:///$contentdir/$stream/RT/$basearch/os/
gpgcheck=1
enabled=0
gpgkey=file:///etc/pki/rpm-gpg/RPM-GPG-KEY-centosofficial
3. 패키지를 설치합니다.
guestshell@guestshell ~]$ sudo yum install dhcp-client
ast metadata expiration check: 0:50:34 ago on Wed Mar 12 17:44:46 2025.
Dependencies resolved.
================================================================================
 Package                Architecture Version                 Repository    Size
================================================================================
Installing:
 dhcp-client            x86_64       12:4.3.6-50.el8         baseos       319 k
Installing dependencies:
 bind-export-libs       x86_64       32:9.11.36-13.el8       baseos       1.1 M
 dhcp-common            noarch       12:4.3.6-50.el8         baseos       208 k
 dhcp-libs              x86_64       12:4.3.6-50.el8         baseos       148 k

Transaction Summary
================================================================================
Install  4 Packages

Total download size: 1.8 M
Installed size: 3.9 M
Is this ok [y/N]: y
Downloading Packages:
(1/4): dhcp-client-4.3.6-50.el8.x86_64.rpm      284 kB/s | 319 kB     00:01
(2/4): dhcp-common-4.3.6-50.el8.noarch.rpm      171 kB/s | 208 kB     00:01
(3/4): dhcp-libs-4.3.6-50.el8.x86_64.rpm        572 kB/s | 148 kB     00:00
(4/4): bind-export-libs-9.11.36-13.el8.x86_64.r 577 kB/s | 1.1 MB     00:02
--------------------------------------------------------------------------------
Total                                           908 kB/s | 1.8 MB     00:02
CentOS Stream 8 - BaseOS                        1.6 MB/s | 1.6 kB     00:00
Importing GPG key 0x8483C65D:
 Userid     : "CentOS (CentOS Official Signing Key) <CentOS Official Signing Key>"
 Fingerprint: 99DB 70FA E1D7 CE22 7FB6 4882 05B5 55B3 8483 C65D
 From       : /etc/pki/rpm-gpg/RPM-GPG-KEY-centosofficial
Is this ok [y/N]: y
Key imported successfully
Running transaction check
Transaction check succeeded.
Running transaction test
Transaction test succeeded.
Running transaction
  Preparing        :                                                        1/1
  Installing       : dhcp-libs-12:4.3.6-50.el8.x86_64                       1/4
  Installing       : dhcp-common-12:4.3.6-50.el8.noarch                     2/4
  Installing       : bind-export-libs-32:9.11.36-13.el8.x86_64              3/4
  Running scriptlet: bind-export-libs-32:9.11.36-13.el8.x86_64              3/4
  Installing       : dhcp-client-12:4.3.6-50.el8.x86_64                     4/4
  Running scriptlet: dhcp-client-12:4.3.6-50.el8.x86_64                     4/4
  Verifying        : bind-export-libs-32:9.11.36-13.el8.x86_64              1/4
  Verifying        : dhcp-client-12:4.3.6-50.el8.x86_64                     2/4
  Verifying        : dhcp-common-12:4.3.6-50.el8.noarch                     3/4
  Verifying        : dhcp-libs-12:4.3.6-50.el8.x86_64                       4/4

Installed:
  bind-export-libs-32:9.11.36-13.el8.x86_64  dhcp-client-12:4.3.6-50.el8.x86_64
  dhcp-common-12:4.3.6-50.el8.noarch         dhcp-libs-12:4.3.6-50.el8.x86_64

Complete!
참고: (CALO의 경우) Yum에 대한 프록시를 구성할 수 있습니다. 이렇게 하면 Yum이 프록시 서버를 통해 연결하여 패키지를 다운로드할 수 있습니다.
[guestshell@guestshell ~]$ echo "proxy=http://<IP_address:port>/" | sudo tee -a /etc/yum.conf > /dev/null
4. eth0에 대한 DHCP IP 주소를 요청합니다.
[guestshell@guestshell ~]$ sudo dhclient eth0
5. IP 주소 할당을 확인하여 DHCP 클라이언트가 작동하는지 확인합니다.
Switch#guestshell run ifconfig
eth0: flags=4163<UP,BROADCAST,RUNNING,MULTICAST>  mtu 1500
        inet 192.168.10.2  netmask 255.255.255.0  broadcast 192.168.10.255
        inet6 fe80::5054:ddff:fea0:4aef  prefixlen 64  scopeid 0x20
        ether 52:54:dd:a0:4a:ef  txqueuelen 1000  (Ethernet)
        RX packets 1516  bytes 2009470 (1.9 MiB)
        RX errors 0  dropped 0  overruns 0  frame 0
        TX packets 687  bytes 54603 (53.3 KiB)
        TX errors 0  dropped 0 overruns 0  carrier 0  collisions 0

lo: flags=73<UP,LOOPBACK,RUNNING>  mtu 65536
        inet 127.0.0.1  netmask 255.0.0.0
        inet6 ::1  prefixlen 128  scopeid 0x10
        loop  txqueuelen 1000  (Local Loopback)
        RX packets 773  bytes 90658 (88.5 KiB)
        RX errors 0  dropped 0  overruns 0  frame 0
        TX packets 773  bytes 90658 (88.5 KiB)
        TX errors 0  dropped 0 overruns 0  carrier 0  collisions 0
DNF Packet Manager 업데이트 실패
문제/장애: 오류로 인해 Guestshell에서 sudo dnf 업데이트 -y를 완료할 수 없습니다.
[guestshell@guestshell ~]$ sudo dnf upgrade --refresh
Warning: failed loading '/etc/yum.repos.d/CentOS-Base.repo', skipping.
솔루션
1. RPM 패키지를 다시 설치하고 업그레이드합니다.
! Clean packages

[guestshell@guestshell ~]$ sudo dnf clean all

! Reinstall and update the tpm2-tss package:

[guestshell@guestshell ~]$ sudo dnf install tpm2-tss-2.3.2-3.el8
[guestshell@guestshell ~]$ sudo dnf upgrade rpm
2. git 패키지를 별도로 설치합니다.
[guestshell@guestshell ~]$ sudo dnf install git -y
업그레이드 후 Guestshell 액세스가 손실됨
문제/장애: 버전 17.08.01 이상으로 업그레이드하면 게스트 셸에 액세스할 수 없게 되어 스크립트를 실행할 수 없게 됩니다.
Switch#guestshell run bash
Switch#
솔루션
이 문제는 Cisco 버그 ID CSCwi63075와 관련이 있습니다.  - 스위치에서 FIPS가 활성화된 경우 업그레이드 중에 트리거됩니다.
1. FIPS를 비활성화합니다.
Switch#configure terminal
Switch(config)#no fips authorization-key
FIPS: Authorization-key erased ONLY from the  Flash.
But the authorization-key is still operational. Use "reload" command for complete removal of key and to enter into non fips-mode.
Make sure to remove fips key from all the members of the stack individually
2. 수정 버전, 버전 17.12.04 또는 이후 릴리스가 포함된 버전 중 하나로 업그레이드할 수 있습니다.
IPv6 주소 지정 제한
문제/장애: 이 문제는 Cisco Guestshell 환경 내의 인터페이스에 나타나는 의도하지 않은 IPv6 주소와 관련이 있습니다. 의도적으로 구성한 것은 아닙니다.
IPV4를 사용하는 스위치에서 관찰된 컨피그레이션은 다음과 같습니다.
!
app-hosting appid guestshell
 app-vnic AppGigabitEthernet trunk
  vlan 50 guest-interface 0
   guest-ipaddress 192.168.20.10 netmask 255.255.255.0  <-- IPv4 address configured
 app-default-gateway 192.168.20.1 guest-interface 0
 app-resource profile custom
 name-server1 192.168.20.1
 !
Guestshell 환경에서 ifconfig 명령을 실행하면 IPv4 주소와 IPv6 주소가 모두 표시됩니다.
lat1-2-ssw01.gts#guestshell run bash
[guestshell@guestshell ~]$ sudo ifconfig
eth0: flags=4163  mtu 1500
        inet 192.168.20.10  netmask 255.255.255.0 broadcast 192.168.20.255
        inet6 2620:119:5022:515:5054:ddff:fe41:c643  prefixlen 64  scopeid 0x0
        inet6 fe80::5054:ddff:fe41:c643  prefixlen 64  scopeid 0x20
        ether 52:54:dd:41:c6:43  txqueuelen 1000  (Ethernet)
        RX packets 7829  bytes 1750981 (1.6 MiB)
        RX errors 0  dropped 0  overruns 0  frame 0
        TX packets 5551  bytes 744320 (726.8 KiB)
        TX errors 0  dropped 0 overruns 0  carrier 0  collisions 0

lo: flags=73  mtu 65536
        inet 127.0.0.1  netmask 255.0.0.0
        inet6 ::1  prefixlen 128  scopeid 0x10
        loop  txqueuelen 1000  (Local Loopback)
        RX packets 292  bytes 63812 (62.3 KiB)
        RX errors 0  dropped 0  overruns 0  frame 0
        TX packets 292  bytes 63812 (62.3 KiB)
        TX errors 0  dropped 0 overruns 0  carrier 0  collisions 0
솔루션
1단계: Guestshell에서 IPv6 라우팅 및 주소 지정을 비활성화합니다.
lat1-2-ssw01.gts#guestshell run bash
[guestshell@guestshell ~]$ sudo sysctl -w net.ipv6.conf.all.disable_ipv6=1
[guestshell@guestshell ~]$ sudo sysctl -w net.ipv6.conf.default.disable_ipv6=1
[guestshell@guestshell ~]$ sudo sysctl -w net.ipv6.conf.lo.disable_ipv6=1
2단계: IPv6가 비활성화되어 있는지 확인합니다.
[guestshell@guestshell ~]$ /sbin/ifconfig
eth0: flags=4163  mtu 1500
        inet 192.168.20.10  netmask 255.255.255.0 broadcast 192.168.20.255
        ether 52:54:dd:41:c6:43  txqueuelen 1000  (Ethernet)
        RX packets 7829  bytes 1750981 (1.6 MiB)
        RX errors 0  dropped 0  overruns 0  frame 0
        TX packets 5551  bytes 744320 (726.8 KiB)
        TX errors 0  dropped 0 overruns 0  carrier 0  collisions 0

lo: flags=73  mtu 65536
        inet 127.0.0.1  netmask 255.0.0.0
        loop  txqueuelen 1000  (Local Loopback)
        RX packets 292  bytes 63812 (62.3 KiB)
        RX errors 0  dropped 0  overruns 0  frame 0
        TX packets 292  bytes 63812 (62.3 KiB)
        TX errors 0  dropped 0 overruns 0  carrier 0  collisions 0
Python 스크립트를 실행하는 동안 디스크 공간 오류 발생
문제/장애: 이 문제는 Guestshell 내의 EEM(Embedded Event Manager)에서 실행되는 Python 스크립트와 관련이 있습니다. 다음 오류와 함께 디스크 공간이 부족하여 스크립트가 실패합니다.
guestshell run python3 /flash/guest-share/monitoring.py -rt True -bgp True
---- pushing bgp status ----
OSError: [Errno 28] No space left on device

During handling of the above exception, another exception occurred:

Traceback (most recent call last):
  File "/flash/guest-share/monitoring_periodic_tasks.py", line 18, in
    print(bgp_status())
  File "/bootflash/guest-share/monitoring_bgp_status.py", line 15, in bgp_status
    vrf = cli.cli('show vrf')
  File "/usr/lib/python3.6/site-packages/cli/__init__.py", line 311, in cli
    _log_to_file("CLI execution invoked for '" + command + "'")
  File "/usr/lib/python3.6/site-packages/cli/__init__.py", line 87, in _log_to_file
    logfile.close()
OSError: [Errno 28] No space left on device
! This error indicates that the disk space allocated for logging command executions within the Guestshell environment has been exhausted.
솔루션
디스크 공간 부족 문제를 해결하려면 Guestshell 환경에 대한 persist-disk 크기를 늘려야 합니다.
1. 지속형 디스크 크기를 늘리도록 응용 프로그램 리소스 프로필을 수정합니다.
Switch(config-app-hosting)# app-resource profile custom
Switch(config-app-hosting-profile)# persist-disk 100
Switch(config-app-hosting-profile)# cpu 800
Switch(config-app-hosting-profile)# memory 256
Switch(config-app-hosting-profile)# end
2. 컨피그레이션을 저장하고 guestshell을 활성화/비활성화합니다.
Switch# write memory
Switch#guestshell disable
Guestshell disabled successfully
Switch#guestshell enable
Interface will be selected if configured in app-hosting
Please wait for completion
guestshell installed successfully
Current state is: DEPLOYED
guestshell activated successfully
Current state is: ACTIVATED
guestshell started successfully
Current state is: RUNNING
Guestshell enabled successfully
Syslog 로깅
guestshell에서 다음 명령을 실행하여 syslog 메시지를 표시할 수 있습니다.
[guestshell@guestshell ~]$ sudo logger -p 1 "Priority 1"
[guestshell@guestshell ~]$ sudo cat /var/log/messages
Mar 11 02:05:24 localhost systemd[248]: user@0.service: Failed at step PAM spawning /usr/lib/systemd/systemd: Operation not permitted
Mar 11 02:05:24 localhost systemd[1]: user@0.service: Failed with result 'protocol'.
Mar 11 02:05:24 localhost systemd[1]: Failed to start User Manager for UID 0.
Mar 11 02:05:24 localhost systemd[1]: Stopping /run/user/0 mount wrapper...
Mar 11 02:05:24 localhost systemd[1]: run-user-0.mount: Succeeded.
Mar 11 02:05:24 localhost systemd[1]: user-runtime-dir@0.service: Succeeded.
Mar 11 02:05:24 localhost systemd[1]: Stopped /run/user/0 mount wrapper.
Mar 11 02:05:24 localhost root[250]: Priority 1
[guestshell@guestshell ~]$ sudo cat /var/log/secure
Mar 11 02:05:24 localhost systemd[248]: pam_unix(systemd-user:account): expired password for user root (root enforced)
Mar 11 02:05:24 localhost sudo[246]: pam_systemd(sudo:session): Failed to create session: Start job for unit user@0.service failed with 'failed'
Mar 11 02:05:24 localhost sudo[246]: pam_unix(sudo:session): session opened for user root by (uid=0)
추적 로그
앱 호스팅 appid guestshell 로그를 bootflash:folder_name으로 이동하여 파일을 회전할 수 있습니다. 이는 대상 디렉토리로 회전하는 데 사용할 수 있지만 traceloguestshell 디렉토리로도 회전합니다.
Switch#app-hosting move appid guestshell log to bootflash:
Successfully moved tracelog to flash:/ioxapploguestshell/iox_R0-0_R0-0.14195_0.20250311023831.bin.gz
참고: IOX guestshell.log는 항상 /tmp/rp/trace 아래의 활성 tracelog 파일입니다 · 이 파일이 1MB에 도달하면 타임스탬프가 포함된 bootflash:traceloguestshell/로 자동 회전되고 새 파일이 시작됩니다.
관련 정보
- Cisco Catalyst 9000 Series 스위치의 애플리케이션 호스팅 백서
- Cisco Catalyst 9300 Series 스위치 하드웨어 설치 설명서
- 프로그래밍 기능 컨피그레이션 가이드, Cisco IOS XE 17.9.x
- Catalyst 9300 Stackwise 시스템 아키텍처 백서
- Cisco 버그 ID CSCwi63075 - FIPS 모드가 활성화된 경우 17.08.01 이상으로 업그레이드한 후에는 CLI를 통해 Guestshell에 액세스할 수 없습니다.
- 기술 지원 및 문서 − Cisco Systems
개정 이력
| 개정 | 게시 날짜 | 의견 |
|---|---|---|
1.0 |
17-Mar-2025
|
최초 릴리스 |
 피드백
피드백