はじめに
このドキュメントでは、Cisco Secure Endpoint Private Cloudアプライアンスからサポートスナップショットを収集し、ライブサポートセッションを有効にする手順について説明します。
背景説明
TACとコラボレーションする際に、サポートスナップショットを収集するか、TACにセキュアエンドポイント(旧称Advanced Malware Protection)のプライベートクラウドアプライアンスへのサポートトンネルの確立を許可することが必要になる場合があります。これにより、修正の徹底的な調査やリモートでの適用が容易になります。
このアプローチは時間を節約し、問題に効果的に対処するために必要な包括的な情報をTACエンジニアに提供します。
スナップショットのサポート
管理ポータルからのサポートスナップショットの生成
管理ポータルからサポートスナップショットを収集するには、次の手順を実行します。
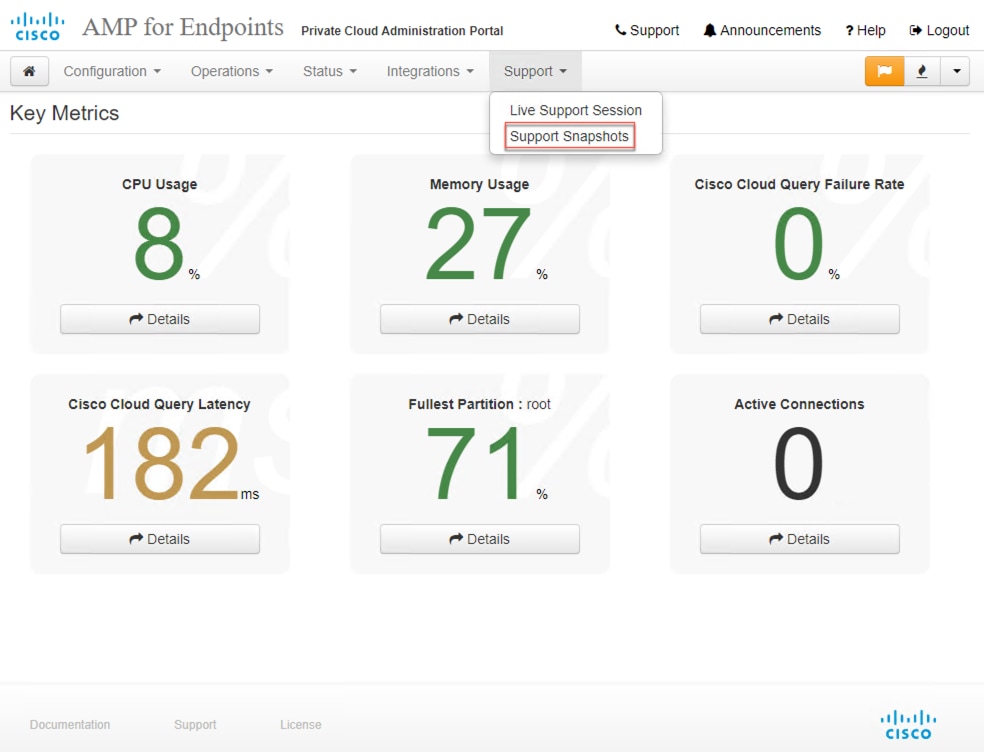
ステップ1:管理ポータルにログインします。
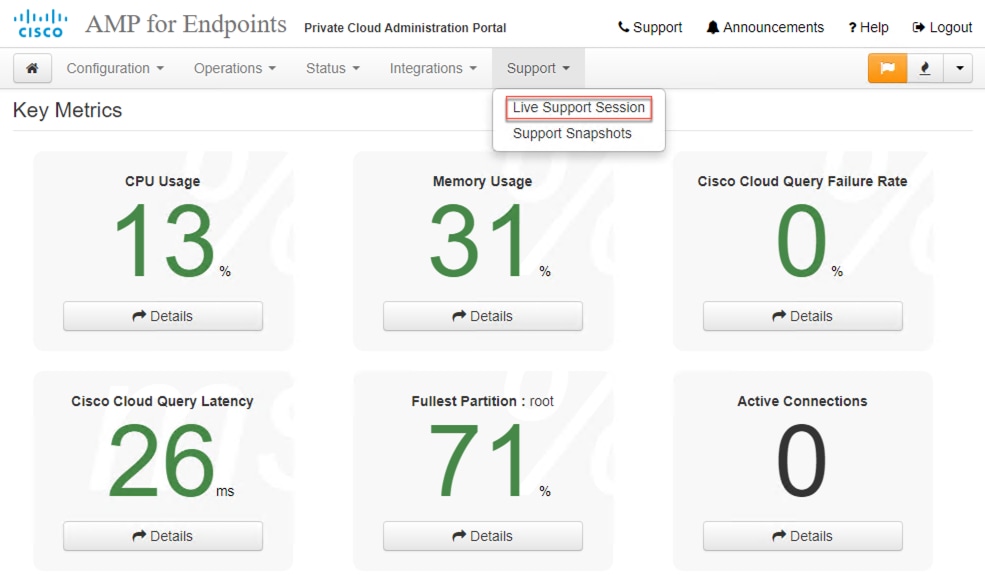
ステップ2:図に示すように、Supportを選択してから、Support Snapshotsを選択します。
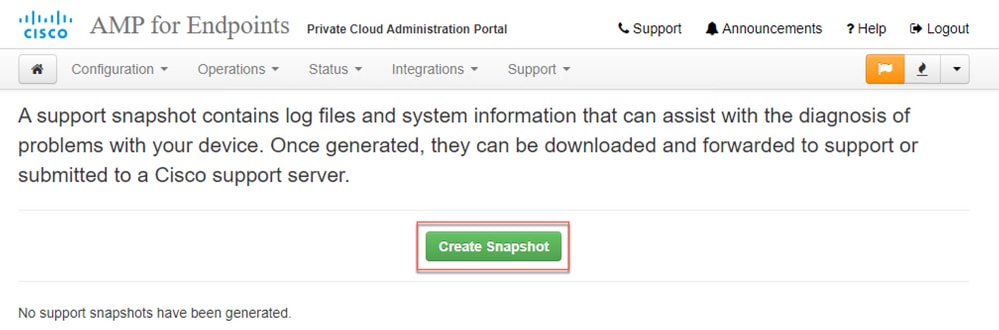
ステップ3:Create Snapshotをクリックします。
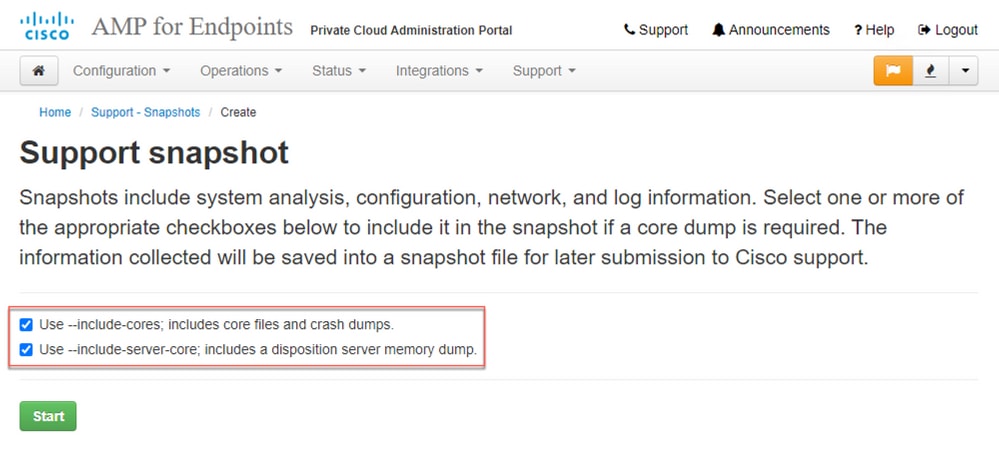
ステップ4:図に示すように、デフォルトでは選択されていないスナップショットを使用して、「コアファイルとその他のメモリダンプを含める」を選択できます。
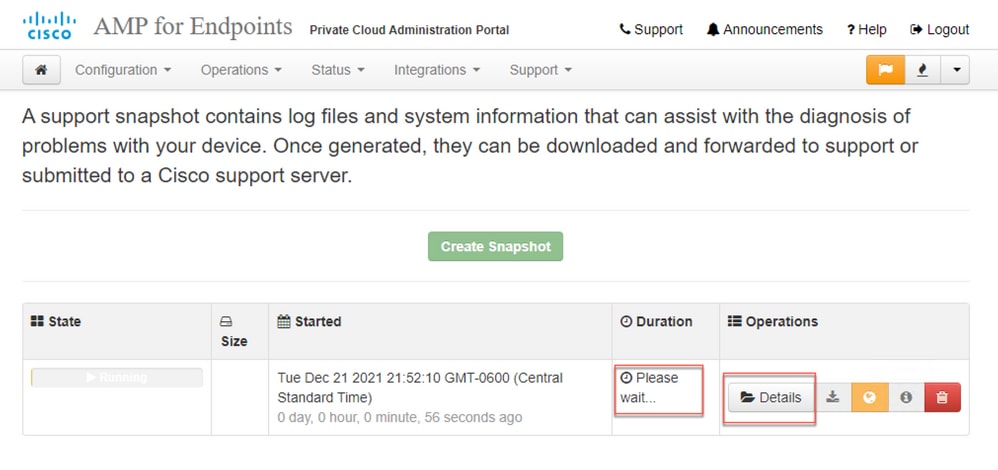
ステップ5:スナップショットが開始され、時間がかかる場合があります。進行状況をモニタするには、図に示すように、Detailsをクリックします。
ステップ6:スナップショットの生成が完了したら、  アイコンをクリックして、ポータルにアクセスしているローカルマシンにスナップショットをダウンロードします。
管理ポータルSSHからのサポートスナップショットの生成
管理ポータルのSSHからサポートスナップショットを作成するには、次の手順を実行します。
ステップ1:管理ポータルにSSHで接続します。
ステップ2:これは、スナップショットを生成するために使用可能なCLIです。
[root@fireamp ~]# amp-support snapshot -A

usage: /opt/opadmin/embedded/bin/amp-support snapshot [options]

Create a snapshot of the current system; this includes log files, system
status, run processes, crash dumps, and other information that can be
used by a support engineer to diagnose problems with your system.
If no explicit options are provided the default ones are assumed.  The
default options are: include-configs, include-logs, include-network,
include-cores, and include-status

    -A, --all                        Include everything.
    -a, --include-analysis           Include system analysis. (SLOW!)
    -C, --include-configs            Include configuration files.
    -c, --include-cores              Include core files.
    -F, --include-firehose-cassandra Include firehose-cassandra status.
    -i, --include-inodes             Include filesystem inode usage.
    -I, --include-integrations       Include appliance integration information.
    -k, --include_kafka              Include Kafka status.
    -L, --include-flink              Include Flink status.
    -l, --include-logs               Include log files.
    -m, --include-mongo              Include MongoDB status.
    -N, --include-cassandra          Include Cassandra status.
    -n, --include-network            Include network analysis.
    -r, --include-redis              Include Redis status.
    -S, --include-server-core        Include a disposition server memory dump.
    -s, --include-status             Include system status.
    -d, --include-docker             Include docker status.
    -z, --include_zookeeper          Include Zookeeper status.
    -f, --fs-check FILE              Include filesystem check results from file.
    -v, --verbose                    Increase output verbosity.
アプライアンスコンソールからのサポートスナップショットの生成
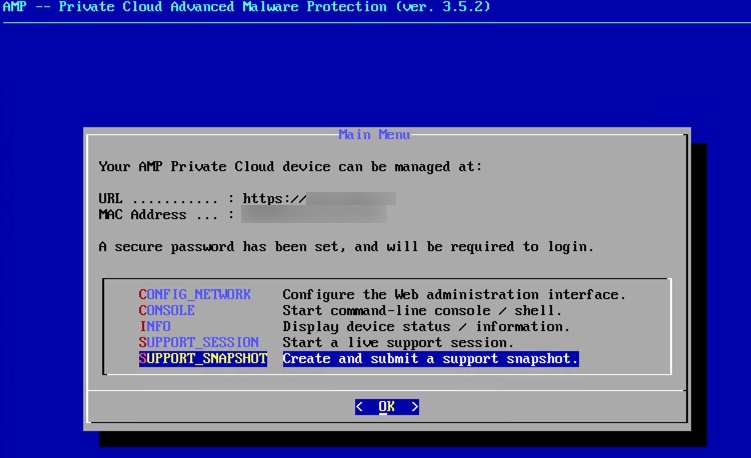
プライベートクラウドアプライアンスコンソールからサポートスナップショットを作成するには、次の手順を実行します。
ステップ1:プライベートクラウドアプライアンスコンソールにログインします。
ステップ2:SUPPORT_SNAPSHOTを選択します。
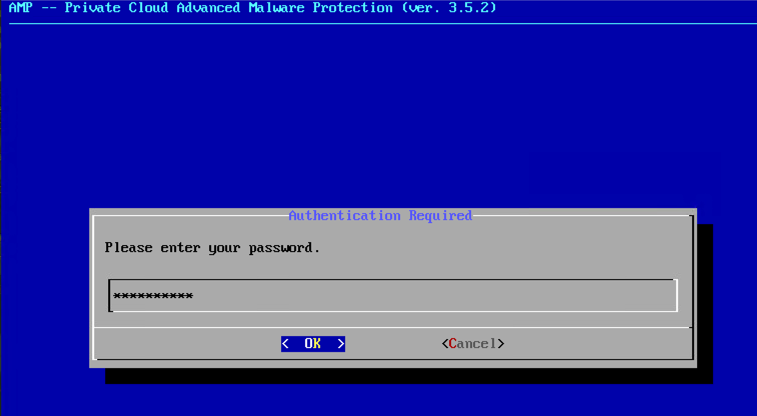
ステップ3:図に示すように、管理ポータルのパスワードを入力します。
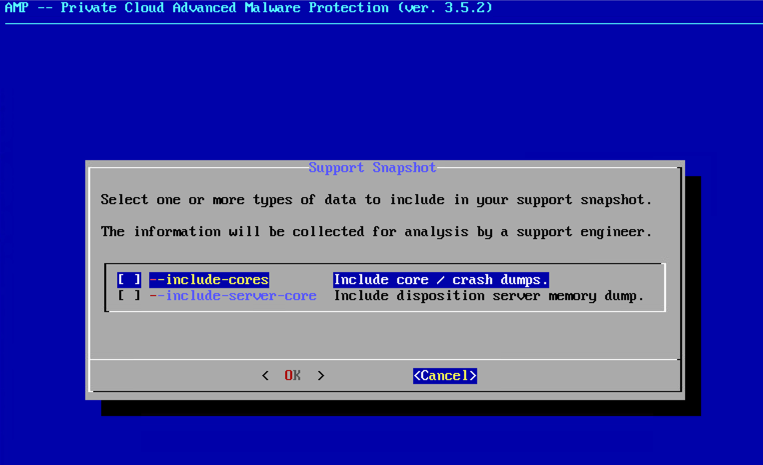
ステップ4:図に示すように、デフォルトでは選択されていないスナップショットを使用して、「コアファイルとその他のメモリダンプを含める」を選択できます。
ステップ5:その後、OKを選択すると、スナップショットが開始されます。
ライブサポートセッション
管理ポータルからのライブサポートセッションの有効化
管理ポータルからイネーブルライブサポートセッションを作成するには、次の手順を実行します。
ステップ1:管理ポータルにログインします。
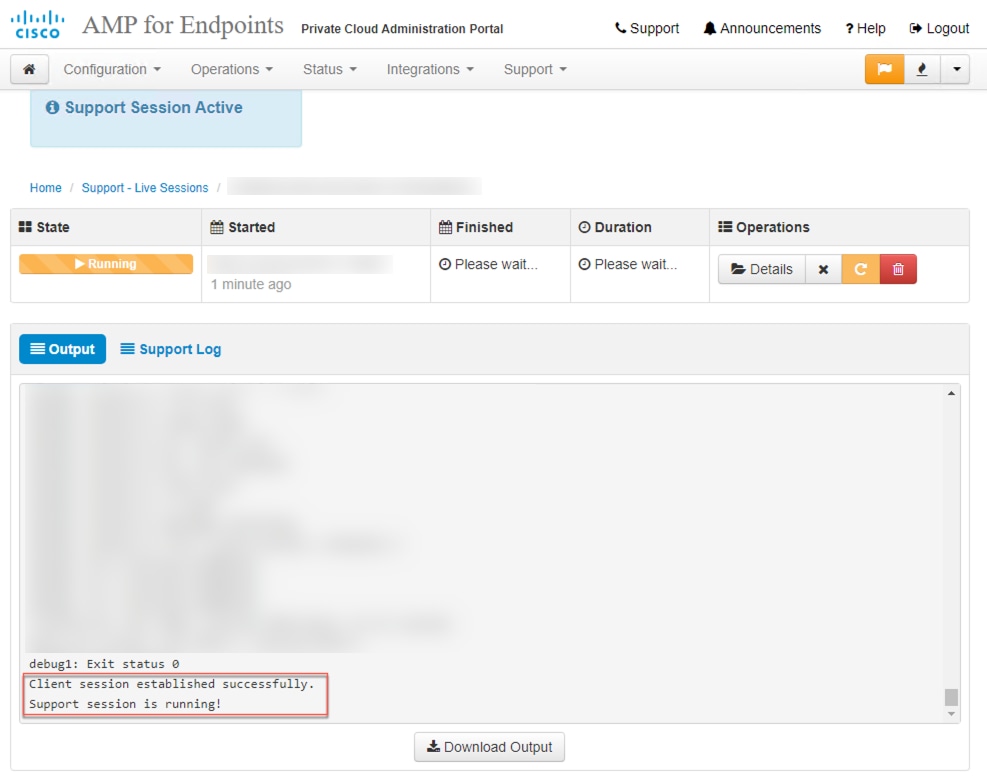
ステップ2:Supportをクリックするか選択して、Live Support Sessionを選択します。
ステップ3:クリックするか、Start Support Sessionを選択してからDownloadを選択して、TACがアプライアンスへのリモート接続に必要とするSSH IDを取得します。次に、Startをクリックまたは選択して、図に示すようにライブサポートセッションを開始します。

ステップ4:図に示すように、アプライアンスがライブサポートセッションに正常に接続された後、図に示すようにログが表示されます。
管理ポータルSSHからのライブサポートセッションの有効化
管理ポータルのSSHから有効なライブサポートセッションを作成するには、次の手順を実行します。
ステップ1:管理ポータルのSSHにログインします。
ステップ2:これは、SSHからのライブサポートセッションを有効にするために使用可能なCLIです。
[root@fireamp ~]# amp-support session -l support.log -s support-sessions.amp.cisco.com -p 22
usage: /opt/opadmin/embedded/bin/amp-support session [options]

Manage a support session with a remote server; this facilitates a secure method of
provide unrestricted shell access to your machine to an engineer on a remote
system. Note that when restart a session, the same parameters as the previous
session are used unless new parameters are supplied. The UUID is expected to be
version 4.

Note that the `--log` option provides an optional log file for the support
engineer to log their shell activity to. A script is provided to the remote
user to collect this log data, but it is not and cannot be enforced by the
support script.

OPTIONS

    -b, --batch                      Use batch (non-interactive) mode.
    -d, --delete                     Delete a support session and all files.
    -l, --log FILE                   Log remote shell commands to file.
    -p, --port PORT                  Connect to an alternative port.
    -s, --support-server SERVER      Set the server of a session.
    -t, --terminate                  Terminate an active session.
    -v, --verbose                    Increase output verbosity.

NOTE: UUID can be any random string as long as it has the format: xxxxxxxx-xxxx-xxxx-xxxx-xxxxxxxxxxxx. Also, you can keep the Port as default to 22

EXAMPLES

    /opt/opadmin/embedded/bin/amp-support session -l support.log -s support.example.com -p 2222 xxxxxxxx-xxxx-xxxx-xxxx-xxxxxxxxxxxx
    /opt/opadmin/embedded/bin/amp-support session xxxxxxxx-xxxx-xxxx-xxxx-xxxxxxxxxxxx
    /opt/opadmin/embedded/bin/amp-support session -t -d xxxxxxxx-xxxx-xxxx-xxxx-xxxxxxxxxxxx
アプライアンスコンソールからのライブサポートセッションの有効化
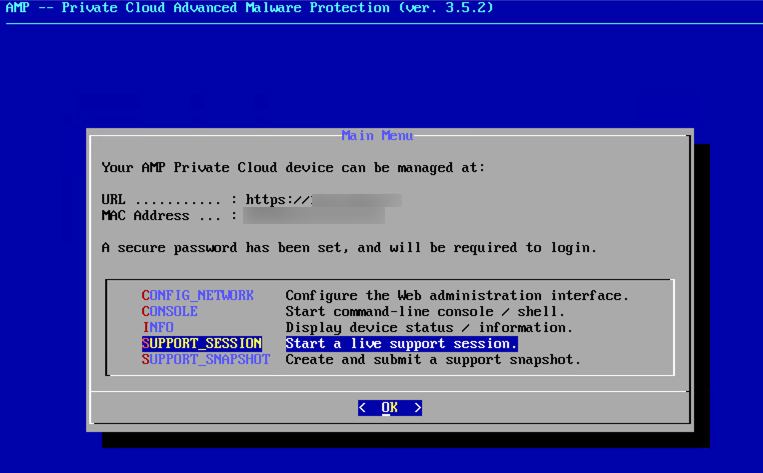
プライベートクラウドアプライアンスコンソールからイネーブルライブサポートセッションを作成するには、次の手順を実行します。
ステップ1:プライベートクラウドアプライアンスコンソールにログインします。
ステップ2:図に示すように、SUPPORT_SESSIONを選択してライブサポートセッションを有効にします。
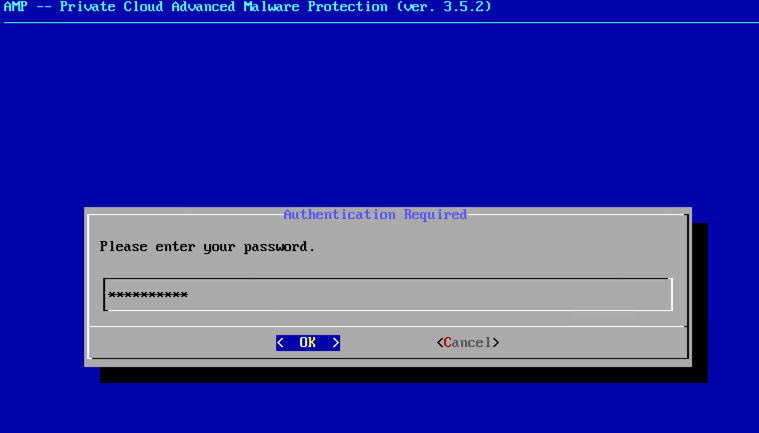
ステップ3:図に示すように、管理ポータルのパスワードを入力します。
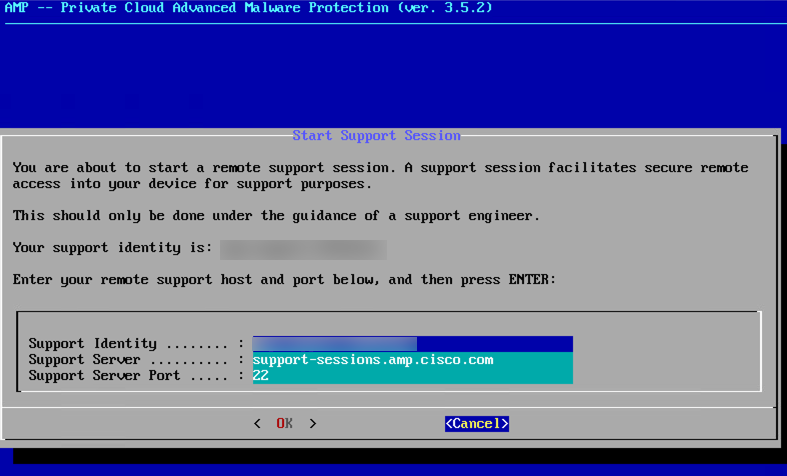
ステップ4:すべてのデフォルト設定を変更せずに残すことができます。図に示すように、ライブサポートセッションを有効にするには、OKを選択します。
 フィードバック