Cisco Aironet 802.11a/b/g Wireless LAN Client Adapters (CB21AG and PI21AG) Administration Utility Administrator Guide (ACAU), Release 2.0
Bias-Free Language
The documentation set for this product strives to use bias-free language. For the purposes of this documentation set, bias-free is defined as language that does not imply discrimination based on age, disability, gender, racial identity, ethnic identity, sexual orientation, socioeconomic status, and intersectionality. Exceptions may be present in the documentation due to language that is hardcoded in the user interfaces of the product software, language used based on RFP documentation, or language that is used by a referenced third-party product. Learn more about how Cisco is using Inclusive Language.
- Updated:
- June 29, 2007
Chapter: Chapter 3 - Global Settings
Global Settings
This chapter describes the Global Settings tab components and how to use them. The global settings enable you to create the configuration file that specifies the administrative overrides to invoke when a user installs the client adapter drivers and ADU. The following topics are covered in this chapter:
•![]() Retrieving a Configuration File
Retrieving a Configuration File
Global Settings Tab
Then Global Settings tab enables you to override default setup, user, and profile component parameters and create a configuration file used by the Install Wizard when the client adapter software is installed. The Global Settings tab is on the ACAU main window (see Figure 3-1).
Figure 3-1 Global Settings Window
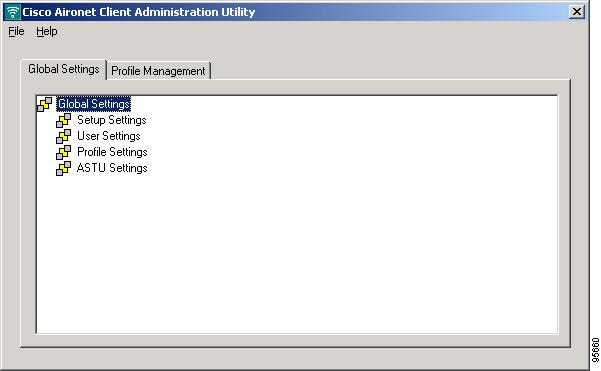
The Global Settings tab enables you to perform the following tasks which provide directions to the Install Wizard when a user installs the client adapter's driver and ADU:
•![]() Configure setup settings
Configure setup settings
•![]() Configure user settings
Configure user settings
•![]() Configure profile settings
Configure profile settings
•![]() Configure ASTU settings
Configure ASTU settings
Double click the component to see its parameters. Figure 3-2 shows the expanded Setup Setting component.
Figure 3-2 Category Components
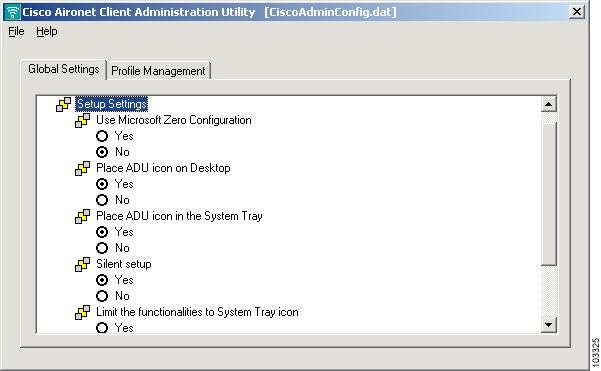
Most parameters have two settings: Yes or No. To change a parameter, click the value you wish the parameter to be.
Some parameters cannot be installed separately. Therefore, when you select or deselect these parameters, the settings of other component parameters may change. The icon next to the parameter changes color when you select or deselect parameters that cannot be installed separately.
When all parameters are set to Yes, the icon consists of two gray boxes overlapping a yellow box (Figure 3-3).
Figure 3-3 Changeable Parameter Icon

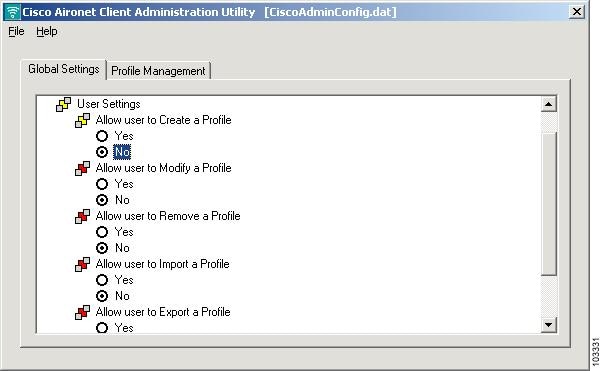
For example, if you set the Allow user to Create a Profile parameter to No, The remaining parameters are also changed to No and the yellow box in the icon changes to red (see Figure 3-4).
Figure 3-4 Non-changeable Parameter Icons
Configuring Setup Settings
The Setup Settings component is where you provide setup information that the Install Wizard uses to install the client adapter driver and software on a user's computer. Double-click Setup Settings to view the parameters in the component. Table 3-1 identifies and describes the parameters in the Setup Setting component and lists their default values.
Configuring User Privileges
The User Settings component is where you determine the privileges a user has after the client adapter driver and software are installed. Table 3-2 identifies and describes the parameters in the Setup Setting component and lists their default values.
Configuring Profile Settings
The Profile Settings component is where you create and configure the active profile used by the ADU after the client adapter driver and software are installed. Table 3-3 identifies and describes the parameters in the Profile Settings component and lists their default values.
Configuring ASTU Settings
The ASTU Settings component is where you configure the Aironet System Tray Utility (ASTU). ASTU is an optional application that provides a small subset of the features available through ADU. Specifically, it enables a user to access status information about the client adapter and perform basic tasks. ASTU is available from an icon on the Windows system tray, making it easily accessible and convenient to use. The ASTU icon appears on the system tray only if you have set the Place ADU icon in the System Tray parameter to Yes.
The parameters you set when you configure the ASTU Settings component identify what users see after opening ASTU on their computers. Table 3-4 identifies and describes the parameters in the ASTU Settings component and lists their default values.
|
|
|
|---|---|
Preferences |
Determines whether ADU Preferences are available to the user. Note 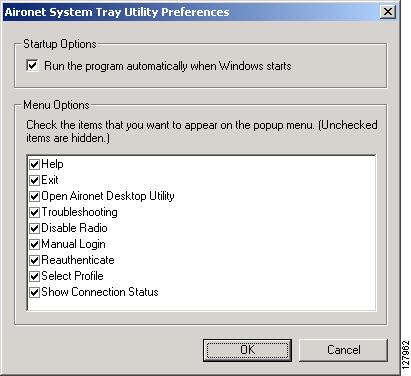
Note |
Help |
Enables the user to access online help from the ASTU. Note |
Exit |
Determines whether the user can exit ADU from ASTU. Note |
Open Aironet Desktop Utility |
Determines whether the user can open ADU from the ASTU. Note |
Troubleshooting |
Determines whether the user can run troubleshooting tests from the ASTU. Note |
Disable Radio |
Enables the user to disable or enable the client adapter's radio from the ASTU. Note |
Manual Login |
Enables the user to use the ASTU to manually invoke the authentication process for a profile that is configured to use a manually prompted LEAP username and password. Note |
Reauthenticate |
Enables the user to use the ASTU reathenticate using the username and password of the active profile. Note Note |
Select Profile |
Enables the user to use the ASTU to select and activate a profile from those available in the Profile Manager. Note Note Note |
Show Connection Status |
Enables the user to display the Connection Status window. Note |
Saving a Configuration File
When you have finished configuring the Global Settings components and parameters, you must save the configuration file. When you use ACAU the first time and save the file using the Save or Save As option in the File drop-down menu, ACAU automatically names the file ciscoadminconfig.dat and saves it to a path and directory you specify.

Note ![]() You must save the ciscoadminconfig.dat file to the drive and directory in which the install wizard (setup.exe) resides. If the file is saved to any other location it is not processed by the install wizard.
You must save the ciscoadminconfig.dat file to the drive and directory in which the install wizard (setup.exe) resides. If the file is saved to any other location it is not processed by the install wizard.
After you have saved the file the first time, subsequent saves automatically overwrite the existing file to the path and directory you specified when you saved it the first time. To change either the filename or the path, you must use the Save As command.
Retrieving a Configuration File
After you have saved a configuration file, you can retrieve it using ACAU. To retrieve a configuration file, use the Open option in the File drop-down menu. ACAU remembers the last location saved location and displays that information in the Open window that appears when you select Open.
You can browse to another location using standard Windows file management procedures or by entering the complete path in the File name field.
 Feedback