Calls

Make calls

Your phone works just like a regular phone. But we make it easier for you to make calls.

Make a call

Use your phone just like any other phone to make a call.

Procedure


Enter a number and pick up the handset.


Make a Call with the Dial Assistance List

When you are dialing a number and dial assistance is configured, the dial assistance list shows you suggestions from your directory and call history.

Procedure


Step 1

Use the navigation button to highlight a phone number that you see in the dial assistance list.

Step 2

Press Dial or Call to place the call.


Make a call with the speakerphone

Use your speakerphone for hands-free calling. Keep in mind that your coworkers might be able to hear your call too.

Procedure


Step 1

Enter a number using the keypad.

Step 2

Press Speakerphone .


Make a call with a headset

Use your headset for hands-free calling that won't disturb your coworker and gives you some privacy.

Procedure


Step 1

Plug in a headset.

Step 2

Enter a number using the keypad.

Step 3

Press Headset .


Make an Emergency Call

Use your phone to make an emergency call, similar to any other call. When you dial the emergency number, your emergency services get your phone number and location so that they can assist you.


Note


If your call disconnects, the emergency services can call you back.


Before you begin

Your phone must be set up to obtain your physical location. Emergency services personnel need your location to find you when you make an emergency call.

Procedure


Enter the emergency number and lift the handset.
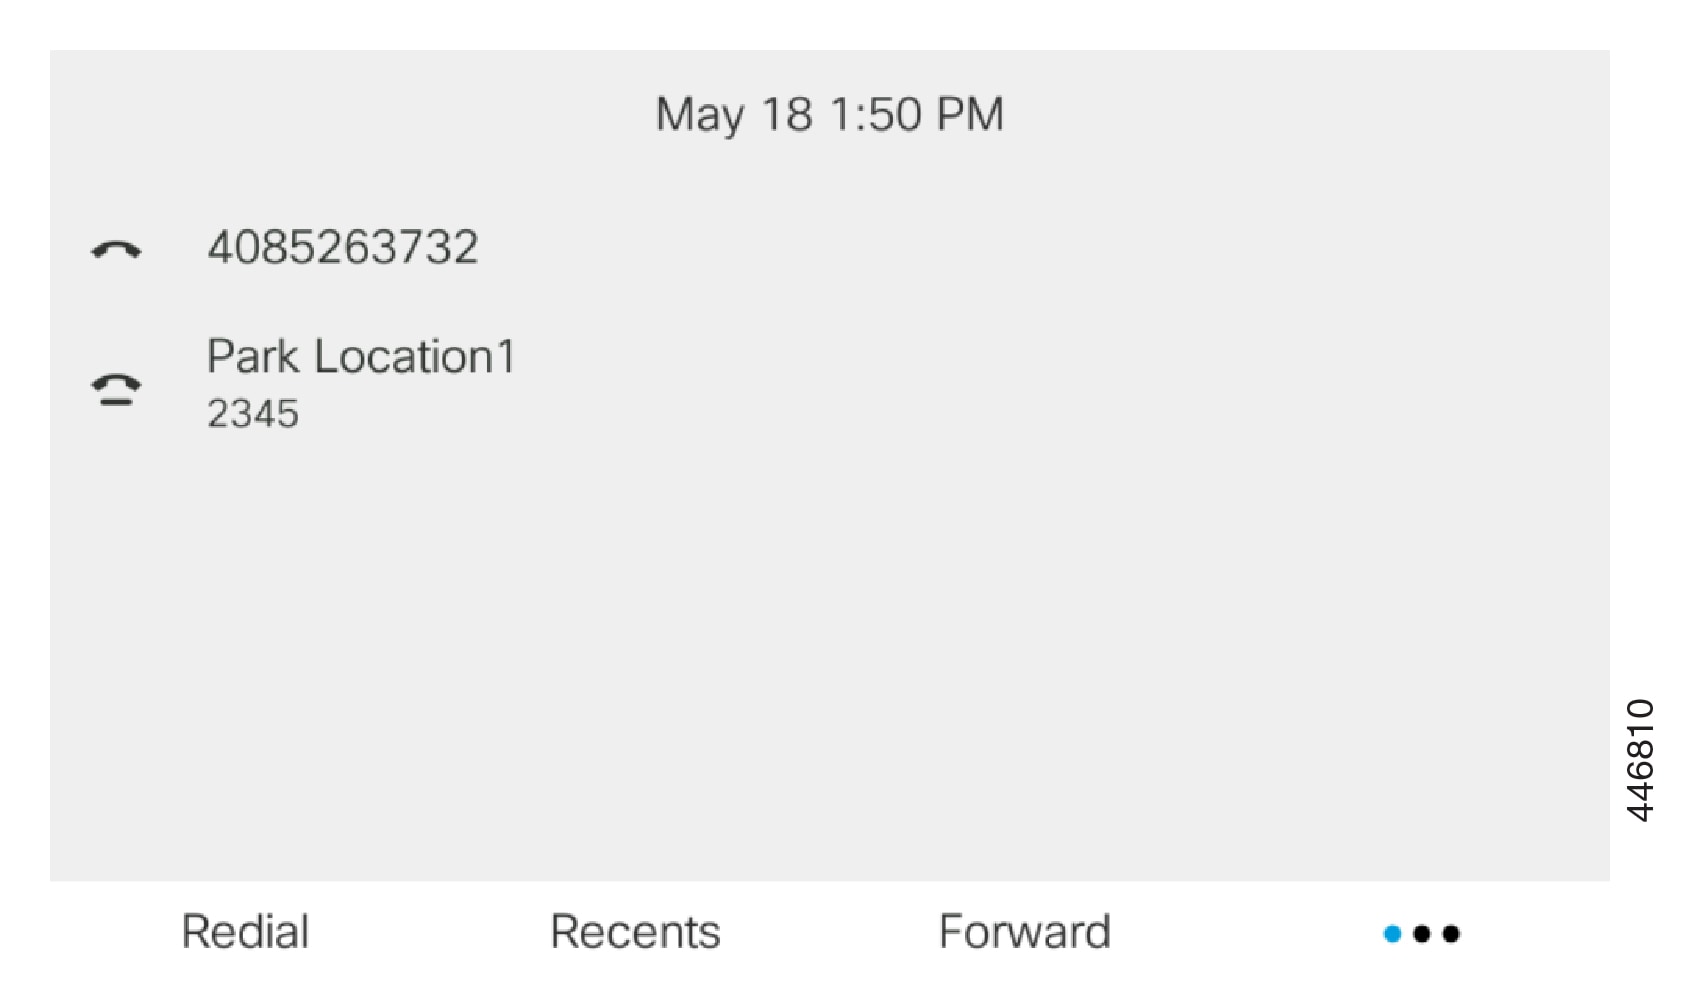

Redial a number

You can call the most recently dialed phone number.

Procedure


Step 1

(Optional) Select a line.

Step 2

Press Redial.

Note


For Webex Calling, workspaces support Redial when Local Call history is set to the workspace devices or by using FAC *66.

Step 3

Select the call record from the Placed calls list and press Call.

You can also access the Placed calls list from Information and settings > Recents > Placed calls.


Speed Dial

Speed Dial allows you to press a button, enter a preset code, or select a phone screen item to place a call. You can configure the speed dial from the phone screen and also from the phone web page.

You can edit, delete, and validate a speed-dial code.

Assign a speed-dial code from the phone screen

You can configure a speed-dial index from your phone screen. You can also assign a speed-dial code from the phone web page.

Procedure

Step 1

Press Applications .

Step 2

Select Speed dials.

Step 3

Scroll to an unassigned speed-dial index.

Step 4

Press Edit and do one of the following:

  • Enter the name and number.
  • Select Option > Select from contact to select a contact from the address book.

Step 5

Press Save.


Make a call with a speed-dial code

Before you begin

Set up speed-dial codes on the phone web page or from your phone screen.

Procedure

Enter the speed-dial code and press Call.


Configure a speed-dial on a line key

You can press any idle line key on your phone and set up speed dial on it. The speed-dial icon, the name, and the extension number are displayed on your phone screen next to the line key. You can also verify this change by checking the Extended Function field on the web page. After you configure the speed dial on a line key, you can press the line key to modify the speed-dial information and assign a new phone number and name. You can press the line key that has speed-dial configured to speed dial a number.

You can configure your key expansion module line key as a speed dial key and you can press that line key to speed dial a number. Your administrator configures the key expansion module line key as a speed dial key from the phone web page.

Before you begin

Go to the web page and disable the line key that will become the speed dial key.

Procedure

Step 1

Press any idle line key on your phone for at least two seconds.

Step 2

In the Speed-Dial window, add the speed-dial name and phone number to call when you press this line key.

Step 3

Click Save.


Remove a speed-dial from a line key

You can press a line key on your phone and delete speed dial assigned to it. The speed dial on the line key is removed. Check the phone web page to confirm that the speed dial is removed.

Procedure

Step 1

Press a line key that has a speed dial configured for at least two seconds.

Step 2

Press Option > Delete in the Speed-Dial window on the phone screen.

Step 3

Select None and confirm with OK


Use the Line in Focus for Speed-Dial Calls

You can configure a line key to perform a speed dial either with a Voice Profile ID (VID) or without a VID. When both are configured, VID has a higher priority. The call is routed to that line.

If a line key is configured without VID, you can configure a speed-dial key to use the line in focus.

Procedure

Step 1

Configure a speed-dial key without using VID.

Step 2

Change the focus to the line that you prefer.

Step 3

Press the speed-dial key to make a call.

The call is made with the line in focus.

If the existing number of calls on the line in focus is equal to the value set in the Call Appearances Per Line field in the phone web page, the speed-dial call is made from the next available line.


Use the Line in Focus to Check Speed-Dial Calls

If a line key is configured without VID, you can perform a check to confirm whether the call is made with the line in focus.

Procedure

Step 1

Configure a speed-dial key without using VID.

Step 2

Change the focus to the line that you prefer.

Step 3

Press the speed-dial key to make a call.

The call is made with the line in focus.


Dial an international number

You can dial international calls when you prefix the phone number with a plus (+) sign.

Procedure


Step 1

Press and hold star (*) for at least 1 second.

The plus (+) sign is displayed as the first digit in the phone number.

Step 2

Enter the phone number.

Step 3

Press Call or wait 10 seconds after the last key press to automatically place the call.


Secure calls

Your phone encrypts all calls to protect the calls. The lock icon displays on the phone screen for all secure calls.

You can also set a password on your phone to restrict unauthorized access.

Answer Calls

Your Cisco IP Phone works just like a regular phone. But we make it easier for you to answer calls.

Answer a Call

Procedure


Press the flashing red session button. If you have multiple lines on your phone, press the solid red line button first.

If Auto Collapse Into Line Key parameter is enabled, the active call window is minimized and the call session information such as name of the caller, number, call duration, call state, and any special icons like secure call, call recording, etc. are displayed in the line label itself.

During multiple calls, the line icon is switched between call counts and current call icon.

To show full screen call window, press the line key.


Answer Call Waiting

When you're on an active call, you know that a call is waiting when you hear a single beep and the session button flashes red.

Procedure


Step 1

Press the session button.

Step 2

(Optional) If you have more than one call waiting, select an incoming call.


Decline a Call

You can send an active or ringing call to your voicemail system or to a preset phone number.

Procedure


Decline a call by performing one of the following actions:

  • Press Decline.
  • If you have multiple incoming calls, highlight the incoming call and press Decline.

Silence an Incoming Call

You can silence an incoming call when you are busy and don't want to be disturbed. The phone stops ringing, but you get a visual alert, and, can answer the phone call.

Before you begin

Your administrator configures the Ignore softkey on your phone.

Procedure


Silence the incoming call by any of the methods:

  • Press the Ignore softkey. When you press this softkey, the softkey disappears from the phone screen, and is restored again during the next incoming call.
  • Press the Volume button down. If you press this button again, the ringer volume decreases.

The ringer volume is restored during the next incoming call.


Turn On Do Not Disturb

Use Do Not Disturb (DND) to silence your phone and ignore incoming call notifications when you need to avoid distractions. However, you will always receive paging and emergency calls, even when DND is turned on.

When you enable DND, your incoming calls forward to another number, such as your voicemail, if it is set up.

When DND is turned on, Do not disturb is displayed in the top bar of the phone screen.

When you enable DND, by default, it affects all lines on your phone. You can also enable DND on a specific line from the Preferences menu.

When a line key has both feature key sync and DND enabled, the DND icon is displayed next to the line key label.

Procedure


Step 1

Press DND to turn on DND.

If the DND softkey is grayed on the phone screen, contact your administrator.

Step 2

Press Clr DND to turn off DND.


Turn On or Turn Off DND Using a Star Code

You can turn on or turn off the do not disturb feature by dialing the respective star codes that are configured for your phone. The administrator enters the star codes in the DND Act Code and DND Deact Code fields respectively on the phone web page.

Procedure


Step 1

To turn on DND, dial the star code provided by your administrator.

Step 2

To turn off DND, dial the star code provided by your administrator.


Answer a Coworker's Phone (Call Pickup)

If you share call handling tasks with your coworkers, you can answer a call that is ringing on a coworker’s phone. First, your administrator has to assign you to at least one call pickup group.

Answer a Call Within Your Group (Pickup)

You can answer a call that rings on another phone within your call pickup group. If multiple calls are available for pickup, you'll answer the call that has been ringing for the longest time.

Procedure

Step 1

(Optional) Press the line button.

Step 2

Press PickUp to transfer an incoming call within your pickup group to your phone.


Mute Your Call

While you are on a call, you can mute the audio so that you can hear the other person, but they cannot hear you.

If you have a video phone, when you mute your audio, your camera continues to transmit video.

Procedure


Step 1

Press Mute .

Step 2

Press Mute again to turn mute off.


Hold Calls

Put a Call on Hold

You can put an active call on hold and then resume the call when you're ready. When you place a video call on hold, video transmission is blocked until you resume the call.

Procedure


Step 1

Press Hold or Hold.

Step 2

To resume a call from hold, press Hold or Resume.


Answer a Call Left on Hold for Too Long

Your phone is configured to provide cues that let you know when you have left a call on hold for too long:

  • Flashing message indicator on the handset

  • Visual notification on the phone screen

  • Ringing notification on the phone if a hold reminder is configured with phone web page

Procedure


Press Hold or Resume to resume the held call.


Swap between active and held calls

You can easily switch between active and held calls.

Procedure


Press the session button for the held call to resume that call and place the other call on hold automatically.


Call park

You can use your phone to park a call. You can then retrieve the call either from your phone or another phone, such as a phone at a coworker’s desk or in a conference room.

A parked call is monitored by your network so you won't forget about it. If the call remains parked for too long, you hear an alert. You can then answer, decline to answer, or ignore the call on your original phone. You can also continue retrieving it from another phone.

If you don't answer the call within a certain length of time, it's routed to voicemail or another destination, as set by your administrator.

A parked call occupies one line.

Place a call on hold with call park

You can park an active call that you answered on your phone and then use another phone in the call control system to retrieve the call.

You can also park a call on your own phone. If so, then you may not hear a recording.

You can park only one call at the call park number.

Before you begin

Your call must be active.

Procedure

Step 1

Press Park.

Your phone plays a recorded message that asks for the number of the parked call.

Step 2

(Optional) If you have call park configured on a key expansion module, press the call park line key.

Step 3

Enter the number and press Pound (#).

Step 4

(Optional) Communicate the parked number to the person retrieving the call.


Retrieve a call on hold with call park

You can pick up a parked call from anywhere in your network.

Before you begin

You need the number that was used to park the call.

Procedure

Step 1

Press Unpark.

Step 2

(Optional) Press the line key that has busy lamp field with call pickup configured to retrieve a call on hold.

Step 3

(Optional) If you have call park configured on a key expansion module, press the call park line key.

Step 4

Enter the number where the call is parked followed by Pound (#).

You can also enter Pound (#) to retrieve the parked call. If you retrieve a call parked on your own phone, you may not need to enter a number.

Park and Unpark a Call with One Line Key

If your administrator has configured a Busy Lamp Field (line status) list with the prk function for you, you can park and unpark active calls. See Coworker Line Status for the idle and Parked call icons.

This feature doesn't apply to phone Cisco IP Phone 7811.

Before you begin
Activate or Deactivate Monitoring of the BLF List
Procedure

Step 1

Press the line key that monitors the user to park an active call.

Step 2

To unpark a call, do one of three things:

  • Press the monitored user that displays the parked call.

  • Press the extension line key, then press the monitored user that displays the parked call.

  • Use the navigation button to focus on the extension line key, then press the monitored user that displays the parked call.


Call Park Extension and Status

Your administrator can configure call park to support parking calls against dedicated call park extensions. These extensions are used only for call park and are not used for call routing.

Figure 1. Call Park in Call Park Extensions

In the above example, the phone is monitoring Park Location1. Your administrator has configured a call park extension, Park Location1. If call park extensions are subscribed successfully, line keys will be assigned for call park function and get the monitored extension status.

The following table shows the call park status and the relevant icon displayed next to the call park extension:

Table 1. Call Park Status and Icons

Status

Icon

Idle

Parked

Forward Calls

You can forward calls from any line on your phone to another number. Call forward is phone-line specific. If a call reaches you on a line where call forward is not enabled, the call rings as usual.

If a line is enabled with feature key sync and call forward on it, the call forward icon is displayed next to the line key label.

If your administrator enables the XMPP directory or assigns a station name for the phone, the call forward number displays beneath the XMPP user ID or the station name in the phone screen header.

There are three Call Forward services:

  • Call Forward All—Forward all incoming calls to a target phone number.

  • Call Forward Busy—Forward an incoming call to a target phone number when the line is busy.

  • Call Forward No Answer—Forward an incoming call to a target phone number when the call isn't answered.

You can set up the call forward service or services by a specific softkey.

Procedure


Step 1

Press Forward or Forward all.

If Forward all displays, you can only set up the Call Forward All service (not including Call Forward Busy and Call Forward No Answer services). After you press the softkey, the menu for only setting up the Call Forward All service displays, skip to the Step 3.

If you want to set up the Call Forward Busy and Call Forward No Answer services, see Forward Calls from Your Phone or Forward Calls with the Phone Web Page.

When your administrator enables the synchronization for call forward, the Call forward all screen displays instead of the Call forward settings screen. In this scenario, see Activate Call Forward All with Feature Activation Code Synchronization.

Step 2

Select one of the following call forward services:

  • Forward all

  • Forward busy

  • Forward no answer

Step 3

Do any of the following:

  • Enter the target number, to which you want to forward incoming calls from this phone line.
  • Press the Contacts softkey and select a contact from your contact directories.

Step 4

Press Set to apply the settings.

Step 5

Verify that your calls are forwarded by looking for the call forward icon next to the line or at the top of the phone screen.


Forward Calls with the Phone Web Page

Use the phone web page to set up your phone to forward calls.

You can also set up call forward on your phone screen. For more information, see Forward Calls or Forward Calls from Your Phone.

Before you begin

Your administrator must enable the call forward services. Otherwise, the configuration on the phone web page doesn't take effect.

Procedure


Step 1

On the phone web page, click User Login > Voice > User.

Step 2

In the Call Forward section, set the Cfwd All, Cfwd Busy, Cfwd No Answer, or combination of them to Yes, and enter a phone number for each of the call forward services that you want to enable:

  • Cfwd All/Cfwd All Dest—Forwards all calls.

  • Cfwd Busy/Cfwd Busy Dest—Forwards calls only if the line is busy.

  • Cfwd No Answer/Cfwd No Ans Dest—Forwards calls only if the line is not answered.

  • Cfwd No Answer/Cfwd No Ans Delay—Assigns a response delay time in seconds.

    If your administrator disables the feature key synchronization (FKS) and XSI sync for call forward on your phone, you can enter the value as number of seconds after which a call is forwarded.

    If your administrator enables feature key synchronization (FKS) or XSI sync for call forward on your phone, you can enter the value as number of rings after which a call is forwarded.

    The call forward settings on the phone web page take effect only when FKS and XSI are disabled. For more information, consult your administrator.

Step 3

Click Submit All Changes.


Activate Call Forward All with Feature Activation Code Synchronization

When you press the Forward or Forward all softkey, the Call forward all screen displays and it allows you to set up your phone to forward all calls.

Before you begin

Your administrator enables a feature activation code that synchronizes the phone with a server to forward all calls.


Note


The Feature Activation Code Synchronization feature only supports the Call Forward All service. The Call Forward Busy and the Call Forward No Answer services are not supported.

When your administrator enables the feature activation code for the synchronization, the screen Call forward settings is ready-only.


Procedure


Step 1

Press Forward or Forward all

Step 2

Do any of the following:

  • Enter the target number, to which you want to forward incoming calls from this phone line.
  • Press Contacts and select a contact from your contact directories.
  • Press Redial and select an entry from the Placed calls list.

Step 3

Press Call to forward all calls to the specified number.

You can clear the call forward settings by pressing Clr fwd or Clf fwd all.

Step 4

Verify that your calls are forwarded by looking for the call forward icon next to the line or at the top of the phone screen.


Transfer Calls

You can transfer an active call to another person.

When your administrator configures support for only one call per line appearance, you will not see the option to transfer the active call.

Transfer a Call to Another Person

When you transfer a call, you can stay on the original call until the other person answers. This gives you an opportunity to talk privately with the other person before you remove yourself from the call. If you don't want to talk, transfer the call before the other person answers.

Procedure


Step 1

From a call that is not on hold, press Transfer .

Step 2

Enter the other person's phone number and press Call.

Step 3

(Optional) Wait until you hear the line ring or until the other person answers the call.


Consult Before You Complete a Transfer

Before you transfer a call, you can talk to the person that you're transferring the call to.

If your adminstrator configures to support only one call per line appearance and only one extension is configured, then you cannot:

  • place a new call if there is an active call.
  • transfer if there is an active call.
  • conference an active call.

Before you begin

You have an active call that needs to be transferred.

Procedure


Step 1

From a call that is not on hold, press Transfer .

Step 2

When the other person answers, you can talk to them.

Step 3

(Optional) Press the line key to return to the held call.

Step 4

(Optional) Press the line key to return to the transfer target phone number.

Step 5

Press Transfer or Transfer again.


Conference Calls and Meetings

You can talk with several people in a single call. You can dial another person and add them to the call. If you have multiple phone lines, you can join two calls across two lines. The conference ends when all participants hang up.

Add Another Person to a Call

Procedure


Step 1

From an active call, press Conference .

Step 2

Enter the phone number for the party you want to add and press Call.

Step 3

Press Conference again.


Conference with a Star Code

Press the Conference button only once to combine many active calls into a conference and talk to several people in a single call.

Before you begin

Your administrator has added a star code to the Conference button from the phone web page.

Procedure


Step 1

Make a call from a line and wait for an answer.

Step 2

Use the same line to call another number and wait for an answer. You can use the same line to call other numbers.

Step 3

Press Conference only once.

All numbers are added to the conference call and you see the star code that represents the conference bridge URL with one of the active calls.


Join a Webex Meeting from the Phone

You can join Webex meetings from your phone. Also, you can ignore or temporarilty turn off meeting notifications. When your administrator enables meeting service on your phone, you can perfom the following tasks.

  • Check the list of all meetings scheduled for the day. For example, if today is Jan 3rd, the list will display all the meetings scheduled only on Jan 3rd, it will not display next day meetings.

  • Can see a notification message on the phone five minutes before a scheduled meeting. The message also displays the start time, end time, and the title of the meeting.

  • Join a meeting with Join softkey.

Before you begin

  • Your administrator enables the meeting service for your account.

  • The phone displays the softkeys: Meetings, Join, Ignore, Snooze on the meeting notification window.

Procedure


Step 1

Schedule a meeting in Webex app or Outlook and invite a phone user.

On your phone, you can see a meeting notification window as a reminder five minutes before the scheduled meeting. If there are multiple meetings scheduled at the same time, phone will display multiple meeting notification list.

. The window contains following softkeys to decide you to join a meeting or to ignore it:

  • Join: Press to join the meeting notified in the window.

  • Snooze: Press to close the notification window temporarily. The notification pops up after 5 minutes.

  • Ignore: Press to ignore only the current meeting notification. When you press it, the notification widnow doesn't pop up again.

  • Meetings: Press to view the meeting list.

When you press the Join softkey to join a meeting, the phone first attempt to fetch a temporary URI (hybrid meeting) for the joining. With the temporary URI, you can join a meeting without a meeting host PIN and a password. While the phone is trying for the temporary URI (it takes 5 secs), if you wish you can press the Cancel softkey on the Meeting screen to abort the process. When you successfully join the meeting, a meeting screen with a meeting title appears. The screen also displays the duration of the meeting. Also, the Meeting list shows In meeting status for the joined meeting. If joining with temporary URI fails, you can join meeting with SIP URI. In this case, if a meeting doesn't have SIP URI, meeting notification doesn't pop up and the Meeting list doesn't contain this meeting in its list.

Note


Hybrid meeting has higher priority than SIP only meeting.

For video meetings, user can press Self-view on or Self-view off softkeys on the phone to show or hide the self-view.

In a connected video meeting, you see Leave and Self-view off softkeys. If you want, press the Leave softkey to leave the current meeting.

Step 2

(Optional) Press Meetings softkey. In the Meetings screen you can view the list of meetings on the phone scheduled for the day. If the meeting is in-progress, phone displays duration of the meeting since the start time. For upcoming meetings, the phone displays the meeting start time and end time.

The following list shows meeting status for scheduled meetings.

  • Connecting: A phone is trying to get temp URI for about 5 seconds.

  • In progress: A meeting is in-progress but you haven't joined it.

  • In meeting: A meeting is in-progress and you have joined it. You can return to the meeting by pressing Return softkey.

  • Starting in nnn mins: A meeting which is about to start after five minutes or lesser. Here, nnn represents the minute number.

  • Just started: A meeting that has just started.

If a meeting is expired, meeting information gets deleted from meeting list after a while.

If a meeting is canceled, meeting information gets deleted from meeting list.

If the scheduled meeting time is changed, the list shows the updated meeting timing.


Remove a Participant as a Host in Ad Hoc Conference

As a host, you can remove a participant from the participant list. However, host and participants can invite multiple participants to join the conference, but any of the participants can only be removed by the person from whom the invite has come. For example, user A is the host of the Ad Hoc conference and calls user B and conferences user C and user D. In such situation, user A will be able to remove user B, user C, and user D. Now, if user C invites user E into the conference call, user C can remove user E but user A cannot remove user E.

Before you begin

You are host of an Ad Hoc conference.

Procedure


Step 1

When in an Ad Hoc conference, press Participants to display the pariticipants name.

Step 2

Select any of the participants who you have invited to the conference call and press Remove.

Step 3

Confirm the removal message on the phone.


View the Participants List as a Participant

You can show list of participants of an Ad Hoc conference.

Before you begin

Participants softkey is available.

Procedure


Step 1

Answer the call from a host.

Participants softkey displays after your host merge you into the meeting.

Step 2

Press Participants softkey to display the list of participants.

Step 3

(Optional) Press Exit to exit from the Participants screen.


View the Participants List as a Host in Ad Hoc Conference

You can show the list of participants when you are hosting an Ad Hoc conference.

Before you begin

Participants softkey is available.

Procedure


Step 1

Make a call (for example, user A) from a line and wait for an answer.

Step 2

Press Conference to invite another person (for example, user B) into the meeting.

Step 3

When user B answers the call, press Conference again to merge user B into the meeting.

You can add more participants into the meeting in the same way.

Step 4

Press Participants softkey. Name of all the participants who has joined the meeting will show up in the Participants screen.

Step 5

(Optional) Press Exit to exit from the Participants screen.


Meeting and Call Interaction

Meeting and call cannot co-exist. When you are in a meeting, you need to leave the meeting to perform the following tasks.

  • Make a new call

  • Answer an incoming call

  • Make a call using speed-dial

  • Make a call using another line key

  • Make a call from Contact list and Recents list

  • Use voice mail

  • Manage incoming paging

When you are on a call, to join a meeting, you need to end the call and then join.

During a meeting, phone doesn't support functions such as transfer, conference, hold, park, and resume.

During a meeting, phone doesn't allow functions such as unpark, pickup, and group pickup. When you press the PLK of pickup, or group pickup or press the Unpark softkey, you see a warning message asking you to leave the meeting first and then perform the function.

Join a Webex Meeting from the Phone

You can join Webex meetings from your phone. Also, you can ignore or temporarilty turn off meeting notifications. When your administrator enables meeting service on your phone, you can perfom the following tasks.

  • Check the list of all meetings scheduled for the day. For example, if today is Jan 3rd, the list will display all the meetings scheduled only on Jan 3rd, it will not display next day meetings.

  • Can see a notification message on the phone five minutes before a scheduled meeting. The message also displays the start time, end time, and the title of the meeting.

  • Join a meeting with Join softkey.

Before you begin

  • Your administrator enables the meeting service for your account.

  • The phone displays the softkeys: Meetings, Join, Ignore, Snooze on the meeting notification window.

Procedure


Step 1

Schedule a meeting in Webex app or Outlook and invite a phone user.

On your phone, you can see a meeting notification window as a reminder five minutes before the scheduled meeting. If there are multiple meetings scheduled at the same time, phone will display multiple meeting notification list.

. The window contains following softkeys to decide you to join a meeting or to ignore it:

  • Join: Press to join the meeting notified in the window.

  • Snooze: Press to close the notification window temporarily. The notification pops up after 5 minutes.

  • Ignore: Press to ignore only the current meeting notification. When you press it, the notification widnow doesn't pop up again.

  • Meetings: Press to view the meeting list.

When you press the Join softkey to join a meeting, the phone first attempt to fetch a temporary URI (hybrid meeting) for the joining. With the temporary URI, you can join a meeting without a meeting host PIN and a password. While the phone is trying for the temporary URI (it takes 5 secs), if you wish you can press the Cancel softkey on the Meeting screen to abort the process. When you successfully join the meeting, a meeting screen with a meeting title appears. The screen also displays the duration of the meeting. Also, the Meeting list shows In meeting status for the joined meeting. If joining with temporary URI fails, you can join meeting with SIP URI. In this case, if a meeting doesn't have SIP URI, meeting notification doesn't pop up and the Meeting list doesn't contain this meeting in its list.

Note


Hybrid meeting has higher priority than SIP only meeting.

For video meetings, user can press Self-view on or Self-view off softkeys on the phone to show or hide the self-view.

In a connected video meeting, you see Leave and Self-view off softkeys. If you want, press the Leave softkey to leave the current meeting.

Step 2

(Optional) Press Meetings softkey. In the Meetings screen you can view the list of meetings on the phone scheduled for the day. If the meeting is in-progress, phone displays duration of the meeting since the start time. For upcoming meetings, the phone displays the meeting start time and end time.

The following list shows meeting status for scheduled meetings.

  • Connecting: A phone is trying to get temp URI for about 5 seconds.

  • In progress: A meeting is in-progress but you haven't joined it.

  • In meeting: A meeting is in-progress and you have joined it. You can return to the meeting by pressing Return softkey.

  • Starting in nnn mins: A meeting which is about to start after five minutes or lesser. Here, nnn represents the minute number.

  • Just started: A meeting that has just started.

If a meeting is expired, meeting information gets deleted from meeting list after a while.

If a meeting is canceled, meeting information gets deleted from meeting list.

If the scheduled meeting time is changed, the list shows the updated meeting timing.


Start a New Call While in a Webex Meeting

You are not allowed to make a call when you are in a meeting. When you are in a meeting and you press the New call softkey, try speed dialing, or make a call from Contacts, you see a warning message asking you to leave the meeting first.

Procedure


Step 1

Select Leave & Call softkey to leave the meeting.

Once you leave the meeting you can make the call.

Step 2

Make a call from one of the following.

  • Enter a contact number in the New call screen.
  • Press a speed-dial line key or a speed-dial number.
  • Make a call from Contacts.

Answer a Call While in a Webex Meeting

You can not answer a call when you are in a meeting.

Procedure


Press Leave & Answer softkey to leave the current meeting if there is an incoming call and you want to answer that call.

When you press this softkey, phone leaves the current meeting and then the call is answered.


Access a Voicemail While in a Webex Meeting

You can not access voice messages when you are in a meeting. During a meeting, when you press the Voicemail button, you see a warning message asking you to leave the meeting first to access the voicemail.

Procedure


Step 1

Press Leave & Call softkey to leave the current meeting that you have joined.

Step 2

Access the voice messages.


Join Another Meeting While in a Webex Meeting

You cannot join a meeting while you are already in another meeting. You try to join another meeting by following options.

  • You access the Meetings list, select a meeting that is about to start, and then press Join. As a result, you see a warning message asking you to leave the current meeting first.

  • While in a meeting, you may get a meeting notification and you want to join from the notification window. This notification window has a Leave & Join softkey.

Procedure


Step 1

Select Leave & Join to leave the current meeting.

Step 2

Join a new meeting.


Join a Webex Meeting While on a Call

You cannot join a meeting if you are in an active call. While in a meeting, you might wish to join a meeting by the following methods.

  • Join a meeting from the Meetings list. When you try to join, you see a message asking you to end the call first.

  • Join a meeting when a meeting notification pops up with a End & Join softkey.

Procedure


Step 1

Select End & Join to end the current call.

Step 2

Join the meeting.


Manage Paging and Webex Meeting

When you are in a meeting, you need to leave the meeting to answer a paging. Also, during a paging call, you cannot join a meeting.

Procedure


Press Leave softkey when you see a paging notification during a meeting.

For priority paging 0, you see a message that informs the meeting is disconnected due to an incoming paging.

For priority paging 1 and 2, if there's an incoming paging call, the user will hear the paging tone first that indicates that there's an incoming paging call. Pressing the Leave sofkey leaves the meeting, and the paging is answered.

If there is an active paging and if you want to join a meeting, you need to press End softkey from the paging screen, or you need to press the End & Join softkey in the meeting notification window that appears.


Display Participant Details Hybrid Meeting

During a hybrid meeting you can see the list of participants who is in the meeting and who is not attending the meeting.

Before you begin

Your administrator has enabled Participants softkey for hybrid meeting.

Procedure


During the meeting, press Participants softkey.

Participant list is displayed to show people who has joined in this meeting and invitee not in this meeting. The list also shows the audio and video status and roles of the participants.

  • Audio status: display muted or unmuted icons

  • Video status: display video-off icon if shutter is closed

  • Role of the participant: display as Me, Host, Co-host, Presenter, and Guest.


Meeting Recording Status Indication

Phone displays recording status in hybrid meeting. You can see the following:

  • If meeting is in recording, phone displays in recording icon.

  • If meeting recording is paused, phone displays pause recording icon.

  • If meeting recording is stopped, record icon disappears.

Mute a Participant in the Meeting (Hybrid)

Participants mute/unmute them using softkey, hardkey, headset. Also, mute and unmute status synchronizes with server.

Procedure


Control the audio of a meeting by any of the methods.

  1. Join as host from Webex application and select Mute on Entry.

    The meeting will have audio mute status. Unmute softkey is displayed on the screen. Hard key mute LED and headset mute LED turn on.

  2. Press Unmute softkey.

    Phone changes to unmute status and Mute softkey on the phone screen appears. Also, hard key mute LED and headset mute LED turn off. If you check the remote side, phone also changes to audio unmute status.
  3. Press Mute softkey.

    Phone changes to mute status and the sofkey switches to unmute. Hard key mute LED and headset mute LED turn on. If you check the remote side, phone also changes to audio mute status.

  4. Connect the phone with headset.

    Phone synchronizes the audio status with the USB, BT, EHS headset.

  5. As a host, mute a participant in the Webex application.

    Phone changes to audio mute status. Phone softkey, hard key mute LED and headset mute LED turn on.

  6. As a host, try to unmute a participant.

    Paritcipant sees a notification window to confirm the request. Once accepted, phone changes to unmute status. Phone softkey turns to Mute, hard key mute LED and headset mute LED turn off.

    If participant select Stay muted, phone remains in mute status. Phone softkey turns to Unmute, hard key mute LED and headset mute LED turn on.

  7. As a host, disallow to unmute a participant. Click Mute all and uncheck the message Allow attendees to unmute themselves and then click Mute all.

    Phone changes to disallow unmute status. The Unmute softkey on the phone appears with a lock icon. Phone doesn't allow to unmute anyone. If anyone tries to unmute from phone softkey, headset button, or phone hard key, a notification window appears.


Join Hybrid Meeting with a Password

To join a hybrid meeting you might have to enter a PIN if your administrator configures the access restriction.

Procedure


Step 1

Press Join softkey on the meeting notificaiton window. A pop-up window appears asking if you are a host. You can join as host or a guest. A pop-up window appears asking for a PIN. Enter the PIN to join the meeting.

Step 2

If you want, you can Leave the meeting.


Control Video for Hybrid Meeting


Note


This feature is only applicable for Cisco IP video phone 8845 and 8865.


User can use camera shutter or soft-key to mute/unmute their video.

Before you begin

Your administrator has enabled the Start video and Stop video softkeys.

Procedure


While in a hybrid meeting, perform one of the following to mute or unmute your video.

  • Use camera shutter to mute the video.

    When the camera shutter is closed and you want to start a video, a notification window appears on the phone asking you to turn the rim clockwise to start the video. Click Start video to start your video during the meeting. When you turn it anti-clockwise your video stops.

    Also, you can use the Self-view on or Self-view off to unmute or mute your video.

    When you mute or unmute video using camera shutter, the video status gets synchronized with the local server and the remote server.

    When you mute your video, the softkey also disappears.

  • Press the Start video softkey to unmute your video or press the Stop video softkey to mute your video.

Change the Video Layout While in a Meeting (Hybrid)

While in a hybrid meeting, user can change the layout of a video by selecting any of the following available layouts:
  • Focus

  • Overlay

  • Stack

  • Grid

  • Prominent

While in a hybrid meeting, perform the following steps to change the video layout in an ongoing meeting. If someone starts sharing any content during the meeting, the layout remains unchanged and also, the Layout softkey is hidden.

Procedure


Step 1

Press the Layout softkey to select a video layout of your choice from the list. If in presentation mode, layout is not changeable

Note


You can press the Self-view off softkey on the phone to hide the self-view for a clear view of the changed layout.

Step 2

Press the Leave softkey to leave the current meeting.


Retrieve Shared Call While in a Meeting (Hybrid)

While in a hybrid meeting and there is a shared call kept on hold for too long, you cannot answer the call without leaving the meeting.

Procedure


Step 1

Press Resume softkey.

As meeting and call cannot coexist, when you press Resume, you see a notification window asking you to leave the meeting to receive the call.

Step 2

Press Leave and Resume to answer the call.


Video Calls

Cisco IP Phones 8845 and 8865 support video calls with a built-in video camera.

You can make an audio call into a video call by opening your camera shutter.

Make a Video Call

Cisco IP Phones 8845 and 8865 support video calls as long as the person you're calling also has a video phone. The ring on the outside of the camera controls the shutter.

Procedure


Step 1

Turn the ring around the camera clockwise to open the shutter.

Step 2

(Optional) Press Self-view and move the camera up and down to improve the perspective.

Step 3

Make your call.


Toggle between phone and video display

If you need to see your phone's desktop while you're on a video call, you can easily switch between the video and the desktop. When you hide the video, it blurs and moves to the background.

Procedure


Step 1

Press the Call list softkey to hide the video.

Step 2

Press the Show video softkey to show the video.


Adjust the Picture-In-Picture (PiP) position

When you are on a video call, you can view your incoming and your outgoing video at the same time, which is known as Picture-in-Picture (PiP). Typically, the incoming video displays on the full screen and a small inset screen shows the video from your camera.

When PiP is on, you can move the inset picture to a different quadrant of the screen. You can also change the view so that your camera video displays on the full screen and the inset displays the incoming video.

Procedure


Step 1

Press PiP to move the PiP window counterclockwise around your phone screen. Or, use the Navigation ring to move the PiP window.

Step 2

(Optional) Press Swap to toggle between the full-screen view and the PiP view.


Stop your video

When you're on a video call, you can close the shutter to stop video transmission.

When you close the shutter, the person you're talking to won't see you, but they'll still be able to hear you.

Procedure


Step 1

Turn the ring around the camera counterclockwise to close the shutter. The phone stops video transmission.

Step 2

Turn the ring around the camera clockwise to open the shutter. The phone starts video transmission.


Adjust the Camera Exposure

You can adjust the camera exposure for the ambient light in your office. Adjust the exposure to change the brightness of the transmitted video.

Before you begin

The camera shutter must be open.

Procedure


Step 1

Press Applications .

Step 2

Select User Preferences > Video > Exposure.

Step 3

Press the Navigation cluster left or right to decrease or increase, the exposure.

The exposure range is 0 to 15, and the default value is 8.

Step 4

Click Set.


Adjust the Video Bandwidth

During a video call, your video can suddenly stop or lag behind the audio. The lag is often caused by a busy network.

By default, your phone automatically selects a bandwidth setting that balances the audio and video network requirements.

You can configure a fixed bandwidth setting to override the automatic selection, if required for your network conditions. If you configure a fixed bandwidth, select a setting and adjust downwards until there is no video lag.

Procedure


Step 1

Press Applications .

Step 2

Select User Preferences > Video > Bandwidth allowance.

Step 3

Choose a bandwidth setting in the Bandwidth allowance screen.

Step 4

Click Select to set the bandwidth.


Video call security and troubleshooting information

Your administrator can take steps to protect your video calls from tampering by people outside your company. If you see the Secure icon displayed during a video call, your administrator has taken steps to ensure your privacy.

When you are in a video call, the video can fail if there is insufficient network bandwidth. The audio continues, but the video stops. If you require the video, hang up, wait a few minutes, and start the call again. If there is still insufficient bandwidth, contact your administrator.

Record a Call

When you're on an active call, you can record it. You might hear a notification tone as you record the call.

During a recording, you see different icons in different recording state. You see the icons on the Calls screen and also on the line key on which you are recording a call.

Table 2. Recording Icons

Icon

Meaning

Recording in progress

Recording in progress (8811)

Recording paused

Recording paused (8811)

Before you begin

Your administrator enables your phone with call recording.

Procedure


Step 1

Press Record while on an active call.

Step 2

(Optional) While recording is in progress, you can press PauseRec to pause the recording.

Step 3

(Optional) Press ResumeRec to resume the recording.

Step 4

(Optional) Press StopRec to stop the recording.

Step 5

Press End Call to end the call.


Instant Message and Presence Contacts

Instant message and presence (IM&P) contacts display their presence information. You can see if the person is available, busy, or unavailable, or if the person does not want to be disturbed.

You use the UC-One Communicator to manage your lists of contacts. Your phone gets your lists of contacts from the UC-One Communicator server.

When you use the phone, the phone sends status information to the UC-One Communicator.

Presence

Your company may use the "UC-One Communicator" service and integrate it with the phone. You can use this service to display the status of your contacts.

On the phone, your status is displayed on the status line of the phone. You see one of the following:

  • Available

  • Away

  • Do Not Disturb

  • Offline

For more information on the "UC-One Communicator" service, see the Broadsoft documentation.

Make a Call to an IM and Presence Contact

When you call someone on your IM&P contacts, their presence state is displayed in your call history.

Before you begin

You administrator enables the IM&P directory in the phone.

Procedure


Step 1

Press Contacts .

Step 2

Press Category, if it displays on the phone. Otherwise, skip the step.

Step 3

Select IM&P contacts.

Step 4

Select a directory.

Step 5

Select an entry.

The entry shows the status of your contact.

Step 6

(Optional) Press Select to view the contact details and press to return to the contacts list.

Step 7

Press Call.


Change Your Presence State

Because the phone is always available, you need to set your presence manually on the phone.

Before you begin

You administrator enables the IM&P directory in the phone.

Procedure


Step 1

Press Contacts .

Step 2

Press Category, if it displays on the phone. Otherwise, skip the step.

Step 3

Select IM&P contacts.

Step 4

Highlight a directory. For example, Favorite, Non-Group, All contacts, and so on.

Step 5

Press Presence.

Step 6

Select your presence from the list.

  • Available—You can take a call.
  • Away—You have stepped away from the phone for a short time.
  • Do not disturb—You don't want to take a call.
  • Offline—You are not available to take calls. Typically, you use this presence when you leave the phone for long periods of time.

Page a Group of Phones (Multicast Paging)

Your administrator can configure your phone as a part of a paging group. In a paging group, your phone can automatically answer pages from other Multiplatform phones in the phone system. Each paging group has a unique number associated with it. Your administrator gives you the configured paging group numbers. When your phone is paged, you hear three short beeps. The phone establishes one-way audio between you and the phone that called you. You do not have to accept the page.

Procedure


Dial the number of the paging group.


XML Application and Multicast Paging

If your phone is part of a paging group XML application enabled, your phone displays images or messages when you receive multicast pages from server. During a unicast and multicast paging or broadcast, phones in the paging group shows the following behavior:

  • Phone (sender) that initiates the page, does not display any XML application message.

  • Phones (receiver) that receive page displays a XML application message (incoming page) on their screen when the paging starts if your administrator configures the service.

  • If the XML application closes due to timeout (sets by your administrator) or by administrator, the receiver shows the incoming page. However, if there is no timeout configured, XML application closes when paging call ends.

Your administrator can invoke XML service from multicast paging.

View XML Application Details

You can view list of Cisco XML objects that your phone supports.

Before you begin

  • Your administrator has configured XML applications.

Procedure


Step 1

Press Applications .

Step 2

Press Settings.

Step 3

In Information and settings screen, select XML applications.

The list of supported Cisco XML objects is displayed, such as CiscoIPPhoneMenu, CiscoIPPhoneDirectory.

Note


XML applications menu is not available on your phone when your administrator disables it.


Multiple Lines

If you share phone numbers with other people, you could have multiple lines on your phone. When you have multiple lines, you have more calling features available to you.

Answer the Oldest Call First

You can answer the oldest call available on all your phone lines, including Hold Reversion and Park Reversion calls that are in an alerting state. Incoming calls always have priority over Held or Park Reversion calls.

When working with multiple lines, you typically press the line button for the incoming call you want to answer. If you just want to answer the oldest call regardless of line, press Answer.

View All Calls on Your Phone

You can view a list of all your active calls—from all your phone lines—sorted in chronological order, oldest to newest.

The list of all calls is useful if you have multiple lines or if you share lines with other users. The list displays all your calls together.

Shared lines on your multiplatform phone

When you share a phone number, you can use that phone line just like you would any other line, but you should be aware of these special characteristics about shared lines:

  • The shared phone number can be configured to appear on a maximum of 35 devices.

  • The shared phone number appears on all phones that share the number.

  • If your coworker answers the call, the shared line button and the session button are solid red on your phone.

  • If you put a call on hold, your line button is solid red and the session button pulses red. Your coworker's line button is also solid red and the session button pulses red.

  • Once the shared line is configured, the call bridge can be invoked by using either

    • FAC Code

    • Soft keys

      Here is an example of customize PSK settings to add new soft key for Call Bridge as shown below:

Soft keys can be configured at three levels. See Configure and modify device settings in Webex Calling to configure soft keys at organization, location and device level.

Add yourself to a call on a shared line

You or your coworker can join a call on the shared line. Your administrator needs to enable the feature on your phone.

If a user with whom you share a line has privacy turned on, you can't see their line settings and you can't add yourself to their call.

Procedure

Step 1

Press the line button for the shared line.

Step 2

Enter *33 on your phone.

Note


If set up this way, you hear a tone to let you know that the system recognizes the access code.

Step 3

Enter the phone number of the person whose call you want to barge in to.

Note


When connected, you're a part of the current call.


Call Center Features

Your administrator configures your phone as a call center phone.

Your administrator can enable your phone with Automatic Call Distribution (ACD) features. This phone acts as a call center agent's phone and can be used to trace a customer call, to escalate any customer call to a supervisor in emergency, to categorize contact numbers using disposition codes, and to view customer call details.

Your phone can have ACD status as:

  • Sign in

  • Sign out

  • Available

  • Unavailable

  • Wrap-up

The initial ACD status is controlled by your administrator in two ways:

  • The last local status can be restored as the ACD initial status when the phone boots up, status is changed to "Registered" from "Unregistered" or "Registration failed", or registration destination ip address is changed due to failover, fallback or DNS response is changed.

  • The ACD initial status can be obtained from the server.

Sign In as a Call Center Agent

When you're ready to start your work as a call center agent, you sign into the phone and set your status.

Your administrator can set up your phone so that when you sign into the phone, your status is set to Available automatically. In this case, you don't need to manually set the status.

Procedure


Step 1

Press AgtSgnIn.

Step 2

Check your status as a call center agent.

If the status is Available, the icon displays beside your phone number. Otherwise, proceed with the next steps to manually set the status.

Step 3

Press Agt status.

Step 4

Highlight the Available status.

Step 5

Press Select.


Sign Out as a Call Center Agent

When you're ready to end your work as a call center agent, change your status and sign out of the phone. After you sign out, you won't receive more call center calls.

If you're on a call and know that you will sign off as soon as the call completes, change your status to Wrap-up.

Procedure


Press AgtSgnOut.


Change Your Status as a Call Center Agent

From time to time, you may need to take a brief break. To do that, change your status so that calls will not ring on your phone.

Procedure


Step 1

Press Agt status.

Step 2

Highlight the Unavailable status.

The Unavailable menu text box allows you to add the reason of your unavailability.

If you need, your administrator can hide the text box on the phone from the phone web interface.

Step 3

Press Select.

Step 4

Press Agt status.

Step 5

Highlight the Available status.

Step 6

Press Select.

Step 7

Highlight the Wrap-up status.

Step 8

Press Select.


Accept a Call Center Call

When you sign into the phone as a call center agent and your phone status is set to available, your phone are ready to accept call center calls. Before you answer a call, you see information about the call.

Procedure


Step 1

When you receive a call, you will see the call information page, press Back to exit and then press Answer to accept it.

Step 2

Press Call Info to see the call details.

Step 3

At the end of the call, press End call.


Hold an Agent Call

When you are on a call center call, you can put the caller on hold and return to the call. While the call is held for a long time, you will hear a reminder tone and a ring splash on the phone screen.

Procedure


Step 1

Press Hold.

Step 2

When you are ready to return, select the held call and press Resume.


Set a Disposition Code While on a Call Center Call

You can assign a disposition code to an active customer call or after you set your status to Wrap-up after a call. Disposition codes are quick labels that you apply to call records to describe a call. It is an easy way to label calls and keep track of customer contact history so that no details about the call are missed.

Before you begin

Your administrator enables your phone to add a disposition code.

Procedure


Step 1

Press Disp code.

Step 2

Press Ok.


Trace a Call

You can trace an active call and the last incoming call in any agent status.

Before you begin

Your administrator enables your phone to trace a call.

Procedure


From an active call or after a call, press Trace.


Escalate a Call to a Supervisor

When you need to escalate a call, you can add your supervisor to a conference call with you and your caller.

Before you begin

Your administrator enables emergency escalation on your phone.

Procedure


Step 1

From an active call, press Emergency.

Step 2

In the Emergency Escalation window, click OK.

You can enter preferred emergency escalation number, or you can leave it empty if you do not have any supervisor preference. You will not see any emergency escalation number.


Executive Calls

If your administrator has configured you as an executive user with a pool of assistants, you and your assistants can share control of your calls as described below:

  • When call filtering is enabled, your incoming calls go to your assistants according to the criteria configured by your administrator on the BroadWorks.

    You also receive your incoming calls that go to your assistants, if your administrator has enabled call screening for you.

    When an assistant answers a call, you no longer see the call on your extension.

  • You receive calls that your assistants transfer to you. If you do not answer a transferred call, the call returns to your assistants.

  • You can join a call that is in progress with an assistant.

  • You can transfer an ongoing call from an assistant to yourself.

Join an Ongoing Call as an Executive

Dial the service activation code provided by your administrator, or follow the procedure described below to join an ongoing call.

Before you begin

One of your assistants is engaged in a call on your behalf.

Procedure


Press the Bridge in softkey on your phone.


Transfer an Ongoing Call to Yourself as an Executive

Dial the service activation code provided by your administrator, or follow the procedure described below to transfer an ongoing call to yourself.

Before you begin

One of your assistants is engaged in a call on your behalf.

Procedure


Press Call retrieve on your phone.


Troubleshooting Executive Calls

Cannot Join or Transfer a Call

You can only transfer or join a call if there is only one ongoing call for you.

Executive Assistant Calls

If your administrator has added you to an executive's pool of assistants, and you have opted in to the pool, you share control of the executive's calls with the executive and other assistants in the pool, as described below:

  • You can initiate calls on behalf of the executive.

  • When call filtering is on, you receive the executives' incoming calls according to the criteria configured by your administrator. When an executive or another assistant answers a call, you no longer see the call on your extension.

  • After you initiate or answer a call, you can transfer the call to the executive. If the executive does not answer a transferred call, the call may return to you.

  • You can join a call that is in progress with an executive.

  • You can transfer an ongoing call from an executive to yourself.

Initiate a Call On Behalf of an Executive as an Assistant

Dial the service activation code provided by your administrator, or follow the procedure described below to initiate a call on behalf of an executive.

Before you begin

You are in an executive's pool of assistants.

Procedure


Step 1

Do one of the following actions:

  • If your administrator has programmed the Assistant function on a line key, press the line key.
  • If you do not have the Assistant function on a line key:
    1. Press Applications .

    2. Select Assistant .

Step 2

If your administrator has configured your extension to connect to the XSI BroadWorks server, the Assistant screen displays. In the screen, select Executive List.

If your administrator only enables the feature key synchronization (FKS) on your extension, the screen directly displays the executive list.

The screen shows a list of all executives associated with all the assistant extensions on the phone. It also shows the Opt-in/Opt-out status of the assistant for each executive.

Step 3

Select the executive on whose behalf you want to initiate a call.

If there are multiple assistant extensions on the phone, the extension with which the selected executive is associated appears at the top.

Step 4

Press Proxy call.

Step 5

Enter the number that you want to call.

Step 6

Press Call.

Step 7

(Optional) If your administrator has configured your extension to connect to the XSI BroadWorks server, you might receive an incoming call from a SIP proxy. In this case, press Answer to initiate the call to the target.

You can also press Decline to decline the call or press Ignore to silence the call.


Transfer an Ongoing Call to an Executive as an Assistant


Note


You can transfer an ongoing call to an executive if it is the only ongoing call for the executive. If assistants are currently engaged in other calls for the executive, you cannot transfer a call.


Dial the service activation code provided by your administrator, or follow the procedure described below to transfer an ongoing call to an executive.

Before you begin

You are engaged in a call on behalf of an executive.

Procedure


Press the Call push softkey to transfer the call.

You can also transfer the call by using the following method:

  1. Press the Hold softkey.

  2. Press the Call push softkey.


Join or Transfer an Ongoing Call to Yourself as an Executive Assistant

Before you begin

A call is in progress with an executive.

Procedure


Step 1

Dial the service activation code provided by your administrator, for initiating calls on behalf of executives, and follow the voice prompts.

Step 2

When you are prompted to enter the destination number, dial the appropriate service activation code provided by your administrator, for joining or transferring a call to yourself.


Troubleshooting Executive-Assistant Calls

Cannot Join or Transfer a Call

You can only transfer or join an executive's call if there is only one ongoing call for the executive.

Cannot Initiate Multiple Calls On Behalf of Executives

The number of calls that you can initiate in parallel on behalf of executives is limited by your administrator.

Mobile Devices and Your Desk Phone

If you have a mobile phone, you can connect the mobile device to your desk phone. This connection allows you to make and answer phone calls on either the mobile device or the desk phone.

Cisco IP Phone 8851 and 8861 support this feature.

Do not pair two or more Cisco IP Phone 8800 Series desk phones.


Note


When your mobile device is connected to the desk phone, the mobile device can't access or use the desk phone contacts. You can't move or copy the desk phone contacts to your mobile device.


Phone Calls with Intelligent Proximity

When you use Bluetooth, you can pair your mobile device (phone or tablet) to your desk phone. After you pair and connect the mobile device, your phone displays an additional phone line, which is your mobile line (your mobile phone number). You can place and receive calls on this mobile line from your desk phone. This ability to use the mobile line on your desk phone is called Intelligent Proximity.

Pair a Mobile Device with Your Desk Phone

After you pair your mobile device to your desk phone, the phone connects to the mobile device when the device is in range. It disconnects from the mobile device when the device is out of range.

If you have both a Bluetooth headset and a mobile device connected, you cannot use the Bluetooth headset to answer the audio from the mobile device.

After the mobile device and phone are connected, you can save your mobile contacts and call history on your desk phone.

Before you begin

Make sure that your mobile device has Bluetooth turned on and that it is discoverable. Check the documentation included with your mobile device if you need help.

Procedure

Step 1

On your desk phone, press Applications .

Step 2

Select Bluetooth > Add Bluetooth device.

Step 3

Select the mobile device from the available devices list to pair.

Step 4

Verify the passkey on the mobile device.

Step 5

Verify the passkey on the desk phone.

Step 6

(Optional) Choose to make your mobile device contacts and call history available on your desk phone.


Switch Connected Mobile Devices

If you have more than one paired mobile device in range of your Cisco IP Phone, you can choose which mobile device to connect.

Procedure

Step 1

Press Applications .

Step 2

Select Bluetooth > Devices.

Step 3

Select a mobile device from the available devices list.


Delete a Mobile Device

You can delete a mobile device, so that it does not automatically connect using Bluetooth.

Procedure

Step 1

Press Applications .

Step 2

Select Bluetooth.

Step 3

Select the mobile device in the available devices list.

Step 4

Select Delete.


Search Your Mobile Contacts on Your Desk Phone

You can search for contacts from your mobile device on your desk phone.
Before you begin
Your mobile phone is paired to your desk phone.
Procedure

Step 1

Press Contacts .

Step 2

Press Category, if it displays on the phone. Otherwise, skip the step.

Step 3

Select your mobile phone from the directory list.

Step 4

Press Option, then select Search.

Step 5

Enter the search criteria.


View Your Paired Bluetooth Devices

A paired mobile device displays in the list of paired devices. You'll see this device listed until you unpair it from the desk phone.

Procedure

Step 1

Press Applications .

Step 2

Select Bluetooth > Devices.


Intelligent Proximity for Mobile Phones

You can share your mobile contacts and call history with the desk phone, and move calls between your mobile phone and desk phone. You can also view signal strength and battery level of the mobile device on the desk phone.

Handle an Incoming Mobile Call
Before you begin

Your mobile phone is paired to your desk phone.

Procedure

When a call rings on your mobile phone, do one of these actions on your desk phone:

  • Press Answer to answer the call.
  • Press Decline to decline the call and send it to your voicemail.

Make a Mobile Call
Before you begin

Your mobile phone is paired to your desk phone.

Procedure

Step 1

Select a mobile line on your desk phone.

Step 2

Enter a phone number.

Step 3

Press Call.


Move a Call Between the Desk Phone and a Mobile Device

You can use your desk phone to move an active call to or from your mobile device.

Before you begin

Your mobile phone is paired to your desk phone.

Procedure

Press Move audio to move a call from your desk phone to your mobile device or in the opposite direction.


Adjust the Mobile Device Volume

Volume controls on your phone and mobile device are synchronized. Synchronization only occurs when there is an active call.

Before you begin

Your mobile phone is paired to your desk phone.

Procedure

Perform one of these options:

  • Press Volume on your desk phone. Press the + to increase the volume or - to decrease the volume.
  • Press the Volume button on your mobile device.

View Your Mobile Contacts on Your Desk Phone

Use your desk phone to view the contacts list on your mobile phone. This is a convenient way to view a contact without accessing your mobile phone.

Before you begin

Before you can use your mobile device with your desk phone, use Bluetooth to pair the two phones. Select the option to share the mobile contacts.

Procedure

Step 1

Press Contacts .

Step 2

Press Category, if it displays on the phone. Otherwise, skip the step.

Step 3

Select your mobile phone from the list.


Save Contacts from Your Mobile Device on Your Desk Phone

You can save the contact list from your mobile device to your desk phone. This mobile contact list remains on your desk phone, even if you disconnect or unpair your mobile device.

Before you begin

Your mobile phone is paired to your desk phone.

Your administrator has enabled either the BroadSoft personal directory or the your personal address book.

Procedure

Step 1

Press Contacts .

Step 2

Press Category, if it displays on the phone. Otherwise, skip the step.

Step 3

Select your mobile phone.

Step 4

Highlight the contact that you want to add, press Option, then select Add contact.

The menu label shows the target directory to which you want to add the contact:

  • If the menu Add personal address entry displays, you add the contact to the local personal address book.

  • If the menu Add BroadSoft personal contact displays, you add the contact to the BroadSoft Personal directory.

Your administrator can change the target directory.

Step 5

Press Save to add the contact.


Delete Contacts in Your Mobile Device Contact List

You can remove your mobile contacts list from your desk phone. The contacts list on your mobile phone remains intact.

Before you begin

Your mobile phone is paired to your desk phone.

Procedure

Step 1

Press Contacts .

Step 2

Press Category, if it displays on the phone. Otherwise, skip the step.

Step 3

Select your mobile phone from the directory list.

Step 4

Press Option, then select Delete all.


View Your Mobile Call History on Your Desk Phone

You can view on your desk phone the recent calls placed or received from your mobile phone.

Before you begin

Before you can see the mobile call history on your desk phone, use Bluetooth to pair the mobile phone with your desk phone. Select the option to share your mobile call history with your desk phone.

Procedure

On the desk phone, press New Call.


Intelligent Proximity for Tablets

If you have a tablet, you can use Bluetooth to pair the tablet to your desk phone. After pairing, audio from a phone app on the tablet can be played on the desk phone. You can't use as many calling features on your tablet as you can with a mobile phone.

The desk phone supports connections from Android and iOS tablets.

Move the Audio from Your Tablet to Your Desk Phone
Before you begin

Your tablet is paired to your desk phone and you receive a call on the tablet.

Procedure

Step 1

On the tablet, set the audio path to use Bluetooth.

Step 2

Use the headset, handset, or speakerphone to listen to the audio on the phone.


Move the Audio from Your Desk Phone to Your Tablet
Before you begin

Your tablet is paired to your desk phone and you are on a call on the tablet with the audio on the desk phone.

Procedure

Do one of the following actions:

  • Hang up the handset.
  • Press Release.
  • Answer another call on the desk phone.