Getting Started with Cisco Intersight Managed Mode Transition Tool

Prerequisites

This section covers the minimum requirements for installing Cisco Intersight Managed Mode Transition Tool:

  • Supported version of Cisco UCS Manager: 3.2(1d) or above.

  • Supported version of Cisco UCS Central: 2.0(1a) or above.

  • Supported ESX version - ESXi 6.0 and above.

  • Minimum VM requirement - 2 vCPUs, 8 GB RAM, 100 GB storage.

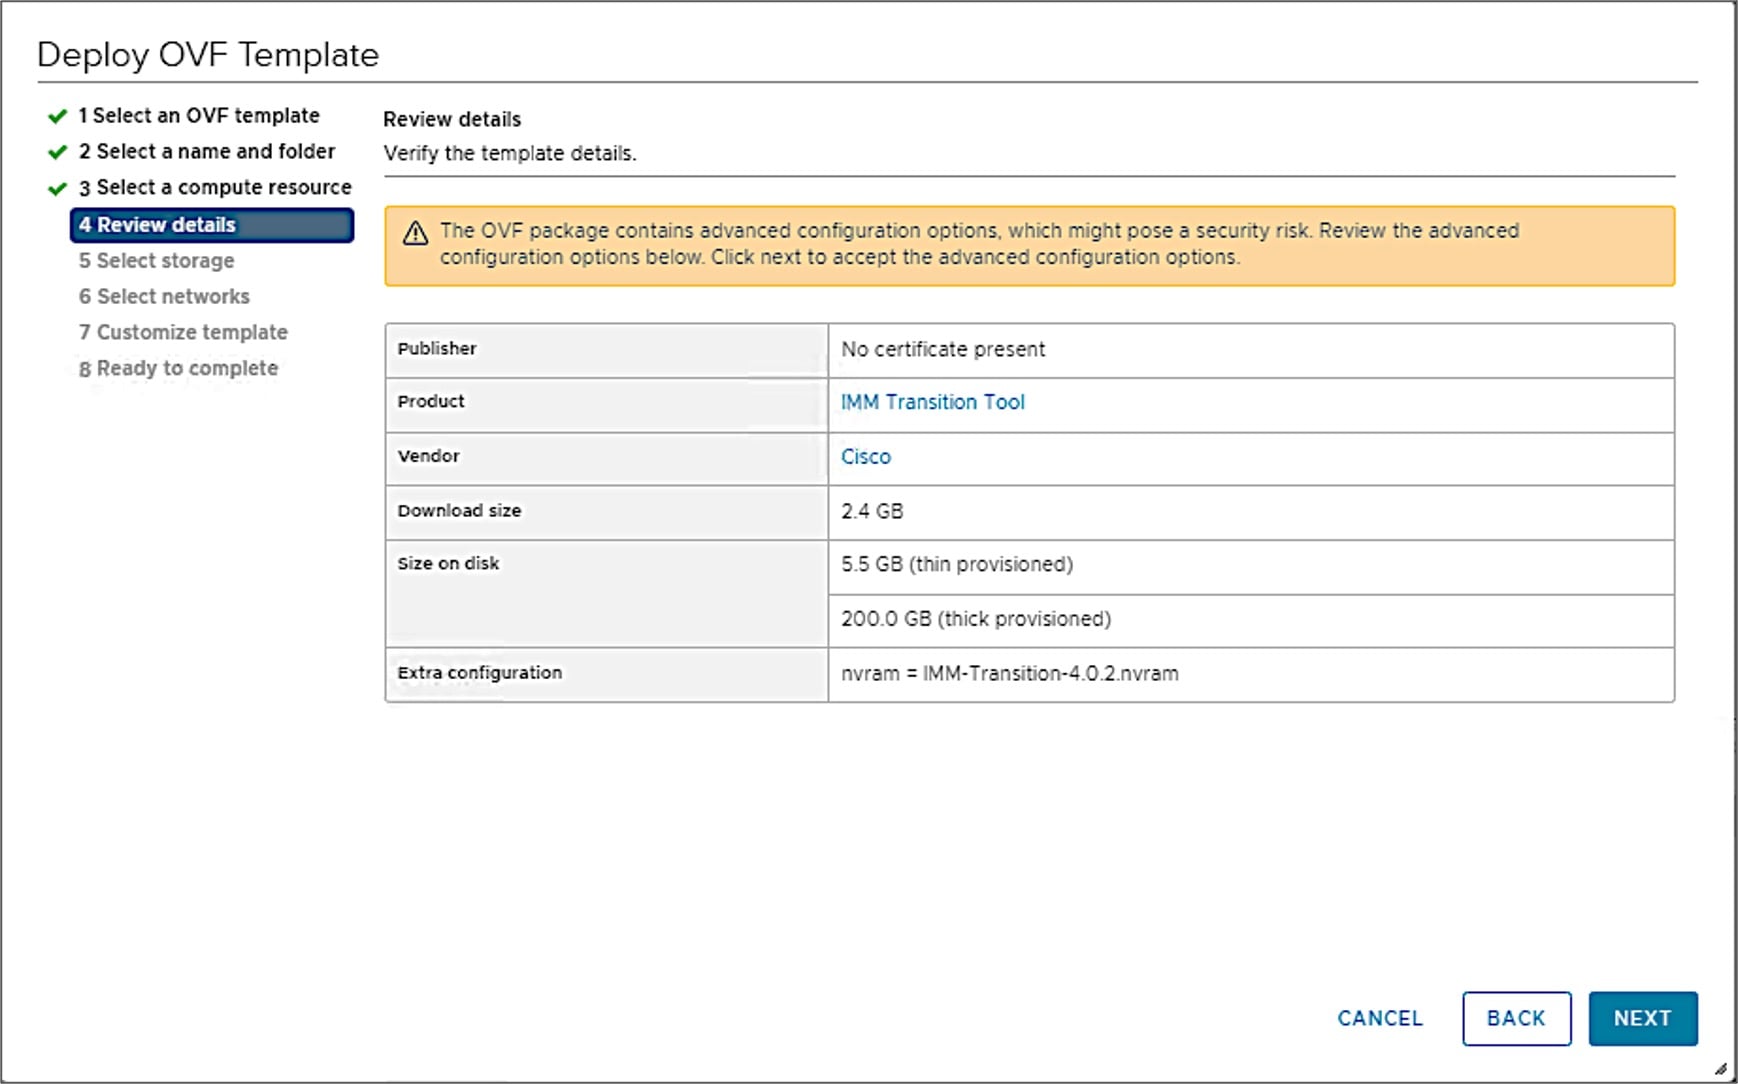
  • Virtual Hardware Version used by the OVA - 11

  • Network Connectivity Requirements:

    • TCP Port 443(HTTPS) (from IMM Transition Tool, Release 1.0.2 onwards)

    • TCP Port 22 (SSH) for troubleshooting or advanced configuration.

    • Access to the following is required:

      • DNS (using TCP/UDP Port 53)

      • NTP (using UDP Port 123)

      • UCS Manager/UCS Central devices (using TCP Port 443 [HTTPS] only)

      • Intersight devices (using TCP Port 443 [HTTPS] only)

      • Connection to the proxy server settings (if any)

    • Pushing Config to Intersight requires HTTPS connectivity to the Intersight instance.

Installing Cisco Intersight Managed Mode Transition Tool

An Open Virtual Appliance (OVA) is a prebuilt software solution that comprises one or more virtual machines (VMs) that are packaged, maintained, updated, and managed as a single unit. The Cisco Intersight Managed Mode Transition Tool OVA has a preinstalled operating system and includes application functionality that is necessary for the IMM Transition Tool functionality. The IMM Transition Tool as an OVA can be deployed on a VMWare Vsphere infrastructure.


Note


From IMM Transition Tool, 3.1.1 onwards, you can take a backup of the tool data and restore it on the same or another instance of the IMM Transition Tool. For more details, see Appendix E: Backup/Restore.


Before you begin

  • From the UCS Tools page, download the IMM Transition Tool .ova file to your computer in a place that is easy to find when you start to deploy the OVF template.

Procedure


Step 1

Log into the HTML5 vSphere Web Client and go to the VMs tab.

Step 2

Add the Deploy OVF Template action button via the Actions dropdown list.

Step 3

Click the added Deploy OVF Template button.

A new window appears, asking to select a template.

Step 4

Click Choose Files, select the downloaded OVA file.

Step 5

Click Next.

Step 6

Select the location where you want to deploy the virtual appliance, click Next.

Step 7

Select the resource you want to use to run the virtual appliance, click Next.

Review the package details, that contain advanced configuration options.

Step 8

Click Next to accept these options.

Step 9

Select the desired storage location from the list of datastores, click Next.

Step 10

Select a destination network from the dropdown list for each source network, click Next.

Step 11

Customize the deployment properties by entering the Network settings values and setting up the System Password.

An auto-generated default password is used as a replacement for any existing password in UCS Manager/UCS Central policies such as Virtual Media, iSCSI Boot that are converted. Similarly, another auto-generated password is used for Mutual CHAP Authentication in iSCSI Boot Policy.

Note


You should change the password for the converted policies after those are pushed to Intersight.

Step 12

Click Next.

Review the configuration data.

Step 13

Click the Refresh button to update the system.

The VM will be visible in the center windowpane.

Step 14

Select the VM and click Power On.

Step 15

Once the VM is powered on, click the Open Console icon to open the VM console in a new window.

You have successfully deployed the OVA template and powered on the VM.


Upgrading Cisco Intersight Managed Mode Tool

Perform the following steps to upgrade the tool from 3.0.1 or 3.0.2 to any of the higher version using CLI :

  1. Take a SNAPSHOT of the VM before starting the upgrade.

  2. Copy (SCP) the downloaded tar file of the higher version to the lower version VM.

  3. Execute the below command:

    sudo imm_upgrade -p <downloaded_tar_file>

    This will take few minutes to complete.

The file validation and the upgrade process will get started as shown below:

INFO: File format validation success

INFO: Version validation success

INFO: MD5 hash validation success

INFO: Upgrading...

INFO: Upgrade Success. Restarting server

INFO: Server Restarted


Note


It is recommended to roll back to the last snapshot of the VM in case of failure of the upgrade.


Accessing Cisco Intersight Managed Mode Transition Tool using the Graphical User Interface

You can access the user interface of the Cisco IMM Transition Tool through browser window, to generate transition readiness report, and convert UCS domain into IMM configuration.

Procedure


Step 1

Launch a Web browser window.

Step 2

Enter http://<VM IP address> or https://<VM IP address>. VM IP address is the IP address of the VM where you have deployed Cisco IMM Transition Tool OVA.

IMM Transition Tool, Release 1.0.2 and above, provides HTTPS support. All the http URLs get redirected to https.

Step 3

In the Login dialog box, enter the user name and password.

User name: admin

Password: Enter the password set on the Customize template page during installation.

Step 4

Click Sign In.

To end the user session, click Log Out from the user settings in the top-right corner.

Note


Session Timeout—In IMM Transition Tool, Release 1.0.2 onwards, if you remain inactive for 30 min, you are automatically logged out of the session. You have to relogin to use the application again.