OpenStack 1.2 for Cisco DFA Install Guide for Using Pre-Built OpenStack for Cisco DFA Images
Bias-Free Language
The documentation set for this product strives to use bias-free language. For the purposes of this documentation set, bias-free is defined as language that does not imply discrimination based on age, disability, gender, racial identity, ethnic identity, sexual orientation, socioeconomic status, and intersectionality. Exceptions may be present in the documentation due to language that is hardcoded in the user interfaces of the product software, language used based on RFP documentation, or language that is used by a referenced third-party product. Learn more about how Cisco is using Inclusive Language.
- Updated:
- May 23, 2014
Chapter: Create Project and Launch VM
Create Project and Launch VM
- Create Project and Launch VM
- Known Caveats
- Steps to Create a Project
- Steps to Create a User for the Project
- Steps to Create the Network
- Steps to Launch the VM
Create Project and Launch VM
The information provided in this section is generic to OpenStack and it is provided here for your convenience with the exception of ConfigProfile, which is DFA specific.
Known Caveats
The following are known caveats when you are creating a project and launching VM:
Steps to Create a Project
Take the following steps to create a project:
Steps to Create a User for the Project
Take the following steps to create a user for the project:
Steps to Create the Network
Take the following steps to create the network:
- Login as the user you created in the "Steps to Create a User for the Project" section.
- Click the Project tab.
- Click Networks and click Create Network.
-
Specify a name for
the network and click the Subnet tab.

Note
Steps 3 and 4 are mandatory. - Specify a network address for the subnet.
- Click the Subnet Detail tab and leave the Enable External DHCP option checked if External DHCP instead of static IP address, for VM to be used.
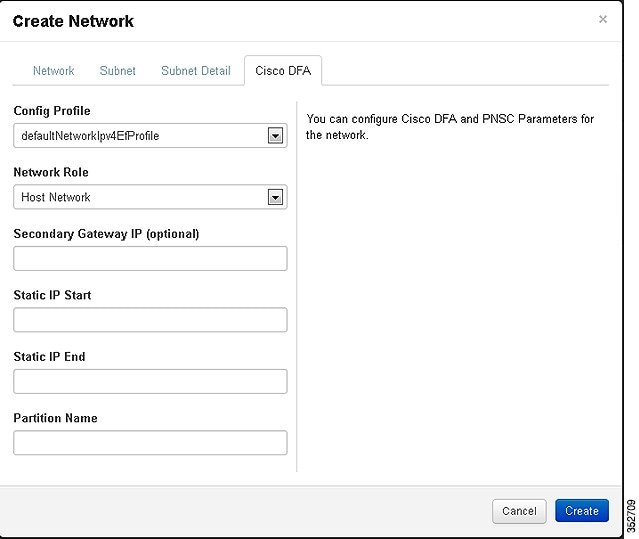
- Click the CiscoDFA tab, It gives you a new window, and then select the config profile from the pull-down menu. The other parameters specified in this window is for Cisco's Prime Network Service Controller (PNSC) integration. Without service, make sure you select the basic non service related profiles:
Steps to Launch the VM
Take the following steps to launch the VM:
 Feedback