Work with Active Directory
Before you configure the Active Directory probe for Passive Identity services, make sure that:
-
The Microsoft Active Directory server does not reside behind a network address translator and does not have a Network Address Translation (NAT) address.
-
The Microsoft Active Directory account intended for the join operation is valid and is not configured with the Change Password on Next Login.
-
Ensure you have properly configured the DNS server, including configuring reverse lookup for the client machine from ISE-PIC. For more information, see DNS Server.
-
Synchronize clock settings for the NTP servers. For more information, see Specify System Time and Network Time Protocol Server Settings.
 Note |
If you see operational issues when Cisco ISE-PIC is connected to Active Directory, see the AD Connector Operations Report under Reports. For more information, see Available Reports. |
Getting Started with the PassiveID Setup
Before you begin
-
Ensure the Microsoft Active Directory server does not reside behind a network address translator and does not have a Network Address Translation (NAT) address.
-
Ensure the Microsoft Active Directory account intended for the join operation is valid and is not configured with the Change Password on Next Login.
-
Ensure that ISE-PIC has an entry in the domain name server (DNS). Ensure you have properly configured reverse lookup for the client machine from ISE-PIC. For more information, see DNS Server
Procedure
| Step 1 |
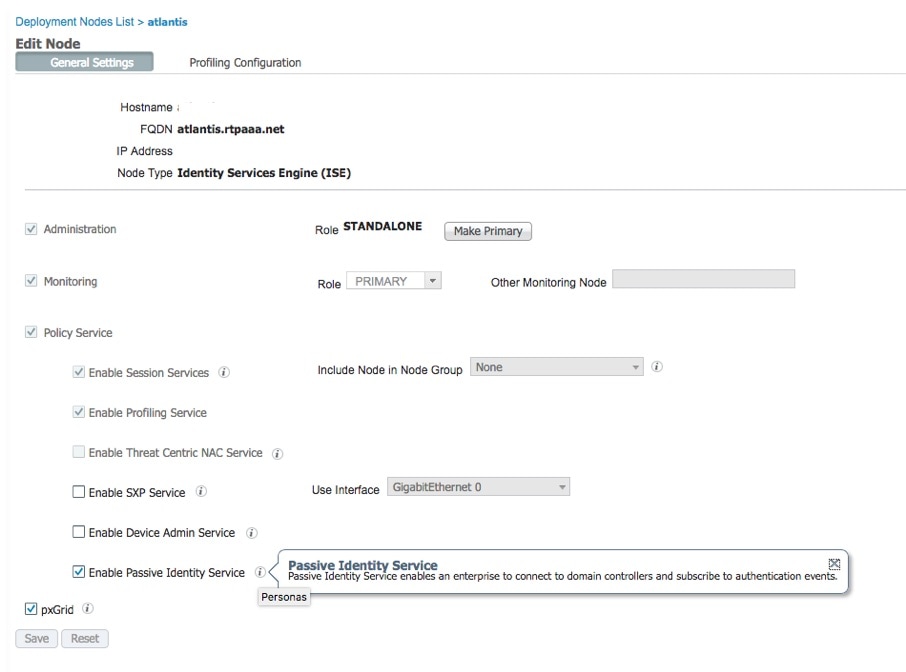
Choose . From the Passive Identity Connector Overview screen, click Passive Identity Wizard. The PassiveID Setup opens:  |
| Step 2 |
Click Next to begin the wizard. |
| Step 3 |
Enter a unique name for this Active Directory join point. Enter the domain name for the Active Directory Domain to which this node is connected, and enter your Active Directory administrator user name and password. |
| Step 4 |
Click Next to define Active Directory groups and check any user groups to be included and monitored. |
| Step 5 |
Click Next. Select the DCs to be monitored. If you choose Custom, then from the next screen select the specific DCs for monitoring. When finished, click Next. |
| Step 6 |
Click Exit to complete the wizard. |
What to do next
When you finish configuring Active Directory as your initial provider, you can easily configure additional provider types as well. For more information, see Providers. Furthermore, you can now also configure a subscriber, designated to receive the user identity information that is collected by any of the providers you have defined. For more information, see Subscribers.
Set Up an Active Directory (WMI) Probe Step-by-Step
To configure Active Directory and WMI for Passive Identity services, use the Getting Started with the PassiveID Setup or follow the steps in this chapter as follows:
-
Configure the Active Directory probe. See Add an Active Directory Join Point and Join Cisco ISE-PIC Node to the Join Point.
-
Create a list of Active Directory Domain Controllers for the WMI-configured node (or nodes) that receives AD login events.
-
Configure the Active Directory in order for it to integrate with ISE-PIC.
-
(Optional) Manage the Active Directory Provider.
Add an Active Directory Join Point and Join Cisco ISE-PIC Node to the Join Point
Before you begin
Ensure that the Cisco ISE-PIC node can communicate with the networks where the NTP servers, DNS servers, domain controllers, and global catalog servers are located.
Join points must be created in order to work with Active Directory as well as with the Agent, Syslog, SPAN and Endpoint probes .
Procedure
| Step 1 |
Choose . |
||||||
| Step 2 |
Click Add and enter the domain name and identity store name from the Active Directory Join Point Name settings. |
||||||
| Step 3 |
Click Submit. A pop-up appears asking if you want to join the newly created join point to the domain. Click Yes if you want to join immediately. If you clicked No, then saving the configuration saves the Active Directory domain configuration globally , but none of the Cisco ISE-PIC nodes are joined to the domain yet. |
||||||
| Step 4 |
Check the check box next to the new Active Directory join point that you created and click Edit. The deployment join/leave table is displayed with all the Cisco ISE-PIC nodes, the node roles, and their status. |
||||||
| Step 5 |
In case the join point was not joined to the domain during Step 3, check the check box next to the relevant Cisco ISE-PIC nodes and click Join to join the Cisco ISE-PIC node to the Active Directory domain. You must do this explicitly even though you saved the configuration. To join multiple Cisco ISE-PIC nodes to a domain in a single operation, the username and password of the account to be used must be the same for all join operations. If different username and passwords are required to join each Cisco ISE-PIC node, the join operation should be performed individually for each Cisco ISE-PIC node. |
||||||
| Step 6 |
Enter the Active Directory username and password in the Join Domaindialog box. The user used for the join operation should exist in the domain itself. If it exists in a different domain or subdomain, the username should be noted in a UPN notation, such as jdoe@acme.com. |
||||||
| Step 7 |
(Optional) Check the Specify Organizational Unit check box. You should check this check box in case the Cisco ISE-PIC node machine account is to be located in a specific Organizational Unit other than CN=Computers,DC=someDomain,DC=someTLD. Cisco ISE-PIC creates the machine account under the specified organizational unit or moves it to this location if the machine account already exists. If the organizational unit is not specified, Cisco ISE-PIC uses the default location. The value should be specified in full distinguished name (DN) format. The syntax must conform to the Microsoft guidelines. Special reserved characters, such as /'+,;=<> line feed, space, and carriage return must be escaped by a backslash (\). For example, OU=Cisco ISE\,US,OU=IT Servers,OU=Servers\, and Workstations,DC=someDomain,DC=someTLD. If the machine account is already created, you need not check this check box. You can also change the location of the machine account after you join to the Active Directory domain. |
||||||
| Step 8 |
Click OK. You can select more than one node to join to the Active Directory domain. If the join operation is not successful, a failure message appears. Click the failure message for each node to view detailed logs for that node.
|
Add Domain Controllers
Procedure
| Step 1 |
Choose . |
||
| Step 2 |
Check the check box next to the Active Directory join point that you created and click Edit. The deployment join/leave table is displayed with all the Cisco ISE-PIC nodes, the node roles, and their statuses. |
||
| Step 3 |
Go to the PassiveID tab and click Add DCs.
|
||
| Step 4 |
Check the check box next to the domain controllers that you would like to add to the join point for monitoring and click OK. |
||
| Step 5 |
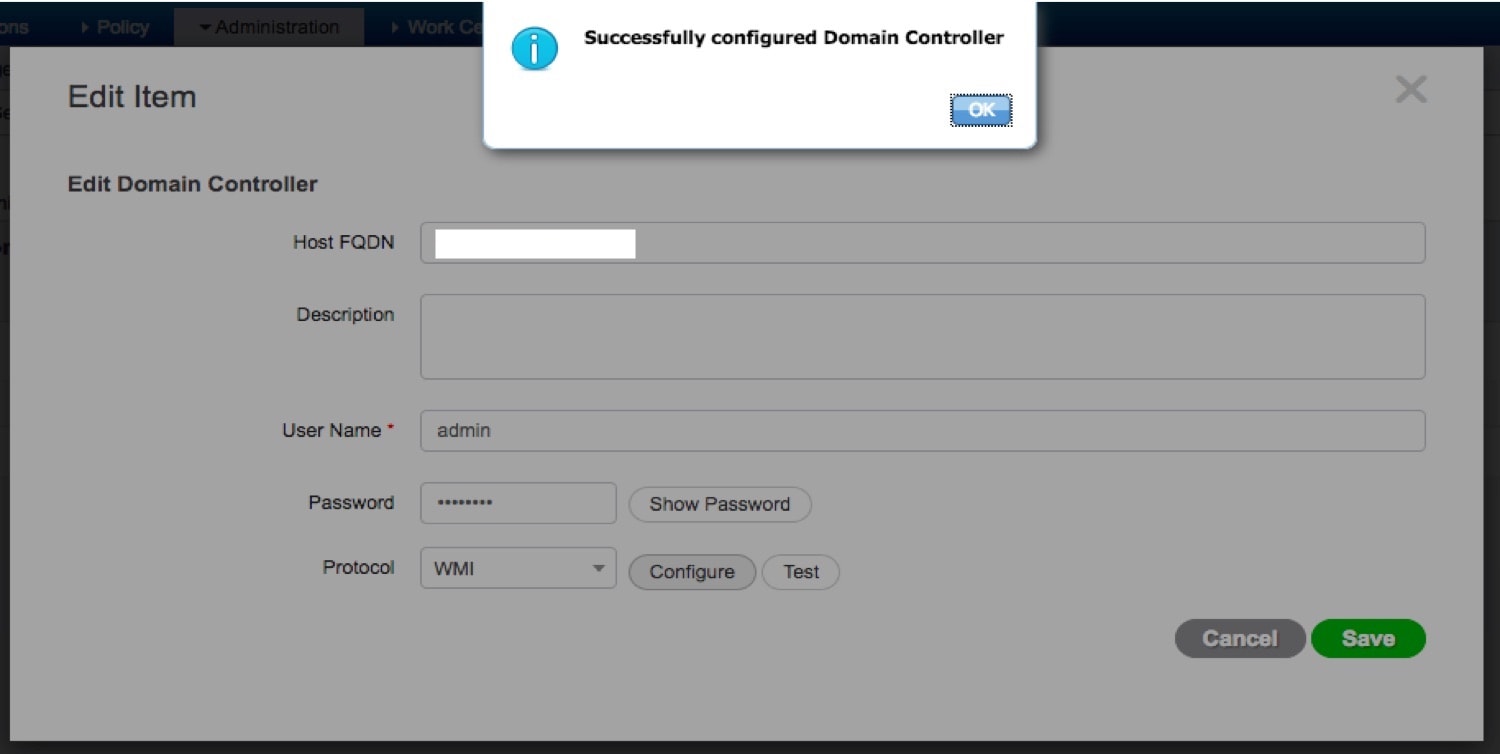
Configure the domain controller:
|
The DC failover mechanism is managed based on the DC priority list, which determines the order in which the DCs are selected in case of failover. If a DC is offline or not reachable due to some error, its priority is decreased in the priority list. When the DC comes back online, its priority is adjusted accordingly (increased) in the priority list.
Configure Active Directory User Groups
Configure Active Directory user groups for them to be available for use when working with different probes that collect user identity information from Active Directory. Internally, Cisco ISE uses security identifiers (SIDs) to help resolve group name ambiguity issues and to enhance group mappings. SID provides accurate group assignment matching.
Procedure
| Step 1 |
Choose . Click the join point for which you would like to add groups. |
||
| Step 2 |
Click the Groups tab. |
||
| Step 3 |
Do one of the following:
|
||
| Step 4 |
If you are manually selecting a group, you can search for them using a filter. For example, enter admin* as the filter criteria and click Retrieve Groups to view user groups that begin with admin. You can also enter the asterisk (*) wildcard character to filter the results. You can retrieve only 500 groups at a time. |
||
| Step 5 |
Check the check boxes next to the groups that you want to be available for use in authorization policies and click OK. |
||
| Step 6 |
If you choose to manually add a group, enter a name and SID for the new group. |
||
| Step 7 |
Click OK. |
||
| Step 8 |
Click Save.
|
Configure WMI for Passive ID
Before you begin
Procedure
| Step 1 |
Choose . |
| Step 2 |
Check the check box next to the Active Directory join point that you created and click Edit. The deployment join/leave table is displayed with all the Cisco ISE-PIC nodes, the node roles, and their statuses. |
| Step 3 |
Go to the Passive ID tab, check the check box next to the relevant domain controllers and click Config WMI to enable ISE-PIC to automatically configure the domain controllers you selected. 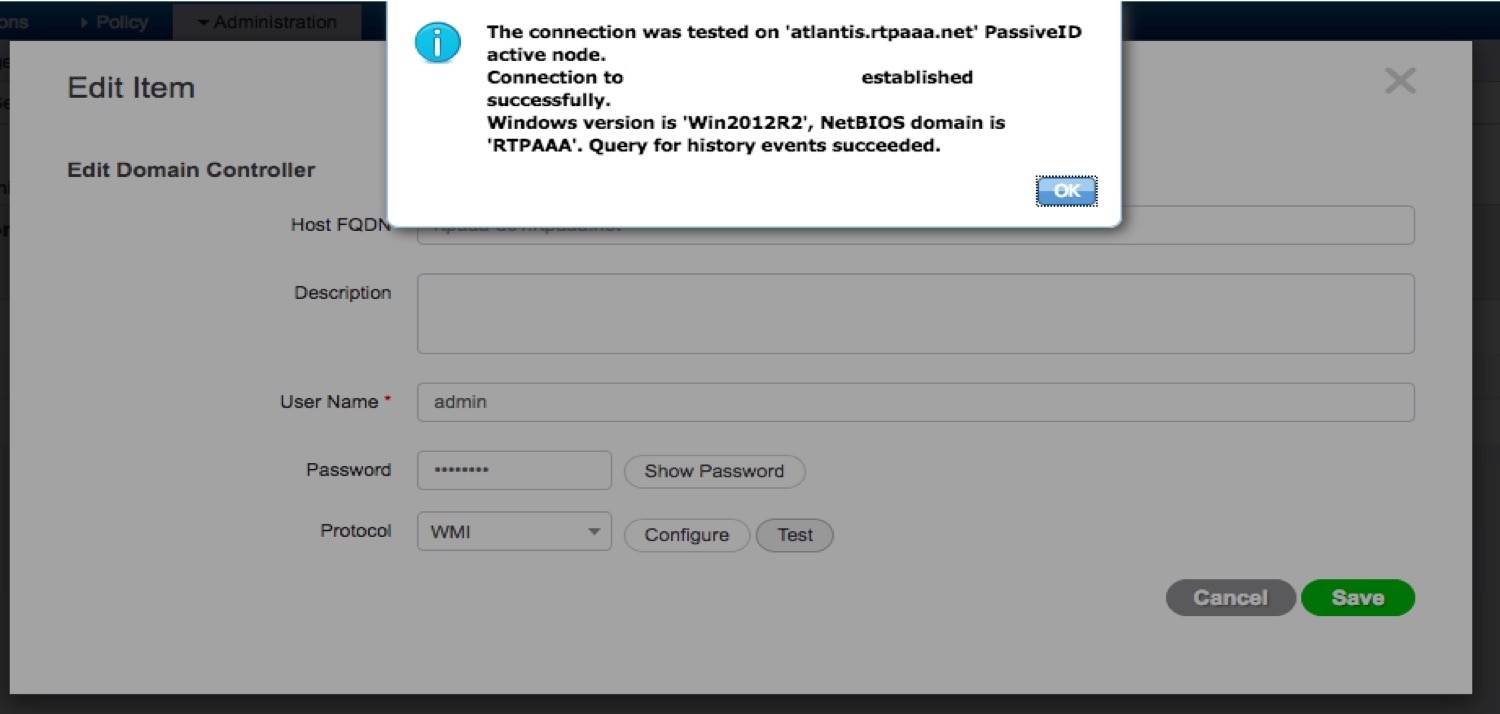
|
Note |
If the agent is unable to pick up accurate DC details on your Windows system, you need to reinstate the communication between the DC and Cisco ISE. You can do this by adding the Cisco ISE IP address and the Cisco ISE FQDN (For example, Cisco ISE IP address: https://10.0.0.0/ and Cisco ISE FQDN: https://ise1.cisco.com/) to the hosts file in your Windows system (). |
Manage the Active Directory Provider
Once you have created and configured your Active Directory join points, continue to manage the Active Directory probe with these tasks:
Test Users for Active Directory Groups
The Test User tool can be used to verify user groups from Active Directory. You can run the test for a single join point or for scopes.
Procedure
| Step 1 |
Choose . |
| Step 2 |
Choose one of the following options:
|
| Step 3 |
Enter the username and password of the user (or host) in Active Directory. |
| Step 4 |
Choose the authentication type. Password entry in Step 3 is not required if you choose the Lookup option. |
| Step 5 |
Select the Cisco ISE-PIC node on which you want to run this test, if you are running this test for all join points. |
| Step 6 |
Check the Retrieve Groups and Attributes check boxes to retrieve the groups from Active Directory. |
| Step 7 |
Click Test. You can also view the time taken (in milliseconds) for Active Directory to perform each processing step. Cisco ISE-PIC displays a warning message if the time taken for an operation exceeds the threshold. |
View Active Directory Joins for a Node
You can use the Node View button on the Active Directory page to view the status of all Active Directory join points for a given Cisco ISE-PIC node or a list of all join points on all Cisco ISE-PIC nodes.
Procedure
| Step 1 |
Choose . |
| Step 2 |
Click Node View. |
| Step 3 |
Select a node from the ISE Node drop-down list. |
| Step 4 |
Click the join point Name link to go to that Active Directory join point page and perform other specific actions. |
| Step 5 |
Click the link in the Diagnostic Summary column to go to the Diagnostic Tools page to troubleshoot specific issues. The diagnostic tool displays the latest diagnostics results for each join point per node. |
Diagnose Active Directory Problems
The Diagnostic Tool is a service that runs on every Cisco ISE-PIC node. It allows you to automatically test and diagnose the Active Directory deployment and execute a set of tests to detect issues that may cause functionality or performance failures when Cisco ISE-PIC uses Active Directory.
There are multiple reasons for which Cisco ISE-PIC might be unable to join or authenticate against Active Directory. This tool helps ensure that the prerequisites for connecting Cisco ISE-PIC to Active Directory are configured correctly. It helps detect problems with networking, firewall configurations, clock sync, user authentication, and so on. This tool works as a step-by-step guide and helps you fix problems with every layer in the middle, if needed .
Procedure
| Step 1 |
Choose . |
| Step 2 |
Click the Advanced Tools drop-down and choose Diagnostic Tools. |
| Step 3 |
Select a Cisco ISE-PIC node to run the diagnosis on. If you do not select a Cisco ISE-PIC node then the test is run on all the nodes. |
| Step 4 |
Select a specific Active Directory join point. If you do not select an Active Directory join point then the test is run on all the join points. |
| Step 5 |
You can run the diagnostic tests either on demand or on a scheduled basis.
|
| Step 6 |
Click View Test Details to view the details for tests with Warning or Failed status. |
Leave the Active Directory Domain
If you no longer need to use this Active Directory domain or this join point to collect user identities, you can leave the Active Directory domain.
When you reset the Cisco ISE-PIC application configuration from the command-line interface or restore configuration after a backup or upgrade, it performs a leave operation, disconnecting the Cisco ISE-PIC node from the Active Directory domain, if it is already joined. However, the Cisco ISE-PIC node account is not removed from the Active Directory domain. We recommend that you perform a leave operation from the Admin portal with the Active Directory credentials because it also removes the node account from the Active Directory domain. This is also recommended when you change the Cisco ISE-PIC hostname.
Procedure
| Step 1 |
Choose . |
||
| Step 2 |
Check the checkbox next to the Active Directory join point that you created and click Edit. The deployment join/leave table is displayed with all the Cisco ISE-PIC nodes, the node roles, and their statuses. |
||
| Step 3 |
Check the checkbox next to the Cisco ISE-PIC node and click Leave. |
||
| Step 4 |
Enter the Active Directory username and password, and click OK to leave the domain and remove the machine account from the Cisco ISE-PIC database. If you enter the Active Directory credentials, the Cisco ISE-PIC node leaves the Active Directory domain and deletes the Cisco ISE-PIC machine account from the Active Directory database.
|
||
| Step 5 |
If you do not have the Active Directory credentials, check the No Credentials Available checkbox, and click OK. If you check the Leave domain without credentials checkbox, the primary Cisco ISE-PIC node leaves the Active Directory domain. The Active Directory administrator must manually remove the machine account that was created in Active Directory during the time of the join. |
Delete Active Directory Configurations
You should delete Active Directory configurations if you are not going to use the specific Active Directory configuration as a probe. Do not delete the configuration if you want to join another Active Directory domain. You can leave the domain to which you are currently joined and join a new domain. Do not delete the configuration if it is the only configuration in ISE-PIC
Before you begin
Ensure that you have left the Active Directory domain.
Procedure
| Step 1 |
Choose . |
| Step 2 |
Check the checkbox next to the configured Active Directory. |
| Step 3 |
Check and ensure that the Local Node status is listed as Not Joined. |
| Step 4 |
Click Delete. You have removed the configuration from the Active Directory database. If you want to use Active Directory at a later point in time, you can resubmit a valid Active Directory configuration. |
Enable Active Directory Debug Logs
Active Directory debug logs are not logged by default. Enabling Active Directory debug logs may affect ISE-PIC performance.
Procedure
| Step 1 |
Choose . |
| Step 2 |
Click the radio button next to the Cisco ISE-PIC node from which you want to obtain Active Directory debug information, and click Edit. |
| Step 3 |
Click the Active Directory radio button, and click Edit. |
| Step 4 |
Choose DEBUG from the drop-down list next to Active Directory. This will include errors, warnings, and verbose logs. To get full logs, choose TRACE. |
| Step 5 |
Click Save. |
 Feedback