Installing Cisco VTS Components in OpenStack using Red Hat Enterprise Linux OpenStack Director
The Red Hat OpenStack Platform director (RHOSPD) is a toolset for installing and managing a complete OpenStack environment. It is based primarily on the OpenStack project TripleO, which is the abbreviation for OpenStack-On-OpenStack. Redhat also has a program for partners to integrate their solution into OpenStack deployment using the framework provided by Red Hat OpenStack Platform director.
Cisco VTS follows the Red Hat Partner Integration document to introduce VTS specific content into the OpenStack installation. See Red Hat OpenStack Platform 10 Partner Integration document for details. As of this release VTS 2.6.3 , the integration has been qualified with Red Hat OpenStack 10 platform (corresponding to OpenStack Newton and OpenStack Queens Release).
Installation and setup of the director node and the necessary networking needed to manage the hardware (that would take roles of Controller, Compute, or Storage) is documented in the Red Hat documentation referenced above. Note that these procedure are dependent on the type of hardware used and the specific configuration of each deployment. If the deployment involves hosting NFV workloads, additional configuration is needed for reserving CPU capacity, huge-pages, and libvirt settings. This needs to be taken into consideration. Red Hat documentation on NFV provides an overview of these configuration options. See the Red Hat OpenStack Platform 10 Network Functions Virtualization Configuration Guide for details.
Prerequisites
- The director node is equipped with the right set of software for undercloud installation. See Installing the Undercloud chapter of the Red Hat OpenStack Platform 10 Director Installation and Usage document, for details.
- You perform the node introspection procedures. See Configuring Basic Overcloud Requirements with the CLI Tools chapter of the Red Hat OpenStack Platform Director Installation and Usage document, for details.
- The OSPD deployment, undercloud, and overcloud nodes have access to the yum repositories and RHEL registration, including any proxy setup. See the Overcloud Registration chapter of the Red Hat OpenStack Platform 10 Advanced Overcloud Customization document, for details.
-
Install the Cisco VTS Heat template and tools RPM packages on the director node.
-
Configure the Heat templates and environmental files in the director, for VTS services
-
Proceed with overcloud deployment including the Cisco VTS environmental files.
Usage of HTTP/HTTPS Proxies—In deployments where HTTP/HTTPS proxy is in use, ensure that the director node's http_proxy, https_proxy, and no_proxy environment variables are set. Additionally, ensure that the overcloud nodes have their proxy settings set correctly. This is needed for performing overcloud package updates during steady-state operation. The latter is usually accomplished by following Red Hat’s recommendation for RHEL registration See the Overcloud Registration chapter of the Red Hat OpenStack Platform 10 Advanced Overcloud Customization document, for details.
Obtaining access to Cisco VTS YUM Packages
 Note |
This document is written assuming the OpenStack Overcloud nodes can retrieve VTS-specific packages from Cisco’s YUM repository at devhub.cisco.com. The exact procedure may vary depending on the customer deployment preferences. Some deployments may have an intermediary satellite repository, which can host RPMs from multiple external YUM repositories. The satellite repository may host RPMs that have been thoroughly validated in a lab environment, prior to using them in production deployment. |
Procedure
|
Cisco Repo Configuration
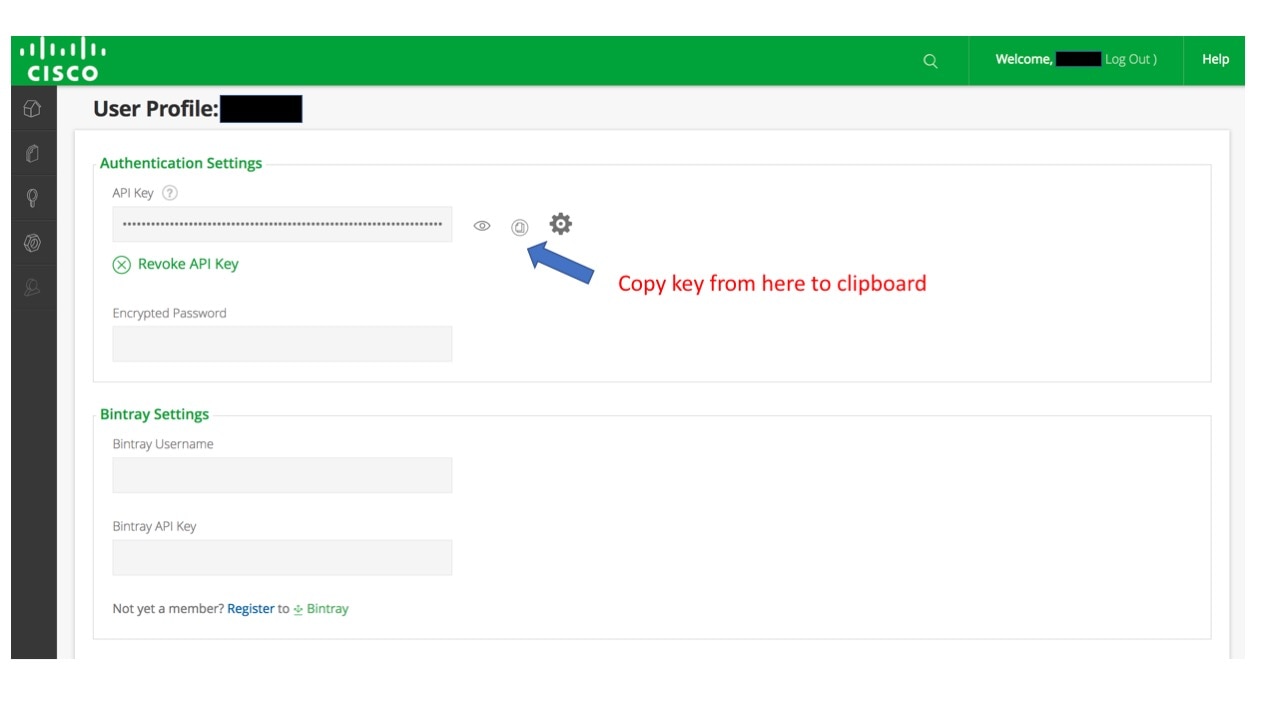
Username= <== the username that user configured to access cisco antifactory from https://devhub.cisco.com/artifactory/webapp/
Password= <== this is the API key that you have obtained while setting up your username from https://devhub.cisco.com/artifactory/webapp/
sudo cat > /etc/yum.repos.d/262.repo <<EOL[cisco2.6.3.vts263-os-newton]name=cisco2.6.2.vts263-os-newtonbaseurl=https://devhub.cisco.com/artifactory/vts-yum/2.6.3.vts263-os-newtonusername=<username>password=<apikey>enabled = 1gpgcheck = 0metadata_expire = 86400Populating the fields in neutron-ml2-cisco-vts.yaml
VTSUsername:
User can get the AdministrativeUser that is mentioned in config.txt while creating the ISO file or from OVA deployment.
VTSPassword:
Get this from VTS deployment ISO or from OVA deployment and encrypt this password with the help of /opt/vts/bin/encpwd
VTSServer:
This is the management IP address of VTS.
VTSVMMID:
For OSPD queens, generate the uuid with the help of Linux command uuidgen. Copy the same ID to VMMID in the VTS GUI Virtual Machine Manager >> Add new VMM.
For OSPD newton, generate the uuid with the help of Linux command uuidgen.
Copy the same ID to the VTS Virtual Machine Manager >> Add new VMM. Select "yes" for Was this VMM installed by Red Hat OpenStack Director? Paste it to VMMID.
VTSSiteId:
The site id can be generated with the help of Linux command uuidgen. User has an option to configure same uuid for both VMMID and siteid.
OSPD 10 Integration
With VTS263 a new enhanced and significantly simpler method of installing the VTS components has been introduced, effective obsoleting the VTS260 procedure. The procedure is also available in VTS263.
This document provides the main install and configuration steps, including the configuration of the multi site feature (introduced in 263).
Brief Overview:
In contrast to the overcloud package install procedure in VTS260, the new overcloud package install procedure does not rely on the modification of the overcloud image. It operates by using the native package manager on the overcloud nodes to access the package repository and install the packages via the "NodeExtraConfig" hook. The install happens thus transparently, and can be also initiated on already deployed overcloud nodes. The overclud nodes require thus access to the yum package repository, and also RH package registration.
The configuration of the components follows on - this operation is unchanged from VTS260, with the exception of new features.
Install Packages on the undercloud director:
Procedure
| Step 1 |
On the undercloud director node Install the cisco263 newton repo (Edit the credentials accordingly) |
| Step 2 |
Install the THT extra RPM: |
| Step 3 |
(optional) Install the VTS tools |
Edit the Cisco VTS Environment Template
Procedure
| Step 1 |
Copy the vts environment template: |
| Step 2 |
Edit the neutron-cisco-vts.yaml template. See the Node Depolyment Resources and Parameters section of the Appedix A for configuration parameters. |
| Step 3 |
Edit the RH Registration template. |
| Step 4 |
When deploying VPP: Edit the NIC templates |
Configure the Service Roles
Add the necessary services to the defined node roles.
sudo vi /usr/share/openstack-tripleo-heat-templates/roles_data.yamlThen add the following roles to the compute(s) or controllers where the VPFA and VPP are to run:
OS::TripleO::Services::VTSAgent

    - OS::TripleO::Services::VppCompute

    - OS::TripleO::Services::CiscoVpfaCompute

    - OS::TripleO::Services::RSyslogClient
    - OS::TripleO::Services::MonitVpfaAgent
- OS::TripleO::Services::CollectDAgentOS::TripleO::Services::VTSAgent
- OS::TripleO::Services::VppController
- OS::TripleO::Services::CiscoVpfaController
- OS::TripleO::Services::RSyslogClient
- OS::TripleO::Services::MonitVpfaAgent
- OS::TripleO::Services::CollectDAgentOS::TripleO::Services::ComputeNeutronOvsAgent: OS::Heat::NoneOS::TripleO::Services::NeutronOvsAgent: OS::Heat::NoneDeploy the Overcloud
openstack overcloud deploy \
--templates \
-e /usr/share/openstack-tripleo-heat-templates/environments/network-isolation.yaml \
-e /home/stack/templates/network-environment.yaml \
-e /home/stack/templates/rhel-registration/environment-rhel-registration.yaml \
-e /home/stack/templates/neutron-cisco-vts.yaml \
--control-scale 1 \
--compute-scale 1 \
--control-flavor control \
--compute-flavor compute \
--log-file oclogs/overcloudDeploy_$(date +%m_%d_%y__%H_%M_%S).log \
--ntp-server ntp.esl.cisco.com \
--verbose --timeout 100
OSPD 13 and VTS263 ML2 Integration
VTS integration with OSPD13 relies on a VTS Tripleo Heat Templates package and VTS specific (eg ML2) containers. This section documents the installation and configuration of the system for ML2 integration.
- If you are using a docker registry other than Undercloud, you must modify the configuration according to the RH OSPD13 documentation.
-
Ensure that RH Undercloud is installed, and that the standard RH container images are downloaded and set up as per the RH OSPD13 documentation. For more information, see https://access.redhat.com/documentation/en-us/red_hat_openstack_platform/13/html/director_installation_and_usage/
-
Ensure that the RH or satellite registration environment template is complete as per https://access.redhat.com/documentation/en-us/red_hat_openstack_platform/13/html/advanced_overcloud_customization/sect-registering_the_overcloud#registering_the_overcloud_with_an_environment_file. The RH registration environment template file is by default available at the following location:
/home/stack/templates/rhel-registration/environment-rhel-registration.yaml
Procedure
| Step 1 |
Set up your HTTP proxy configuration by configuring the HTTP_PROXY and HTTPS_PROXY environment variables. This step is optional. |
||
| Step 2 |
Install the cisco263 queens repo.
|
||
| Step 3 |
Perform these steps to download the Neutron ML2 container:
|
||
| Step 4 |
Perform these steps to set up the neutron-cisco-vts.yaml environment file.
|
||
| Step 5 |
Deploy the overcloud by including the following items to the deploy command line: The environment file that is shown in Step 4. The relevant RH registration environment file. For example: |
OSPD 13 and VTS263VTF Integration
The deployment of VTF, alongside all of its ancillary components (monit, collectd, etc) requires either the install of packages into the overcloud image, or running an update to an existing deployment passing one of the dedicated package update/install script. Containers are not used for any of these services in VTS263. The latter method is described here, which involves a two run deployment process; Install; Configure.*
IMPORTANT: Due to the fact that the VPP package is missing in the RH overcloud images it is imperative that no VPP interface data is passed via the nic-configuration settings until after the update/install script run. The deployment will fail if the data is passed without the package present.
*The two run deployment could be reduced to one should the use install the vpp package into the overcloud image.
The cisco_vts_packages script found in puppet/extraconfig/pre_deploy/cisco_vts_packages.yaml provides the base for an idempotent upgrade/install method of all VTF packages. Given that the packages have external RHEL repository dependencies, two convenience wrapper scripts are provided that can be passed to the NodeExtraConfigure hook which only accepts a single script.
puppet/extraconfig/pre_deploy/cisco_vts_no_rh_reg_wrapper.yaml : Wrapper Script without RHEL registration, but with VTF install and VTF extra-config**
puppet/extraconfig/pre_deploy/cisco_vts_rh_reg_wrapper.yaml : Wrapper script with RHEL registration, VTF install and VTF extra-config.
**VTF-Extra config is required to inject per node data necessary to complete the VTF configuration
Stage - 1: This stage installs all the necessary packages
Procedure
| Step 1 |
Enable Hugepages by enabling the appropriate KernelArgs, as per Step 6 of Network Functions Virtualization Planning and Configuration Guide - Red Hat Customer Portal . |
| Step 2 |
In the neutron-cisco-vts.yaml environment file configure the chosen wrapper script to the NodeExtraConfig hook. |
| Step 3 |
In the neutron-cisco-vts.yaml environment file VTSUpdate setting is set to 'true' and the package list set to: VTSUpgradeNewForgePackages: | |
| Step 4 |
Edit the rhel-registration/environment-rhel-registration.yaml settings with the details of your RHEL license/satellite repo. |
| Step 5 |
Run the deployment. |
Stage - 2: Enable and Configure the Components
Procedure
| Step 1 |
You can edit the settings of VTF, monit, collectd, and so on, in the neutron-cisco-vts.yaml environment file. If this data are already inputted at or prior to Stage1 you mst edit the PerNodeData element. For example, by adding a dummy entry as shown below in the "foo": "bar" data. This is necessary because Heat mechanism does not trigger the PreConfig VTF Extra configuration script unless a data change has occurred. |
||
| Step 2 |
Add the desired roles to the node role data definition file /usr/share/openstack-tripleo-heat-templates/roles_data.yaml For example, to compute: |
||
| Step 3 |
Add the following role registry definitions to the /usr/share/openstack-tripleo-heat-templates/environments/docker.yaml file:
|
||
| Step 4 |
Add to the compute and/or controller nic-data definitions the vpp interface data. |
||
| Step 5 |
Edit the network environment file to allow the above interface configuration updates to be propagated to the deployment. To do that, add the following setting to the network-environment.yaml file, or any other environment file that is passed to the deployment command. NetworkDeploymentActions: ['CREATE','UPDATE'] |
||
| Step 6 |
Re-run the overcloud deployment. |
Cisco VTS with VTF on Controller/Compute
VPFA Configuration Parameters
This section provides details about VPFA configuration parameters. These are mandatory to be configured
###################
### VPFA Config ###
###################
UnderlayIpNewtorksList: '21.0.0.0/8,10.10.10.0/24,50.50.0.0/16,40.40.0.0/16,42.42.42.0/24'
VTSR_u_IpAddressList: '10.10.10.133,10.10.10.134'
VPFAHostname: '<some_name>'
NetworkConfigMethod: 'static'
NetworkNameServerIP: ''
VifTypeCompute: 'vhostuser'
VifTypeController: 'tap'
-
UnderlayIpNetworksList—List of underlay IP networks for VTF reachability. To specify multiple values, use a comma-separated string.
-
VTSR_u_IpAddressList—List of underlay IP address assigned to VTS.
-
VPFAHostname—Hostname assigned to VPFA.
-
NetworkConfigMethod—VPFA network configuration method. Default value is “static”.
- NetworkNameServerIP—DNS IP assigned to VPFA.
-
VifTypeCompute—VPFA VIF type for compute is “vhostuser”.
-
VifTypeController—VPFA VIF type for Controller node is “tap”.
VPP Configuration Parameters
This section provides details about VPP configuration parameters.
#####################################
### VPP Configuration Parameters ###
#####################################
## MTU for Tun/tap interfaces
VppTunTapMtu: '9000'
##The CPUs listed below need to be part of the grub isol CPU list (configured elsewhere)
VppCpuMainCoreController: '6'
VppCpuMainCoreCompute: '6'
## Comma delimited workers list
VppCpuCorelistWorkersCompute: '7,8,9'
VppCpuCorelistWorkersController: '7,8,9'
## Avoid dumping vhost-user shared memory segments to core files
VppVhostUserDontDumpMem: True
Note |
All CPU values given above are examples and need to be adapted to the actual deployment, or left commented out (that is, these are optional). |
-
VppTunTapMtu—MTU for VPP tap interface.
-
VppCpuMainCoreController—Pin VPP to a CPU core on controller.
-
VppCpuMainCoreCompute—Pin VPP to a CPU core on compute.
-
VppCpuCorelistWorkersCompute—Pin VPP worker threads to a CPU core on compute.
- VppCpuCorelistWorkersController—Pin VPP worker threads to a CPU core on controller
-
VppVhostUserDontDumpMem—Do not dump vhost-user memory segments in core files.
PerNodeData Parameters
-
Gather baremetal (ironic) UUID for overcloud nodes where VTF needs to be deployed.
“openstack baremetal node list” - The node-specific hieradata is provisioned based on the node UUID, which is hardware dependent and immutable across reboots/reinstalls.
Value returned will be unique and immutable machine UUID not related to the baremetal node UUID. Extract the machine unique
UUID from the command below by substituting <baremetal-UUID> from the previous step. Run:
“openstack baremetal introspection data save <baremetal-UUID> | jq .extra.system.product.uuid” - Populate “PerNodeData” parameters for each node where VTF is intended to be deployed in the neutron-cisco-vts.yaml. For example:
PerNodeData: |
    {
      "< Node1 UUID >": {
          "cisco_vpfa::vtf_underlay_ip_v4": "10.0.0.2",
          "cisco_vpfa::vtf_underlay_mask_v4": "24",
          "cisco_vpfa::network_ipv4_gateway": "10.0.0.1"},
      "< Node2 UUID >": {
          "cisco_vpfa::vtf_underlay_ip_v4": "10.0.0.3",
          "cisco_vpfa::vtf_underlay_mask_v4": "24",
          "cisco_vpfa::network_ipv4_gateway": "10.0.0.1"}
    }
-
UUID—Immutable machine UUID derived from Step 2 for the overcloud node.
- “cisco_vpfa::vtf_underlay_ip_v4”—Underlay IPv4 address assigned to VTF.
-
"cisco_vpfa::vtf_underlay_mask_v4"—Underlay IPv4 netmask assigned to VTF.
-
"cisco_vpfa::network_ipv4_gateway"—Underlay IPv4 network gateway assigned to VTF.
Monit Agent Configuration
This section provides details about Monit agent configuration parameters.
##################################
### Monit Agent Configuration  ###
##################################

# IMPORTANT: To enable the Monit Agent config, add the VPFA specific "OS::TripleO::Services::MonitVpfaAgent"
# or generic "OS::TripleO::Services::MonitAgent" to the corresponding nodes role data configuration.


## General settings. Applied to all Monit Agents
## Credentials
MonitUser: ''
MonitPassword:
-
MonitUser—The Monit username.
-
MonitPassword—The Monit password.
collectd Agent Configuration
This section provides details about collectd Agent Configuration
#####################################
### Collectd Agent Configuration  ###
#####################################

# IMPORTANT: To enable the Collectd Agent config, add the  "OS::TripleO::Services::CollectDAgent"


##Enable or disable collectd (default is true)
# CollectDEnable: true

## Purge default/previous configurations
CollectDPurge: true

## CollectD Plugin configurations
## Each named plugin should have its own named dictionary entry, followed by a "content" element containing the
## plugin's XML configuration stanza, in JSON list format.
## The configuration content is the native collectd configuration for the plugin
CollectDPluginConfigs: |
  {
    "memory":
    {
     "content":
      [
      "<Plugin memory>",
        "ValuesAbsolute true",
        "ValuesPercentage false",
      "</Plugin>"
      ]
    },
    "cpu":
    {
      "content":
      [
        "<Plugin cpu>",
           "ReportByCpu true",
           "ReportByState true",
           "ValuesPercentage false",
           "ReportNumCpu false",
           "ReportGuestState false",
           "SubtractGuestState true",
         "</Plugin>"
      ]
    },
    "python":
    {
      "content":
      [
        "<Plugin python>",
        "ModulePath \"/opt/cisco/vpe/collectd/\"",
        "LogTraces true",
        "Import \"cisco-vpfa-collectd-plugin\"",
        "</Plugin>"
      ]
    },
    "write_log":
    {
      "content":
      [
        "<Plugin write_log>",
        "Format JSON",
        "</Plugin>"
      ]
    },
    "interface":
    {
      "content":
      [
        "<Plugin interface>",
        "Interface \"br-ctlplane\"",
        "Interface \"br-ex\"",
        "Interface \"br-tenant\"",
        "Interface \"lo\"",
        "IgnoreSelected false",
        "ReportInactive true",
        "UniqueName false",
        "</Plugin>"
      ]
    },
    "disk":
    {
      "content":
      []
    },
    "load":
    {
      "content":
      [
        "<Plugin load>",
        "ReportRelative true",
        "</Plugin>"
      ]
    }
  }
-
CollectDEnable—Enable or disable collectd, By default, this is set to true.
-
CollectDPurge— Purge default or previous configurations. By default, this is set to true.
-
CollectD Plugin configurations—Modify this for changing the VTF collectd plugin configuration. See Monitoring Cisco VTS chapter in the Cisco VTS 2.6.3 User Guide for details about collectd plugins.
Configuring the neutron-cisco-vts.yaml File
All of the configuration sections below apply to the neutron-cisco-vts environment file.
Neutron ML2 Parameters
This section provides details about the Neutron ML2 parameters.
###################
### Neutron ML2 ###
###################
NeutronCorePlugin: 'neutron.plugins.ml2.plugin.Ml2Plugin'
NeutronMechanismDrivers: 'sriovnicswitch,cisco_vts'
NeutronTypeDrivers: 'vxlan,vlan,flat'
NeutronServicePlugins: 'cisco_vts_router,trunk'


#NeutronInterfaceDriver: ‘cisco_controller.drivers.agent.linux.interface.NamespaceDriver'
-
NeutronCorePlugin—This is the Core neutron plugin for neutron tenant network. Default value is “neutron.plugins.ml2.plugin.Ml2Plugin”.
-
NeutronMechanismDrivers—These are the mechanism drivers for neutron tenant network. To specify multiple values, use a comma-separated string. To enable VTS-specific mechanism driver, add cisco_vts to this list. For enabling SR-IoV interfaces on the compute, add sriovnicswitch.
-
NeutronTypeDrivers—These are the tenant network types for neutron tenant network. To specify multiple values, use a comma-separated string.
-
NeutronServicePlugins—This is the neutron service plugin for neutron tenant network. To enable L3 networking, add cisco_vts_router. To enable trunk mode operation (VLAN aware VMs) add trunk to the list of type drivers.
-
NeutronInterfaceDriver—Specifies the interface driver used by the Neutron DHCP Agent. When deploying the VTF on nodes running the Neutron DHCP Agent this setting needs to be passed (uncommented). Valid values are (default) ‘neutron.agent.linux.interface.OVSInterfaceDriver’ and ‘cisco_controller.drivers.agent.linux.interface.NamespaceDriver'.
VTS Agent Configuration Parameters
This section provides details about the VTS Agent parameters.
########################
### VTS Agent Config ###
########################
VTSPhysicalNet: 'physnet101'
VTSRetries: 15
VTSTimeout:
VTSPollingInterval: 6
-
VTSPhysicalNet—VTSPhysicalNet should be set to the ‘physnet’ used for the tenant networks for OVS on the compute. The environment file in the Heat templates should have the mapping of the tenant OVS bridge to the physnet name.
-
VTSRetries—Number of times VTS agent retries a neutron request. Default is 15.
-
VTSTimeout—Cisco VTS agent times out a request. Default value is 120 seconds.
-
VTSPollingInterval—Cisco VTS agent polling interval for a request. Default value is 6 seconds.
Multiple Updates on Ports
When the VTS mechanism driver uses RESTCONF to communicate with VTS/NSO, VTS/NSO can send multiple updates in a single transaction and update the physical switches through ‘Sync thread”. This process reduces the overall processing time of port updates and thus displays the following results:
-
If the transaction is successful, the next iteration will be started and the events of the successful transaction will be removed from the journal table.
-
If the transaction is failed, the events will be reprocessed on one-by-one basis. The bulk update method will be continued for the consecutive transaction.
Note |
It is recommended to use the existing failure handling methodology for the events failed during one-by-one basis (Revert the operation, if possible). To reduce the overall updates of the bulk updates, a single query for all the events with same UUID is processed by gathering the first to last update and removing all the intermediate updates. |
|
FAQs |
Solution |
|---|---|
|
FAQ on “Sync” Thread |
|
|
What is the expected number of events to be accumulated between two iterations of the “Sync” thread? |
It depends on the time taken by NSO to answer the current request as well as the speed at which the new ports are being added to the Openstack. |
|
How to improve the NSO response time? |
The NSO response time can be improved only for the bulk operation. The NSO is capable of pushing several configuration simultaneously. |
|
Will “Sync” thread wait for the previous transaction to end, before querying the journal table? |
Yes, the “Sync” thread waits for the NSO REST response (with either success or failure) and then queries the journal table again. Irrespective of the controllers enabled, only a single thread runs in the cluster. |
|
In the instance of failed transaction, how the “Sync” thread knows where to do one-by-one basis and when to start the next iteration? |
A bool variable “multiple_rows” is used in the thread. The bool “multiple_rows” is set to true, if it is dealing with multiple rows. |
|
FAQ on Additional Speed-up |
|
|
Does query performed in the current journal table or only in “window” of the current bulk? |
The code uses the configuration variable “cfg.CONF.ml2_cc.max_batch” with default value 9 if not specified explicitly in the config file to query up to that number of distinct UUIDs. . For example, if the “max_batch” is 10 and the journal table has 30 rows deal with 9 distinct UUIDs, the query will return the whole 30 rows. However, the journal table has 30 rows and the 16th row deals with 11th UUID, the query will return only 15 first rows. |
|
If the query is performed in the current journal table, will it cause the events to arrive out-of-order and disrupt the configuration? |
No, the querying is done only for ports and thus all the port events will be sent altogether. |
|
What does “removing all the intermediate updates” means? |
For example, with 9 unique UUIDs covered by 30 rows. These 30 rows are reduced to 9 rows covering all operations per unique UUID from the first one to the last one. Thus NSO processes compressed/compacted requests much faster. |
|
Does the unit test cover the bulk operations? |
Yes. You can view details in cisco_controller/tests/unit/ml2/base_driver_test_class.py |
Rsyslog settings for computes with VTF
# IMPORTANT: Add OS::TripleO::Services::RSyslogClient to the role data catalogue for the service to come into effect

# ****** EDIT THE SYSLOG SERVER IP ADDRESS AND PORT IN ClientLogFilters and add/remove entries as needed! *******
#The default template below uses UDP (@) servers on port 514. To add a TCP server, add an extra stanza prefixing
# with @@ the server's IP address

ClientLogFilters: | [
{
"expression": "$syslogfacility-text == 'local3' and $syslogseverity-text == 'crit'", "action": "@[192.168.128.2]:514;forwardFormat"
},
{
"expression": "$syslogfacility-text == 'local3' and $syslogseverity-text == 'err'", "action": "@[192.168.128.2]:514;forwardFormat"
},
{
"expression": "$syslogfacility-text == 'local3' and $syslogseverity-text == 'warning'",

"action": "@[192.168.128.2]:514;forwardFormat"
},

{
"expression": "$syslogfacility-text == 'local3' and $syslogseverity-text == 'info'", "action": "@[192.168.128.2]:514;forwardFormat"
}

]
Note |
In this example, 192.168.128.2 is the IP address of the Syslog server, and 514 is the UDP port. |
Additionally, the rsyslog client service on the computes and controller may need to be enabled in the roles_data.yaml file.
##Add rsyslog client under Controller role:
-	OS::TripleO::Services::RSyslogClient

#Add rsyslog client under Compute role:
-	OS::TripleO::Services::RSyslogClient
Updating VTS RPMs in Overcloud
To be able to update packages, Red Hat recommends the use of activation keys. To do this, the overcloud nodes need to be registered using environment files. See Registering the Overcloud with an Environment File section of the Red Hat OpenStack Platform 10 Advanced Overcloud Customization document, for details.
After these are setup, you can update overcloud nodes with the latest set of RPMs initiated from the OpenStack director node, by following the procedures documented in the Updating the Overcloud Packages section of the Red Hat OpenStack Platform 10 Upgrading Red Hat OpenStack Platform document.
 Feedback