- Installation Overview
- Installation Requirements
- Preparing for Installation
- Preparing the Oracle External Database
- Installing the Prime Network Gateway and Units Using the Installation Wizard
- Installing the Prime Network Gateway Using CLI
- Installing Prime Network Units
- Installing the Vision, Events, and Administration Clients
- Installing the Prime Network Integration Layer
- Upgrading and Rolling Back Prime Network
- Uninstalling Prime Network
- Next Steps
- Using Chinese Characters in Business Tags
Cisco Prime Network Installation Guide, 4.3.2
Bias-Free Language
The documentation set for this product strives to use bias-free language. For the purposes of this documentation set, bias-free is defined as language that does not imply discrimination based on age, disability, gender, racial identity, ethnic identity, sexual orientation, socioeconomic status, and intersectionality. Exceptions may be present in the documentation due to language that is hardcoded in the user interfaces of the product software, language used based on RFP documentation, or language that is used by a referenced third-party product. Learn more about how Cisco is using Inclusive Language.
- Updated:
- July 18, 2017
Chapter: Installing the Prime Network Integration Layer
- Prerequisites for Installing the PN-IL
- Installing the PN-IL Using the Installation Wizard
- Installing the PN-IL (CLI Method)
- Enabling and Disabling the PN-IL Health Monitor
- Managing FTP for Prime Network Integration Layer Server
- Changing the Ports Used by the PN-IL
- Migrating the PN-IL from Standalone Mode to Suite Mode
Installing the Prime Network Integration Layer
Prime Network can be used with Multi-Technology Operations Systems Interface (MTOSI) and 3rd Generation Partnership Project (3GPP) northbound interfaces. To enable this, you must install the Prime Network Integration Layer (PN-IL) along with the MTOSI and 3GPP bundles.

Note The PN-IL must be installed if you intend to use Prime Network in suite mode.
The PN-IL server allows Prime Network to expose MTOSI and 3GPP APIs over Simple Object Access Protocol (SOAP). The integration layer exposes MTOSI and 3GPP interfaces to enable clients to register and receive notifications. For information on interfaces exposed by the integration layer for MTOSI and 3GPP, refer to the Cisco Prime Network OSS Guide . An OSS client can use these standard and vendor extension APIs to integrate with Prime Network.
There are two methods for installing the PN-IL—using the GUI wizard (preferred method) or using CLI commands.
The following topics guide you through these PN-IL tasks:
- Installing the PN-IL Using the Installation Wizard
- Installing the PN-IL (CLI Method)
- Enabling and Disabling the PN-IL Health Monitor
- Managing FTP for Prime Network Integration Layer Server
- Changing the Ports Used by the PN-IL
Note If the integration layer is installed and you want to upgrade to the current version, refer to the section Upgrading the Prime Network Integration Layer (PN-IL).
Prerequisites for Installing the PN-IL
Before you start installing the PN-IL:
- Make sure Prime Network is completely installed.
- Verify that the ports required by PN-IL are available. See the Prime Network Integration Layer Ports . To change the default ports used by PN-IL, see the section Changing the Ports Used by the PN-IL.
- Verify that the system has at least 4 GB of RAM available using the top command.
- Verify that the system has minimum of 1 GB free space in the temp directory.
- To use the GUI method (installation wizard), make sure that:
– An X client application, such as Xming, is installed on the local machine where you plan to launch the wizard.
– A Telnet/SSH client, such as PuTTY, is installed on the local machine where you plan to launch the wizard, and X11 forwarding is enabled.
– Max user processes value on the machine is higher than 2048. Check this by executing:
Installing the PN-IL Using the Installation Wizard
The PN-IL can be quickly and easily installed using the GUI installation wizard.
Make sure that all the prerequisites for installing the PN-IL are met. See Prerequisites for Installing the PN-IL.
Step 1 Launch the X client application (for example, Xming).
Step 2 As the root user, launch a terminal to the Prime Network gateway server.
Step 3 Insert Disk 2: Software and Documentation in the DVD drive. (See Installation DVDs).
Step 4 Mount the inserted DVD using the mount command, and move to the mount directory.
Step 5 In the mount directory, locate the PNIntegrationLayer_v1.9.0.bin file and run it. This will launch the installation wizard.
Step 6 Read the introduction in the Welcome page and click Next.
Step 7 In the License page, accept the terms of the License Agreement and click Next.
Step 8 In the Prime Network Credentials page, provide the following information, then click Next.
- Operating System user—The username for the Prime Network operating system that was defined during installation of the Prime Network gateway.
- Prime Network Root User—The username for the root user that was defined during installation of the Prime Network gateway.
- Prime Network Root User Password—Password for the root user.
Step 9 After you have entered the Prime Network credentials, the installation checks the disk space and RAM and identifies whether Prime Network is installed in standalone or suite mode. Click OK to proceed with the installation.
Figure 9-1 PN-IL Installation Wizard - Prime Network Credentials

Step 10 The Port Details page lists the ports used by the PN-IL. Verify that they are available. Click Next.
Step 11 Review the pre-installation summary. If you need to change any of the user inputs, click Previous, otherwise click Install to continue.
Step 12 To run 3GPP services in Prime Network, use the following command to enable the NBI script:
Step 14 When the installation is complete, click Done to close the wizard.
Step 15 Verify the PN-IL installation by logging into the Prime Network bin directory on the gateway as the Prime Network user (e.g., pn432) and executing this command:
The integration layer status should be “Restarted”.
Note After the PN-IL installation is complete, a new environmental variable $PRIMEHOME is created and points to the PN-IL installation directory.
Installing the PN-IL (CLI Method)
Make sure that all the prerequisites for installing the PN-IL are met. See Prerequisites for Installing the PN-IL.
Step 1 As the root user, open a terminal on the Prime Network gateway server where you want to install PN-IL.
Step 2 Insert Disk 2: Software and Documentation in the DVD drive.
Step 3 Mount the inserted DVD using the mount command and change to the mount location.
Step 5 Create an installation directory for PN-IL (pnil in this example).
Step 6 Copy the PN-IL installation tar file from the mount location to this directory.
Step 7 Move to the directory in which the tar file was copied and extract the PN-IL installation tar:
Step 8 Move to the directory in which the installation tar files were extracted and run the installation script:
Step 9 Reload user profile using the following command:
The installation does the following:
Step 10 Configure PN-IL in standalone mode by running the following command as pnuser .
Note If you installed Prime Network in suite mode, you must configure PN-IL to run in suite mode after Prime Network has been integrated with Prime Central. Refer to the Cisco Prime Central Quick Start Guide.
Step 11 Go to the path cd $PRIMEHOME/bin.
itgctl config 1 --anaPtpServer ana_host_ip --anaPtpUser user --anaPtpPw password --authURL pnetwork-authentication-URL
- user is the Prime Network root user (usually root )
- password is the Prime Network root user password
- pnetwork-authentication-URL is the URL used to authenticate Prime Network calls; usually https://localhost:6081/ana/services/username
Step 12 To run 3GPP services in Prime Network, use the following command to enable the NBI script:
Enabling and Disabling the PN-IL Health Monitor
The PN-IL health monitor checks the PN-IL status every 3 minutes. If the services are down for any reason, the health monitor brings the PN-IL back up.
If you do not want PN-IL to be automatically restarted (such as for a maintenance window), manually disable the health monitor. As pnuser, enter the following:
To re-enable the health monitor:
Note By default, the PN-IL health monitor is disabled.
Managing FTP for Prime Network Integration Layer Server
Each PN-IL FTP server has a primary and a secondary FTP server setup with a failover option or a replication option
- Failover—If the primary server is not reachable, files are transferred to the secondary FTP server. If the secondary server is also not reachable, files are copied to the configured directory on the local machine.
- Replication—Files are transferred to both the primary and the secondary FTP servers.
The PN-IL directory contains a script (ftpConfig.sh) that is available in the PN-IL installation directory. The default location is $PRIMEHOME /esb/bin.
Use the ftpConfig.sh script with the following options to modify the file transfer component:
ftpConfig.sh [ -help ] [ -ftp enable | disable ] [ -localDir new-location ] [ -replication enable | disable ] [- clearConfig ] [- display ]
|
Changes the storage directory that is used on the local machine when file transfer is disabled (the default is /tmp). |
||
|
Enables and disables replication of XML and status files on both primary and secondary FTP servers. To see where files are stored, see Storage Location for PN-IL Replicated Files. |
||
|
Clears the FTP configuration. See Clearing the FTP Configuration for the Standalone Integration Layer Server |
||
|
Displays the FTP configurations, with the following options : |
||
Displays all servers configured for Inventory Management interface type for 3GPP. Use -hostOption to specify the primary or secondary server. |
||
Displays FTP configurations for primary and secondary servers across all management interface type for 3GPP. |
||
Storage Location for PN-IL Replicated Files
Table 9-1 shows where the files are stored when the replication is enabled/disabled. Tick mark indicates ftp details are configured for the particular FTP server.
Table 9-1 FTP Configuration with Replication Enabled/ Disabled


Changing the Ports Used by the PN-IL
This section explains how to change the default ports listed in Prime Network Integration Layer Ports.
Note These procedures stop the PN-IL. If you do not want the health monitor to automatically restart the PN-IL after 3 minutes, disable it as described in Enabling and Disabling the PN-IL Health Monitor.
Changing the NIO and SSL Ports
By default, the NIO and SSL transport ports are 61616 and 61615. To change the port numbers:
Step 1 Edit the $PRIMEHOME/es b /etc/activemq.broker.cfg as follows:
Step 2 Edit the $PRIMEHOME/e sb /etc/com.cisco.prime.esb.jms.cfg file and change the prime.connection.port value to the value of nioTransportPort from Step 1.
Step 3 Save and close the activemq.broker.cfg and com.cisco.prime.esb.jms.cfg files.
Step 4 From the $PRIMEHOME/bin directory, stop the integration layer server by invoking itgctl stop .
Changing the MTOSI Web Services Port
By default, the MTOSI web services implementation port is 9110. To change the port number:
Step 1 Open the $PRIMEHOME/esb/etc/com.cisco.prime.esb.mtosi.cfg file and change the mtosiPort value to a port number that is not in use.
Step 2 Save and close the com.cisco.prime.esb.mtosi.cfg file.
Step 3 From the $PRIMEHOME/bin directory, stop the integration layer server by invoking itgctl stop .
Changing the 3GPP Web Services Port
By default, the 3GPP web services implementation port is 9220. To change the port number:
Step 1 Open the $PRIMEHOME/esb/etc/com.cisco.prime.esb.tgpp.cfg file and change the tgppPort value to a port number that is not in use.
Step 2 Save and close the com.cisco.prime.esb.tgpp.cfg file.
Step 3 From the $PRIMEHOME/bin directory, stop the integration layer server by invoking itgctl stop .
Changing the Alarm Web Services Port
By default, the Alarm web services implementation port is 9020. To change the port number:
Step 1 Open the $PRIMEHOME/esb/etc/com.cisco.prime.esb.alarm.cfg file and change the alarmMgmtPort value to a port number that is not in use.
Step 2 Save and close the com.cisco.prime.esb.alarm.cfg file.
Step 3 From the $PRIMEHOME/bin directory, stop the integration layer server by invoking itgctl stop .
Migrating the PN-IL from Standalone Mode to Suite Mode
If Prime Network was originally installed in standalone mode and was subsequently migrated to work as part of a suite, you need to migrate the PN-IL to suite mode as well. You can do this using the installation wizard.
During the installation, the system automatically detects that the migration to suite mode is required and, after receiving your confirmation, proceeds with the relevant installation and configuration.
To migrate the PN-IL to suite mode:
Step 1 Log in to the Prime Network gateway as the Prime Network user.
Step 2 Stop the PN-IL instance and then disable PN-IL Health checker, as follows:
Step 3 Launch the installation wizard and follow Steps 1 through 8 in Installing the PN-IL Using the Installation Wizard.
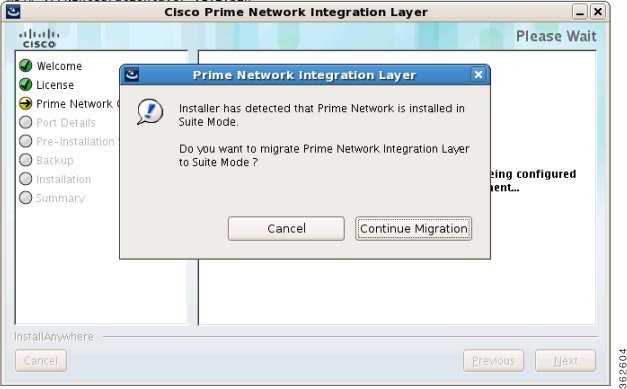
Step 4 After you have provided the Prime Network credentials, the system identifies that Prime Network is installed in suite mode. Click Continue Migration in the displayed message:
Figure 9-2 Migration to Suite Mode
Step 5 Click Next in the Port Details page.
Step 6 In the Pre-Installation Summary page, check that the installation mode is Suite Mode Deployment, then click Install.
Step 7 When the installation is complete, click Done to close the wizard.
 Feedback