Registering New Pod to Insight
In this step the User registers a new pod to Insight. Pod registration includes the following steps:
Before you begin
Insight UI Admin needs to register a Pod Admin to allow the user to register a pod. Following are the steps required for UI Admin to register a Pod Admin:
Procedure
| Step 1 |
Login as UI Admin and navigate to Manage Pod Admin(s) page. |
| Step 2 |
Click Add Pod Admin. |
| Step 3 |
Enter the username of the user.
|
| Step 4 |
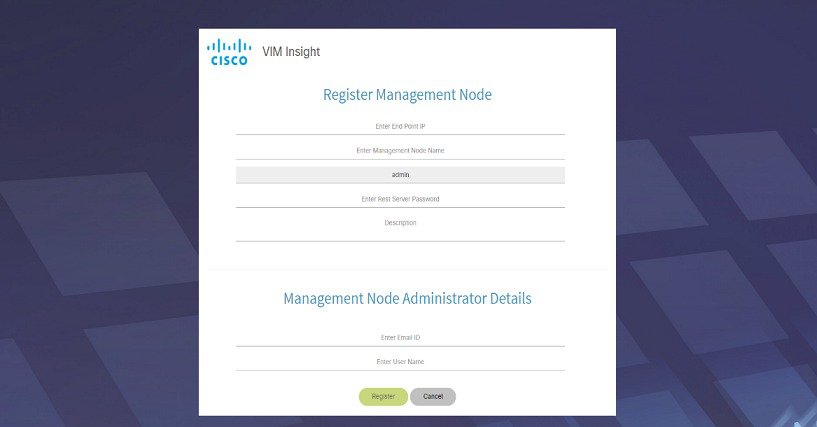
Navigate to https://br_api:9000. |
| Step 5 |
Click the Register Management Node link.
|
Login to Insight as Pod Admin
To login to Insight as Pod Admin, complete the instructions below:
Procedure
| Step 1 |
Enter the relevant registered email id. |
||
| Step 2 |
Enter the valid password. |
||
| Step 3 |
Click login as POD.
|
The VIM Insight UI
The VIM Insight UI is divided into four parts:
-
Dashboard
Dashboard of the VIM Installer provides the user an intuitive view of monitoring deployment. Dashboard provides a 3D view of 8 stages, which are present in the Installer CLI. The Carrousel displays the real-time status of the install steps, and it rotates automatically once an install stage is completed and a new install stage is started or scheduled. Dashboard maintains the pod state even when the User logs out. It will show the most recent data available via the VIM REST API on the management node. Dashboard provides the following rights to the administrator:
-
Deployed Blueprint Details: Shows information about the current Blueprint (Active/In-Progress). In case of an Inactive Blueprint, the table will be blank.
-
Deployment Status: This tells the status of the Blueprint. There are 3 stages of a Blueprint : Active, in-progress and Failed. Incase of in-progress and Failed states, the stage name would be mentioned in Deployment Status which is a hyperlink. If you click on the stage name, the carrousel will directly jump to that particular stage.
-
Deployment Started at: This tells the time when the installation was started.
-
Last Updated at: This tells the last updated time of the installation.
-
Click Here to check logs: If you click Here you will be redirected to the logs page in a new tab for which you will have to enter the REST Username and Password locatated at /opt/cisco/ui_config.json on the node. By default REST Username is "admin".
-
-
POD Operation Details: Displays the status regarding all the POD Activities done POST Installation like POD Management, Re-generate Secrets, etc. Following are the information shared in POD Operation Details table:
-
Current Operation: Name of the Operation Running.
-
POD Operation Status: Status of the Operation.
-
Operation Started at: Operation Start time.
-
Last Updated at: Operation last update time.
-
-
Blueprint Deployment Progress bar for a given POD: Shows the Blueprint success or failure state in percentage.
-
Switch Between Management Nodes: Will be covered later in this chapter.
Figure 2. VIM Insight Dashboard 
-
-
Pre-install
This section has two menus:
-
Blueprint Setup: Blueprint is the YAML (setupdata) present in the Management node. There are two ways to create a Blueprint:
-
Form based through the UI.
-
Upload an existing YAML.
In case of manual creation the user has to fill in details for Initial setup, physical setup and OpenStack, which covers core and optional features like VMTP, NFVI Monitoring, COLLECTED, Auto configuration of ToR, Optional services like Heat, Keystonev3 and so on. In case of upload of an existing YAMLl, the user can just upload the file and click Upload to automatically populate all the corresponding fields in the UI. At any given point, one can initiate the offline validation of the entry, by clicking the Offline Validate button, on the upper right hand corner in the Blueprint Setup menu.
Offline Validation will only take place if all the fields marked in Blueprint are filled and there are no client side validations remaining. Even if they are the Offline Validation, pop up will show which field is missing.
Figure 3. Blueprint Creation 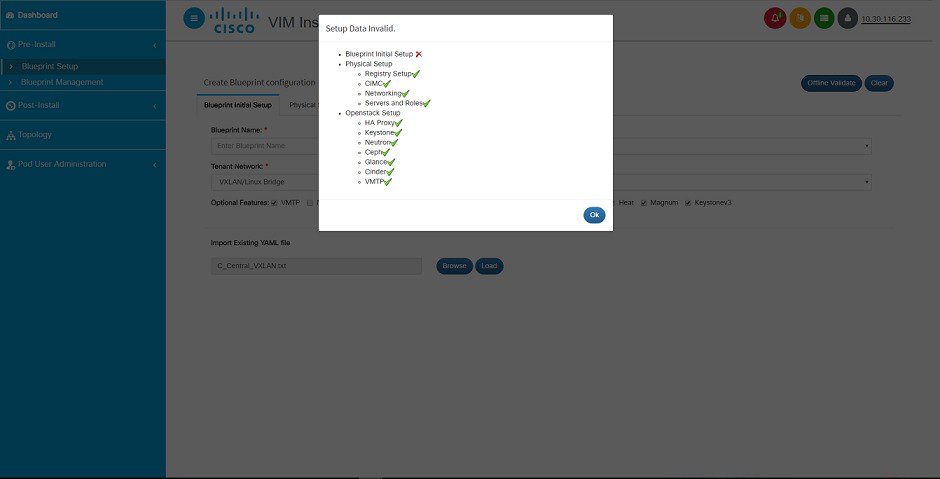
After filling all the details offline validation will take place, if successful, Save Blueprint option will be enabled, else user will not be allowed to save the Blueprint. Click Save blueprint to be redirected to Blueprint Management.
Figure 4. Blueprint Successful 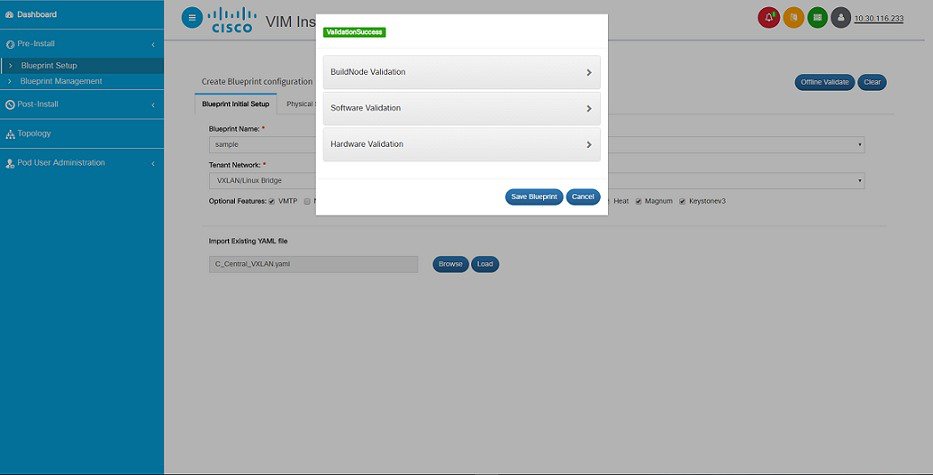
-
-
Blueprint Management:Blueprint Management gives CRUD access to users for Blueprints in the System. A user can use following features in Blueprint Management:
Figure 5. Blueprint Management 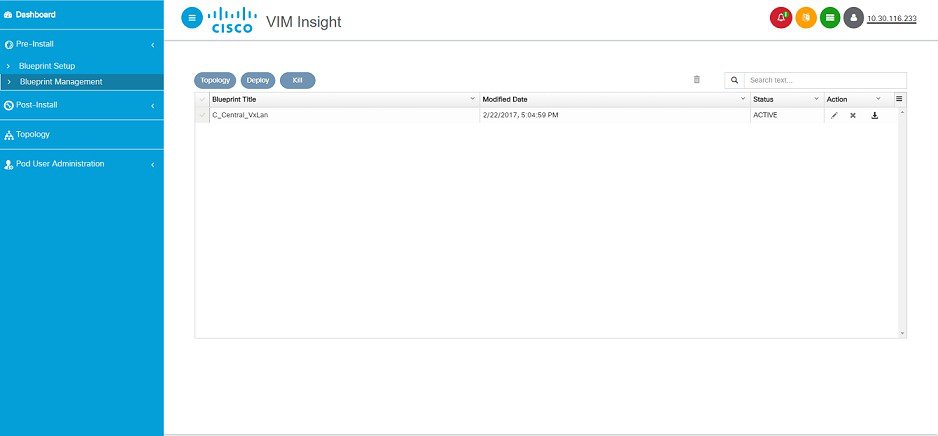
-
Delete Single or Multiple Blueprints which are in Inactive State.
-
Edit Blueprint which are in Inactive State.
-
Deploy Blueprint.
-
Uninstall or Abort Blueprint.
-
View Topology.
-
Preview and Download created Blueprint on local machine.
-
Search Blueprint from created Blueprints.
-
Figure 6. Blueprint Management Test 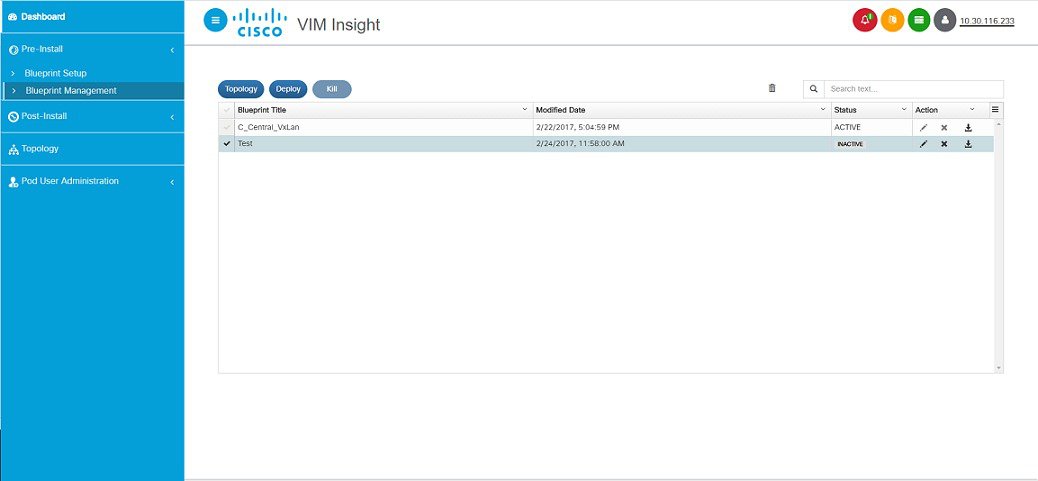
-
-
Post-install.
This section is active only when a Blueprint is in active state; that is if the install is successful, hence day-n operations are allowed.
-
Topology.
Topology is a logical representation of the Blueprint where it tells the user about the nodes connectivity with the respective networks and hardware information. Topology shows the active blueprints and user can select one among them.
Figure 7. Topology 
-
Pod User Administration
Pod User Administration menu is available only to admin of the Management Node. This admin can be default admin of the pod or users assigned with Pod Admin role by the default admin. It has two additional sub-panel options:
-
Manage Roles:
-
Add/Edit/Delete Roles.
-
Permissions to restrict the user access.
-
Roles provide the granular access to a specific user.
-
A role cannot be deleted directly if it is associated to an user.
Figure 8. Manage roles 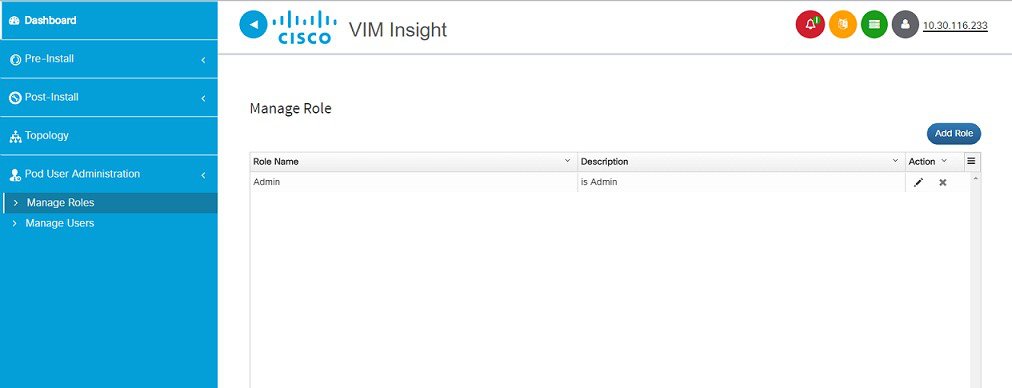
-
-
Manage Users:
-
Add/Edit/Delete Users.
-
List User name and Email ID for the users registered in the system.
-
Roles associated to users.
-
The current status of the user (Online and Offline user with Green and Red dot respectively).
-
User registration status.
-
Refresh button to get latest information about the users status.
Figure 9. Manage users 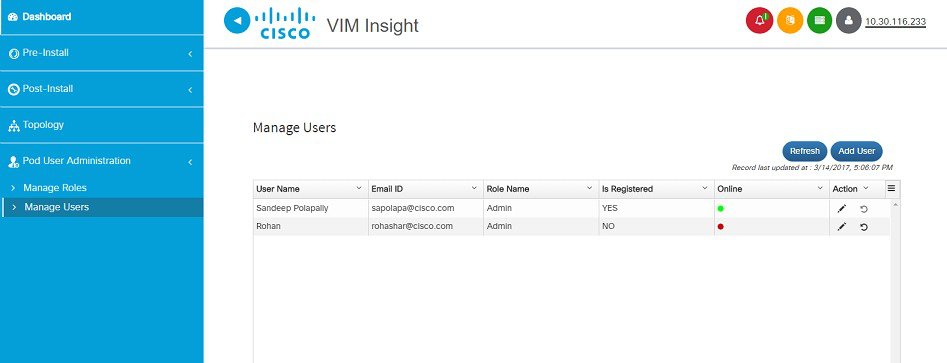
-
-
-
Notification - Tells the current status of Blueprint.
-
Context Switching - User can switch between two or more nodes.
-
User Profile - User can change the Password or Logout or Switch from UI to pod admin or vice-versa.
Context Switching within Insight
There are two ways that you can switch to another pod:
-
Context Switching Icon: Context Switching Icon is situated on the top right corner of the UI and is the third Icon from the left tool tip. Click Management Node Context Switching, to access all pods. There can be a case when a pod has red dot right next to it which indicates that the REST Password provided during registration of Management node does not matches with the current REST Password for that particular node. The Pod Admin/User can reach out to UI Admin and ask them to update the password for that Node from Manage Nodes in Insight UI Admin Portal.
-
Switch Between Management Nodes: Switch Between Management Nodes is situated in Dashboard. You can navigate to the pods by a single click. If mouse changes form hand or cursor to a red not sign then it is the same case as mentioned above for the REST Password mismatch.

 Feedback