Setting Up Cisco SD-WAN Specific Configurations in MSX
Configure the following for Cisco SD-WAN setup:
Disabling MSX-Managed Proxy
MSX allows you to connect to the control plane using an MSX-managed proxy, in which case you do not have to add the tenant's IP addresses to the allowed list. This functionality is enabled by default and can be disabled using an API.
To disable this functionality, set the enableVmanageProxy metadata to false using the PUT /sdwanservice/v1/featureflag/enable/vmanageproxy in the SDWAN Service API.
For more information on this API, refer the Swagger documentation that can be accessed from Account Settings > Swagger > SDWAN Microservice > feature-flag-controller section.
 Note |
Note: Only users with the following permissions can execute the vmanageproxy API.
|
Configuring Cisco SD-WAN Orchestrator Settings
Before creating a control plane for a tenant, you must first provide the SD-WAN Orchestration settings in the MSX Portal.
To configure orchestrator settings for Cisco SD-WAN:
Before you begin
Procedure
| Step 1 |
Log in to the MSX Portal . |
||
| Step 2 |
From the main menu, click Settings > Service Configurations > SD-WAN > Settings > Cisco SD-WAN Orchestration Settings tile, to access the orchestrator settings for Cisco SD-WAN. |
||
| Step 3 |
Specify the details of the SD-WAN orchestration stack, such as orchestrator URL, username, password, contact email, and status tag. The Status Tag field accepts two values—Proof-of-concept (POC), and production. So, you can add the status tag with one of these values. This status tag applies the relevant label within the vOrchestrator.
The Contact Email field notifies the user about progress in the SD-WAN processes. Only three email domains are accepted in this field: gmail.com, cisco.com, and external.cisco.com |
||
| Step 4 |
Click Save. |
Configuring Serial Number Format for an ENCS Device
Cisco SD-WAN coordinates with the SD-Branch service pack to deploy virtual vEdge on ENCS. To configure the ENCS device serial number format for the vEdge cloud deployments, do the following:
Procedure
| Step 1 |
Log in to the Cisco MSX portal using your credentials. |
| Step 2 |
From the left hand pane, choose Settings > Service Configurations > SD-Branch > Settings > SD-Branch Settings. |
| Step 3 |
Choose device serial number format. Specify device serial number format to be used during the Add Site flow:
|
| Step 4 |
Specify the Site Contact Information and Terms and Conditions for the service. |
| Step 5 |
Click Submit. |
Configuring Subnet Pools
Use the following procedure for the vEdge Cloud to configure subnet pool for IPSec Tunnel for secure communication between MSX and NFVIS.
Procedure
| Step 1 |
Log in to the Cisco MSX portal using your credentials. |
| Step 2 |
From the left hand pane, choose Settings > Service Configurations > SD-Branch > Settings > SD-Branch > Settings > Subnet Pools. |
| Step 3 |
Specify the following for the IPsec tunnel:
|
| Step 4 |
Click Submit. |
Managing Cisco SD-WAN vEdge Cloud TDE Templates
Cisco SD-WAN coordinates with SD-Branch service pack to deploy virtual vEdge on ENCS. To simplify the deployment of the virtual branch that gets hosted on the ENCS unit, operators can use existing vEdge cloud TDE templates in MSX and collect inputs from users associated with the parameters used in the branch.
Along with the vEdge cloud templates, ensure you have the desired version of the vEdge image available within MSX or on a webserver to deploy devices on ENCS.
Generate vEdge TAR image for new Cisco SD-WAN versions or custom root certificates. The process of generating vEdge TAR image for deploying vEdge Cloud on ENCS device is available in the Cisco MSX DevNet Portal documentation.
By default, the following onboarding types will use the following template and image for both new install or upgrade:
-
Open Network Policy:
-
Internal value: ("standard")
-
TDE Template file name: DualIP-vedge19.1.0-msx3.6.tar.gz (image)
-
NFVIS < 3.11
-
-
2 Public IP Addresses:
-
Internal value: ("standard-secure")
-
TDE Template file name: DualIP-vedge19.1.0-msx3.6.tar.gz (image)
-
NFVIS 3.11, 3.10.2+
-
-
Single Public IP:
-
Internal value: ("single_ip_secure")
-
TDE Template file name: SingleIP-vedge19.1.0-msx3.6.tar.gz (image)
-
NFVIS 3.11, 3.10.2+
-
For more information on these onboarding types, see Step 15 in Adding a vEdge Cloud Site or Device.
The topics below describe how to manage vEdge cloud templates in MSX.
Uploading a vEdge Cloud Template
Before you begin
Download the vEdge templates from DevNet Portal and save it on your local.
To upload a template:
Procedure
| Step 1 |
Log in to the Cisco MSX Portal. |
| Step 2 |
In the main menu, choose Settings > Service Configuration. |
| Step 3 |
Click SD-Branch and then click the Settings > Template Management. The Manage Template appears. |
| Step 4 |
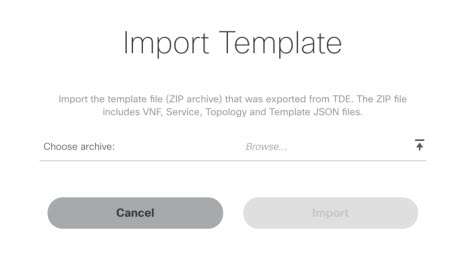
To add a new template:
|
| Step 5 |
To modify an existing template:
|
Deleting a vEdge Cloud Template
To delete a template version:
Procedure
| Step 1 |
Log in to the Cisco MSX Portal. |
||
| Step 2 |
In the main menu, choose Settings > Service Configuration. |
||
| Step 3 |
Click SD-Branch and then click the Settings > Template Management. The Manage Template appears and list the existing templates. |
||
| Step 4 |
Select the template version that you want to delete and click the Delete (X) icon. A confirmation dialog box appears.
|
||
| Step 5 |
Click Delete Template. |
Managing vEdge Cloud Template Access for Tenants
After the cloud service (vEdge cloud) templates are created via TDE and uploaded into MSX, use this procedure to assign these templates to a tenant user. These templates will then be visible to a tenant user while adding a site.
To assign or modify template access for tenants:
Procedure
| Step 1 |
Log in to the Cisco MSX Portal. |
| Step 2 |
In the main menu, choose Settings > Service Configuration. |
| Step 3 |
Click SD-Branch and then click the Settings > TemplateManagement. The Manage Template appears and list the existing templates. 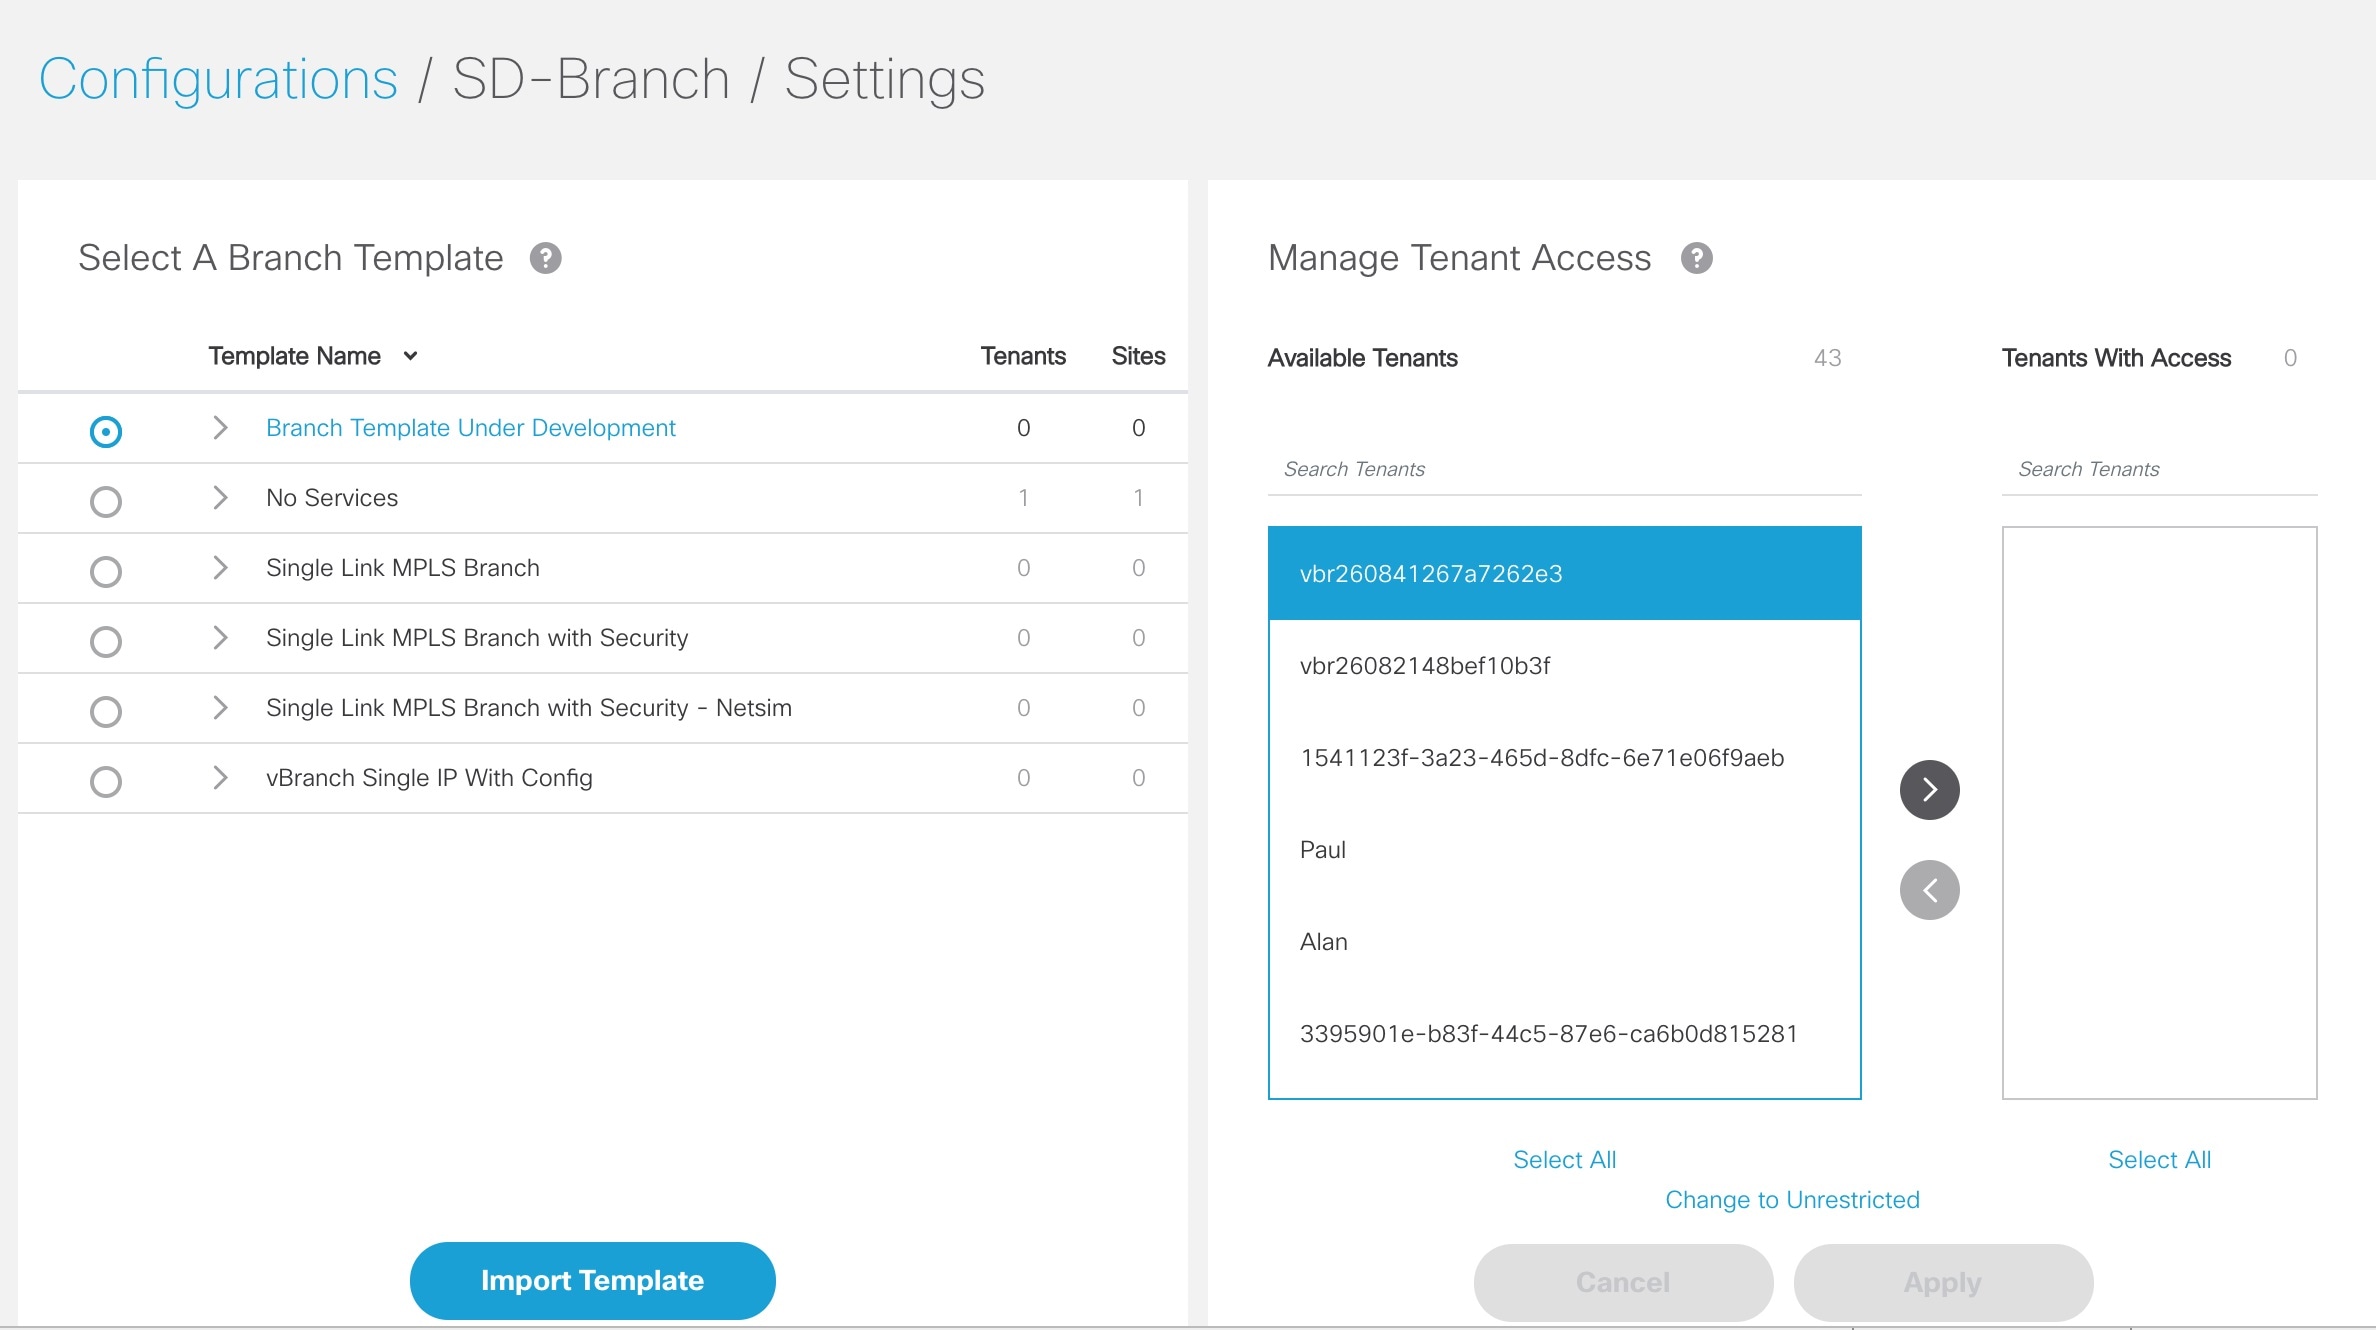
|
| Step 4 |
To assign the template to a tenant:
|
| Step 5 |
To remove access to a template: |
Setting Up Control Plane for Cisco SD-WAN
The deployment of an SD-WAN service in the context of a managed service requires deployment per customer and includes the SD-WAN management control plane (vManage, vBond and vSmart), and the corresponding data plane (vEdge and cEdge).
Note |
This section describes the steps required to set up MSX control plane on both AWS and OpenStack. |
The following are the topics covered in this section:
Prerequisites for Setting Up Control Plane
This section lists the common prerequisites as well as OpenStack and AWS-specific prerequisites for setting up Control Plane.
Control Plane Prerequisites for both AWS and OpenStack
The following are control plane prerequisites applicable for both AWS and OpenStack environment:
-
Contact Cisco Account representative for:
-
Setting up a Smart Account if you are a Service Provider, or you can request for a smart account here: https://software.cisco.com.
-
Creating a Virtual Account for a new tenant (Service Provider end customer) and associating it to the service provider smart account. A Virtual Account is necessary for every new SD-WAN tenant.
-
Requesting for Cisco SD-WAN orchestration stack environment. This is required to spin up control plane components on AWS.
-
Ordering physical devices and virtual devices through Cisco Commerce Workspace (CCW).
-
Associating the purchased devices to the Virtual Account.
After devices are associated with your smart account, you can synchronize the device details on the Control Plane after setting the Control Plane. For more information, see Synchronizing Smart Accounts from the Control Plane.
-
-
Assign ‘SD-WAN Control Plane’ permission to the user who will create a Control Plane for the tenant. Along with the control plane permission, assign other SD-WAN permissions to the user managing SD-WAN services. For more information on the SD-WAN-specific permissions and to associate these permissions to a role, see Managing Roles in Cisco MSX.
-
Create a new SD-WAN tenant for the Service Provider end customer on MSX, see Managing Tenants and Managing Users.
-
If you have an SD-WAN deployment with vManage connected, your external certificates must be copied and imported into the centralized MSX keystore. Contact your Cisco representative to add your external certificates to MSX.
Control Plane Prerequisites Applicable Only For AWS
The following are control plane prerequisites for AWS:
-
Provide the SD-WAN orchestration settings to integrate MSX with Cisco SD-WAN orchestration stack. For more information, see Configuring Cisco SD-WAN Orchestrator Settings.
-
Add Cisco MSX and Tenants IP Subnets in the MSX Allowed List: For Cisco MSX to create SD-WAN Control Planes, it needs to be able to communicate with the Cisco SD-WAN Orchestration stack which is protected by secure IP. Do the following to add these IP to the allowed list in MSX:
-
Determine the source IP addresses of an Cisco MSX deployment:
-
If Cisco MSX is installed on AWS: These are the NAT GW IP addresses. Go to VPC > NAT Gateway dashboard on your AWS console. There should be three IP addresses, one for each public subnet.
-
If Cisco MSX is installed on-prem: This will be proxy IP, if no proxy, then use the Cisco MSX public IP.
-
-
Contact Cisco TAC, submit your tenant users IP subnet and request to add these to the allowed list on SD-WAN Orchestration Stack for HTTPS/443 port.
Note
If you use Cisco MSX to access the control plane, you do not have to add tenant's IPs to the allowed list as MSX connects to the control plane using an MSX-managed proxy. This functionality is not enabled by default and can be configured using an API. For more information, see Disabling MSX-Managed Proxy.
-
Control Plane Prerequisites Applicable Only For OpenStack
The following are control plane prerequisites for OpenStack:
-
You can customize Cisco MSX to create control plane in OpenStack environment. Leverage and deploy an ansible API playbook. This will install the additional OpenStack Orchestration (OSorch) micro-services in the Cisco MSX.
-
Create flavors, these are hardware specifications such as vCPU, Root Disk, RAM, and so on. Provide the hardware details that are required for creating control plane on OpenStack.
Note
OS orchestration creates 100G (vManage) volume as part of the deployment
-
Download the qcow images from the SD-WAN Cisco website (CCO) and upload it into OpenStack cloud.
-
-
To install the OS orchestrator from the deployer system, execute the following command:
export ANSIBLE_VAULT_PASSWORD_FILE=/tmp/ansible-vault-password
cd /msx-4.1.0/ansible/
ansible-playbook -i inventory/inventory deploy-osorch.yml
Creating Control Plane on OpenStack
You need to specify the following attributes while creating SD-WAN control plane on OpenStack.
|
Key Options of OS orchestrator |
Explanation |
||
|---|---|---|---|
|
Provider Network |
|
||
|
Tenant Network |
|
||
|
Multi-Tenant |
|
||
|
Enterprise Certificate Authentication (CA) |
|
||
|
Default Symantec/Cisco CA |
|
-
To create a control plane on OpenStack environment, use curl command from Kubernetes-master mode.
-
The OS orchestrator requires authorization token, and to get the token use the following curl command:
curl -k https://<MSX fqdn>/idm/api/v1/login -XPOST -d '{"username": "username
", "password": "<password
>"}' -H 'content-type: application/json'
-
Enter authorization token as the value of the authorization parameter, as shown in the sample:
This is an sample curl command for creating and deleting VIM:
curl -H "Authorization: Bearer <token
>" http://osorch.service.consul:8080/osorch/v1/vims -X POST -H "Content-Type: application/json" -d '<payload>'
curl -H "Authorization: Bearer <token
>" http://osorch.service.consul:8080/osorch/v1/vims -X DELETE -H "Content-Type: application/json" -d '<payload>'
Note
You can enter the valid values in <token> and <payload>.
-
-
This table below various APIs used in managing SD-WAN control plane on OpenStack.
|
Request Type |
API |
Description |
||
|---|---|---|---|---|
|
Create VIM |
|
|
||
|
Delete VIM |
Use the given API in the DELETE job and monitor the progress using the jobs API: |
|
||
|
Create CP |
|
|
||
|
Delete CP |
Use the following API in DELETE job and monitor the progress using the jobs API: |
|
||
|
Get the Create/Delete job status |
|
|
||
|
Get all Templates |
|
|
||
|
Get Content of a Template |
|
|
||
|
Change the Template |
|
|
For information about the sample JSON files of the payloads that are involved in creating the control plane, see Sample Payloads for Creating Cisco SD-WAN Control Plane on Openstack.
Note |
After the process is complete, an email is sent to the user whose email address was provided during the control plane creation process. The email includes the link to the vManage URL and the organization name. Attach the control plane to SD-WAN Tenant on Cisco MSX using the vManage URL. For more information, see Attaching Control Plane. The control plane instance is blank and has a default admin user. Controllers in the Control Plane appears in the alarm state as the controllers are not enrolled with a certificate authority and also does not have secure control connections between the controllers. To fix the alarm state, complete all the post-deployment tasks. For more information, see Postdeployment Tasks for SD-WAN Control Plane. |
Creating Cisco SD-WAN Control Plane on AWS
To create SD-WAN control plane service on AWS:
Procedure
| Step 1 |
Log in to the Cisco MSX Portal. |
||
| Step 2 |
In the main menu, click Service Catalog > SD-WAN > Continue to Offers. |
||
| Step 3 |
Select the tenant from the drop-down. |
||
| Step 4 |
Click Get Started. |
||
| Step 5 |
From the SD-WAN Service screen, click Add Control Plane to add a control plane for the customer. |
||
| Step 6 |
Select Create Control Plane to create a new control plane for the tenant. |
||
| Step 7 |
Enter the following details in the Control Plane Information section: 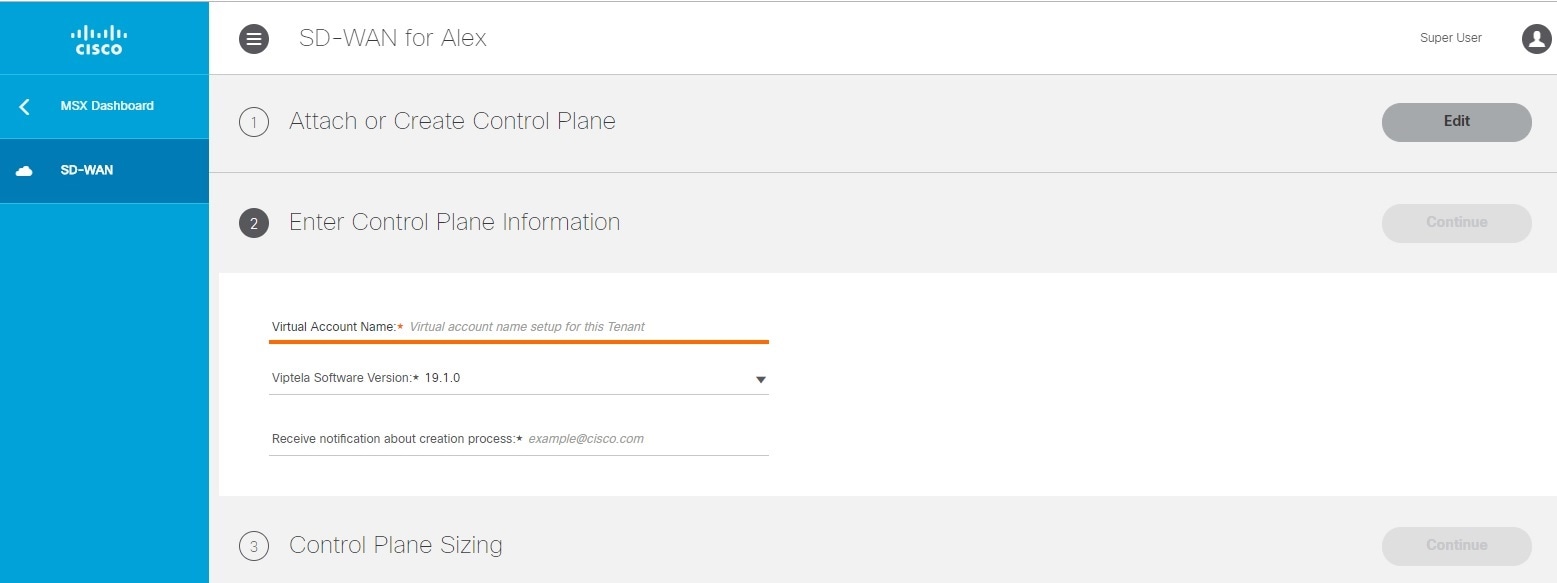
|
||
| Step 8 |
In the Control Plane Sizing section:
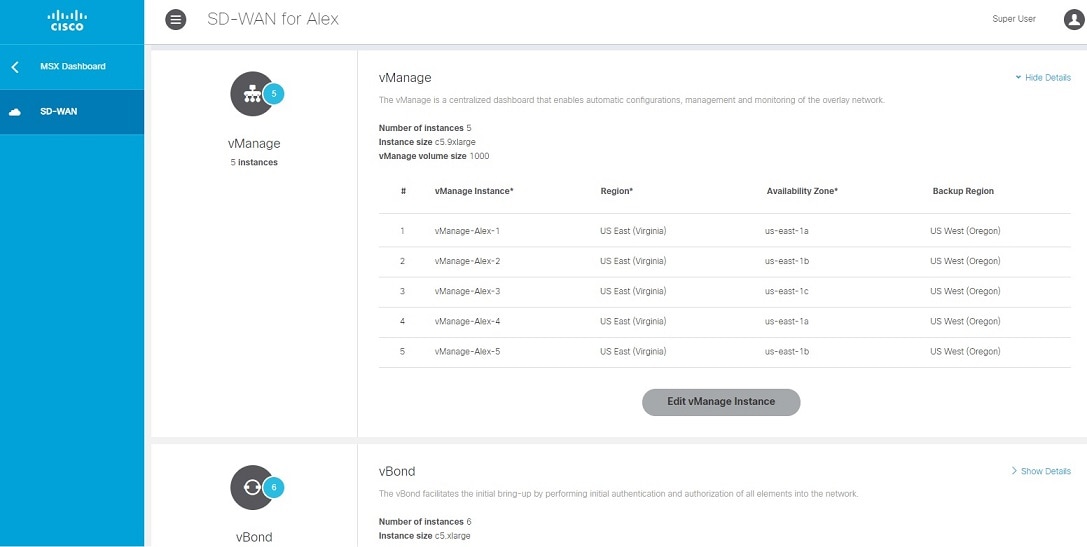
|
||
| Step 9 |
Click Submit to start the control plane creation process. A notification on the control plane creation process will be displayed at the top of the SD-WAN home page for a few seconds. Even if there is an intermediate error in creating the Control Plane, the system continues to poll until the creation process is complete. The Control Plane creation process can take up to an hour or more. The progress is tracked in the Event Log. For information on accessing event logs, see Viewing Event Logs. After the process is complete, an email is sent to the user whose email address was provided during the control plane creation process. The email includes the link to the vManage URL and the organization name. Use this URL to login with default credentials. |
What to do next
The control plane instance is blank and has a default admin user. Controllers in the Control Plane appears in the alarm state as the controllers are not enrolled with a certificate authority and also does not have secure control connections between the controllers. To fix the alarm state, complete all the post-deployment tasks. For more information, see Postdeployment Tasks for SD-WAN Control Plane.
Attaching Control Plane
Use this procedure to associate an existing control plane to a tenant:
Procedure
| Step 1 |
Log in to the Cisco MSX Portal. |
||
| Step 2 |
In the main menu, click Service Catalog. |
||
| Step 3 |
Click SD-WAN. |
||
| Step 4 |
Select the tenant from the drop-down. |
||
| Step 5 |
Click Get Started. |
||
| Step 6 |
From the SD-WAN Service screen, click Add Control Plane to add a control plane for the customer. |
||
| Step 7 |
Select Attach Control Plane to attach an existing control plane. Enter the SD-WAN Control Plane URL (Such as https://www.example.com),organization name, username, and password of the control plane.
|
 Feedback