Cisco Configuration Engine Administration Guide 3.5
Bias-Free Language
The documentation set for this product strives to use bias-free language. For the purposes of this documentation set, bias-free is defined as language that does not imply discrimination based on age, disability, gender, racial identity, ethnic identity, sexual orientation, socioeconomic status, and intersectionality. Exceptions may be present in the documentation due to language that is hardcoded in the user interfaces of the product software, language used based on RFP documentation, or language that is used by a referenced third-party product. Learn more about how Cisco is using Inclusive Language.
- Updated:
- March 29, 2010
Chapter: groups
Groups
To access Group management tasks, log into the system (see Logging In, page 2-1). Then, from the Home page, click the Tools tab. The Tools page appears.
From the Tools page, click Group Mgr. The Group Management page appears showing:
•![]() View Groups
View Groups
•![]() Create Group
Create Group
•![]() Edit Group
Edit Group
•![]() Clone Group
Clone Group
•![]() Move Group
Move Group
•![]() Delete Groups
Delete Groups
•![]() Create Group Using Search
Create Group Using Search
Viewing Groups
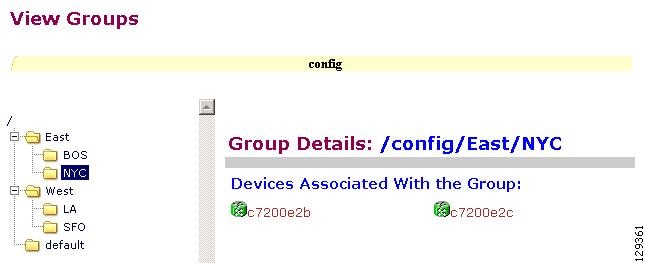
From the Group Management page, click View Groups. The View Groups page appears (see Figure 6-1).
Figure 6-1 View Groups Page
Creating Groups
Step 1 ![]() From the Group Management page, click Create Groups.
From the Group Management page, click Create Groups.
The Create Groups page appears (see Figure 6-2).
Figure 6-2 Create Group
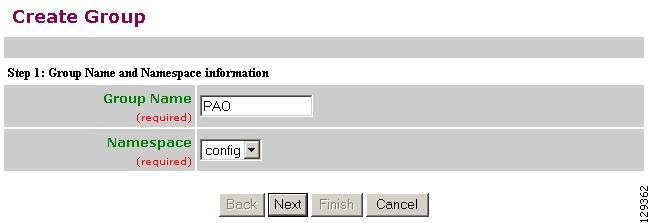
Step 2 ![]() Enter the group name.
Enter the group name.
Step 3 ![]() Use the drop-down arrow to select a namespace value (only config available), then click Next.
Use the drop-down arrow to select a namespace value (only config available), then click Next.
The Select Parent Group page appears (see Figure 6-3).
Figure 6-3 Select Parent Group Page
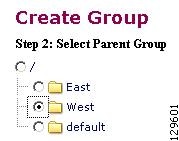
Step 4 ![]() Click the radio button(s) to select the parent group with which you want the new group to associated, then click Next.
Click the radio button(s) to select the parent group with which you want the new group to associated, then click Next.
The Select Member Devices page appears (see Figure 6-4).
Figure 6-4 Select Member Devices Page
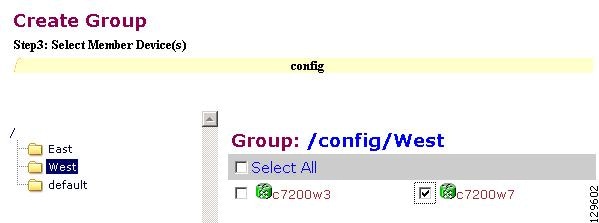
Step 5 ![]() Check to select the devices you want to be in this group, then click Finish.
Check to select the devices you want to be in this group, then click Finish.
Editing Groups
Step 1 ![]() From the Group Management page, click Edit Group.
From the Group Management page, click Edit Group.
The Group list appears.
Step 2 ![]() Click the radio button to select a group to edit, then click Next.
Click the radio button to select a group to edit, then click Next.
The Rename Group page appears.
Step 3 ![]() Rename group, if applicable, then click Finish to complete the task, or click Next to continue (see Figure 6-5).
Rename group, if applicable, then click Finish to complete the task, or click Next to continue (see Figure 6-5).
Figure 6-5 Edit Group Members
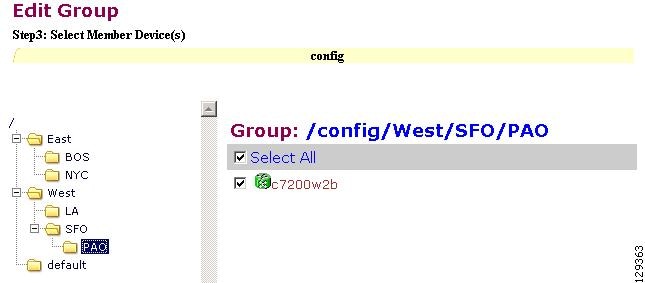
Step 4 ![]() Click the Group you are editing to bring up its members.
Click the Group you are editing to bring up its members.
Step 5 ![]() Modify the members in this group by using the check box next to each member, then click Finish.
Modify the members in this group by using the check box next to each member, then click Finish.
Cloning Groups
Step 1 ![]() From the Group Management page, click Clone Group.
From the Group Management page, click Clone Group.
The Group list appears.
Step 2 ![]() Select a group to clone.
Select a group to clone.
Step 3 ![]() Select parent group.
Select parent group.
Step 4 ![]() Enter new group name. After cloning a group, the devices in the original group will exist in the cloned group.
Enter new group name. After cloning a group, the devices in the original group will exist in the cloned group.
Moving Groups
Step 1 ![]() From the Group Management page, click Move Group.
From the Group Management page, click Move Group.
The Group list appears.
Step 2 ![]() Select a group to move.
Select a group to move.
Step 3 ![]() Select parent group.
Select parent group.
Deleting Groups
Step 1 ![]() From the Group Management page, click Delete Groups.
From the Group Management page, click Delete Groups.
The Group list appears.
Step 2 ![]() Check to select the group(s) you want to delete.
Check to select the group(s) you want to delete.

Note ![]() When you delete a group, the devices associated with that group will not be deleted.
When you delete a group, the devices associated with that group will not be deleted.
Creating Groups Using Search
Step 1 ![]() From the Group Management page, click Create Group Using Search.
From the Group Management page, click Create Group Using Search.
The search for devices page appears (see Figure 6-6).
Figure 6-6 Search for Devices
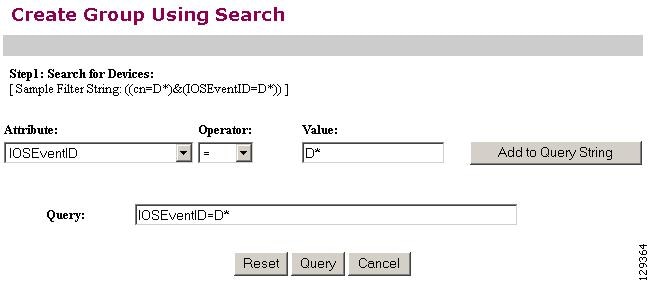
Step 2 ![]() Enter the appropriate arguments for the search, then click Query.
Enter the appropriate arguments for the search, then click Query.
Any devices found appear on the next page (see Figure 6-7).
Figure 6-7 Select Devices to Add to Group
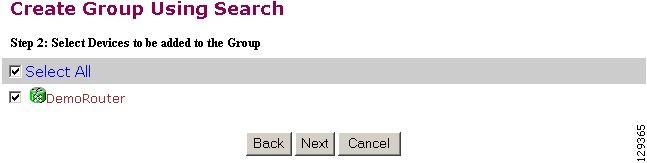
Step 3 ![]() Check to select the devices you want to become members of this new group, then click Next.
Check to select the devices you want to become members of this new group, then click Next.
The next page (see Figure 6-8) gives you the choice to add a new group, or just add the devices found to an existing group.
Figure 6-8 Name Group and Namespace
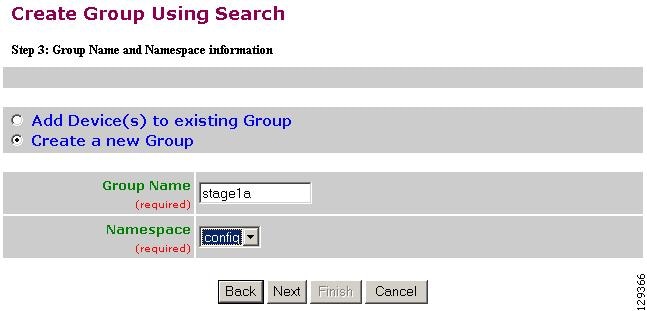
Step 4 ![]() Enter group name.
Enter group name.
Step 5 ![]() Use the drop-down arrow to select a namespace value, then click Next.
Use the drop-down arrow to select a namespace value, then click Next.
The group list page appears.
Step 6 ![]() Select group parent, then click Finish.
Select group parent, then click Finish.
 Feedback