| Step 1 |
enable
|
Enables
privileged EXEC mode.
|
| Step 2 |
configure
terminal
Device# configure terminal
|
Enters global
configuration mode.
|
| Step 3 |
ip
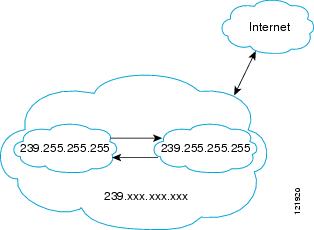
multicast-routing
distributed
Device(config)# ip multicast-routing
|
Enables IP
multicast routing.
|
| Step 4 |
Either perform
Steps 5 through 7 or perform Steps 6 and 8.
|
|
| Step 5 |
ip
pim
autorp
listener
Device(config)# ip pim autorp listener
|
Causes IP
multicast traffic for the two Auto-RP groups 224.0.1.39 and 224.0.1.40 to be
PIM dense mode flooded across interfaces operating in PIM sparse mode.
|
| Step 6 |
interface
type
number
Device(config)# interface Gigabitethernet 1/0/0
|
Selects an
interface that is connected to hosts on which PIM can be enabled.
|
| Step 7 |
ip
pim
sparse-mode
Device(config-if)# ip pim sparse-mode
|
Enables PIM
sparse mode on an interface. When configuring Auto-RP in sparse mode, you must
also configure the Auto-RP listener in the next step.
|
| Step 8 |
ip
pim
sparse-dense-mode
Device(config-if)# ip pim sparse-dense-mode
|
Enables PIM
sparse-dense mode on an interface.
|
| Step 9 |
exit
|
Exits
interface configuration mode and returns to global configuration mode.
|
| Step 10 |
Repeat Steps
1 through 9 on all PIM interfaces.
|
|
| Step 11 |
ip
pim
send-rp-announce
{interface-type
interface-number |
ip-address }
scope
ttl-value
[group-list
access-list ]
[interval
seconds ]
[bidir ]
Device(config)# ip pim send-rp-announce loopback0 scope 31 group-list 5
|
Sends RP
announcements out all PIM-enabled interfaces.
-
Perform
this step on the RP device only.
-
Use
the
interface-type and
interface-number arguments to define which IP
address is to be used as the RP address.
-
Use
the
ip-address argument to specify a directly
connected IP address as the RP address.
| Note
|
If
the
ip-address argument is configured for this
command, the RP-announce message will be sourced by the interface to which this
IP address is connected (that is, the source address in the IP header of the
RP-announce message is the IP address of that interface).
|
|
| Step 12 |
ip
pim
send-rp-discovery
[interface-type
interface-number ]
scope
ttl-value
[interval
seconds ]
Device(config)# ip pim send-rp-discovery loopback 1 scope 31
|
Configures
the device to be an RP mapping agent.
| Note
|
Auto-RP
allows the RP function to run separately on one device and the RP mapping agent
to run on one or multiple devices. It is possible to deploy the RP and the RP
mapping agent on a combined RP/RP mapping agent device.
|
-
Use the
optional
interface-type and
interface-number arguments to define which IP
address is to be used as the source address of the RP mapping agent.
-
Use the
scope keyword
and
ttl-value
argument to specify the Time-to-Live (TTL) value in the IP header of Auto-RP
discovery messages.
-
Use the
optional
interval
keyword and
seconds
argument to specify the interval at which Auto-RP discovery messages are sent.
| Note
|
Lowering
the interval at which Auto-RP discovery messages are sent from the default
value of 60 seconds results in more frequent floodings of the group-to-RP
mappings. In some network environments, the disadvantages of lowering the
interval (more control packet overhead) may outweigh the advantages (more
frequent group-to-RP mapping updates).
|
|
| Step 13 |
ip
pim
rp-announce-filter
rp-list
access-list
group-list
access-list
Device(config)# ip pim rp-announce-filter rp-list 1 group-list 2
|
Filters
incoming RP announcement messages sent from candidate RPs (C-RPs) to the RP
mapping agent.
|
| Step 14 |
no
ip
pim
dm-fallback
Device(config)# no ip pim dm-fallback
|
(Optional)
Prevents PIM dense mode fallback.
| Note
|
The
no
ip
pim
dm-fallback command behavior is enabled by default
if all the interfaces are configured to operate in PIM sparse mode (using the
ip
pim
sparse-mode command).
|
|
| Step 15 |
interface
type
number
Device(config)# interface gigabitethernet 1/0/0
|
Selects an
interface that is connected to hosts on which PIM can be enabled.
|
| Step 16 |
ip
multicast
boundary
access-list
[filter-autorp ]
Device(config-if)# ip multicast boundary 10 filter-autorp
|
Configures an
administratively scoped boundary.
-
Perform
this step on the interfaces that are boundaries to other devices.
-
The
access list is not shown in this task.
-
An access
list entry that uses the
deny keyword
creates a multicast boundary for packets that match that entry.
|
| Step 17 |
end
|
Returns to
global configuration mode.
|
| Step 18 |
show
ip
pim
autorp
Device# show ip pim autorp
|
(Optional)
Displays the Auto-RP information.
|
| Step 19 |
show
ip
pim
rp
[mapping ]
[rp-address ]
Device# show ip pim rp mapping
|
(Optional)
Displays RPs known in the network and shows how the device learned about each
RP.
|
| Step 20 |
show
ip
igmp
groups
[group-name |
group-address |
interface-type
interface-number ] [detail ]
Device# show ip igmp groups
|
(Optional)
Displays the multicast groups having receivers that are directly connected to
the device and that were learned through Internet Group Management Protocol
(IGMP).
|
| Step 21 |
show
ip
mroute
[group-address
|
group-name ]
[source-address |
source-name ]
[interface-type
interface-number ] [summary ] [count ] [active
kbps ]
Device# show ip mroute cbone-audio
|
(Optional)
Displays the contents of the IP multicast routing (mroute) table.
|


 Feedback