Perform an MDS 9000 Series Switch Non-Disruptive NX-OS Upgrade
Available Languages
Introduction
This document describes instructions for a non-disruptive upgrade of NX-OS software on Cisco MDS 9000 Series Multilayer Director Switches (MDS).
Background Information
Non-Disruptive Upgrade Overview
This process applies to both open systems and FICON MDS switches.
All MDS switches support non-disruptive upgrades and downgrades, subject to limitations listed in the Cisco MDS 9000 NX-OS and SAN-OS Software Install and Upgrade Guide. Refer to the MDS documentation, including Release Notes: Cisco MDS 9000 - Release 9.x Documentation Suite.
The target release is the NX-OS release the MDS is being upgraded or downgraded to in an install all step. The final target release is the NX-OS release that is the desired final release. It can take two or more installations of these intermediate target releases to reach the final target release. The non-disruptive upgrade matrices for both open systems and FICON can be found: Cisco MDS 9000 NX-OS Software and Firmware Upgrade and Downgrade Guide, Release 9.x.
These have been modified and require all upgrades from a NX-OS version prior to 9.4(1a) to a final target NX-OS version later than 9.4(1a) first upgrade to NX-OS 9.4(1a). It is imperative the Cisco MDS 9000 NX-OS Software and Firmware Upgrade and Downgrade Guide guide be consulted for details.
On 97xx Series MDS with dual supervisors, during the NX-OS installation the new images are loaded on the standby supervisor. A switchover then occurs to make the standby supervisor that runs the new code active. The code is loaded on the previously active supervisor and becomes the new standby supervisor. The data plane continues to pass fiber channel traffic. The modules then non-disruptively start the upgrade process at the lowest numbered module and proceed to the highest.
MDS 91xx, 92xx, or 93xx Series fabric switches have only one supervisor. The supervisor (control plane) is reloaded non-disruptively after the upgrade is completed. The data plane continues to pass Fiber Channel traffic without disruption.
If you intend to upgrade via Telnet, Secure Shell (SSH), or Simple Network Management Protocol (SNMP) (Fabric Manager/Device Manager), ensure you have an Ethernet connection to both supervisors. When the supervisor non-disruptively restarts, your terminal session is lost. You must reconnect to the switch and you must connect to the previous standby supervisor.
Multiple switches within the same fabric can be upgraded concurrently. Once all switches in the fabric are upgraded, the functionality of all devices can be evaluated over a time period of approximately seven days. If no problems are found, the switches in the redundant fabric can be updated.
Updated MDS Upgrade Instructions - Applicable for all MDS platforms
The best practices for upgrading MDS 9000 series switches have been updated to ensure a smooth experience with ISSUs. Prior to running the install all kickstart... system... command, adhere to this procedure precisely.

Note: The target release is the NX-OS release the MDS is being upgraded or downgraded to in an install all step. The final target release is the NX-OS release that is the desired final release. It can take two or more installations of these intermediate target releases to reach the final target release. This process can be repeated for each intermediate target release and the final target release.
Note: Verify the supported non-disruptive upgrade or downgrade path to the final target release. This can be found in the Supported Cisco MDS NX-OS Software Non-disruptive Downgrade Path Chapter in the Cisco MDS 9000 NX-OS Software and Firmware Upgrade and Downgrade Guide, Release 9.x.
1. Save a Copy of a Show Tech-Support Detail as a Gzipped File
This contains the current switch configuration, log files, and state of all interfaces. If there was an anomaly during or after an upgrade, having the state of the switch prior to the upgrade helps in troubleshooting, and reduces the time to diagnose any problems. In NX-OS releases 8.4(2b) and later, the tac-pac command can be used. In releases prior, the show tech-support details command can be used:
mds9124V# tac-pac
Collecting show tech-support details...
Show tech details will take 4-8 minutes to complete. Please Wait ...
Collecting show logging onboard...
tacpac file volatile:mds9124V_tacpac_2025-08-22.gz created.
mds9124V#
2. Save tac-pac/techsupport File External to the Switch
Copy the tac-pac/techsupport you saved to your TFTP server, renaming it to include 'before_install'. This accomplishes three things:
- It verifies you have an operational TFTP server.
- It verifies you can reach the server over the IP network.
- It places a copy of the configuration in a location that is external to the switch, so you have a backup in the event of a switch failure.
MDS9124V# move volatile:F241-16-10-9124V-3_tacpac_2025-08-22.gz volatile:F241-16-10-9124V-3_tacpac_2025-08-22_before_install.gz
MDS9124V# copy volatile: tftp:
<prompts for file name> mds9124V_tacpac_2025-08-22_before_install.gz
<prompts for tftp server name or ip address> 192.168.1.1
Note: In the previous example TFTP is used, the MDS also supports FTP, SCP and SFTP.
3. (Optional) Save current images in Use External to the Switch
Verify you have a copy of current images on your TFTP server, so you have a backup if you must return to the original version. If you do not, copy it from the switch to the TFTP server now. To determine the current images, run the show version command. See these examples:
MDS9124V# copy bootflash: tftp:
<prompts for file name> m9124v-s8ek9-kickstart-mz.9.3.2a.bin
<prompt for tftp server name or ip address> 192.168.1.1

MDS9148V# copy bootflash: tftp:
<prompts for file name> m9124v-s8ek9-mz.9.3.2a.bin
<prompt for tftp server name or ip address> 192.168.1.1
Note: For the prompts file name entries, use your current version.
In the previous example, TFTP is used. MDS also supports FTP, SCP and SFTP.
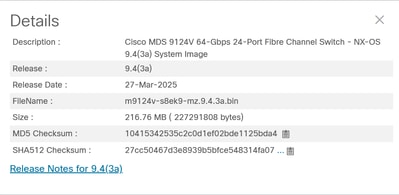
4. Download the Target System and Kickstart images
Download the new NX-OS images from the Cisco Download Software page. You need both a kickstart and a system image. Place them on the TFTP server in the default TFTP directory.
Cisco provides two types of NX-OS software. Payload Non-Crypto, also known as Non-Payload Encryption (NPE), releases are for countries or governments the United States Department of Commerce have listed as a non-export list of software that includes encryption. Certain advanced troubleshooting abilities are not included in NPE releases. NPE releases can also limit the ability for Cisco to provide workarounds or hot fixes. Only customers that fall under the export restrictions can run NPE releases.
This table can be used in to select your switch series, and switch software image:
| Cisco MDS Series Switch Type | IBM MDS Series Switch Type |
Naming Convention |
| SAN24C-7 |
File name begins with m9124v-s8ek9 |
|
| SAN32C-6 |
File name begins with m9100-s6ek9 |
|
| None |
File name begins with m9100-s5ek9 |
|
| SAN48C-6 |
File name begins with m9148-s6ek9 |
|
| SAN48C-7 |
File name begins with m9148v-s8ek9 |
|
| SAN16C-R |
File name begins with m9220-s7ek9 |
|
| SAN50C-R |
File name begins with m9250-s5ek9 |
|
| None |
FIle name begins with m9300-s1ek9 |
|
| SAN96C-6 |
FIle name begins with m9300-s2ek9 |
|
| SAN96C-7 |
FIle name begins with m9396v-s3ek9 |
|
| MDS 9710, 9706, and 9718 Series Supervisor Module-3 |
01FT600 SF1 and 01FT601 SF1E |
File name begins with m9700-sf3ek9 |
| MDS 9710, 9706, and 9718 Series Supervisor Module-4 |
02JD753 SF4 |
File name begins with m9700-sf4ek9 |
Note: On the Cisco download page, hover over the file name to retrieve the Message Digest5 (MD5).
5. Verify there is Enough Free Space Available on the Bootflash for the New Images to be Added
If there is insufficient space on the bootflash to hold the target system and kickstart images, you must erase at least the system image file. Keep the kickstart image and if there is a malfunction, you can get the switch to a point where you can load (TFTP) a new image. Once you have upgraded, you can delete the old version.
Note: The current images cannot be deleted.
Run the dir command to check the available bootflash free space:
MDS9124V# dir bootflash:
If you run a dual-supervisor MDS 9700 switch, run this command to check if there is enough free space on the standby supervisor:
MDS9700# dir bootflash://sup-standby/
6. Download New Images to the Bootflash on the Switch from the TFTP Server
MDS9124V# copy tftp: bootflash:
<prompts for file name> m9124v-s8ek9-kickstart-mz.9.4.3a.bin
<prompt for tftp server name or ip address> 192.168.1.1

MDS9124V# copy tftp: bootflash:
<prompts for file name> m9124v-s8ek9-mz.9.4.3a.bin
<prompt for tftp server name or ip address> 192.168.1.1
Note: In the previous example, TFTP is used. The MDS also supports FTP, SCP and SFTP.
Validate the checksum and the MD5 checksum:
Valid MD5 checksum example:
MDS9124V# show version image m9124v-s8ek9-mz.9.4.3a.bin
MD5 Verification Passed
image name: m9124v-s8ek9-mz.9.4.3a.bin
bios: v1.11.0(11/27/2024)
system: version 9.4(3a)
compiled: 3/1/2025 12:00:00 [03/25/2025 00:13:28]
MDS9124V#
Example of MD5 checksum that is invalid, and must be re-downloaded.
MDS9124V# show version image m9124v-s8ek9-mz.9.4.3a.bin
MD5 Verification Failed
Image integrity check failed
If the MDS to be upgraded is a 9700 series, copy both the kickstart and system images to the bootflash on the standby supervisor:
mds-9706# copy bootflash:m9700-sf4ek9-kickstart-mz.9.4.4.bin bootflash://sup-standby/
Copy progress 100% 80165KB
Copy complete, now saving to disk (please wait)...
mds-9706# copy bootflash:m9700-sf4ek9-mz.9.4.4.bin bootflash://sup-standby/
Copy progress 100% 542544KB
Copy complete, now saving to disk (please wait)...
mds-9706#
7. Save the SAN Analytics Configuration and Temporarily Disable the SAN Analytics Feature
This step must be completed if all steps are true:
- SAN analytics is enabled.
- The switch model is an MDS 9700 switch and contains one or more 32 Gbps modules "4/8/16/32 Gbps Advanced FC Module DS-X9648-1536K9".
For IBM branded 9700 switches, the IBM model for the "4/8/16/32 Gbps Advanced FC Module is 01FT644."
- The switch model is an MDS 9132T, MDS 9148T or MDS 9396T.
When the non-disruptive upgrade path includes more than one upgrade to the final target release, this step must only be completed on the first NX-OS upgrade.
This is due to a problem that can cause TCAM corruption when analytics is enabled and an NX-OS upgrade is completed. Analytics is re-enabled in Step 15 once the upgrade is completed. If the show feature command shows analytics is disabled, then this step and Step 14 can be skipped. This problem is documented in Cisco bug ID CSCwo03706.
This command shows a 32 Gbps module in slot 12 is an MDS 9718:
MDS9718# show module
Mod  Ports  Module-Type                         Model              Status
---  -----  ----------------------------------- ------------------ ----------
1    48     2/4/8/10/16 Gbps Advanced FC Module DS-X9448-768K9     ok
4    48     2/4/8/10/16 Gbps Advanced FC Module DS-X9448-768K9     ok
9    0      Supervisor Module-4                 DS-X97-SF4-K9      ha-standby
10   0      Supervisor Module-4                 DS-X97-SF4-K9      active *
11   34     1/10/40G IPS,2/4/8/10/16G FC Module DS-X9334-K9        ok
12   48     4/8/16/32 Gbps Advanced FC Module   DS-X9648-1536K9    ok
13   48     8/16/32/64 Gbps Advanced FC Module  DS-X9748-3072K9    ok
This command shows a 32 Gbps module in slot 12 in an IBM branded SAN192C (9706):
 SAN192C# show module
Mod  Ports  Module-Type                         Model              Status
---  -----  ----------------------------------- ------------------ ----------
1    48     4/8/16/32 Gbps Advanced FC Module   01FT644 48x32 FC   ok
2    48     8/16/32/64 Gbps Advanced FC Module  03FR076 48x64 FC   ok
3    0      Supervisor Module-4                 02JD753 SF4        active *
4    0      Supervisor Module-4                 02JD753 SF4        ha-standby
5    34     1/10/40G IPS,2/4/8/10/16G FC Module 01FT645 24/10 EX   ok
6    48     8/16/32/64 Gbps Advanced FC Module  03FR076 48x64 FC   ok
This command shows the switch type is a 9148T:
MDS9148T# show version
Cisco Nexus Operating System (NX-OS) Software
TAC support: http://www.cisco.com/tac
Documents: http://www.cisco.com/en/US/products/ps9372/tsd_products_support_serie
s_home.html
Copyright (c) 2002-2025, Cisco Systems, Inc. All rights reserved.
The copyrights to certain works contained herein are owned by
other third parties and are used and distributed under license.
Some parts of this software are covered under the GNU Public
License. A copy of the license is available at
http://www.gnu.org/licenses/gpl.html.

Software
  BIOS:      version 1.11.0
  loader:    version N/A
  kickstart: version 9.4(3b)
  system:    version 9.4(3b)
  BIOS compile time:       11/27/2024
  kickstart image file is: bootflash:///m9148-s6ek9-kickstart-mz.9.4.3b.bin
  kickstart compile time:  5/24/2025 12:00:00 [05/28/2025 12:25:54]
  system image file is:    bootflash:///m9148-s6ek9-mz.9.4.3b.bin
  system compile time:     5/24/2025 12:00:00 [05/28/2025 13:58:43]


Hardware
  cisco MDS 9148T 48X32G FC (1 RU) Chassis ("4/8/16/32 Gbps FC/Sup-4")
  Intel(R) Xeon(R) CPU D-1530 @ 2.40GHz with 5735444 kB of memory.
  Processor Board ID JAE22500MUN

  Device name: F241-14-08-9148T-2
  bootflash:    3735552 kB

Kernel uptime is 8 day(s), 1 hour(s), 27 minute(s), 47 second(s)

Last reset at 462831 usecs after Thu Aug 14 19:44:56 2025
  Reason: Reset due to upgrade
  System version: 8.4(2d)
  Service:

plugin
  Core Plugin
MDS9148T#
This command shows feature analytics is enabled:
MDS9718# show feature | i analytics
analytics 1 enabled If SAN Analytics is enabled, save a copy of the SAN Analytics configuration to both supervisors:
MDS9718# echo "configure terminal" > before_issu_analytics.cfg
MDS9718# show running-config analytics >> before_issu_analytics.cfg
If this is an MDS 9700 or an IBM branded 9700, copy the analytics configuration to the standby supervisor:
MDS9718# copy before_issu_analytics.cfg bootflash://sup-standby/Temporarily disable the SAN Analytics feature:
MDS9718# configure terminal
MDS9718(config)# no feature analytics
MDS9718(config)# end
MDS9718# copy running-config startup-config
8. Perform a System Switchover (MDS 9700s only)
This step must be completed if the switch model is an MDS 9700 switch.
Run a system switchover command from the active supervisor. Once the system switchover is completed, reconnect the newly active supervisor and wait until the standby supervisor reaches the 'ha-standby' state.
This is an example of the system switchover command from the console connection on the active supervisor:
MDS9710# system switchover
MDS9710#
User Access Verification
MDS9710 login: [703536.990233]  writing reset reason 7,

ME Firmware Status #1: 0x000F0345
ME Firmware Status #2: 0x38000000
ME Current State: Operational
ME Error Code: No Error
ME Operational Firmware Version: 06:3.0.3.214

  CPU Signature - 0x00050663: Version - 0x00050660
  CPU - 1 : Cores - 8 : HTEn - 1 : HT - 2 : Features - 0xBFEBFBFF
  MicroCode Version : 0x0700001E

...etc...
Reconnect to the newly active supervisor and run the show module command. Once the supervisor enters the 'ha-standby' state, this step is complete:
MDS9710# show module
Mod  Ports  Module-Type                         Model              Status
---  -----  ----------------------------------- ------------------ ----------
1    48     2/4/8/10/16 Gbps Advanced FC Module DS-X9448-768K9     ok
4    48     2/4/8/10/16 Gbps Advanced FC Module DS-X9448-768K9     ok
5    0      Supervisor Module-4                                    powered-up
6    0      Supervisor Module-4                 DS-X97-SF4-K9      active *
8    34     1/10/40G IPS,2/4/8/10/16G FC Module DS-X9334-K9        ok
9    48     4/8/16/32 Gbps Advanced FC Module   DS-X9648-1536K9    ok
10   48     8/16/32/64 Gbps Advanced FC Module  DS-X9748-3072K9    ok
...

MDS9710# show module
Mod  Ports  Module-Type                         Model              Status
---  -----  ----------------------------------- ------------------ ----------
1    48     2/4/8/10/16 Gbps Advanced FC Module DS-X9448-768K9     ok
4    48     2/4/8/10/16 Gbps Advanced FC Module DS-X9448-768K9     ok
5    0      Supervisor Module-4                 DS-X97-SF4-K9      ha-standby
6    0      Supervisor Module-4                 DS-X97-SF4-K9      active *
8    34     1/10/40G IPS,2/4/8/10/16G FC Module DS-X9334-K9        ok
9    48     4/8/16/32 Gbps Advanced FC Module   DS-X9648-1536K9    ok
10   48     8/16/32/64 Gbps Advanced FC Module  DS-X9748-3072K9    ok
...
9. Check for Incompatibilities Between NX-OS Releases
Run the show incompatibility system <target system image name> command to check for incompatibilities between NX-OS releases, and any switch events that would prevent you from upgrading. This also ensures the /var/volatile/tmp file system has sufficient space to continue. This is an example:
MDS9124V# show incompatibility system m9124v-s8ek9-mz.9.4.3a.bin
Checking incompatible configuration(s):
No incompatible configurations

Checking dynamic incompatibilities:
No incompatible configurations
MDS9124V#
10. Determine any Impact for Installation
This checks images and ensures they are compatible with the switch. It also indicates if a BIOS upgrade is included in the image. This is completed via the the show install all impact command:
MDS9124V# show install all impact system m9124v-s8ek9-mz.9.4.3a.bin kickstart m9124v-s8ek9-kickstart-mz.9.4.3a.bin
Installer will perform impact only check. Please wait.

Verifying image bootflash:/m9124v-s8ek9-kickstart-mz.9.4.3a.bin for boot variable "kickstart".
[####################] 100% -- SUCCESS

Verifying image bootflash:/m9124v-s8ek9-mz.9.4.3a.bin for boot variable "system".
[####################] 100% -- SUCCESS

Performing module support checks.                                                 [####################] 100% -- SUCCESS

Verifying image type.
[####################] 100% -- SUCCESS

Extracting "system" version from image bootflash:/m9124v-s8ek9-mz.9.4.3a.bin.
[####################] 100% -- SUCCESS

Extracting "kickstart" version from image bootflash:/m9124v-s8ek9-kickstart-mz.9.4.3a.bin.
[####################] 100% -- SUCCESS

Extracting "bios" version from image bootflash:/m9124v-s8ek9-mz.9.4.3a.bin.
[####################] 100% -- SUCCESS

Performing Compact Flash and TCAM sanity test.
[####################] 100% -- SUCCESS

Notifying services about system upgrade.                                          [####################] 100% -- SUCCESS


Compatibility check is done:
Module  bootable          Impact  Install-type  Reason
------  --------  --------------  ------------  ------
     1       yes  non-disruptive         reset


Images will be upgraded according to following table:
Module       Image                  Running-Version(pri:alt)           New-Version  Upg-Required
------  ----------  ----------------------------------------  --------------------  ------------
     1      system                                   9.3(2a)               9.4(3a)           yes
     1   kickstart                                   9.3(2a)               9.4(3a)           yes
     1        bios   v1.11.0(11/27/2024):v1.11.0(11/27/2024)   v1.11.0(11/27/2024)            no


MDS9124V#
Note: This command must be entered as a single line, not two separate lines. This command is not used for the installation, however, it can be used to verify the installation process and provide a report showing the versions coming from and going to. It also displays if the upgrade is disruptive or non-disruptive when executing the upgrade.
Note: All file transfer sessions (like SFTP/SCP) to the switch must be closed before beginning the upgrade/downgrade process. Any open file transfer sessions can cause the switch to disruptively reload at the time of ISSU/D.
See Cisco bug ID CSCvo22269 and Cisco bug ID CSCvu52058 for more information. Clients have complained the MobaXterm opens a SFTP session when opening an SSH session, and it prevents the upgrade from occurring.
Note: Specific Guidelines for 32 Gbps Fabric Switches:
- Starting with NX-OS 9.4(5), when upgrading to any later NX-OS release, the mechanism for activating Supervisor CPU BIOS updates on 32 Gbps fabric switches has changed. By default, BIOS updates are installed, however, not loaded by the CPU unless the switch is disruptively reloaded. The ISSU install all command has been enhanced with a disruptive option to allow the disruptive reload to automatically execute at the end of the ISSU. Alternatively, the disruptive reload can be completed after the ISSU as a later and separate operation using the reload command. Do not use the reload system non-disruptive command. To determine if the upgrade also contains a BIOS upgrade, check the output of the show install all impact command.
- For 32 Gbps fabric switches running NX-OS versions lower than NX-OS 9.4(5), the mechanism for activating Supervisor CPU BIOS during ISSU is not reliable. Only if the new NX-OS version includes a BIOS update, the BIOS in the new NX-OS can be installed prior to the upgrade with the hidden install module 1 bios system newNxosSystemImage command. Then, the switch can be disruptively reloaded using the reload CLI command. Do not use the reload system non-disruptive command. Subsequently, the ISSU of NX-OS can be executed non-disruptively as the ISSU can detect that the BIOS has already been upgraded.
- See Steps 12 and 14 for more details.
Note: Specific Guidelines for 64 Gbps Fabric Switches:
The mechanism for activating BIOS updates on 64 Gbps fabric switches has changed. After the first upgrade to NX-OS 9.4(5) or later, it is recommended the switch EPLD also be upgraded. This EPLD contains new functionality to allow the CPU of the switch be independently power cycled while still maintaining non-disruptive traffic forwarding. All EPLD upgrades are disruptive since the switch is reloaded as part of the EPLD upgrade. This must only be completed once after the first upgrade to NX-OS 9.4(5) or later.
See Step 14 for more details.
11. Verify the Tmp File Directory has no more than 9% in Use
Some MDS switches use /var/volatile/tmp directory and others use the /var/tmp directory. Run the show system internal flash | inc "/var/tmp|/var/volatile/tmp" command to check for available space on both of these:
MDS9124V# show  system internal flash | inc "/var/tmp|/var/volatile/tmp"
Mount-on                  1K-blocks      Used   Available   Use%  Filesystem
/var/volatile/tmp            614400       104      614296      1   none

MDS9124V#
Note: The previous example shows the file system has used 1%, so it is safe to proceed to the next step. If the /var/volatile/tmp directory or the /var/tmp directory has more than 9% utilized, do not continue with the install and contact Cisco TAC.
12. Upgrade the Supervisor(s) BIOS from the New System Image
Each specific type of hardware has its own BIOS versions. The numbering varies widely depending on the specific type of hardware such as supervisor, switching module, and so on. If the output of the show install all impact command in Step 10 indicates there is a BIOS upgrade in the target release, continue with these steps.
Note: A new supervisor BIOS was introduced in NX-OS 9.4(2) to address CVE-2024-20397.
This procedure is relevant for all switch models when the current switch NX-OS release is between 8.4(2) and 9.3(2a), and the target NX-OS release is 9.4(2) or higher. It is also relevant for 32 Gbps fabric switches running NX-OS versions lower than NX-OS 9.4(5). Ensure NX-OS images are already copied to the supervisor before proceeding with these steps.
- Manually install the latest supervisor BIOS on each supervisor running the hidden command: install module module_number bios system newNxosSystemImage. On an MDS 9700 with dual supervisors this must be done on each supervisor. For MDS fabric switches, the module number is always 1. On fabric switches the switch can be reloaded after the BIOS upgrade is complete. This is done via the reload command. In this example, the BIOS is upgraded from the 9.4(3a) system image on an MDS 9124V fabric switch:
MDS9124V# install module 1 bios system m9124v-s8ek9-mz.9.4.3a.bin
Collecting bios version from module 1 and system image. This may take a while.
Warning: Please do not remove or power off the module at this time
Upgrading primary bios
Started bios programming .... please wait
[############################100%############################]
BIOS install succeeded for module 1
Upgrading alternate bios
Started bios programming .... please wait
[############################100%############################]
BIOS install succeeded for module 1
MDS9124V#
MDS9124V# reload
This command will reboot the system. (y/n)?  [n] y
2026 May 14 18:20:00 MDS9124V %PLATFORM-2-PFM_SYSTEM_RESET: Manual system restart from Command Line Interface
...
In this example the BIOS in an MDS 9718 with supervisors in slots 9 and 10 are being upgraded to 9.4(2a):
MDS9718# show module | include Supervisor
9    0      Supervisor Module-4                 DS-X97-SF4-K9     active *
10   0      Supervisor Module-4                 DS-X97-SF4-K9     ha-standby
MDS9718#
MDS9718# install module 9 bios system m9700-sf4ek9-mz.9.4.2a.bin
Collecting bios version from module 1 and system image. This may take a while.
Warning: Please do not remove or power off the module at this time
Upgrading primary bios
Started bios programming .... please wait
[############################100%############################]
BIOS install succeeded for module 9
Upgrading alternate bios
Started bios programming .... please wait
[############################100%############################]
BIOS install succeeded for module 9
MDS9718#
MDS9718# install module 10 bios system m9700-sf4ek9-mz.9.4.2a.bin
Collecting bios version from module 1 and system image. This may take a while.
Warning: Please do not remove or power off the module at this time
Upgrading primary bios
Started bios programming .... please wait
[############################100%############################]
BIOS install succeeded for module 10
Upgrading alternate bios
Started bios programming .... please wait
[############################100%############################]
BIOS install succeeded for module 10
MDS9718#
13. Upgrade the NX-OS on the Switch.
Proceed with the upgrade to the new version of NX-OS running the 'install all' command:
This is an example of upgrading a MDS 9124V to NX-OS 9.4(4):
MDS9124V# install all kickstart m9124v-s8ek9-kickstart-mz.9.4.4.bin system m9124v-s8ek9-mz.9.4.4.bin
Installer will perform compatibility check first. Please wait.

Verifying image bootflash:/m9124v-s8ek9-kickstart-mz.9.4.4.bin for boot variable "kickstart".
[####################] 100% -- SUCCESS

Verifying image bootflash:/m9124v-s8ek9-mz.9.4.4.bin for boot variable "system".
[####################] 100% -- SUCCESS

Performing module support checks.                                                                          [####################] 100% -- SUCCESS

Verifying image type.
[####################] 100% -- SUCCESS

Extracting "system" version from image bootflash:/m9124v-s8ek9-mz.9.4.4.bin.
[####################] 100% -- SUCCESS

Extracting "kickstart" version from image bootflash:/m9124v-s8ek9-kickstart-mz.9.4.4.bin.
[####################] 100% -- SUCCESS

Extracting "bios" version from image bootflash:/m9124v-s8ek9-mz.9.4.4.bin.
[####################] 100% -- SUCCESS

Performing Compact Flash and TCAM sanity test.
[####################] 100% -- SUCCESS

Notifying services about system upgrade.                                                                   [####################] 100% -- SUCCESS


Compatibility check is done:
Module  bootable          Impact  Install-type  Reason
------  --------  --------------  ------------  ------
     1       yes  non-disruptive         reset


Images will be upgraded according to following table:
Module       Image                  Running-Version(pri:alt)           New-Version  Upg-Required
------  ----------  ----------------------------------------  --------------------  ------------
     1      system                                   9.4(1a)                9.4(4)           yes
     1   kickstart                                   9.4(1a)                9.4(4)           yes
     1        bios   v1.11.0(11/27/2024):v1.11.0(11/27/2024)   v1.11.0(11/27/2024)            no


Do you want to continue with the installation (y/n)?  [n] y

Install is in progress, please wait.

Performing runtime checks.                                                                                 [####################] 100% -- SUCCESS

Notifying services about the upgrade.                                                                      [####################] 100% -- SUCCESS

Setting boot variables.
[####################] 100% -- SUCCESS

Performing configuration copy.
[####################] 100% -- SUCCESS

Module 1: Refreshing compact flash and Upgrading bios/loader/bootrom/power-seq.
Warning: please do not remove or power off the module at this time.
[####################] 100% -- SUCCESS

Upgrade can no longer be aborted, any failure will result in a disruptive upgrade.

Freeing memory in the file system.                                                                         [####################] 100% -- SUCCESS

Loading images into memory.                                                                                [####################] 100% -- SUCCESS

Saving linecard runtime state.                                                                             [####################] 100% -- SUCCESS

Saving supervisor runtime state.                                                                           [####################] 100% -- SUCCESS

Saving mts state.                                                                                          [####################] 100% -- SUCCESS

Reloading the kernel to proceed with the upgrade.
All telnet and ssh connections will now be temporarily terminated.
F241-16-11-9124V-1#

MDS BIOS: v1.11.0 Date: 11/27/2024 15:45:42
System Date: 08/27/2025  Time: 18:43:44.0
Booting bootflash:/m9124v-s8ek9-kickstart-mz.9.4.4.bin
Trying diskboot
 Filesystem type is ext2fs, partition type msdos.
Image SWID valid
Image MD5Sum match
OS Image Key Type: Development KEY


Image Signature verification was Successful.

Boot Time: 8/27/2025  18:43:51
INIT: version 2.88 booting
USB device found..

boot device node /dev/sda
obfl flash device node /dev/sdb
Checking obfl filesystem. done.
Checking all filesystems.... done.
ACT2: ACT2 AUTHENTICATION TEST STATUS : SUCCESS
/etc/rc.d/rcS.d/S81mcelog-init: line 33: boot_debug: command not found
Starting mcelog daemon
Loading system software
isanimg_passed_by_sycli::
System image digital signature verification successful.
Uncompressing system image: bootflash:/m9124v-s8ek9-mz.9.4.4.bin Wed Aug 27 18:44:37 UTC 2025
blogger: nothing to do.
CCCCCCCCCCCCCCCCCCCCCCCCCCCCCCCCCCCCCCCCCCCCCCCCCCCCCCCCC
..done Wed Aug 27 18:44:39 UTC 2025
INIT: Entering runlevel: 3
starting statd: done
2025 Aug 27 18:44:50 F241-16-11-9124V-1 %SYSLOG-2-SYSTEM_MSG : Syslogs wont be logged into logflash until logflash is online
2025 Aug 27 18:44:53 F241-16-11-9124V-1 %KERN-2-SYSTEM_MSG: [   14.911303] igb_probe: Could not do igb_proc_init - kernel
2025 Aug 27 18:45:10 F241-16-11-9124V-1 %CARDCLIENT-2-REG: OK
2025 Aug 27 18:45:17 F241-16-11-9124V-1 %PMON-SLOT1-2-PMON_CRIT_INFO: Port Monitor Critical Information: Config download success .
2025 Aug 27 18:45:19 F241-16-11-9124V-1 %PLATFORM-2-PS_DETECT: Power supply 1 detected but shutdown (Serial number LIT24512HRP)
2025 Aug 27 18:45:19 F241-16-11-9124V-1 %PLATFORM-2-PS_OK: Power supply 2 ok(Serial number LIT24512HSG)
2025 Aug 27 18:45:19 F241-16-11-9124V-1 %PLATFORM-2-PS_FANOK: Fan in Power supply 2 ok

User Access Verification

Continuing with installation process, please wait.
The login will be disabled until the installation is completed.

Status for linecard upgrade.                                                                               [####################] 100% -- SUCCESS

Performing supervisor state verification.                                                                  [####################] 100% -- SUCCESS

Supervisor non-disruptive upgrade successful.

Install has been successful.
This is an example of upgrading an MDS 9710 to NX-OS 9.4(3a):
MDS9710# install all kickstart m9700-sf4ek9-kickstart-mz.9.4.3a.bin system m9700-sf4ek9-mz.9.4.3a.bin
Installer will perform compatibility check first. Please wait.

Verifying image bootflash:/m9700-sf4ek9-kickstart-mz.9.4.3a.bin for boot variable "kickstart".
[####################] 100% -- SUCCESS

Verifying image bootflash:/m9700-sf4ek9-mz.9.4.3a.bin for boot variable "system".
[####################] 100% -- SUCCESS

Performing module support checks. [####################] 100% -- SUCCESS

Verifying image type.
[####################] 100% -- SUCCESS

Extracting "slc4xb" version from image bootflash:/m9700-sf4ek9-mz.9.4.3a.bin.
[####################] 100% -- SUCCESS

Extracting "bios" version from image bootflash:/m9700-sf4ek9-mz.9.4.3a.bin.
[####################] 100% -- SUCCESS

Extracting "system" version from image bootflash:/m9700-sf4ek9-mz.9.4.3a.bin.
[####################] 100% -- SUCCESS

Extracting "kickstart" version from image bootflash:/m9700-sf4ek9-kickstart-mz.9.4.3a.bin.
[####################] 100% -- SUCCESS

Extracting "lctsh" version from image bootflash:/m9700-sf4ek9-mz.9.4.3a.bin.
[####################] 100% -- SUCCESS

Extracting "slcf32" version from image bootflash:/m9700-sf4ek9-mz.9.4.3a.bin.
[####################] 100% -- SUCCESS

Extracting "slc-hindon" version from image bootflash:/m9700-sf4ek9-mz.9.4.3a.bin.
[####################] 100% -- SUCCESS

Notifying services about system upgrade. [####################] 100% -- SUCCESS


Compatibility check is done:
Module bootable Impact Install-type Reason
------ -------- -------------- ------------ ------
1 yes non-disruptive rolling
4 yes non-disruptive rolling
5 yes non-disruptive reset
6 yes non-disruptive reset
8 yes non-disruptive rolling
9 yes non-disruptive rolling
10 yes non-disruptive rolling


Other miscellaneous information for installation:
Module info
------ ----------------------------------
8 FC ports 1-24 are hitless, IPS 1-8 are hitful, and Intelligent Applications running are hitful


Images will be upgraded according to following table:
Module Image Running-Version(pri:alt) New-Version Upg-Required
------ ---------- ---------------------------------------- -------------------- ------------
1 slc4xb 9.4(2a) 9.4(3a) yes
1 bios v1.10.23(04/07/20):v1.10.23(04/07/20) v1.10.23(04/07/20) no
4 slc4xb 9.4(2a) 9.4(3a) yes
4 bios v1.10.23(04/07/20):v1.10.23(04/07/20) v1.10.23(04/07/20) no
5 system 9.4(2a) 9.4(3a) yes
5 kickstart 9.4(2a) 9.4(3a) yes
5 bios v2.21.0(11/27/2024):v2.21.0(11/27/2024) v2.21.0(11/27/2024) no
6 system 9.4(2a) 9.4(3a) yes
6 kickstart 9.4(2a) 9.4(3a) yes
6 bios v2.21.0(11/27/2024):v2.21.0(11/27/2024) v2.21.0(11/27/2024) no
8 lctsh 9.4(2a) 9.4(3a) yes
8 bios v4.2.19(05/16/2023):v4.2.19(05/16/2023) v4.2.19(05/16/2023) no
9 slcf32 9.4(2a) 9.4(3a) yes
9 bios v4.1.56(05/16/2023):v4.1.56(05/16/2023) v4.1.56(05/16/2023) no
10 slc-hindon 9.4(2a) 9.4(3a) yes
10 bios v1.11.0(11/27/2024):v1.11.0(11/27/2024) v1.11.0(11/27/2024) no


Do you want to continue with the installation (y/n)? [n] y

Install is in progress, please wait.

Performing runtime checks. [####################] 100% -- SUCCESS

Syncing image bootflash:/m9700-sf4ek9-kickstart-mz.9.4.3a.bin to standby.
[####################] 100% -- SUCCESS

Syncing image bootflash:/m9700-sf4ek9-mz.9.4.3a.bin to standby.
[####################] 100% -- SUCCESS

Setting boot variables.
[####################] 100% -- SUCCESS

Performing configuration copy.
[####################] 100% -- SUCCESS

Module 1: Upgrading bios/loader/bootrom/power-seq.
Warning: please do not remove or power off the module at this time.
[####################] 100% -- SUCCESS

Module 4: Upgrading bios/loader/bootrom/power-seq.
Warning: please do not remove or power off the module at this time.
[####################] 100% -- SUCCESS

Module 5: Upgrading bios/loader/bootrom/power-seq.
Warning: please do not remove or power off the module at this time.
[####################] 100% -- SUCCESS

Module 6: Upgrading bios/loader/bootrom/power-seq.
Warning: please do not remove or power off the module at this time.
[####################] 100% -- SUCCESS

Module 8: Upgrading bios/loader/bootrom/power-seq.
Warning: please do not remove or power off the module at this time.
[####################] 100% -- SUCCESS

Module 9: Upgrading bios/loader/bootrom/power-seq.
Warning: please do not remove or power off the module at this time.
[####################] 100% -- SUCCESS

Module 10: Upgrading bios/loader/bootrom/power-seq.
Warning: please do not remove or power off the module at this time.
[####################] 100% -- SUCCESS

ME Firmware Status #1: 0x000F0345
ME Firmware Status #2: 0x3800E000
ME Current State: Operational
ME Error Code: No Error
ME Operational Firmware Version: 06:3.0.3.214

CPU Signature - 0x00050663: Version - 0x00050660
CPU - 1 : Cores - 8 : HTEn - 1 : HT - 2 : Features - 0xBFEBFBFF
MicroCode Version : 0x0700001E

Banzai FPGA Information:
BANZAI BusNum 3B Tornado VenID = 0x1137 DevId = 0x141 PCI address 0xF800000C
BANZAI FPGA BusNum 3C VenID = 0x10EE DevId = 0x7 PCI address 0xBC000000
BANZAI LPC VenID = 0x8086 DevId = 0x8C54
Revison Number = 0x14
BIOS = Primary 0x200

Primary SB_Result: 0x18C3140
SB_Address: 0xFFDE008C
SB_Error: 0x0

Secondary SB_Result: 0x0
SB_Address: 0x0
SB_Error: 0x0

Enable OS Watchdog timer. Value 0x7FC00
Punch SPI boot timer Stop. Value 0x300
IOFPGA MISC RESET REG 0x18. Default Value 0x0
IOFPGA MISC RESET REG 0x18. Value 0x400
Config S2S Command register 0x704. Value 0x4
Config S2S Config register 0x700. Value 0x800000F
IDROM MAC Address = 10:B3:D6:8E:19:04

Disable GBE ASPM

SATA Port 0: Micron_5100_MT - 240.0 GB

NEXUS OS Boot Mode = 0x0

Selected Boot Option:
NEXUS OS: GRUB Boot

CISCO SUP3DC3X BIOS: v2.21.0 Date: 11/27/2024 12:29:13

Pre OS Boot Entry:

IO-FPGA: Disabled OS Watch Dog Timer!

PMB2_REG(0x8)=0xaa

S2S_REG(0x24)=0x1
Booting bootflash:/m9700-sf4ek9-kickstart-mz.9.4.3a.bin
Trying diskboot
Filesystem type is ext2fs, partition type 0x83
Image SWID valid


Image Signature verification was Successful.

Boot Time: 8/27/2025 12:41:37

Cisco OS Boot Entry:

IO-FPGA: Enabled the OS Watch Dog Timer!
INIT: version 2.88 booting
Checking Bootflash
Bootflash firmware upgrade not required
Checking SSD
Checking firmware version for SSD
Firmware is already at latest version


OBFL device found as /dev/sda
usb device (2-1:1.0) /dev/sdb found after 0 iterations
boot device node /dev/sdb
cat: /sys/bus/usb/devices/1-1.1/dev: No such file or directory
mknod: invalid minor device number ''
Checking obfl filesystems...[ 35.469121] OBFL Error: (line 1265):obfl_global_header_check: number of blocks 5 not valid, expected 6

Checking all filesystems..r.r.r.R.r done.
[ 59.398556] SUP booted with primary IO-FPGA
[ 59.448706] in cctrl2 module
[ 59.483190] registering callback
Starting mcelog daemon
Starting rpcbind daemon...done.
creating NFS state directory: done
starting 8 nfsd kernel threads: done
starting mountd: done
starting statd: done
Loading system software
/bootflash//m9700-sf4ek9-mz.9.4.3a.bin read done
System image digital signature verification successful.
Uncompressing system image: bootflash:/m9700-sf4ek9-mz.9.4.3a.bin Wed Aug 27 12:43:13 UTC 2025
blogger: nothing to do.
C
..done Wed Aug 27 12:43:19 UTC 2025
INIT: Entering runlevel: 3
System is coming up ... Please wait ...
System is coming up ... Please wait ...
System is coming up ... Please wait ...
System is coming up ... Please wait ...
System is coming up ... Please wait ...
System is coming up ... Please wait ...
System is coming up ... Please wait ...
System is coming up ... Please wait ...
System is coming up ... Please wait ...
System is coming up ... Please wait ...

User Access Verification

Continuing with installation, please wait
2025 Aug 27 12:45:31 MDS9710 %USBHSD-2-MOUNT: logflash: online

Module 5: Waiting for module online.
-- SUCCESS
2025 Aug 27 12:50:50 MDS9710 %KERN-2-SYSTEM_MSG: [ 523.196775] Switchover started by redundancy driver - kernel
2025 Aug 27 12:50:50 MDS9710 %SYSMGR-2-HASWITCHOVER_PRE_START: This supervisor is becoming active (pre-start phase).
2025 Aug 27 12:50:50 MDS9710 %SYSMGR-2-HASWITCHOVER_START: Supervisor 5 is becoming active.
2025 Aug 27 12:50:51 MDS9710 %SYSMGR-2-SWITCHOVER_OVER: Switchover completed.
2025 Aug 27 12:50:54 MDS9710 %PLATFORM-1-PFM_ALERT: Disabling ejector based shutdown on sup in slot 5
2025 Aug 27 12:50:55 MDS9710 %IVR-2-IVR_NAT_INFO: Only IVR NAT is supported on this platform in this NX-OS release. IVR NAT is not enabled by default - it must be explicitly enabled.
2025 Aug 27 12:55:17 MDS9710 %USBHSD-STANDBY-2-MOUNT: logflash: online
2025 Aug 27 12:55:17 MDS9710 %USBHSD-STANDBY-2-MOUNT: slot0: online
2025 Aug 27 12:58:49 MDS9710 %PLATFORM-1-PFM_ALERT: Enabling ejector based shutdown on sup in slot 6


Module 1: Non-disruptive upgrading.
[# ] 0%2025 Aug 27 12:59:45 MDS9710 %PLATFORM-1-PFM_ALERT: Enabling ejector based shutdown on sup in slot 5
2025 Aug 27 13:00:33 MDS9710 %MODULE-2-MOD_EOL_WARN: module 1 (DS-X9448-768K9) is approaching End of Life date. Refer to https://www.cisco.com/c/en/us/products/collateral/storage-networking/mds-9700-series-multilayer-directors/eos-eol-notice-c51-742195.html for EOL notice
2025 Aug 27 13:00:43 MDS9710 %PMON-SLOT1-2-PMON_CRIT_INFO: Port Monitor Critical Information: Con[####################] 100% -- SUCCESS


Module 4: Non-disruptive upgrading.
[# ] 0%2025 Aug 27 13:01:59 MDS9710 %MODULE-2-MOD_EOL_WARN: module 4 (DS-X9448-768K9) is approaching End of Life date. Refer to https://www.cisco.com/c/en/us/products/collateral/storage-networking/mds-9700-series-multilayer-directors/eos-eol-notice-c51-742195.html for EOL notice
2025 Aug 27 13:02:08 MDS9710 %PMON-SLOT4-2-PMON_CRIT_INFO: Port Monitor Critical Information: Con[####################] 100% -- SUCCESS


Module 8: Non-disruptive upgrading.
[# ] 0%2025 Aug 27 13:05:32 MDS9710 %PMON-SLOT8-2-PMON_CRIT_INFO: Port Monitor Critical Information: Config download success .


Module 9: Non-disruptive upgrading.
[# ] 0%2025 Aug 27 13:10:19 MDS9710 %PMON-SLOT9-2-PMON_CRIT_INFO: Port Monitor Critical Information: Config download success . [####################] 100% -- SUCCESS


Module 10: Non-disruptive upgrading.
[# ] 0%2025 Aug 27 13:12:31 MDS9710 %PMON-SLOT10-2-PMON_CRIT_INFO: Port Monitor Critical Information: Config download success . [####################] 100% -- SUCCESS

Install has been successful.
14. Reload or Install EPLD for Fabric Switches
- Specific Guidelines for 32 Gbps Fabric Switches:
If an upgrade was after NX-OS 9.4(5) or later and contains a BIOS upgrade, reload the switch running the reload CLI command. Do not run the reload systemnon-disruptive command.
- Specific Guidelines for 64 Gbps Fabric Switches:
The mechanism for activating BIOS updates on 64 Gbps fabric switches has changed. The new mechanism requires a one-time disruptive switch EPLD upgrade to IO FPGA versions or higher:
Table IO FPGA Versions for non-disruptive BIOS Updates:
| Switch | Minimum IO FPGA Version (IO SPI 2) |
| MDS 9124V | 0.018 |
| MDS 9148V | 0.018 |
| MDS 9396V | 0.016 |
These versions are released as part of NX-OS 9.4(5) and can be installed once the switch is running NX-OS 9.4(5) (or later). The EPLD is upgraded running the install module 1 epld CLI command. This includes an automatic disruptive reload of the switch to activate the EPLD update. If the EPLD is not upgraded, the old reload mechanism is used, which can result in the switch hanging during an ISSU, this includes a BIOS update. This capability does not exist on 16 Gbps and 32 Gbps fabric switches.
Once the EPLD is updated, subsequent ISSUs can activate any new BIOS versions contained in the image without any disruptive reloads. To determine the current EPLD versions run the show version module 1 epld command. The EPLD device 'IO SPI 2' is the version that must match the previous table.
This is an example from an MDS 9148V switch showing the 'IO SPI 2' version is 0.013, which is less than the required version of 0.018:
MDS9148V# show version module 1 epld

EPLD Device                     Version
---------------------------------------
MI IO SPI                         0.011
IO SPI 2                          0.013
For more information on EPLD installation and updates, refer to the Release Notes for MDS 9000 Series EPLD Firmware, Release 9.4(5), which includes all MDS documentation.
15. Verify the installation.
Verify the installation is successful and complete by running the show version command and noting the system and kickstart versions are the expected versions:
MDS9124V# show version
Cisco Nexus Operating System (NX-OS) Software
TAC support: http://www.cisco.com/tac
Documents: http://www.cisco.com/en/US/products/ps9372/tsd_products_support_serie
s_home.html
Copyright (c) 2002-2025, Cisco Systems, Inc. All rights reserved.
The copyrights to certain works contained herein are owned by
other third parties and are used and distributed under license.
Some parts of this software are covered under the GNU Public
License. A copy of the license is available at
http://www.gnu.org/licenses/gpl.html.

Software
  BIOS:      version 1.11.0
  loader:    version N/A
  kickstart: version 9.4(3a)
  system:    version 9.4(3a)
  BIOS compile time:       11/27/2024
  kickstart image file is: bootflash:///m9124v-s8ek9-kickstart-mz.9.4.3a.bin
  kickstart compile time:  3/1/2025 12:00:00 [03/24/2025 22:26:25]
  system image file is:    bootflash:///m9124v-s8ek9-mz.9.4.3a.bin
  system compile time:     3/1/2025 12:00:00 [03/25/2025 00:13:28]


Hardware
  cisco MDS 9124V 24X64G FC (1 RU) Chassis ("24X8/16/32/64 Gbps FC/Sup-4")
  Intel(R) Xeon(R) CPU D-1633N @ 2.50GHz with 8053200 kB of memory.
  Processor Board ID JAE26220SYR

  Device name: F241-16-10-9124V-3
  bootflash:    7364608 kB

Kernel uptime is 0 day(s), 0 hour(s), 2 minute(s), 53 second(s)

Last reset at 356414 usecs after Fri Aug 22 20:22:16 2025
  Reason: Reset due to upgrade
  System version: 9.3(2a)
  Service:

plugin
  Core Plugin
MDS9124V#
On MDS 9700s, verify all modules are the correct NX-OS level via the show module command:
MDS9710# show module
Mod  Ports  Module-Type                         Model              Status
---  -----  ----------------------------------- ------------------ ----------
1    48     2/4/8/10/16 Gbps Advanced FC Module DS-X9448-768K9     ok
4    48     2/4/8/10/16 Gbps Advanced FC Module DS-X9448-768K9     ok
5    0      Supervisor Module-4                 DS-X97-SF4-K9      active *
6    0      Supervisor Module-4                 DS-X97-SF4-K9      ha-standby
8    34     1/10/40G IPS,2/4/8/10/16G FC Module DS-X9334-K9        ok
9    48     4/8/16/32 Gbps Advanced FC Module   DS-X9648-1536K9    ok
10   48     8/16/32/64 Gbps Advanced FC Module  DS-X9748-3072K9    ok

Mod  Power-Status  Reason
---  ------------  ---------------------------
2    powered-dn     Configured Power down
3    powered-dn     Configured Power down

Mod  Sw               Hw
---  ---------------  ------
1    9.4(3a)          1.1
4    9.4(3a)          1.3
5    9.4(3a)          1.0
6    9.4(3a)          1.0
8    9.4(3a)          1.0
9    9.4(3a)          1.0
10   9.4(3a)          1.0
...
16. Re-enable Analytics
When the non-disruptive upgrade path includes more than one upgrade to the final target release, this step must only be completed on the last NX-OS upgrade. That is, the upgrade to the final target release. Once the upgrade to the final target release is complete, if the analytics feature was disabled in Step 7, it can now be re-enabled:
MDS9718# run before_issu_analytics.cfg17. Save a Copy of a Show Tech-Support Details after the Upgrade is Completed
mds9124V# tac-pac
Collecting show tech-support details...
Show tech details will take 4-8 minutes to complete. Please Wait ...
Collecting show logging onboard...
tacpac file volatile:mds9124V_tacpac_2025-08-22.gz created.
mds9124V#18. Copy the tac-pac/techsupport you just Saved to your TFTP Server
For questions on the install to the tac-pac prior to the install, you can compare to the tac-pac after the install. Review the 'move' command, which renames the file:
MDS9124V# move volatile:F241-16-10-9124V-3_tacpac_2025-08-22.gz volatile:F241-16-10-9124V-3_tacpac_2025-08-22_after_install.gz
MDS9124V#
MDS9124V# copy volatile:F241-16-10-9124V-3_tacpac_2025-08-22_after_install.gz tftp://192.168.1.1
Trying to connect to tftp server......
Connection to server Established. Copying Started.....
-
TFTP put operation was successful
Copy complete.
MDS9124V#
Revision History
| Revision | Publish Date | Comments |
|---|---|---|
7.0 |
01-Jul-2026
|
Updated Introduction (shortened), spelling, spacing, grammar, sentence structure, and CCW alerts. |
6.0 |
15-Apr-2026
|
Added specific instructions for 32G and 64G fabric switches starting in NX-OS 9.4(5). |
5.0 |
04-Sep-2025
|
Added 'system switchover' and reversed the order of checking for incompatabilies and impact. |
4.0 |
28-Aug-2025
|
Updated special instructions for Cisco MDS 9700 series directors |
2.0 |
26-Nov-2024
|
Recertification, re-written to include all Shipping MDS hardware, updated to current best practices including log capture and MD5 checksums. |
1.0 |
01-Sep-2021
|
Initial Release |
 Feedback
Contact Cisco
- Open a Support Case

- (Requires a Cisco Service Contract)