Wi-Fi Configuration on SPA525G and SPA525G2 IP Phone
Available Languages
Objective
This document showcases the procedure to configure Wi-Fi on the SPA525G/SPA525G2 IP Phone. The phone has the feature to connect to a unified communication device using the Wi-Fi network. This gives an advantage as the phone can be carried anywhere in the vicinity of the wireless network.
Applicable Devices
• SPA 525G
• SPA 525G2
Wi-Fi Configuration.
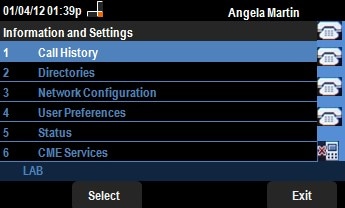
Step 1. Press the Setup button on the phone. The Information and Settings menu appears.

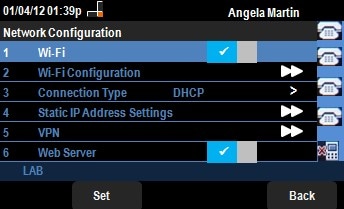
Step 2. Use the navigation keys and scroll down to Network Configuration. Press the Select softkey. The Network Configuration menu appears.

Step 3. To enable Wi-Fi, with the Wi-Fi option selected press the Right Arrow navigation key. The white right symbol on blue background signifies that Wi-Fi is enabled.

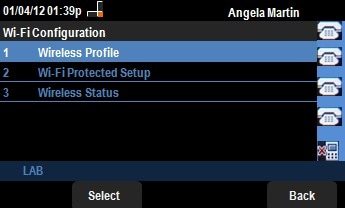
Step 4. Use the navigation keys and scroll down to Wi-Fi Configuration. Press the Right Arrow navigation key. The Wi-Fi configuration menu appears on the screen.

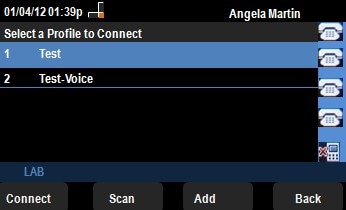
Step 5. Press the Select softkey to enter into the Wireless Profile option. The Select a Profile menu appears on the screen.

Step 6. For the first time configuration, press the Scan softkey. This will display the available wireless networks in vicinity.
Step 7. Use the navigation keys to choose the appropriate network first. After that, press the Connect softkey. The SPA525G/SPA525G2 will ask for a final confirmation for saving the settings.

Step 8. The connected network will be displayed in the Select a Profile menu. Here it was the Test network as shown in the following image.
 Feedback