Workaround for VLAN Management IP Address Assignment
Available Languages
Objective
When the switch is configured with an IP address on any VLAN, the ‘fallback’ IP address on VLAN1 (192.168.1.254) will be released.To preserve connectivity, prior to assigning an IP address to any VLAN interface, ensure the management VLAN has an IP address assigned first. The IP address can be obtained via a DHCP server or statically assigned to the VLAN interface. This article provides you with a workaround for VLAN IP assignment.
Applicable Devices
-
250 series Switches
Software Version
- 2.5.0.83
Enabling SSH and Confirming Switch Status
If this is not your first time booting up the Switch, skip to Step 3.
Step 1. Power up the new switch and log in to the switch via the web browser by using the default username and password.
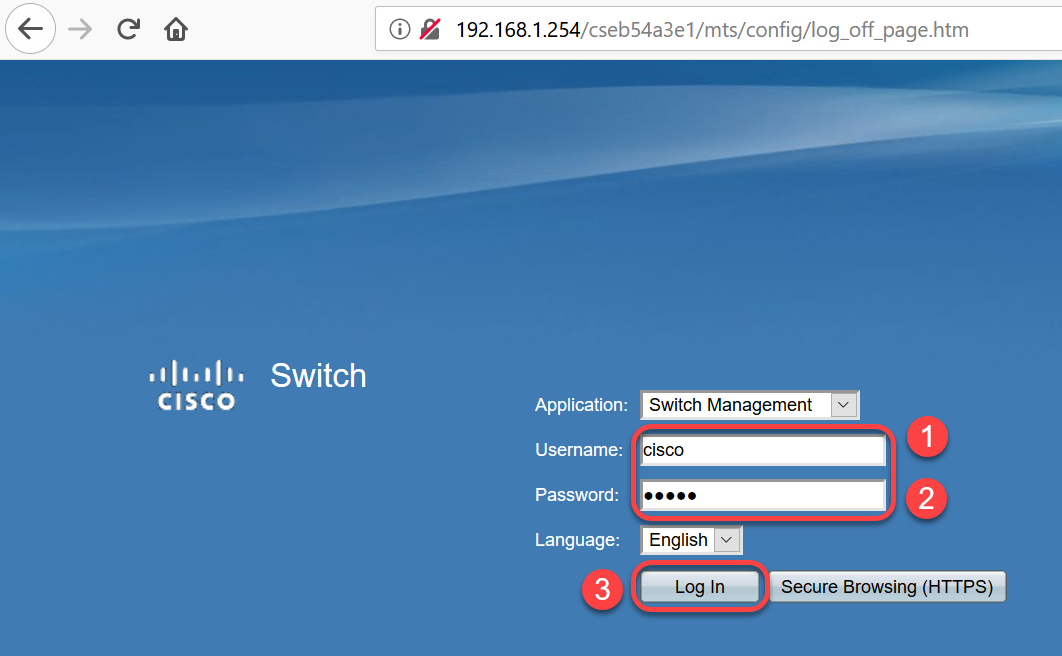
Note: The default username and password upon first boot is cisco / cisco.
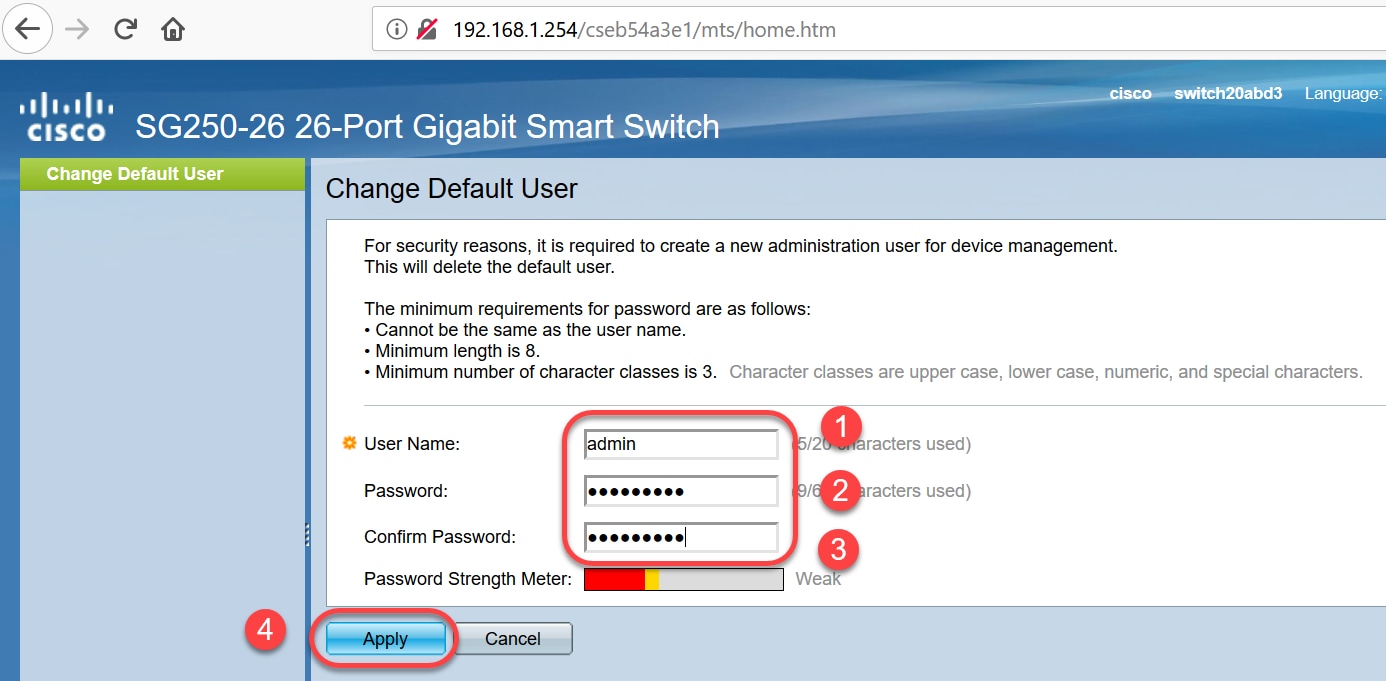
Step 2. Change the default username and password. Click Apply.
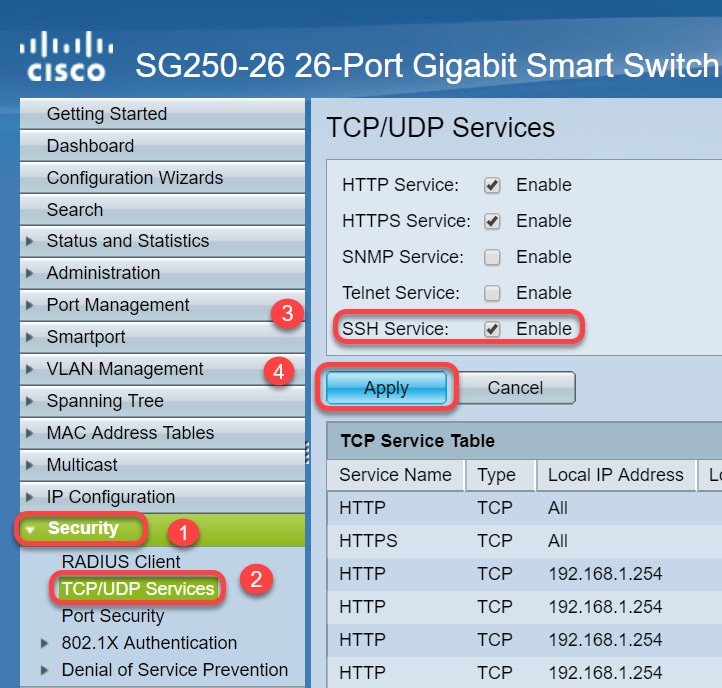
Step 3. Once the main menu has opened, click Security > TCP/UDP Services. Once this page loads enable SSH on the switch. Click Apply.
Step 4. Log in to the switch via SSH, we chose to use Putty.
Note: To learn how to access an SMB switch through SSH or Telnet, click here.
Step 5. To display details of the firmware and to confirm whether the Switch is updated to the latest available firmware version or not, enter the following command.
switch20abd3#show versionNote: It is recommended to use the latest firmware on the Switch. To download the latest firmware, please click here.
Step 6. To display information about VLAN settings of the switch, enter the following command:
switch20abd3#show vlan
Step 7. To display information about IP interface, enter the following:
switch20abd3#show IP interface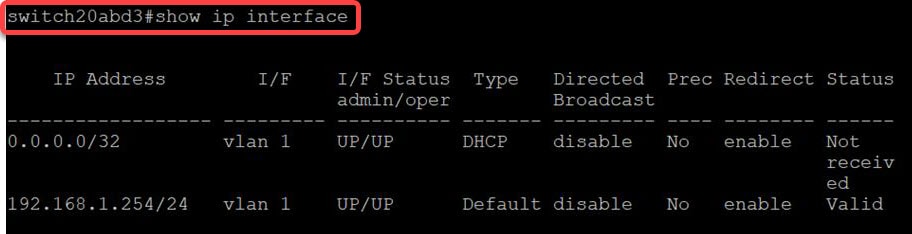
By using the above mentioned command, you can see the current IP address settings on the interfaces and decide about assigning a new IP on the new VLAN interface.
Example: Creating the VLAN and Assigning the IP address
Note: The below is an example of the steps SSH session loss. When you enter the last command, you will lose access to the switch because VLAN1 will not have an IP address and all switch ports are still assigned to VLAN1.
To skip directly to the workaround steps, click here.
Step 8. From the Privileged EXEC mode of the switch, enter the Global Configuration mode by entering the following command:
switch20abd3#configure terminal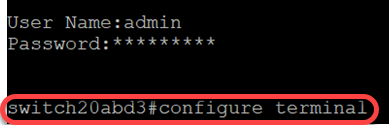
Step 9. To configure the VLAN 2 on the Switch, enter the following:
switch201bd3 (config) #vlan 2

Step 10. To manage the VLAN 2 interface, enter the following:
switch201bd3 (config) #interface vlan 2

Step 11. To configure the IP on VLAN 2 interface, enter the following:
switch201bd3 (config-if) #ip address 192.168.2.254 255.255.255.0

Workaround: Preventing loss of SSH session
By assigning a static IP address to the VLAN 1 interface, you preserve the SSH connection when assigning IP addresses to VLANs 2, 3, 4 etc.
To avoid losing the connection from VLAN 1 while assigning the IP on a different VLAN interface you can perform the following:
Step 1. Enter the below commands in sequence to set the static IP address on VLAN 1.
Switch20abd3#configure terminalSwitch20abd3 (config) #interface vlan 1
Switch20abd3 (config-if) #ip address 192.168.1.254 255.255.255.0
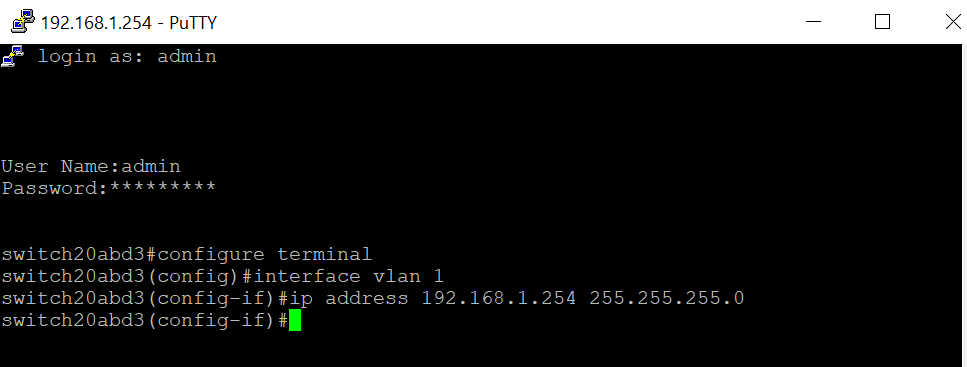
Note: from this point you are able to assign IP addresses at will.
Step 2. Apply the below mentioned command to create a VLAN 2 and assign an IP on that.
Switch20abd3#configure terminalSwitch20abd3 (config) #vlan 2
Switch20abd3 (config) #interface gi2
Switch20abd3 (config-if) #switchport mode access
Switch20abd3 (config-if) #switchport access vlan 2
Switch20abd3 (config-if) #exit
Switch20abd3 (config) #interface vlan 2
Switch20abd3 (config-if) #ip address 192.168.2.254 255.255.255.0
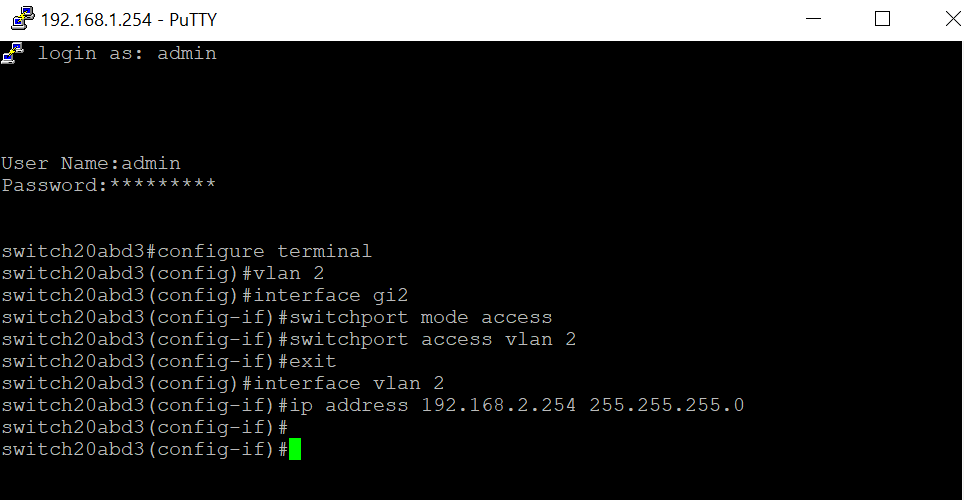
Note: In the example above, if you were connected to the switch via gi2 then you would lose the connection.
Step 3. (Optional) You can now verify the VLAN & IP address of the switch by using the following commands.
Switch20abd3#show vlanSwitch20abd3#show ip interface
Conclusion
You have now successfully assigned an IP on another VLAN interface without losing connection to VLAN1. It will be helpful to assign a static IP on the VLAN 1 interface of the Switch for management purpose.
 Feedback
Contact Cisco
- Open a Support Case

- (Requires a Cisco Service Contract)